The Lightning Flyer 12/11

Rat Rod Bikes Bicycle Forum

Help Support Rat Rod Bikes Bicycle Forum:

This site may earn a commission from merchant affiliate links, including eBay, Amazon, and others.
Re: The Flying Pig

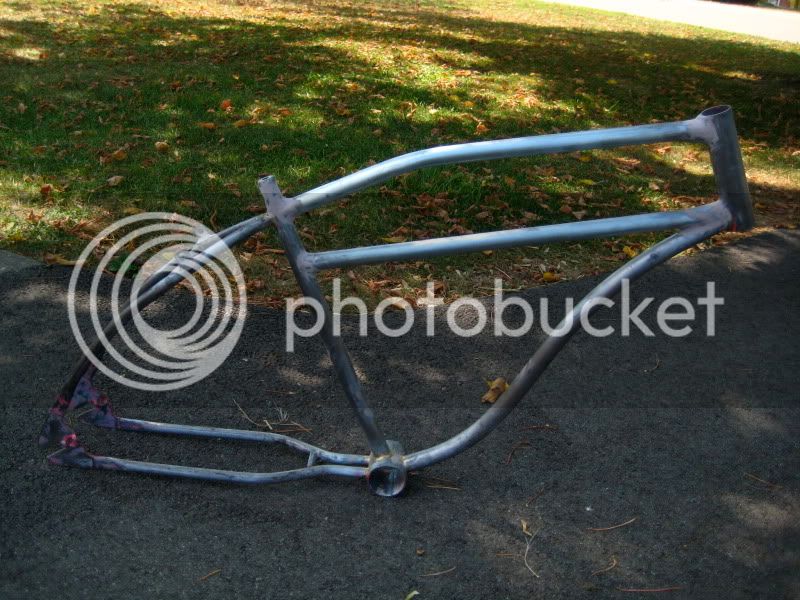
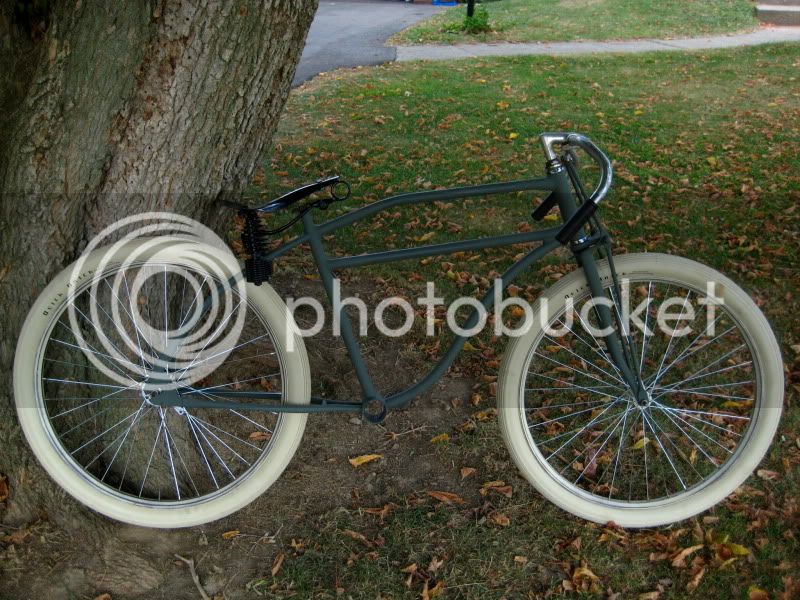
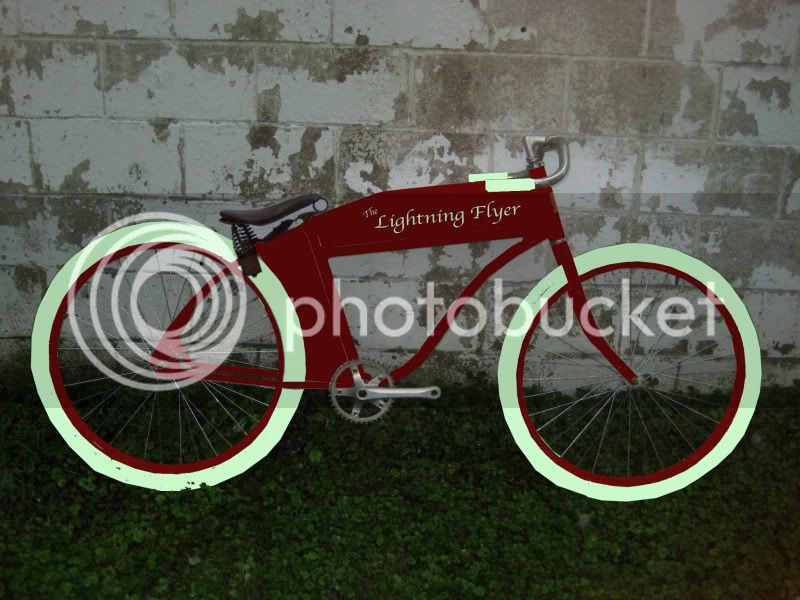
Ok, this is the last time I'm going to change the build, I swear :lol: If you've followed this bike in the past it's been through a lot of changes (gender reassignment, builds and disassembles, loss of interest,....) But I'm going to finish it once and for all. Name change to "Lightning Flyer" to match the headbadge, all maroon paint with creme tires and accents, brown saddle. I have a brown longspring saddle on the way (thanks muddywater) and creme quick bricks coming also (thanks to my cycletruck flip :D ). Now to take it apart yet again, strip the paint, get the tanks tig welded and finished, mock it all up, paint, and so on. I WILL GET IT DONE!

boardtrackmaroon-1.jpg
 
Re: The Lightning Flyer (former flying pig)

i like it with out the tanks but I love the seat you have and the paint job is A+
 
Re: The Lightning Flyer (former flying pig)

Bought some Shelby shock-ease forks from Crassly (thanks Gordon!) I've been wanting to find these for a while now, perfect boardtrack racer look, and better yet nobody else has them :p Should have a mock up pick as soon as all my parts arrive.

securedownload.jpg
 
Re: The Lightning Flyer (former flying pig)

Shoot! I never even saw that build. Creme Felts, Shelby fork, and I hope he doesn't do a brown long spring saddle! Hopefully he keeps that color and ours should look totally different. I thought I had something going with the shelby fork. :( Oh well, hats off to you MikeS for doing it before me.
 
Re: The Lightning Flyer (former flying pig)

you guys do have something going.....those are the only 2 ive ever seen on here(and i only know of one other person that has a set).....
 
Re: The Lightning Flyer (former flying pig)

Forks showed up today so I was anxious for a test fit. I need to trim my frame's headtube down (which I planned for) but I'm really liking the look of these.

IMG_2620.jpg
 
Re: The Lightning Flyer MOCK UP PIC 8/25

Quick mock up pick of my progress so far. I still need to cut down my head tube and think of a way to mount the front of the seat. A buddy has my tanks, they should be welded up and finished soon.

IMG_2628.jpg


I think I'm going to take everything back down to bare metal and ride it until winter, then break it all down and paint/finish it for next year.
 
Re: The Lightning Flyer MOCK UP PIC 8/25

looks great!
got a picture of the front spring(from the underside...i want too see if theres a space between the coils)?
if so i may have an idea
 
Re: The Lightning Flyer MOCK UP PIC 8/25

I'm going to take them apart tomorrow so I'll take some pics. I'm also curious as to what's inside, not sure if there is just a spring in the headtube or what?
 
Re: The Lightning Flyer MOCK UP PIC 8/25

Oh, the seat! :lol: I'll take a pic of that as well. I'm not sure that I like how it sits, the tabs on my frame were made for a totally different seat, the springs on the back match up but I think it sits too high. I may move the tabs back a few inches so that it looks more like my photoshop pic (chop down the seat tube)
 
Re: The Lightning Flyer MOCK UP PIC 8/25

Here's the front of my seat.
IMG_2633.jpg


I think what I am going to do is remove/lower the rear tabs down about 3/4 of an inch. It makes a huge difference on how the rear of the seat sits. As for the front, keep the seat tube, and make a compression cap (sort of like a threadless stem cap) that will hold down the seat rails.

Tabs as they are.
IMG_2630.jpg


Where the seat will sit after I modify the tabs.
IMG_2635.jpg
 
Re: The Lightning Flyer MOCK UP PIC 8/25

Here are the guts of the fork for those that are curious. Pretty simple (primitive) design, the spring sits in the headtube that has a built in stop at the bottom, the fork legs flex forward and pull the bolt which compresses the spring. The rubber grommet sits in between the headtube and the fork legs. Was it a great working springer? No, but it was a cool looking idea.

IMG_2636.jpg
 
Re: The Lightning Flyer MOCK UP PIC 8/25

thanks for posting the inside of that!! i never knew thats what it was(guess but didnt know.........and knowing is half the battle :mrgreen: )
as for the seat mount...id weld a bolt on the top tube that would slide through the front seat spring(may have to put something to act as a stop so it doesnt bottom out when ridding) small washer on to and bolt it down and just move the rear mounts back a little
 
Re: The Lightning Flyer UPDATE 8/30

Ok, finally got all of my welding done. Lowered and moved the seat tabs back, capped off the seat tube and welded in a 3/8" nut underneath for my front clamp. Chopped down the frame's headtube and the forks fit perfectly. While out at my dad's borrowing his welder, I discovered that he's been hiding a sandblaster in his barn :shock: Oh, the hours I spent sanding until I couldn't feel my hands. :( Never more.

IMG_0245.jpg


IMG_0244.jpg


Now to just smooth the welds down and the frame will be ready for primer.
 
Re: The Lightning Flyer UPDATE 9/3

Spent a few days filing/smoothing welds and filling pin holes in the frame and forks (not fun) and put them in self etching primer. Sandblasted the seat pan and sprayed it gloss black. Still need to take the wheels apart and strip/paint the the rims and hubs, but that can wait until I find the maroon paint that I need. And of course no word on my tanks yet :?

IMG_2641.jpg


IMG_2643.jpg
 
Re: The Lightning Flyer UPDATE 9/3

Looks good so far . I was wondering how that spring worked on those forks. Glad you posted the pictures for all of us to see what was in one.
 
Back
Top