I had considered the the skateboard deck idea too, I'm a bit stuck at this point. I had envisioned a metal seat pan with the outer edge rolled down for the leather cover to lace to. I would like it to be comfortable but still appear reasonably thin. With all the time and money invested, I don't want to my backside to require a rest every 15 minutes while riding. :roll:
You are using an out of date browser. It may not display this or other websites correctly.
You should upgrade or use an alternative browser.
You should upgrade or use an alternative browser.
Air Ride Bike
- Thread starter OCD
- Start date


Help Support Rat Rod Bikes Bicycle Forum:
This site may earn a commission from merchant affiliate
links, including eBay, Amazon, and others.
Today I started out by making a 1/2" plywood seat pan with rounded edges.

Using the wooden form, the seat pan was layed out on 16 gauge sheetmetal with an additional 1/2" all the way around for the lip where the leather cover will fasten.

Vicegrips were used to crimp the edges of the pan.

The crimping step was followed with some hammer/dolly work using scraps of pipe and other forms laying around the shop.

The slight rocker shape adds to the bobber style.

Here's how the new metal pan looks in place.

Roughly cut out and trimmed the leather cover to fit, soaked it with water to shape it over the wooden form.

Using the wooden form, the seat pan was layed out on 16 gauge sheetmetal with an additional 1/2" all the way around for the lip where the leather cover will fasten.
Vicegrips were used to crimp the edges of the pan.
The crimping step was followed with some hammer/dolly work using scraps of pipe and other forms laying around the shop.
The slight rocker shape adds to the bobber style.
Here's how the new metal pan looks in place.
Roughly cut out and trimmed the leather cover to fit, soaked it with water to shape it over the wooden form.
G-ratter: Your seat turned out great. I'm afraid a bit of padding is needed for my aging backside. I've been planning to contact some of my wheelchair suppliers at work as I hear you can get gel padding that comes by the sheet which can be trimmed to fit custom applications. If only I wasn't so busy with my own clients, I might actually remember to check it out. 
I tried the garden kneeling pad idea for the seat base on my recycled recumbent. It works okay, but anytime your feet are so far out in front of your body a lot of weight/shearing force is placed on your sitting bones. I find my recumbent starts to become a little uncomfortable after about 30 minutes. Specialized seating is part of my job so I'm looking to go the extra mile (pun intended) with the air ride build, just wish it wasn't -10c here in my workshop the moment. :roll:
A quick pic of it set up for commuting to work with rear fender and rack, I've since recycled an old leather coat for the backrest upholstry:

A quick pic of it set up for commuting to work with rear fender and rack, I've since recycled an old leather coat for the backrest upholstry:
Very nice work on the seat so far, I look forward to seeing the end result (and watching all the steps along the way). Sweet looking recumbent too!
A bit of hammer and dolly work on the seat pan, followed by the drilling of numerous holes.

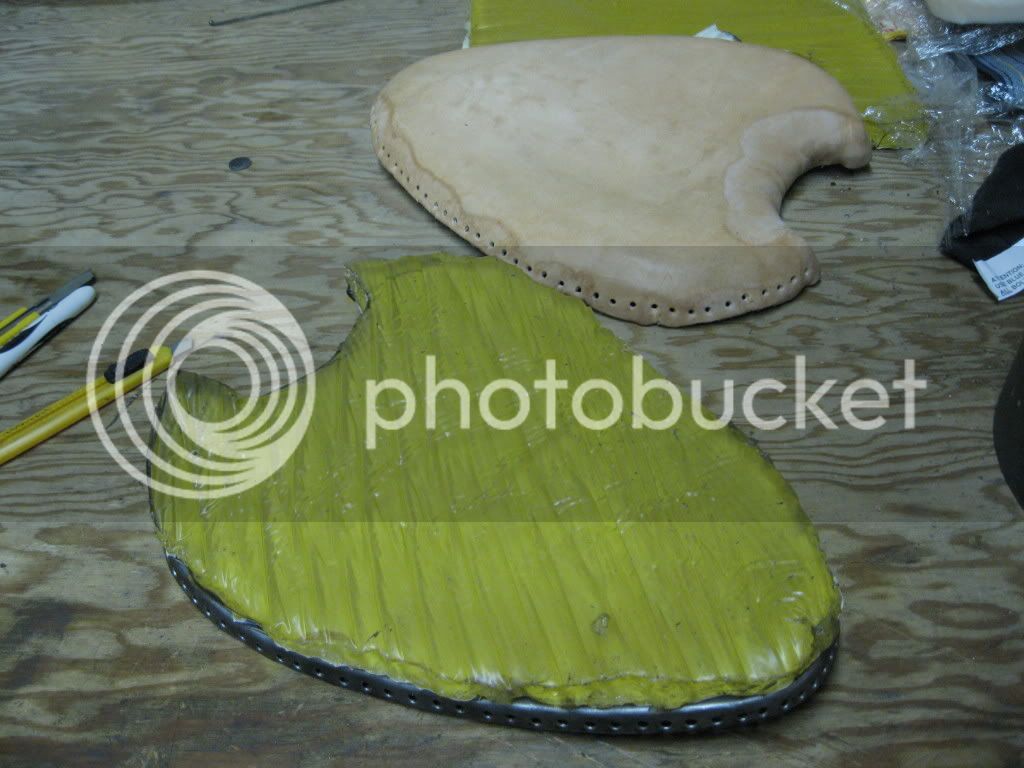
Punched every 5th hole and zip tied the leather over 1" high density foam to shape it. After the leather sets I'll add the metal strip around the pan cut-out.

Applying pressure to help the leather conform to the back of the pan.

Punched every 5th hole and zip tied the leather over 1" high density foam to shape it. After the leather sets I'll add the metal strip around the pan cut-out.
Applying pressure to help the leather conform to the back of the pan.
The metal strip needs to angle forward to match the diameter of the tire. I'll make a cardboard template first, cut out, drill the holes and then weld it to the seat pan. I was planning to lace it to the pan but rivets would also work.

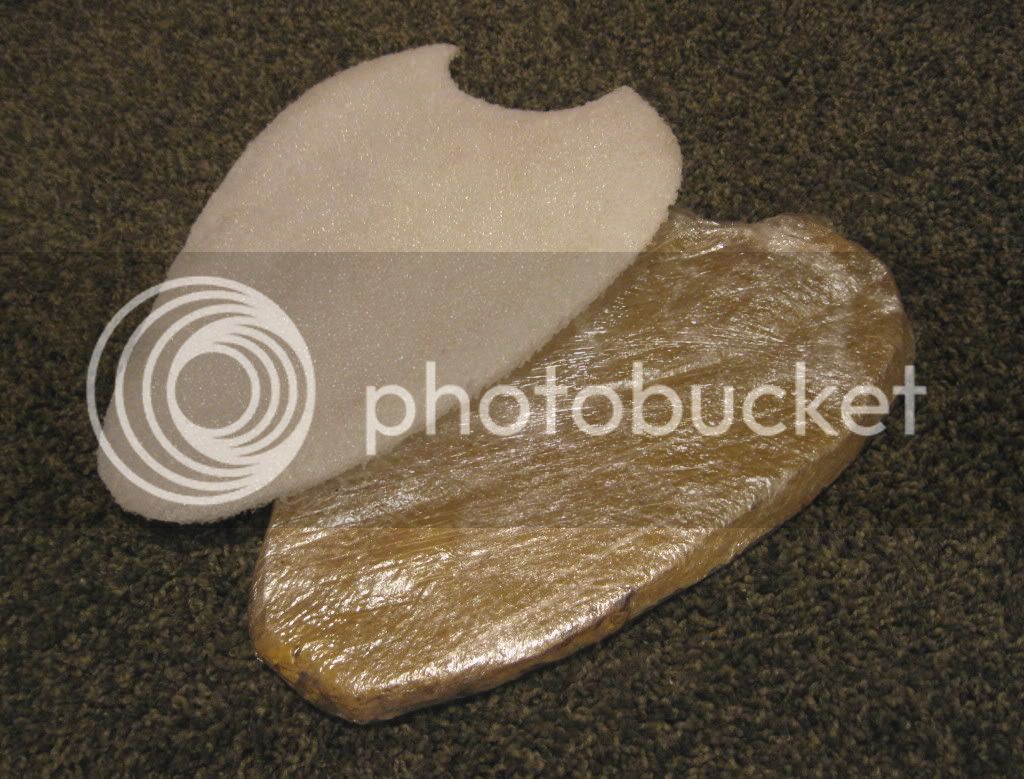
Here's the gel I got from one of the local rehab equipment suppliers. This will be much more comfortable than the 1" high density foam (on the left) I've used in the past.
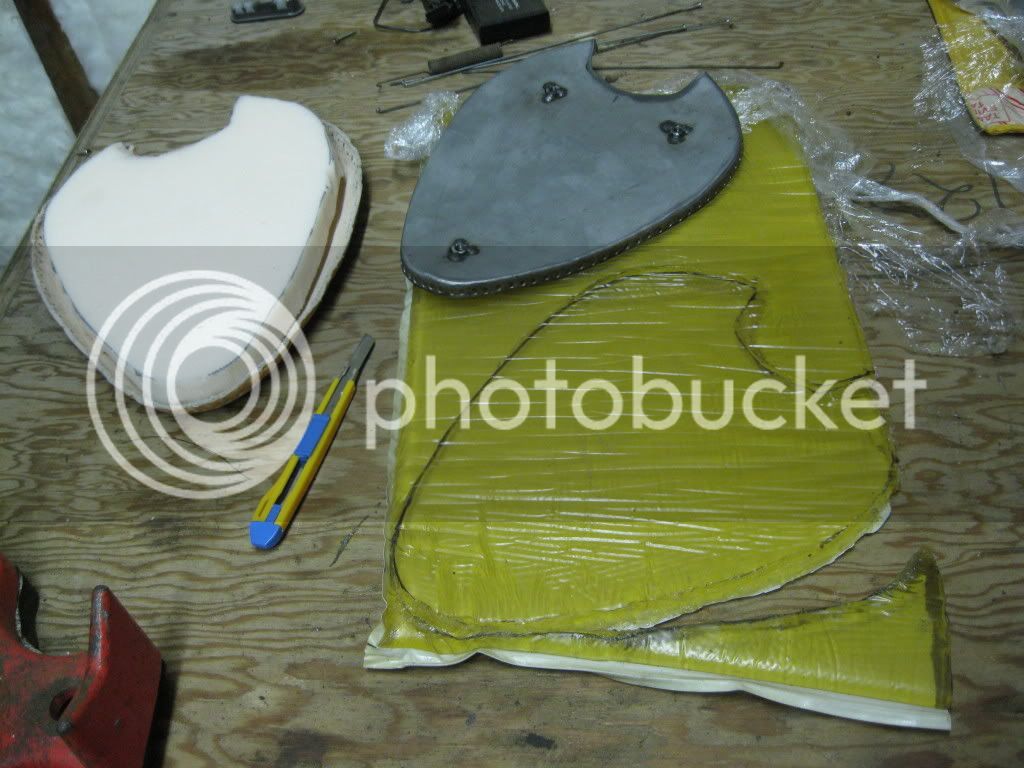
The gel material can be cut to any shape and then tightly wrapped with cling film to stop it from 'migrating'.
I shaped some closed cell foam to round the top of the saddle and spead the load of my sitting bones so as not to displace the gel.
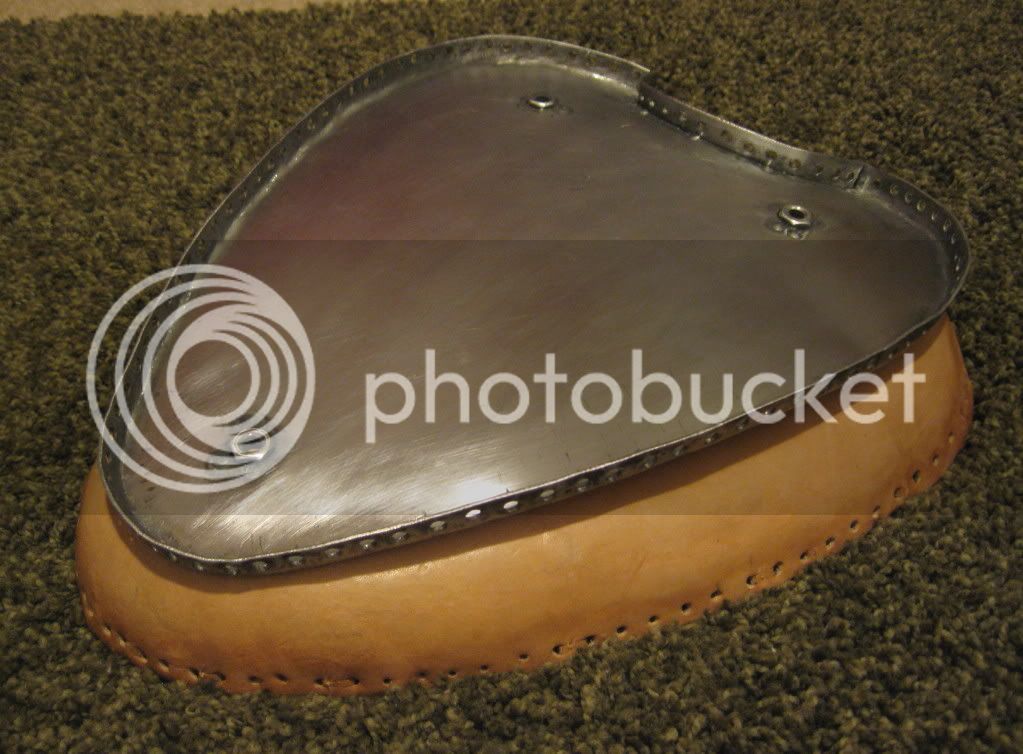
The three 1/4" nuts for the seat mount were sunk into the pan and welded from the top side. Lastly the rear piece was cut, welded in and drilled to finish off the rear section of the pan.
The gel material can be cut to any shape and then tightly wrapped with cling film to stop it from 'migrating'.
I shaped some closed cell foam to round the top of the saddle and spead the load of my sitting bones so as not to displace the gel.
The three 1/4" nuts for the seat mount were sunk into the pan and welded from the top side. Lastly the rear piece was cut, welded in and drilled to finish off the rear section of the pan.
Thanks rustrat! Due to the extra length added by the springer, I was trying to keep everything compact as possible. By design, the rear suspension moves forward when dropped, so without a deraileur you can't it peddle anyway. :wink:
Not a lot progress apart from the seat is now finished. I'm hoping to pull it apart and get some paint on it this spring once things warm up a bit more. I've had a couple of attempts to get the air system leak free and reliable but it's not there yet, I'm actually thinking switching to a 12v linear actuator similar to what Kim (aka Aussie Jester) uses on his e-cruiser bikes to work his retractable outriggers. It would be a much more reliable option as I don't want to end up carrying it on the 35km charity ride this year.
Here's the layout, carving and the beginnings of tooling the leather:

Here it is after many, many hours of working until I'm cross-eyed. Carved, tooled, dyed and laced onto the seat pan. Man, is it ever better than an inch of foam! I'd recommend this method of using rehab gel to anyone looking for max comfort with min thickness:

I figured if the mounts were made a bit longer, I could trim them down later, but I like the daylight showing under the seat:

Here's the layout, carving and the beginnings of tooling the leather:
Here it is after many, many hours of working until I'm cross-eyed. Carved, tooled, dyed and laced onto the seat pan. Man, is it ever better than an inch of foam! I'd recommend this method of using rehab gel to anyone looking for max comfort with min thickness:
I figured if the mounts were made a bit longer, I could trim them down later, but I like the daylight showing under the seat:
- Joined
- Mar 10, 2009
- Messages
- 1,465
- Reaction score
- 1
Hey OCD, your seat is a work of art and a great addition to an already very cool bike! That you showed step by step, how you made it is appreciated and timely as my daughter and I are considering something very similar for the project we are working on. Keep up the great work! 8)