Singletracked's crash course in moto bicycles.

Rat Rod Bikes Bicycle Forum

Help Support Rat Rod Bikes Bicycle Forum:

This site may earn a commission from merchant affiliate links, including eBay, Amazon, and others.
d719ff96b5bedc1d821ca5ca836af11b.jpg

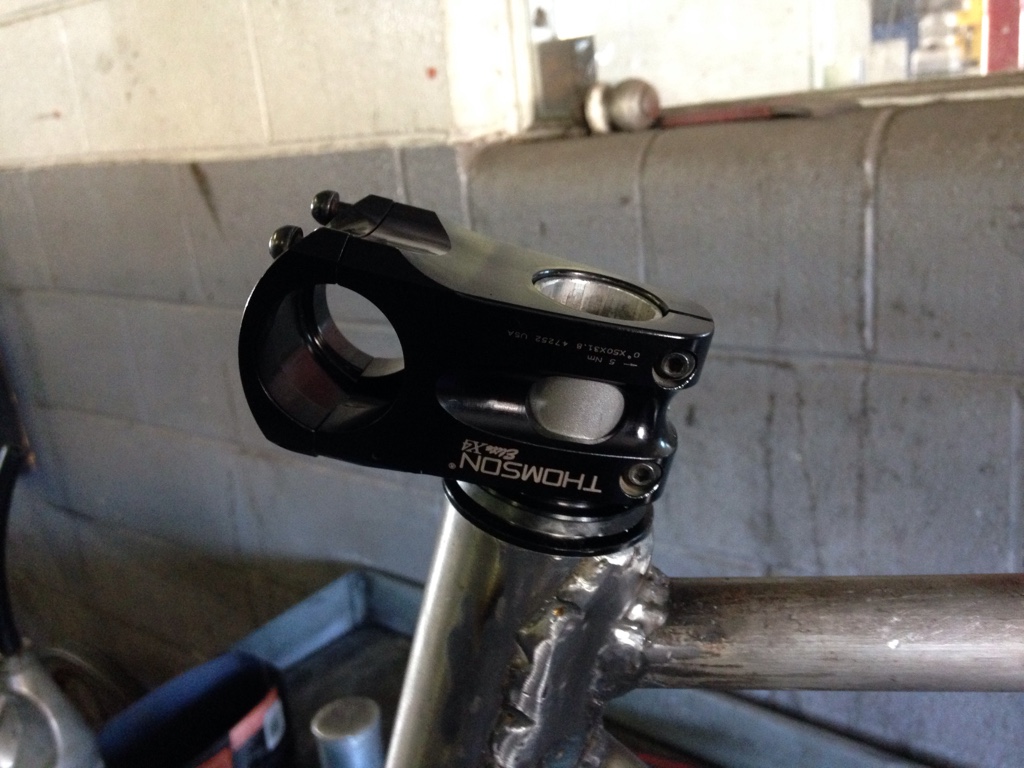
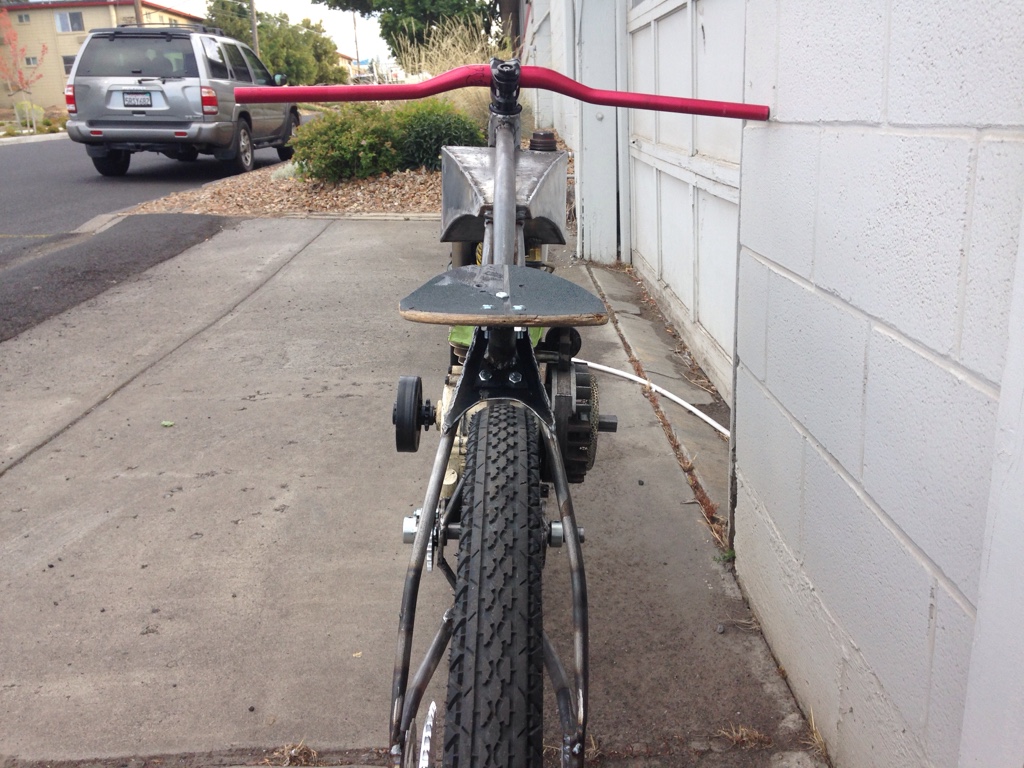
I shortened the head tube about 9/16"
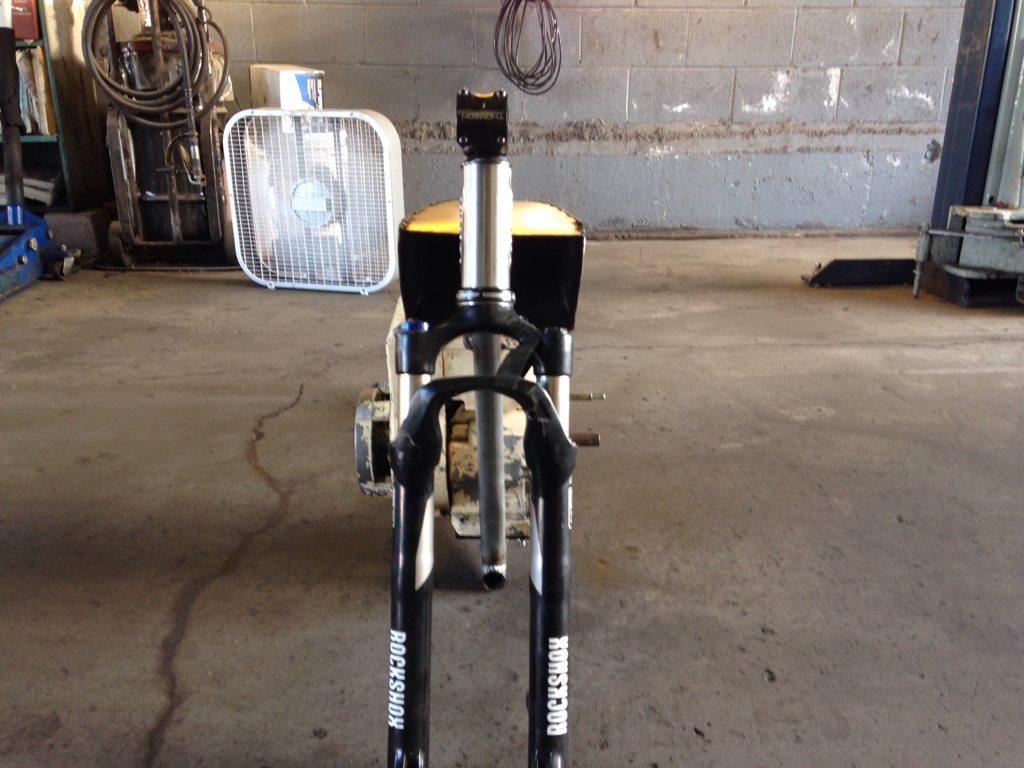
The steer tube is just long enough but enough. It will have a flush top cap.
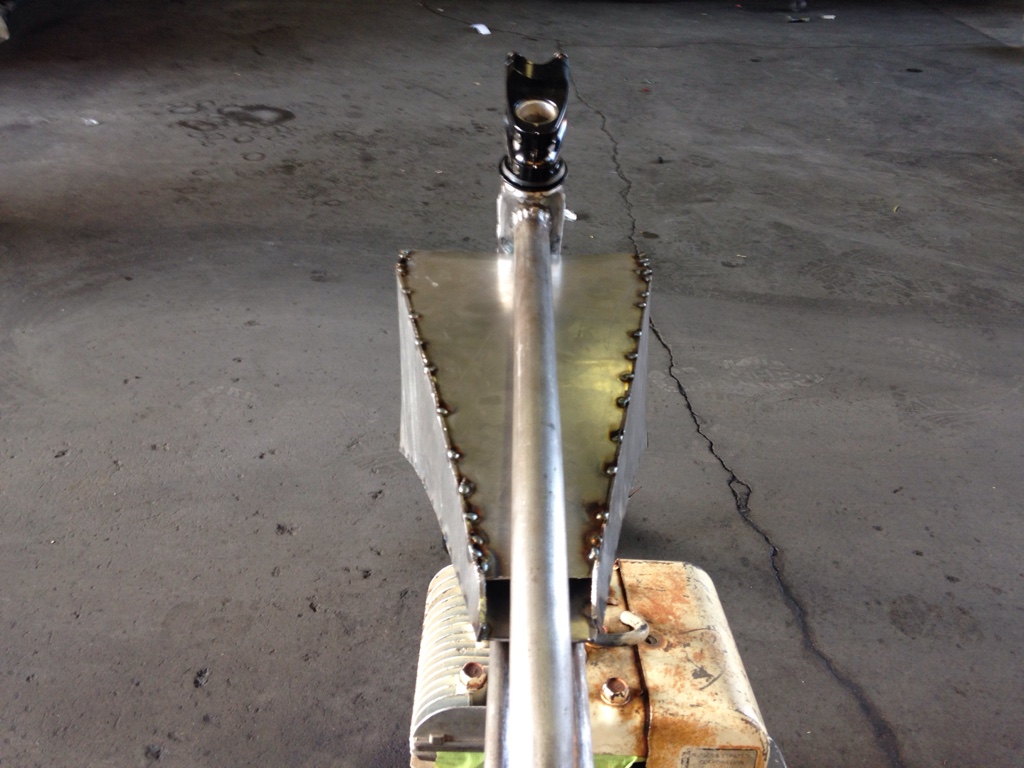
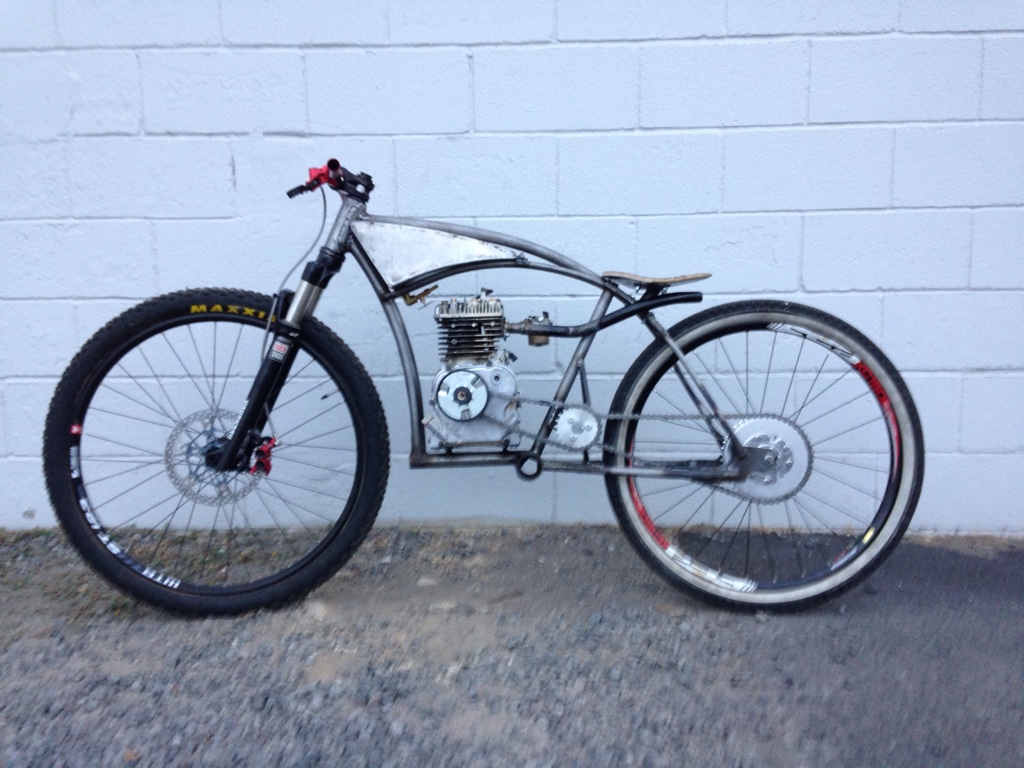
I started on the fuel tank. I used card stock aided design to get my shapes right. Transferred those to 16guage sheet. Then started tacking it together.
So far I like it. Not bad for my first tank, far from done though.
6cf4ae3835d64bd244272a61638d32cc.jpg

485aa21fdcfacced14ea0419c8214107.jpg

8db8fa5746fca455995c63afe5f48b65.jpg
 
Productive day today.
Weld a ton, grind a ton. Weld more. Grind more. The tank is pretty much welded. Still have to add a filler cap and a petcock.
5fef22daa68ad373b631f3a8a53891a3.jpg

2b2abc2b338c10d6e7d520c6d2e9c92a.jpg

Then I cooked up some mounting tabs. The front is drilled and tapped into the down tube. Two 5/16 bolt hold the tank well enough.
a720a37cd22a135d29a47470c99fcc56.jpg

Then the rear:
8d608093eccafbc2347f5801c16b099f.jpg
 
I ordered my jackshaft set up. Kinda experimental gearing cause I couldn't get a answer for a good starting point. I used a gear calculator to get 9.6:1 ratio.
Clutch is 10, 22 jshaft input, 10 output to a 44t rear sprocket. All with #41 chain. Tell me what you think
 
Those numbers remind me of those little electric scooters. They worked fine, so I don't see why this won't.
 
I guess we'll see. The jshaft kit I ordered comes with a 14 and a 10. So if it's too low I can go higher with out ordering a sprocket
 
2e26363d815ea781e3cffa6890cde126.jpg

b9cfe153d7e9b878560a6c30fb8e09e2.jpg

Look familiar? I cut the filler neck out of the old Briggs fuel tank and burned it it in mine.
21b42153ab07717a311601bb35ce8ce3.jpg

I ran to the hardware store and picked up some plumbing. I cut the locking part off a quick disconnect fitting and welded it in the bottom.
I poured some solvent in the tank to see were it would leak from. There is a couple spots but it's minimal. Fuel tank sealer will take care of that. The tank is about ready to use
 
Threw some bars I had laying around on, upside down.
099443af5aabf7939d007422733ef41b.jpg

I lowered the fork 2" by removing the air piston, cutting the piston shaft 2". Then re-drilled and tapped threads into it again.
fdd481d8714424e83cdc3f0c90acaf0f.jpg
 
Last edited:
c904093bbd768ed09f94e9747bb35a3f.jpg

The new seat post. I made it bolt on so it would be easier to change if I wanted to.
b3f049dc2edd49dd8d8c9263ec6067e3.jpg

I cut the tail off a old skate deck. Works pretty well.
43a2257fb7185bc064915efbe292e855.jpg

It will need some shaping still but I like it so far
 
Missed updates on this, looking good so far. Great way to recycle skate board decks.
 
Updates!
Front brake is done thanks to my buddy at Hope tech USA. It's a V4 4 piston caliper. Stainless braded hose
9069e1ac2023088daa9759e0b6aacffa.jpg

I also got the chain set up.
ab0892e576cceb82affb5fd24cbd05ee.jpg

e5bd6a539b46a10374f65a7e91f13ddc.jpg


I think I lucked out and am able to run it with out tensioners.
It's getting close! Lots of small stuff left
 
Update!
Carburetor and exhaust.
Whittled up a few flanges.
They are not quite the same but I'll take care of that.
2f6b688f06cb28dc574d0eb5e7a12a97.jpg

2 sets of Handle bars were donated to the build by a co worker. Perfect size tube for the ports. .75" ID or so..
Intake mock up
04e7b75a7193ee6b45d504000b7270ae.jpg

The bolt holes on the engine side are around 1 3/8" apart. So I had to oval the tube to get it to fit between the bolts well enough for clearance.
199a3e80a43d7e155ca5f62b1101628e.jpg

Welded up. I will smooth out the interior.
The bends in the cruiser bike bars where nearly spot on. It comes straight back, curves to the left then right and up to fit right under the seat. The way it is now it exits toward the right of the bike (riders right). I'll probably add a 45* to point it directly inline of the rear tire.
35d8baca4bf369e59b66c868ee0d17ca.jpg


Rider view
b804ca670b5368a70658fdfbba3d9ffa.jpg


f91ed7324015c07a7a667456c5867273.jpg

45abdded028b39df85fea589a05b5b90.jpg

I did add a smaller pipe at the flange. It fit inside the flange ok so I can weld it inside and out; also add some back pressure, I guess..... Haha!
I don't have plans for a muffler.
 
Awsome stuff, curious to see what needs to be done regaurding the vacume fule pump and swapping carb styles.
I have a 2hp early alum briggs on my bench...
Only thing that caught my attantion was the lead sproket on the jackshaft.. the shaft collor is sitting on the heads of the nuts attaching the sprocket. Is there a way to maybe key the collar so the nuts lock in on it or build a spacer...

No fuel pump. Gravity fed. The carb is off a horizontal 5hp lawnmower. It has a float.
I believe you where seeing the gear in mock up hardware.
I have since drilled and tapped the hub so no more nuts. Like so
8f29fc321acc32dbc62e27b0891a5694.jpg

e6af83f86b08e3af3d71bc252db6b420.jpg

Yes the key is sticking out. It will be trimmed at final assembly
 
Yup thats what i was seeing.
About the carb, do you have to put a block off plate on the old vacume thats below the carb and exhaust? Id cut one from 6160 and was unsure if it needed to ramain vented for some reason.
And this thing is awsome by the way... sorry got excited to ask questions first :)
 

Latest posts

Back
Top