The Renaissance Man
__CERTIFIED DIVER__ (Open Water & Open Dumpster)
Staff member
Moderator
Pro Member
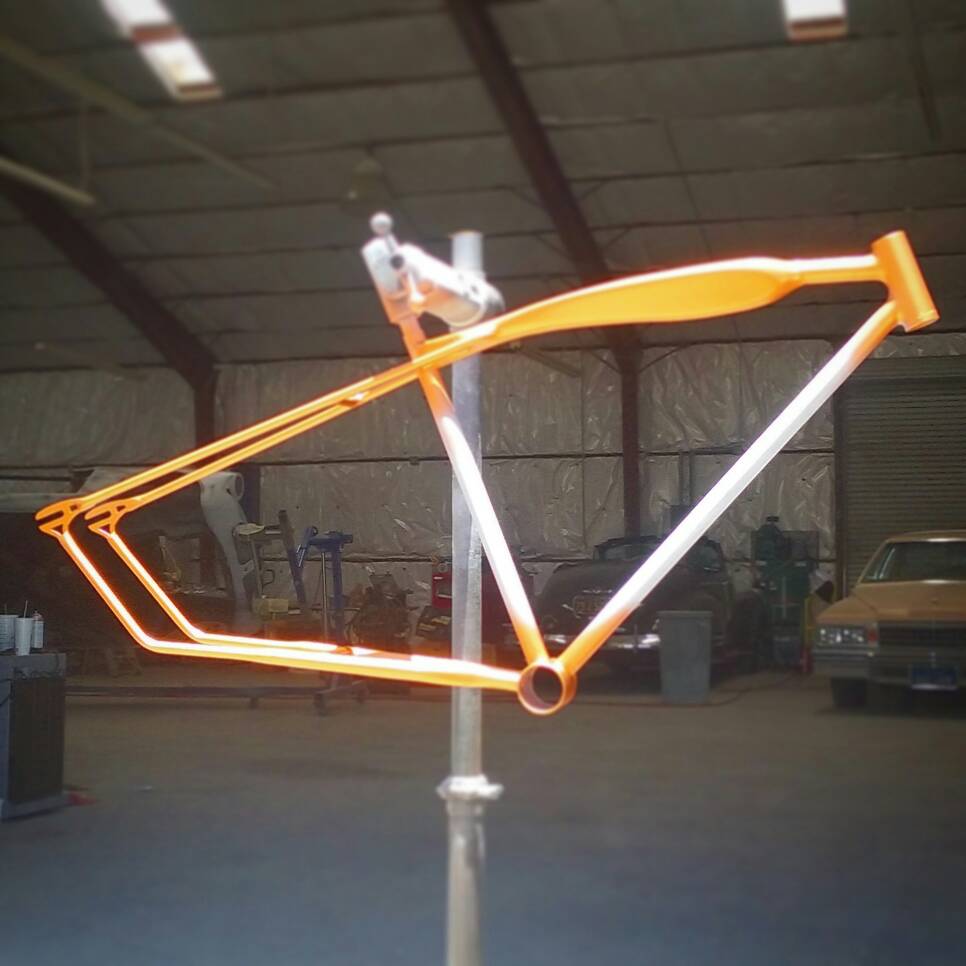
That gold looks great!


The paint rundown is a little complicated, but if you know what the section of the frame is that you want to recreate, it shouldn't be difficult.Okay Gow,
I NEED to know the paint color for this!!! I have a Spaceliner frame that I want to build into a 60's hot rod bike....and that color is IT!!!
The paint rundown is a little complicated, but if you know what the section of the frame is that you want to recreate, it shouldn't be difficult.
The first color that I laid down was a coat of VHT Engine Metallics Burnt Copper. I basically sprayed it everywhere except the downtube and seattube.
I followed it up with the main color, Duplicolor Performance Wheel Gold. I shot most of the bike with this, being careful to fade out to the orange along the tank sides, rear dropouts/stays and the very front edge of the headtube.
Now, what really made everything pop was the two coats of Roth Flake Rattle Bombs All-In-One "Daffodil Killer" yellow-gold. This is a metalflake, pearl and candy all in one can, so it self-levels well and can look pretty great over a bunch of different base colors. http://rothmetalflake.com/4-rattle-bombs
To really bring out the "lime gold" look that I was going for, I shot a light coat of Roth Flake Rattle Bombs Pearls "Finkster Green" over the gold areas. This is a flip-flop pearl suspended in a clear carrier, so it really only shows up under direct lighting, and only from certain angles.
I coated the whole thing in 2K clear, but I think any decent clear would work. Duplicolor/VHT paints seem to play well with the Roth Flake Rattle Bombs. I wouldn't recommend trying to put them over cheaper brands like Rustoleum or Krylon, but if you do, I'd test shoot the combination on a scrap, and watch for unwanted reactions (wrinkling, crazing, etc.).
Hope that this helps.
Just know that these Roth Flake paints will fool you a little. They dry with a semi-gloss finish, and really don't come into their own until you lay the gloss clearcoat on top, at which point, they POP like crazy, visually.Thanks Gow!
I'll read this a couple times to be sure I get what I want.
Stellar job, my friend!
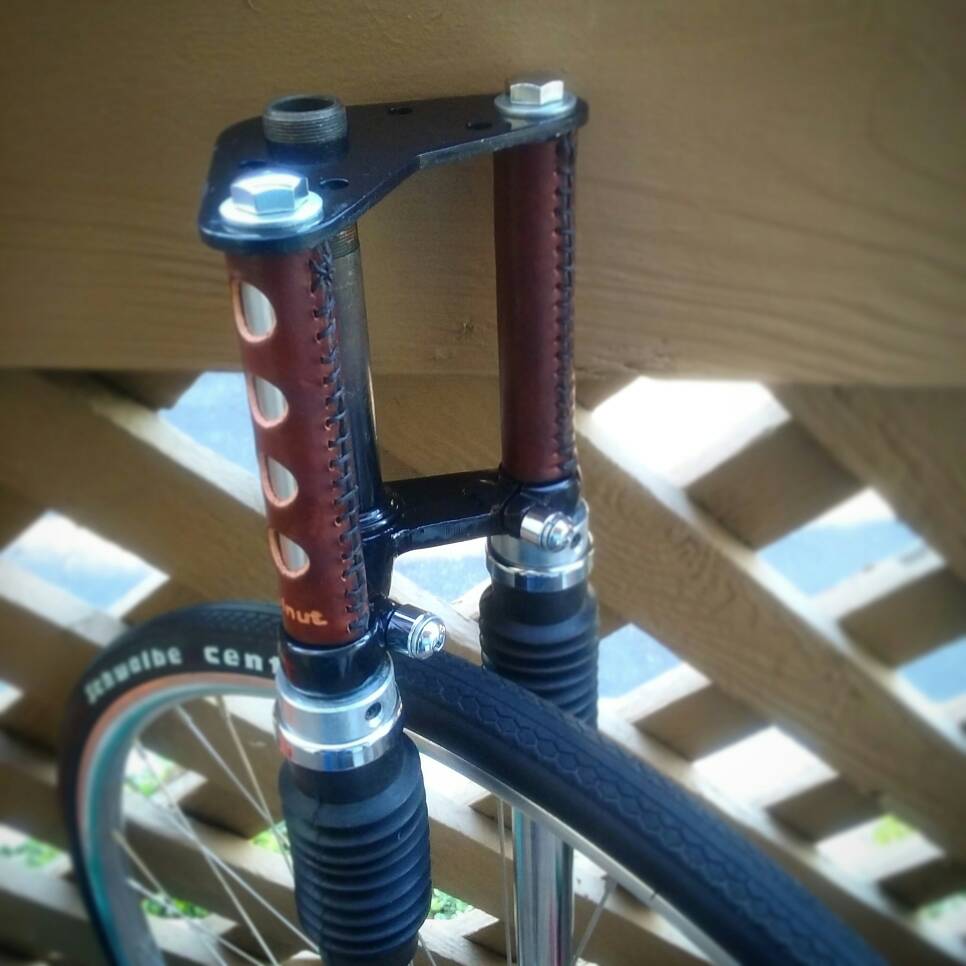

Thanks! Me too. Waiting to start assembling it has been stressing me out. I'm not that patient by nature, but I'm forcing myself to wait, for the sake of the final product. I still need to solder up the headlight switch/battery/LED conversion, too. Maybe I can get to that later tonight, so I can try to finish the headlight mount tomorrow night.I've gotta say, I'll miss the clip ons but those leather sleeves are so sick! I can't wait to see this one put together.
Enter your email address to join:

