Hi Ratrodders,
I know I have a lot of projects running... but still thinking about the ability for producing custom frames, or in other words, 'more professionalisation' of this functional artform. And since learning probably never ends, I am currently exploring another from scratch build.
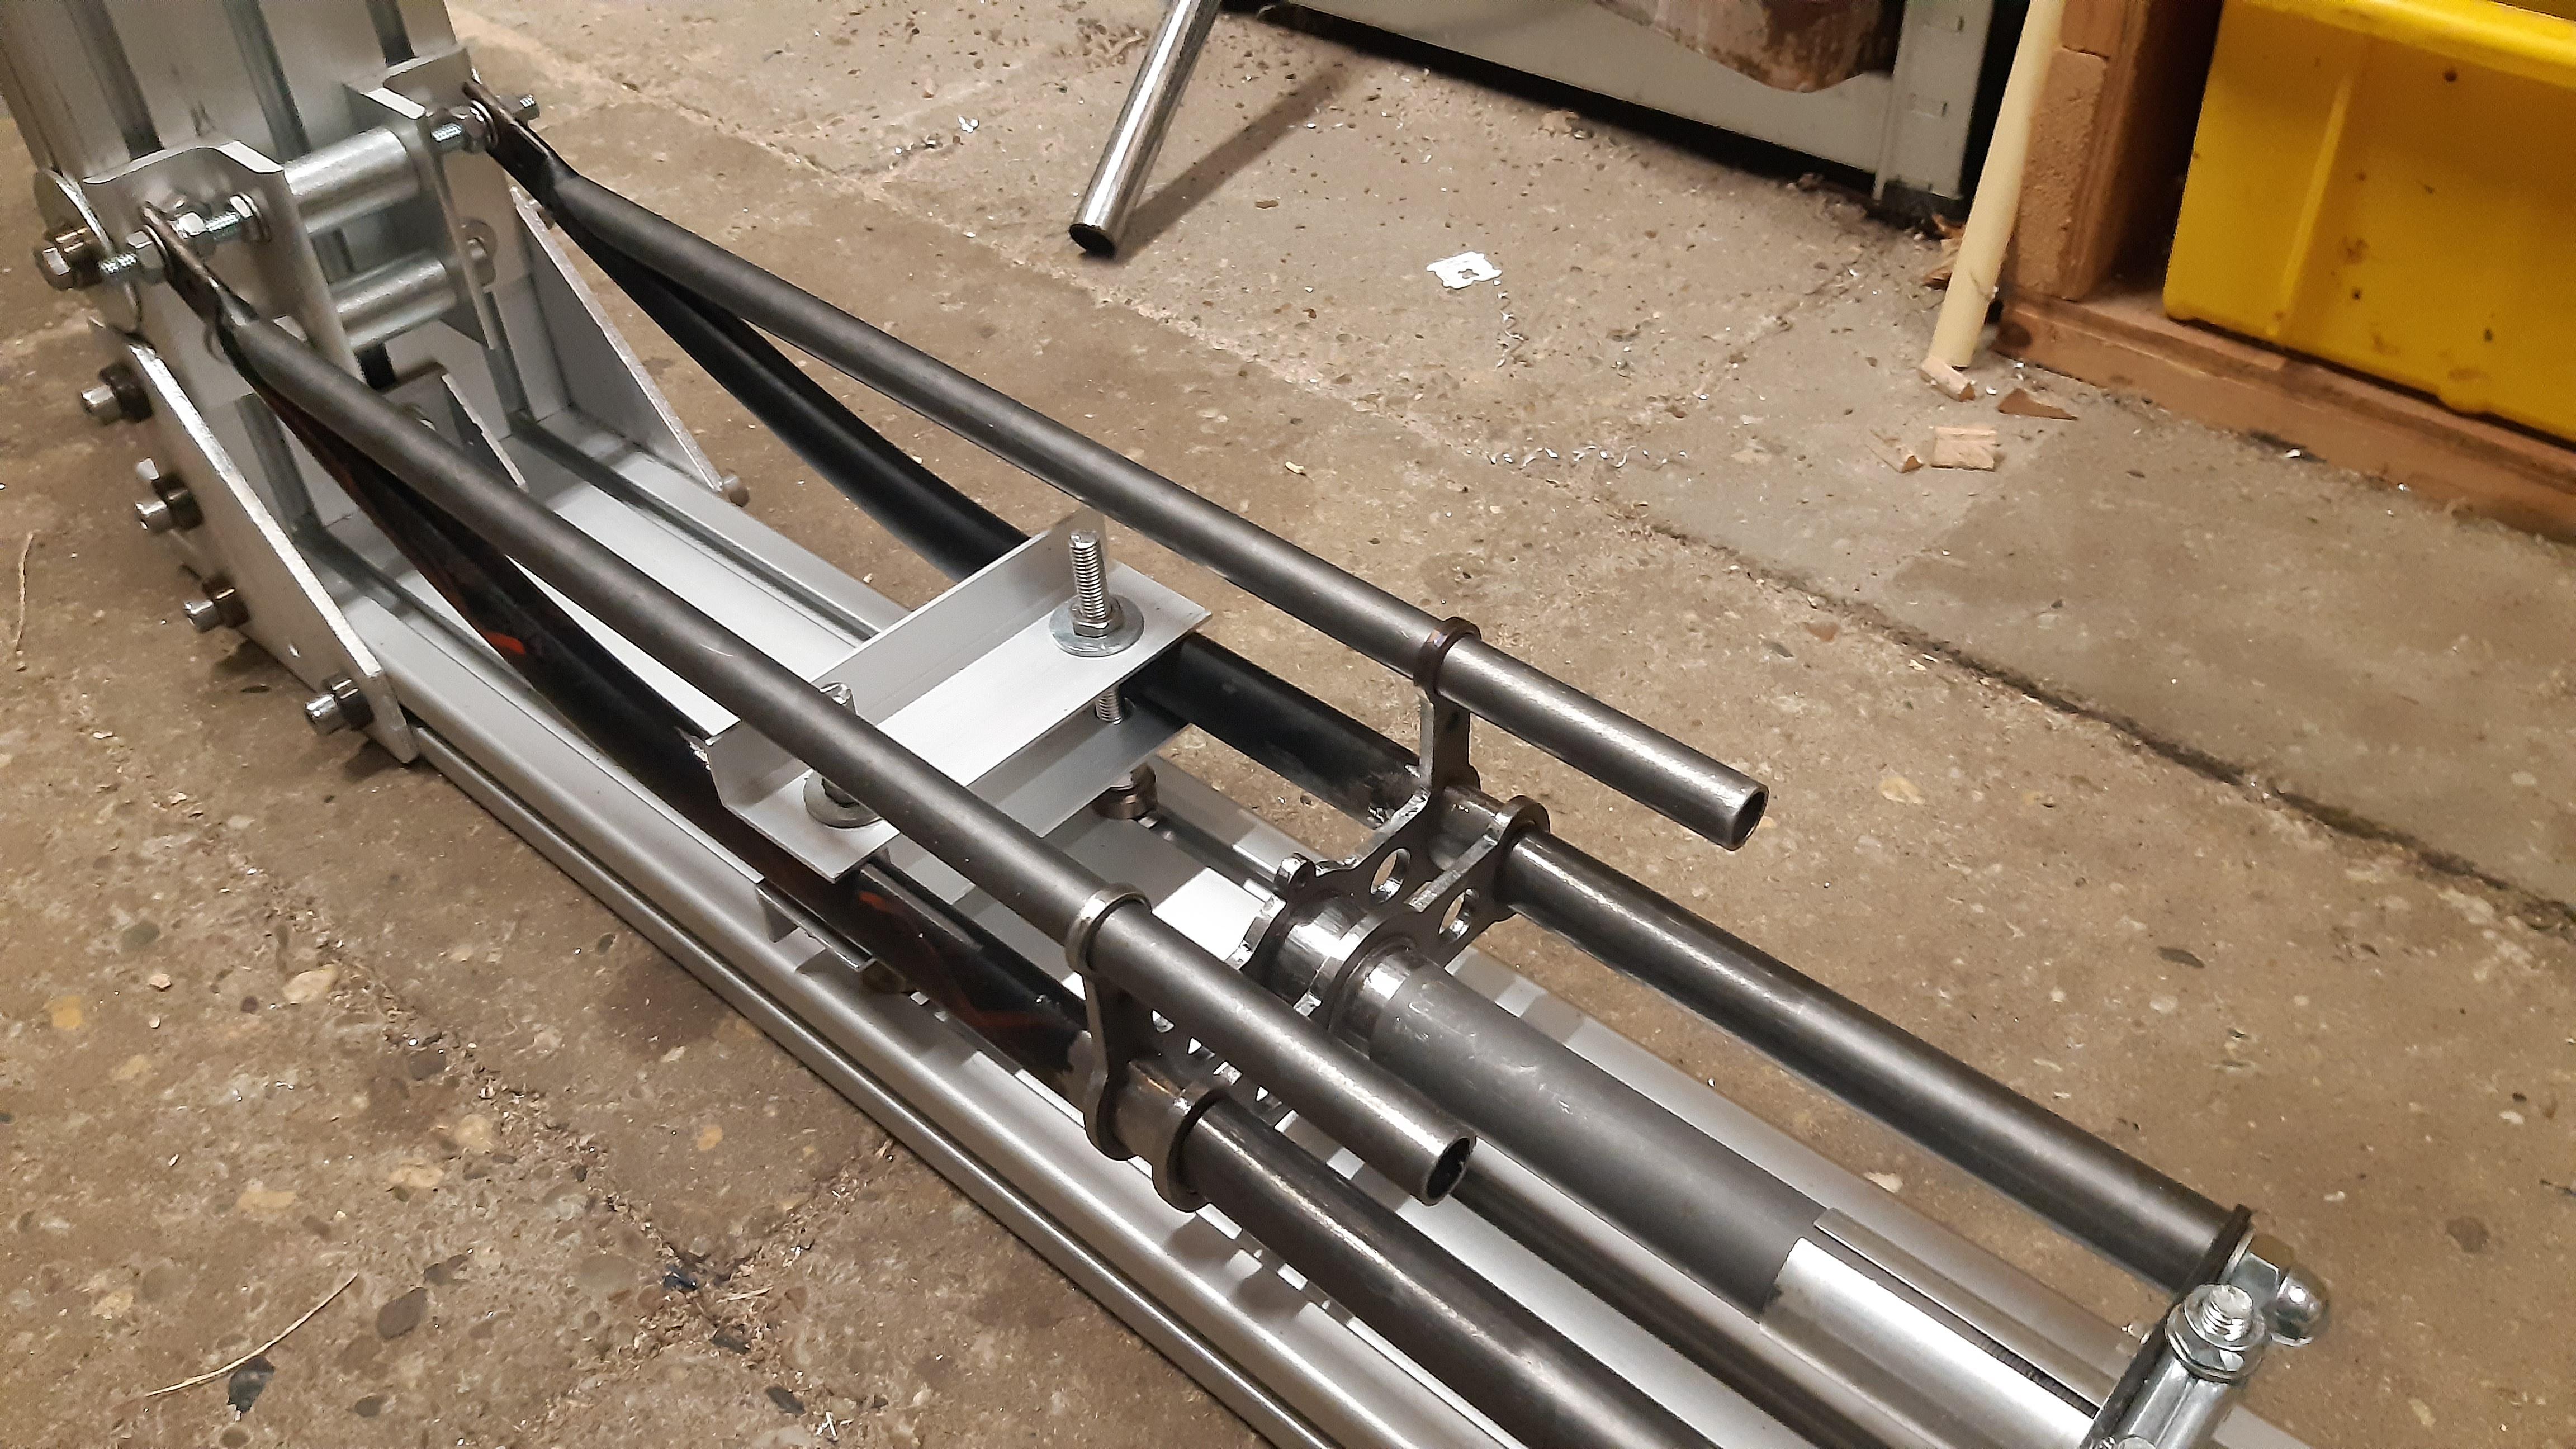
So I need some tools in my shop to really start with simple frame building:
So I wanna keep you posted on the designs and thoughts. I will start with a few chapters:
The last few years I built some great riding bikes. My current commuter is "Pope Roger". And I am very happy with that big bike. The position and riding feels really good.
Build link:
https://ratrodbikes.com/threads/pope-roger-bike-build.111479/page-4

Some time later, I built a bike with a "Ruff Cycles Porucho" frame. This bike is very comfortable! But has in my opinion some serious drawbacks to be able to ride it every day. The biggest downsides were the VERY low bottom bracket and the VERY forward placed bottom bracket. The bottom bracket position gives a lot of room for a low seat, which looks simply great. I had to ride this bike with 155mm cranks and still pay attention to pedal strikes when cornering.
Build link and picture:
https://ratrodbikes.com/threads/boardtracker-antique-motorcycle-style-bicycle-build.114712/page-7

Before I had an account on the Ratrodbikes forum, I rode an "Project 346 Basman". One of the most beautiful modern production frames I believe. Yet the low frame made sidewalk crossing impossible.

So you'll probably guess where I am heading...
I am looking to combine the best features of all above mentioned bikes. The basic starting geometry of the Pope Roger crossframe bike, but with the seat and bottom bracket relocated a bit to get closer to the Basman or Porucho bike. But with a more practical bottom bracket location.
The current production cruisers which are easier to attain, have relatively small frames, thus a seat with long seatpost for my size...
*I like big bikes and I can not lie*
INSPIRATION
In relation to looks I got quite a lot of inspiration from this forum.
Following pictures are not mine.

Classic look.

Huffman Lafrance.

My Electra Ratrod. Love many features of the design, just wish the frame was slightly bigger. The combination of straight and curved tubes is what I really like.

This bike is incredible. I love the straight line underbelly!

From @Reallybigtim

From Graffix1972.
All these bikes have features I absolutely love:
REQUIREMENTS
CONCEPT SKETCHES
Most sketches have low rear rack tubing drawn. I am certainly aiming this take this bike for commutes and possibly multiple-day holiday trips.
The sketches are based on geometry models with lines on paper.

Geometry first sketch. Checkout the letters at the measurements.

Side note: The Wheelbase of the Electra Ratrod is incorrect! I measured in the dark and did not have enough space.I think it is 1200mm actually.


Tried something here. In hindsight it was a bit silly.


Some fun sketches:


I felt inspired by @handyandy1100 regarding the exhaust pipes. Thanks for that Andy!

In the end, I'm not looking to create the most extreme bicycle design. More functional, utilitarian art
Thanks for having a look ya'll!
I know I have a lot of projects running... but still thinking about the ability for producing custom frames, or in other words, 'more professionalisation' of this functional artform. And since learning probably never ends, I am currently exploring another from scratch build.
So I need some tools in my shop to really start with simple frame building:
- Frame welding JIG, to keep the alignment in check.
- Tubing roller.
- A tube notcher makes it easier, but I currently work with patience, hacksaw and file.
- I have acces to a welding machine in our vehicular hobby shop.
So I wanna keep you posted on the designs and thoughts. I will start with a few chapters:
- GEOMETRY
- INSPIRATION
- REQUIREMENTS
- EARLY CONCEPT SKETCHES
The last few years I built some great riding bikes. My current commuter is "Pope Roger". And I am very happy with that big bike. The position and riding feels really good.
Build link:
https://ratrodbikes.com/threads/pope-roger-bike-build.111479/page-4
Some time later, I built a bike with a "Ruff Cycles Porucho" frame. This bike is very comfortable! But has in my opinion some serious drawbacks to be able to ride it every day. The biggest downsides were the VERY low bottom bracket and the VERY forward placed bottom bracket. The bottom bracket position gives a lot of room for a low seat, which looks simply great. I had to ride this bike with 155mm cranks and still pay attention to pedal strikes when cornering.
Build link and picture:
https://ratrodbikes.com/threads/boardtracker-antique-motorcycle-style-bicycle-build.114712/page-7
Before I had an account on the Ratrodbikes forum, I rode an "Project 346 Basman". One of the most beautiful modern production frames I believe. Yet the low frame made sidewalk crossing impossible.
So you'll probably guess where I am heading...
I am looking to combine the best features of all above mentioned bikes. The basic starting geometry of the Pope Roger crossframe bike, but with the seat and bottom bracket relocated a bit to get closer to the Basman or Porucho bike. But with a more practical bottom bracket location.
The current production cruisers which are easier to attain, have relatively small frames, thus a seat with long seatpost for my size...
*I like big bikes and I can not lie*
INSPIRATION
In relation to looks I got quite a lot of inspiration from this forum.
Following pictures are not mine.
Classic look.
Huffman Lafrance.
My Electra Ratrod. Love many features of the design, just wish the frame was slightly bigger. The combination of straight and curved tubes is what I really like.
This bike is incredible. I love the straight line underbelly!
From @Reallybigtim
From Graffix1972.
All these bikes have features I absolutely love:
- The open frames from the Elgin Twin and Graffix1972 his work.
- The straight underbelly of the blue Ratrodbikes buildoff (#8 I believe) bike.
- The antique rugged looks of the top cruiser.
- Combination of straight and curved tubes.
- I like small diameter tubing, but need to keep stiffness in check.
REQUIREMENTS
- Steel frame. CroMo, HiTen or construction steel.
- Intended use: Commutes, maybe even light bikepacking.
- The frame must be stiff enough, but is not the first aim here.
- 26x3.0" or 29x3.0" Wheels. 26" wheels have more tires options for cruisers.
- USA bottom bracket for one piece cranks. 68mm wide.
- Horizontal dropouts. 130mm wide.
- Bracket for coasterbrake attachment.
- 170 - 175mm cranks.
- Bottom Bracket height from ground: Minimum of 280mm. Depending on wheel size.
- Wheelies are not required.
CONCEPT SKETCHES
Most sketches have low rear rack tubing drawn. I am certainly aiming this take this bike for commutes and possibly multiple-day holiday trips.
The sketches are based on geometry models with lines on paper.
Geometry first sketch. Checkout the letters at the measurements.
Side note: The Wheelbase of the Electra Ratrod is incorrect! I measured in the dark and did not have enough space.I think it is 1200mm actually.
Tried something here. In hindsight it was a bit silly.
Some fun sketches:
I felt inspired by @handyandy1100 regarding the exhaust pipes. Thanks for that Andy!
In the end, I'm not looking to create the most extreme bicycle design. More functional, utilitarian art
Thanks for having a look ya'll!
Last edited:


")
 And I really like the meditative work with a file.