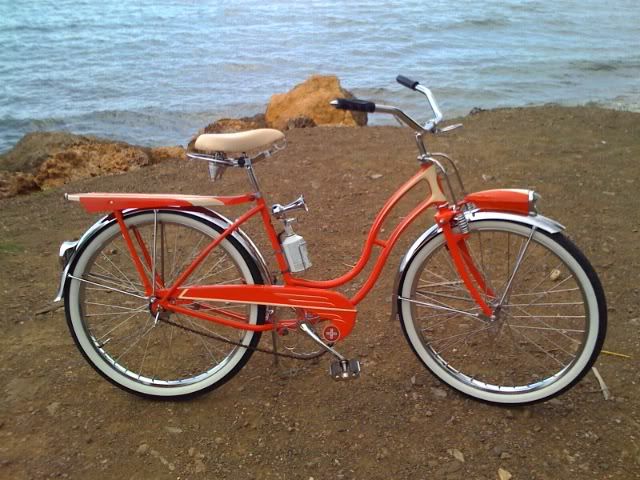
1936 Elgin Project - BACK FROM THE DEAD!!!

Rat Rod Bikes Bicycle Forum

Help Support Rat Rod Bikes Bicycle Forum:

This site may earn a commission from merchant affiliate links, including eBay, Amazon, and others.
Joined
Dec 7, 2007
Messages
1,871
Reaction score
251
Location
New Hampshire
Rating - 100%
10   0   0
Here is my mess of an Elgin. Start out with some pics of how it looked when I bought it this summer. Thought it had a bent fork leg, but it was much worse. They were broken, cracked and I thought ruined. Walker fixed it up for me though! See some pics of that project.


IMG_2344.jpg


IMG_2346.jpg


IMG_2347.jpg


IMG_2345.jpg


IMG_2348.jpg


IMG_2349.jpg


IMG_2350.jpg
 
Re: 1936 Elgin Project

With the fork repaired, it was time to get on with it. :D

Take the bike all apart and check out the super-cool, extra thick house paint job.


IMG_2443.jpg


Took a few evenings to strip this sucker down to the bare metal. Found that whoever stripped it last time appeared to use a sand blaster. The metal has lots of pits that were covered with the 1/4 inch of paint. Oh well...onward we go. I laid down a coat of etching primer and then a few coats of filler primer. Decided NOT to fill in every imperfection with body filler. I may regret that, but we will see.

IMG_2506.jpg


IMG_2508.jpg


The real question here is, why is Brian (Stickit) so excited?

IMG_2507.jpg
 
Re: 1936 Elgin Project

Really classy bike, should look great when done. That house paint job almost looked pretty good though...for house paint.
 
Re: 1936 Elgin Project

looking good Dan, about time you work on a bike instead of just buying them :lol: by the way, Sandblasting won't pit a frame
 
Re: 1936 Elgin Project

KZ1000 said:
looking good Dan, about time you work on a bike instead of just buying them :lol: by the way, Sandblasting won't pit a frame

I had an Elgin that looked pitted. I think that is just how they are. Mine is the curvy seattube version.

Looks like you are doing everything right.
 
Re: 1936 Elgin Project

Another Elgin brought back to life. I like it, can't wait to see it done.
Sean
 
Re: 1936 Elgin Project

so there I am, I'm scrolling down looking at the photos, and then I get to the one with Brian in it and "AHHH!", pushed back from my desk like 3'. I was scared. Please don't do that.
 
Re: 1936 Elgin Project

Thanks for the compliments everyone!

Skip: The bike you and Ian brought me was my Build-Off bike. Never finished it because I am still waiting for wheels (yes, those wheels) and a few other parts. It is painted though.

Rick: I always thought if somebody used an abbrasive too rough, it would damage the metal. If not, I don't know what happened to this thing...it was a long time ago in any case.
 
Re: 1936 Elgin Project

Hey Dan, Cool to see your working on it! I still haven't touched mine. Gonna be very nice when you get it done :mrgreen:
 
Re: 1936 Elgin Project

wow :shock:
love the frame something about the color i like keep up the good work :!: cant wait to se it completed :wink:
chinitaenlaplaya.jpg
 
Re: 1936 Elgin Project

I've painted two pitted framed bikes. One I primed and sanded 3 times before they came out. The other had such deep pinholes that primer would not do it. I primed it twice and let the chips fall where they may. In the end there were some pits showing but it was quite acceptable looking given the age of the bike. The paintjob overshadowed the pits.
 
Re: 1936 Elgin Project

good to see this one getting some love finally :mrgreen:
i know you probably have this all planned out but just typing out loud........
id leave the red primer, do black scallops, and run black walls(you know..kinda opposite of the color scheme on my zep)
 
Re: 1936 Elgin Project

Man I love an Elgin. Something that everybody should remember is ,if its metal it can be fixed. :wink:
 
Re: 1936 Elgin Project

Alrighty, here is a big update...

First, we have the frame after a few more coats of primer and then a coat of cream/tan color. You may or may not notice the headtube area is coated very well...the rest, just a light coat.


IMG_2520.jpg


IMG_2521.jpg


IMG_2522.jpg


A week later, after the base coat dried, it was time for the big tape-off! Kinda hard to see some of the arrows going on because it is white masking tape. Just cut the tape with an exacto knife and applied by hand while eyeballing the alignment.


IMG_2523.jpg


IMG_2524.jpg


IMG_2525.jpg


IMG_2526.jpg


Starting to coat with metallic green!


IMG_2527.jpg


After a few coats of green, some dry time, tape removal, touch up of overspray on white part, and a whole lot of paint fumes, the frame came out like this...


IMG_2528.jpg


IMG_2529.jpg


IMG_2530.jpg


IMG_2531.jpg


These last pics were taken at almost midnight...long night! The fork is a mess, and it and the frame need some touch up work. Still unsure of what to do with the guard and truss rods. Plus, needs clear coat. Stay tuned!

Dan
 
Back
Top