Thank you! 
You are using an out of date browser. It may not display this or other websites correctly.
You should upgrade or use an alternative browser.
You should upgrade or use an alternative browser.
The Galtbacken 18
- Thread starter Galtbacken
- Start date

Help Support Rat Rod Bikes Bicycle Forum:
This site may earn a commission from merchant affiliate
links, including eBay, Amazon, and others.
Outstanding artistic skills and fabrication ability top notch an extremely professional finish...i would definately be upping my price
they are getting a steal if you sell a bike of such quality for 1500 IMHO.. Only thing i would suggest is removing your rings when working around machinery, a little reminder of what can and DOES happen when a ring gets caught up on something spinning fast
WARNING EXTREMELY GRAPHICAL IMAGES ...IF YOUR SQUEAMISH I SUGGEST YOU DON'T CLICK THE LINK
Ring Removal The Painful way
Look forward to next update mate absolutely supeeeerb.
KiM
p.s OH..i also stole your "tip" with the rag wrapped around the rollers on the bender so simply and it WORKS (i have exact same bender as you
the marking of the tube in increments i already discovered hehe)
Dude I know I was warned but that is almost too much! I need to forward that to all my friends! :mrgreen:
AussieJester: Thank you!  I know the price is low, but the total cost for my bikes (including donor bike, tubes, sheet metal, everything for the LED-circuits, cut discs, drill bits, flap discs sanding paper, bondo, paint...everything) is $400-500. So if I sell this for $1500 I still make a profit of $1000-1100. I know that's too little if you start counting hours and if I was trying to make it my living. Thing is I see what I do now as sort of an apprenticeship, I'm still learning this stuff and don't want to charge full price until I feel more sure about what I'm doing. I don't consider it a steal, since I've been selling to people I know so far I see it as a way of giving.
IronSpadeCycles: Indeed!! :shock: My rings will come off before I work around machinery!
IronSpadeCycles: Indeed!! :shock: My rings will come off before I work around machinery!
Sometimes its not all about the profit, there is a thing called enjoyment, and the freedom to create with your hands. And if you are making it a job it takes all the fun out of it trying to build on someone elses schedule. Just do what you love and love what you do and if your making money at it....BONUS!!!!!! :wink:
Bulls eye my friend!  Don't make play into work...
Every time I finish a bike I get to keep, I like to imagine my grand children telling their children: "This was made by your grand grandpa back in the day things had wheels, so take good care of it". 
Thinking like that is pay enough for me :wink:
Thinking like that is pay enough for me :wink:
That's a good thought! 
I still have a 1927 Ford that my Great grandmother drove back in the 30's. Its a hot rod now but its still in the family, passed down through my dads dad to my dad and now to me. My dad first built it into the hot rod back in the early 60's when he was just a kid and I put my changes to it 20 years ago but its still got the original 1927 steel body.
I'll probably give it to my nephew as I don't have any kids and he can pass it on, if we're even allowed to drive ICE cars when he's old enough to have kids. LOL Who knows. Yeah I'm sure some kid will find one of my bikes in someones barn 75 years from now, and just sort of wonder what I was thinking back then. How cool would that be?
Late T
IronSpadeCycles said:Dude I know I was warned but that is almost too much! I need to forward that to all my friends! :mrgreen:
Yes it is graphical and as you would well know Travis accidents in a shop happen to often...It wasnt SO much for Galtbacken benefit im sure he's aware and is a responsible adult, but some of the younger members may not be & graphical images tend to "stick" in the brain and HOPEFULLY it will make them think twice ...apologies if it offended anyone.
Galtbacken...I wasn't aware you had already factored in your costs, 1000 bucks profit for something you LOVE doing is definitely acceptable in my book. I get what your say about being an "apprenticeship" i think your now a "Master" of bike building though buddy time to take on an "apprentice" of your own :: puts up hand :: pick me hehehe
Look forward to more projects from you mate best of luck with the hobby and making it a profitable one OR at least a free one
KiM
IronSpadeCycles: Cool to have a car like that that's been passed on in your family!! Let's hope when gasoline engines are out of the equation that it's possible to adapt the new powersources to such cool old cars!  When someone find one of your bikes in a barn sometime in the future I believe they'll say "bikes where so much cooler back when this was made!" :wink:
AussieJester: Yepp, that's how I see it too! Haha, I don't know about me having an apprentice, but I think it'd be great fun to share "build space" with a fellow bike builder sometime and be able to get ideas and inspiration and learn little tricks from each other...pretty much like this site, when I think of it!
  I'm still amazed by this forum, to have the possibility look at what other people are building, and learn techniques and get ideas from skilled craftsmen from halfway around the world!
I'm keeping an eye on your electric cruiser, by the way, and I can't believe my eyes what those motors are capable of! Awesome build you've got going there!
As for the bike, there's not much progress to show since last time. I've pretty much had to spend most of my spare time with my head buried in physics- and chemistry books, but I've done a little filler work and the small parts of the bike are soon ready for paint. Kind of ironic that when I started this build I planned on not using any filler on it, and now I'm more meticulous about filler and sanding on this bike than on any of the previous builds. Hmm... :lol:
I'll post more photos as soon as I got more to show you! Take care until then everybody!
AussieJester: Yepp, that's how I see it too!
I'm keeping an eye on your electric cruiser, by the way, and I can't believe my eyes what those motors are capable of! Awesome build you've got going there!
As for the bike, there's not much progress to show since last time. I've pretty much had to spend most of my spare time with my head buried in physics- and chemistry books, but I've done a little filler work and the small parts of the bike are soon ready for paint. Kind of ironic that when I started this build I planned on not using any filler on it, and now I'm more meticulous about filler and sanding on this bike than on any of the previous builds. Hmm... :lol:
I'll post more photos as soon as I got more to show you! Take care until then everybody!
Agreed Galtbacken I am a member on a handful of forums and it simply blows me away the quality and talent of builds
posted. RatRod bikes definitely takes the prize for best all out custom builds though hands down IMHO..
The interweb has DEFINITELY made it ALOT easier for us DIYers thats for certain, information
galore at the tips of your fingers...simply supeeerb! My oldman was HUGE DIYer and had to
head to the library everytime he needed info on how to go about a certain project!
With regards to the "filling" are you using the standard body filler as per used on car body work? I wouldn't
imagine there is a great deal of filling required from the picture i have seen, im guessing though your very very fussy about the finish JUST like me im to the point its obsessive LoL..Have you heard of JB Weld? I use this instead of Car body filler when only small areas need attention, sticks like .... to a blanket
there are other similar products basically though they are two part epoxys ...Liquid Steel is another i use, dries in ~15 minutes rock hard. Lil more expensive is Devcon, this has a HIGH metal content in it, can be drilled tapped milled turned filed etc, i have seen it used internally on engines AMAZING stuff..Is available with a variety of metals both ferrious and non ferrious...Be the stuff to use if you intend getting frames powdercoated that require filling.
Have you ever thought about electrifying one of your custom builds? I would suggest perhaps a hub motor for its Stealth attributes, it
wouldnt distract so much from your custom frame work as much as the non-hub motors like i am using. Would make the bikes a viable means of long distance transport too...40-50kms in under an hour no sweating ;-) Might be something to think about down the track as fuel prices rise and people start to look for cheaper modes of transport...your custom bikes electrified would open up a WHOLE new customer base...food for thought anywayz bud ...
KiM
I don't personally use JB Weld as a filler cause it doesn't sand as easily as high quality body filler. But one trick I've found with both types is that if you keep a bowl of simple paint thinner near by you can dip your fingers in the paint thinner and pre-smooth filler into the weld areas without it sticking to your finger. It saves a lot of time on sanding later if you've contoured the fillet while the filler is still wet. Try not to saturate the filler, only wet your fingers and rub them together then add thinner as needed to keep them moving smoothly over the filler.
I once repaired a giant cast iron check valve with JB Weld and smoothed it all out like above and after repainted it red and you would never know it was cracked. Held up to 3 years of 125PSI pressures before it failed again.
Later T
I once repaired a giant cast iron check valve with JB Weld and smoothed it all out like above and after repainted it red and you would never know it was cracked. Held up to 3 years of 125PSI pressures before it failed again.
Later T
IronSpadeCycles said:I don't personally use JB Weld as a filler cause it doesn't sand as easily as high quality body filler.
True...but it does stick 110% better and wont shrink and crack like bondo does over time...I'm not talking using it on HUGE areas just small spots inch by inch size for example...cover pitz etc..light spray of spray putty over the top once sanded and shes there for good
KiM
Thanks for the tips guys! Just as you suspected, AussieJester, there's not much that need to be filled, mostly just to smooth things out the welds a little. I don't want to grind down the welds that are part of the frame structure and such too much, so I use filler instead. Yes, I use regular autobody filler, but I think I'll give your suggestions a try on future builds!  Funny you ask if I've thought of putting electric motors on my bikes! Not long ago I told my mother about hub motors...and she seems to like the idea of having such a bike!
  I think that could be a fun project! And you're probably right about it opening up a bigger customer base!!
deorman: Yepp, busy! Working, studying and trying to finish painting the house that was going to be a workshop but might not be that after all if I'll sell my house when the "real" studies begin this spring, hopefully. It's getting colder too, but still not not too bad!!
Here's what I've done when I've taken short breaks from all the other things:
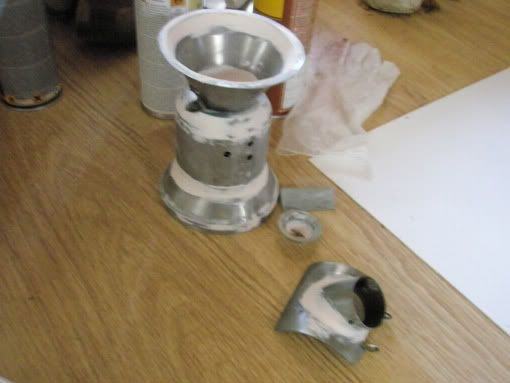
Here's just to show you where I use filler on some parts.
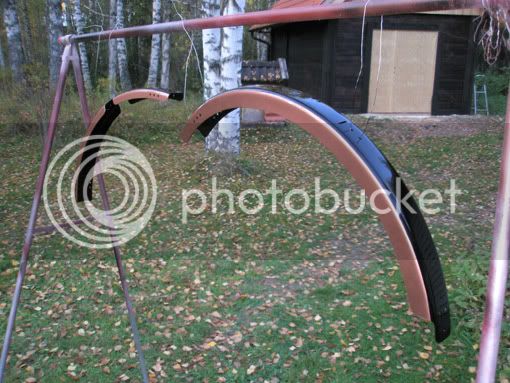
Fenders painted and clearcoated.
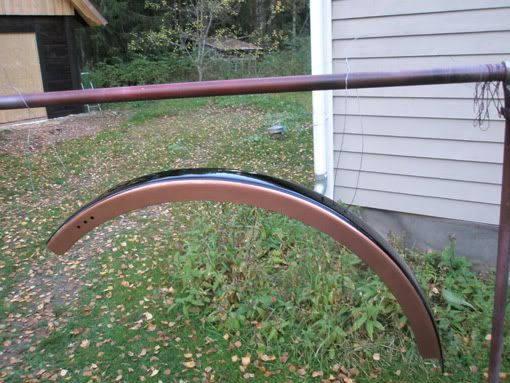
Chainguard primed and painted white (well not bright white, more like cream or ivory)
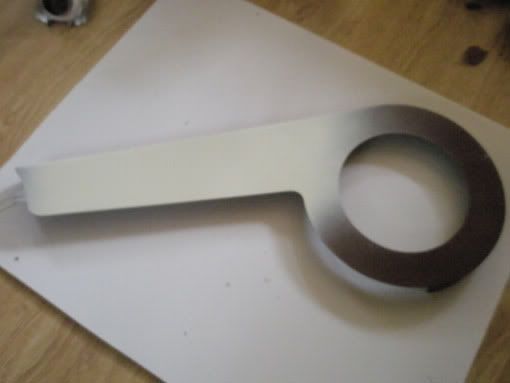
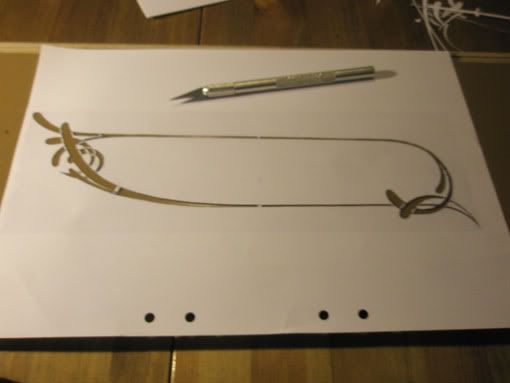
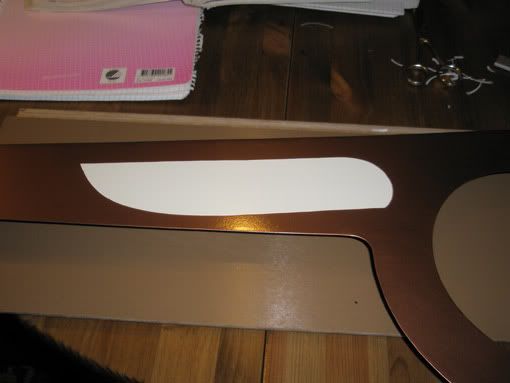
Paper template for the chainguard graphics.
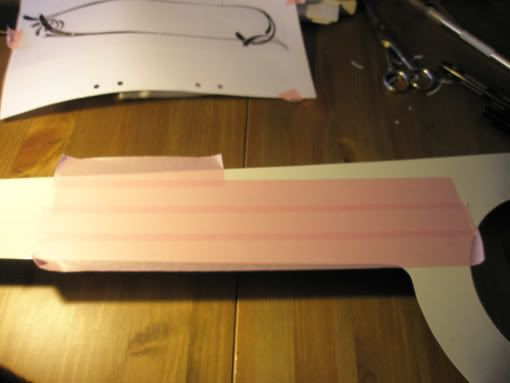
Masked off what will be left white.
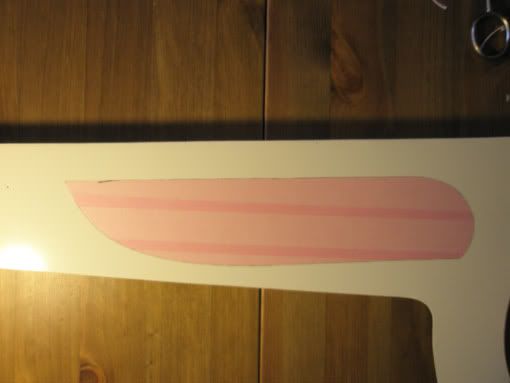
Painted copper.
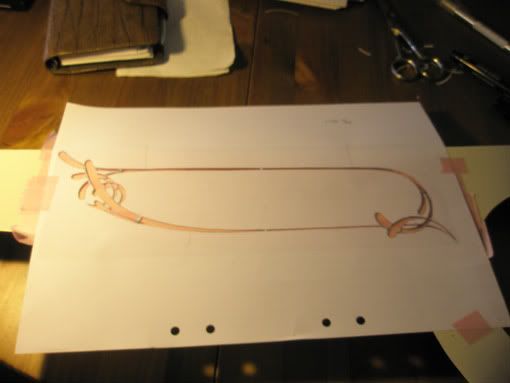
More masking tape, with a print out of the logo on top.
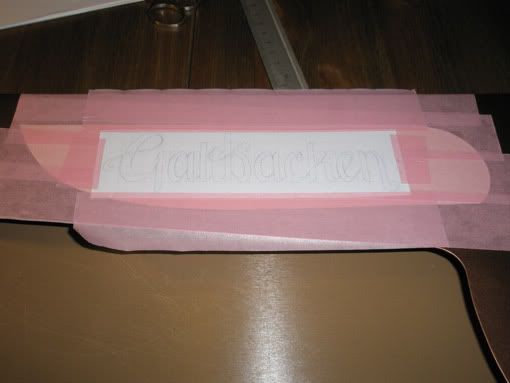
Traced the lines with a sharp knife, voilá!
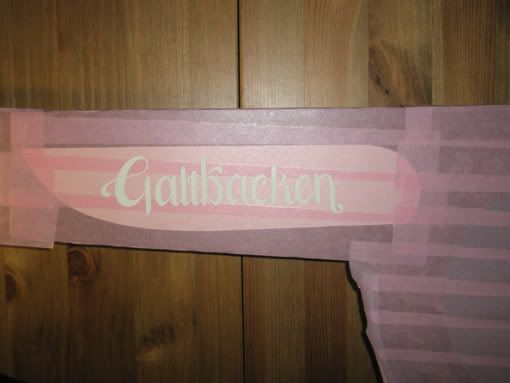
Some blue paint.
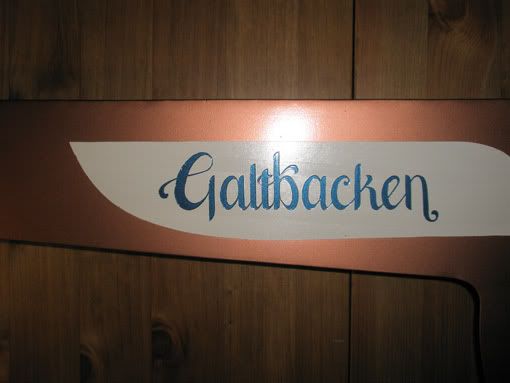
More masking and then some black paint.
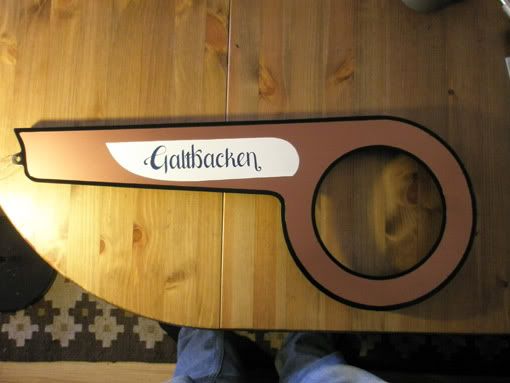
Drew the outlines of the stripe design.
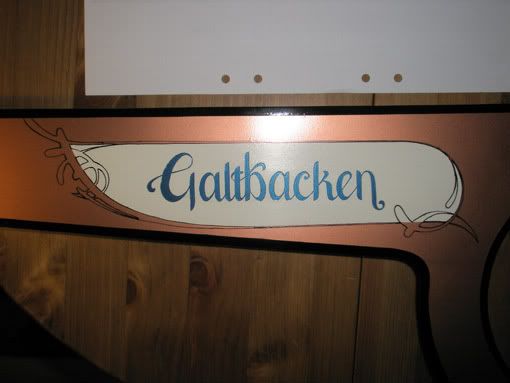
I've done some of the striping, but I won't show you until it's done! :wink:
deorman: Yepp, busy! Working, studying and trying to finish painting the house that was going to be a workshop but might not be that after all if I'll sell my house when the "real" studies begin this spring, hopefully. It's getting colder too, but still not not too bad!!
Here's what I've done when I've taken short breaks from all the other things:
Here's just to show you where I use filler on some parts.

Fenders painted and clearcoated.


Chainguard primed and painted white (well not bright white, more like cream or ivory)

Paper template for the chainguard graphics.

Masked off what will be left white.


Painted copper.

More masking tape, with a print out of the logo on top.

Traced the lines with a sharp knife, voilá!

Some blue paint.

More masking and then some black paint.

Drew the outlines of the stripe design.

I've done some of the striping, but I won't show you until it's done! :wink:
Hey there people, I've finally been able to do some more on the bike! I've finished the first stage of my studies so now got a little more time to do fun stuff...and to just kick back and relax!
Hmm...I thought that I had posted photos of the finished striping on the chainguard, but it seems my memory failed me. Been away for too long maybe...
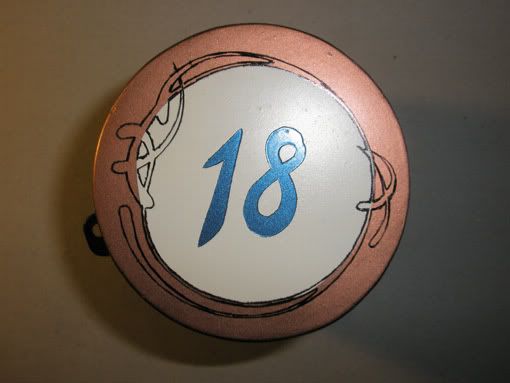
Anyway, here are some photos of the paint on the rearlight/cookiejar or what to call it.
The sides painted with copper, then masked and shot with white, then masked again and sprayed with some blue.
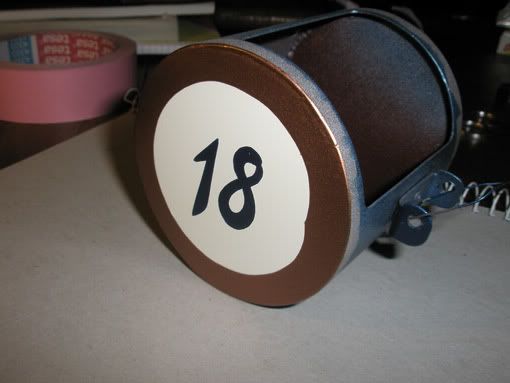
The rest painted black.
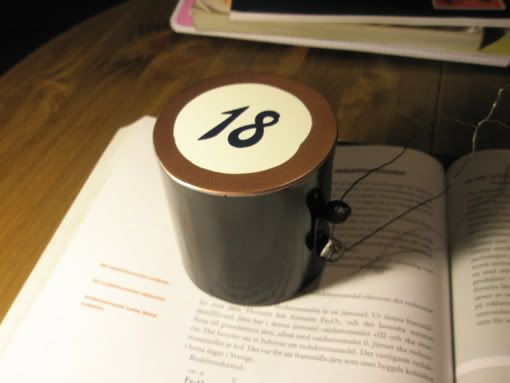
Drew the stripe design on with a marker pen.
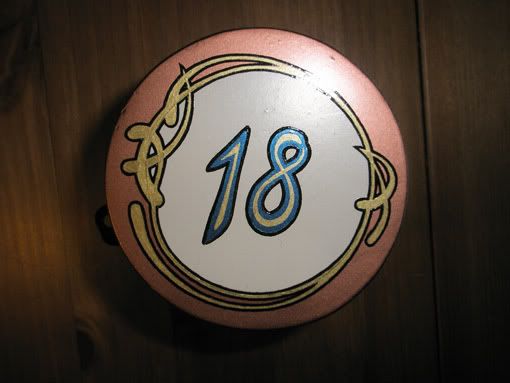
Striping done! Oh well almost at least, there'll be a gold line between the copper and the black. Same design on both sides. Did the striping with Humbrol Enamels and an old worn out watercolour brush....because I'm really picky when it comes to choosing only the best tools to work with! :lol:
I've also done some more painting and clearcoating on the small parts, so there'll be more pics coming in not too long I hope.
Take care everybody!
Hmm...I thought that I had posted photos of the finished striping on the chainguard, but it seems my memory failed me. Been away for too long maybe...
Anyway, here are some photos of the paint on the rearlight/cookiejar or what to call it.
The sides painted with copper, then masked and shot with white, then masked again and sprayed with some blue.

The rest painted black.

Drew the stripe design on with a marker pen.

Striping done! Oh well almost at least, there'll be a gold line between the copper and the black. Same design on both sides. Did the striping with Humbrol Enamels and an old worn out watercolour brush....because I'm really picky when it comes to choosing only the best tools to work with! :lol:

I've also done some more painting and clearcoating on the small parts, so there'll be more pics coming in not too long I hope.
Take care everybody!


