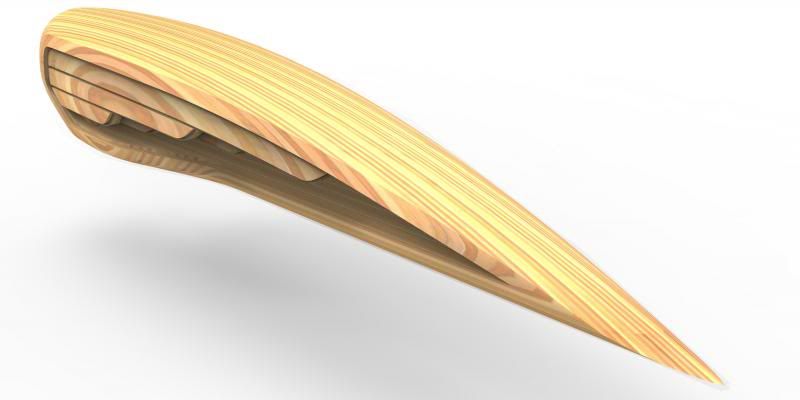
Well I've finalized the geometry of the tank. If there wasn't a deadline to this build off I'm sure I could think of another 100 ways to tweak this thing but enough is enough. Overall it's gotten quite a bit curvier than when I last posted images. It looked good before but I think it looks better now. I guess you could say it went from "Keira Knightley" to "Sophia Vergara." sweet tank bro !!
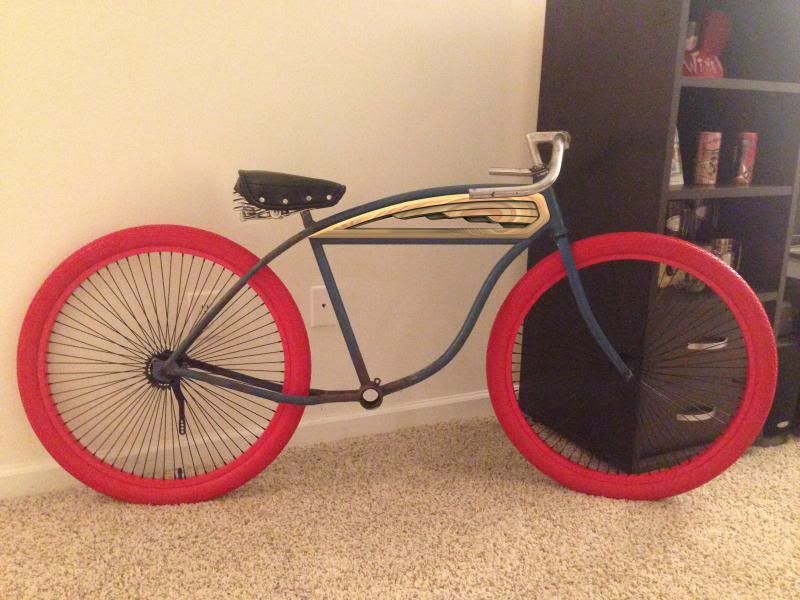
I'm still working on getting some CNC time, and while I'm waiting I have to finish up how I plan to mount this thing. The plan is to go through the bottom and possibly use some strong magnets in order to avoid visible screws. Below is a quick photoshop of the tank on the bike, as well as the potential location for the seat.
- COMPETITIONS
- THE COMPETITION ARCHIVES
- RRBBO OFFICIAL COMPETITIONS
- BUILD OFF 9 - (2014)
- BUILD OFF 9 BIKES
You are using an out of date browser. It may not display this or other websites correctly.
You should upgrade or use an alternative browser.
You should upgrade or use an alternative browser.
RE-TIRED STRIPPER - Formerly Spit Ply-er DONE (basically)
- Thread starter Pedal2daMetal
- Start date


Help Support Rat Rod Bikes Bicycle Forum:
This site may earn a commission from merchant affiliate
links, including eBay, Amazon, and others.
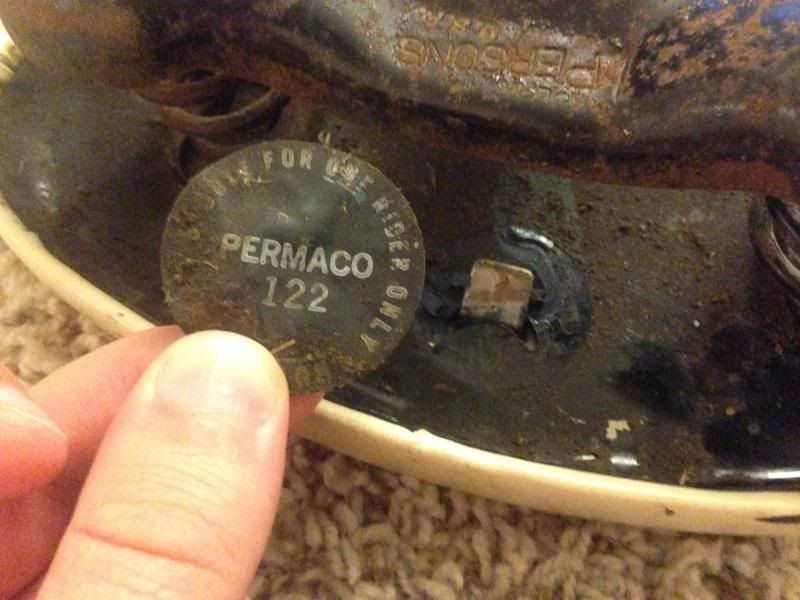
for the seat , you have to remove the 2 bolts from the spring and the one on the front , that is what hold the 2 pans togetter... you just hot glue your new material and sandwich it back together ")
the seat almost look like it has some blue leather under there
the seat almost look like it has some blue leather under there
for the seat , you have to remove the 2 bolts from the spring and the one on the front , that is what hold the 2 pans togetter... you just hot glue your new material and sandwich it back together
the seat almost look like it has some blue leather under there
That's what confused me, there aren't any bolts to remove. The springs are just wound in and at the front the bracket is fastened with a rivet that I'd have to drill out. I think I found the ticket though. They hid a little folded tab with this sticker. I can't believe the sticker has held on this long... I may just re-adhere it after I redo the seat....

Oh, and the blue is left over from when the frame was repainted way back when.
Have you had a chance to cut out that tank yet?
Unfortunately not, but I got the wood together this weekend and it shouldn't be long now (I know I've already said that!)Have you had a chance to cut out that tank yet?
Well, it's been a while since I've posted. The last few weeks haven't been the most productive but I bought a lot of parts and pieces for the bike. Got a donor bike that had a set of handlebars I wanted, an NOS headbadge, leather handle grips, and a lot of items to help with the head light. Most importantly, the tank build has finally started!
Yes! Been waiting for this!
Luke.
Luke.
Classic!
uhhh nice! I almost forgot about your awesome tank! Cant wait to see it all milled and pretty!
Over the top tank idea. Good luck with the finish cutting.
Thanks, I feel like I need it. I was talked into making it two pieces when originally I was going to have a third piece in the center as a spacer. If it works it will be nicer now, but I'm nervous because now it requires each half of the tank to be flipped and milled on both sides. Hope it all lines up... We'll see!Over the top tank idea. Good luck with the finish cutting.
Last edited:
So I wanted the look of an old school sealed beam spotlight, but I also didn't want to have any visible wiring anywhere on the bike so I needed a light that didn't require major battery power. I bought a flashlight that could run on AA's or D's so I knew I could get away with minimal space for batteries, and got to modifying. Turned out I could fit a couple C's in the headlight bucket which should help with longevity. It's not as bright as I'd like but I don't really plan on riding this bike at night and it gives off a spooky animal eye type of look when lit. I'm digging it.
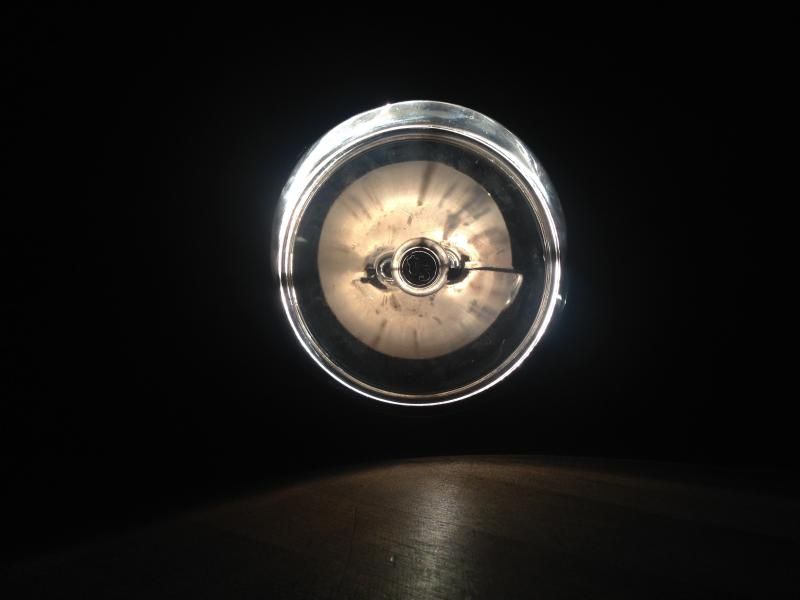
Here's what I had to do: First purchase diamond dust bits on Amazon. $15 for a set of five sizes was way cheaper a lot of other places and it seemed to work well. It drilled through the glass relatively quickly and easily.

Next drill out a location for the switch. I got the smallest toggle switch I could find so it isn't real noticeable and blends in with the original bucket.
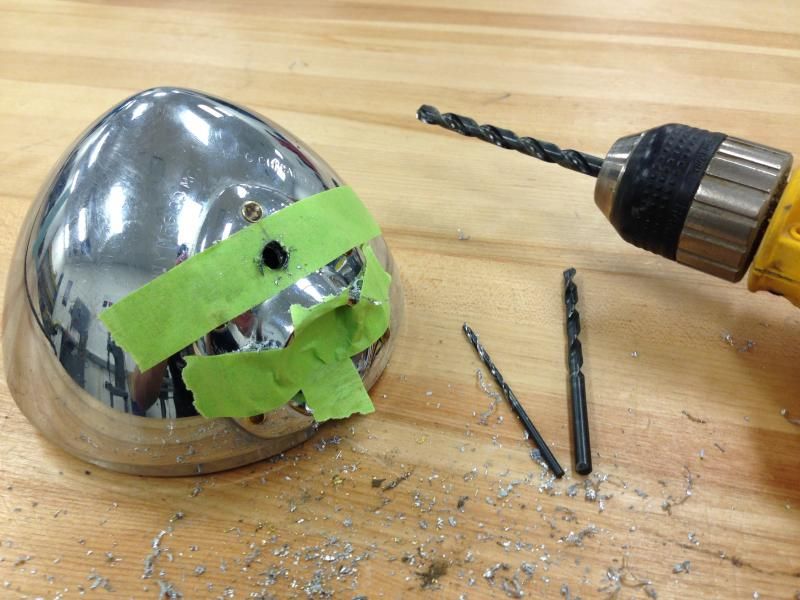
Then I mounted a battery holster for two C's, mounted the switch, and wired it up. I had to do some engineering on how to make the bulb fit and stay tight without the space for threads as it was held on in the flash light I sourced it from. I'm pretty happy with the way this came out. It should be pretty simple to change a bulb when needed. That said, it was very difficult to find a flashlight that was NOT LED..... buying bulbs in the future might get tough.
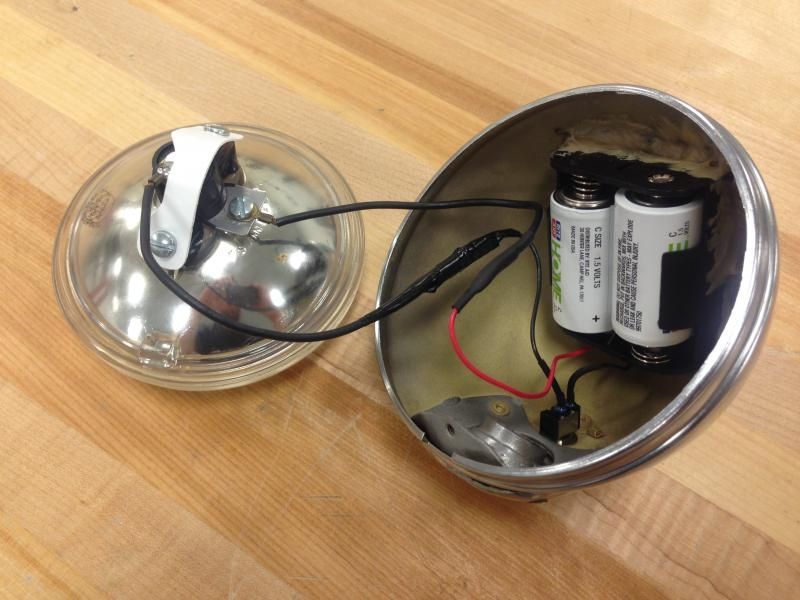
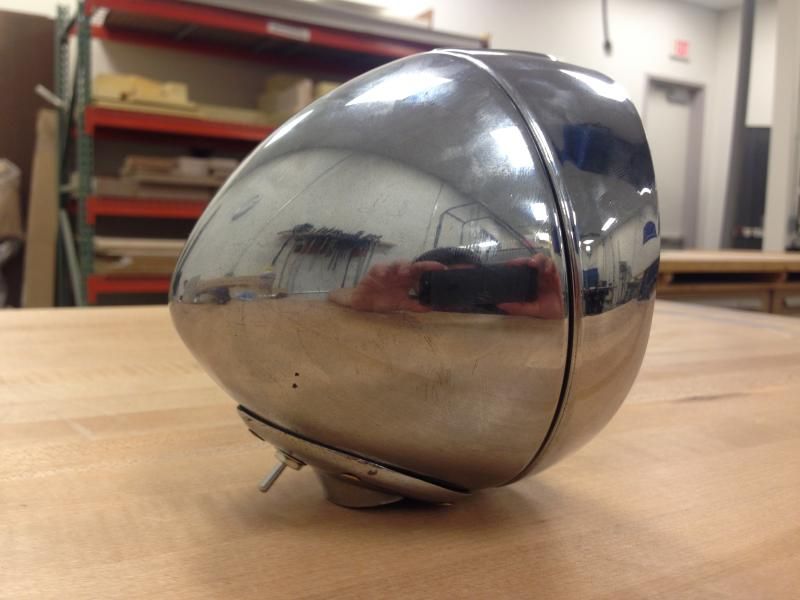
Close it back up and you have yourself a new headlight with no external wiring needed!

Here's what I had to do: First purchase diamond dust bits on Amazon. $15 for a set of five sizes was way cheaper a lot of other places and it seemed to work well. It drilled through the glass relatively quickly and easily.
Next drill out a location for the switch. I got the smallest toggle switch I could find so it isn't real noticeable and blends in with the original bucket.
Then I mounted a battery holster for two C's, mounted the switch, and wired it up. I had to do some engineering on how to make the bulb fit and stay tight without the space for threads as it was held on in the flash light I sourced it from. I'm pretty happy with the way this came out. It should be pretty simple to change a bulb when needed. That said, it was very difficult to find a flashlight that was NOT LED..... buying bulbs in the future might get tough.
Close it back up and you have yourself a new headlight with no external wiring needed!
Nice work on the light!
Luke.
Luke.
I can't wait to see this all come together. Good work, Rg
Great work on that light!! I'm impressed! It looks great too, can't wait to see it on the bike.
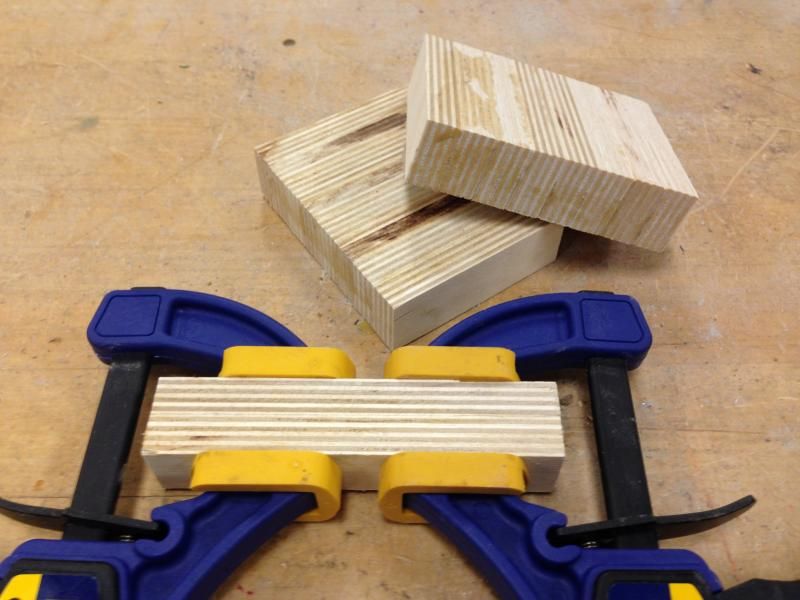
Well I've been chipping away at this thing and my confidence of finishing in time has grown quite a bit over the last week. I don't have a major update but I did start building the pedals and aside from those I found one additional location to add some stacked plywood. The pedals were always a part of the plan but the last piece is a new addition. It will be subtle, but a nice touch I think. Stay tuned to see where it goes....
Very cool! Any progress on the tank?
Luke.
Luke.
Haha I was wondering if anyone would ask. There has been a little progress because it's programmed in the CNC software and ready to go but there are other projects in front of it that have to get done. I'm not going to throw a date out there because I don't want to jinx myself but I don't think I'll have any issues getting it done in time. I have to finish the headlight bracket, then I can start cleaning the frame up and painting parts. If I'm smart with my time (which I need to be at this stage in the game) I could have the frame all painted and ready to go by the time the tank is milled so I would just have to mount it up... assuming it fits as planned!