You are using an out of date browser. It may not display this or other websites correctly.
You should upgrade or use an alternative browser.
You should upgrade or use an alternative browser.
The Galtbacken 18
- Thread starter Galtbacken
- Start date


Help Support Rat Rod Bikes Bicycle Forum:
This site may earn a commission from merchant affiliate
links, including eBay, Amazon, and others.
genius, nuff said 
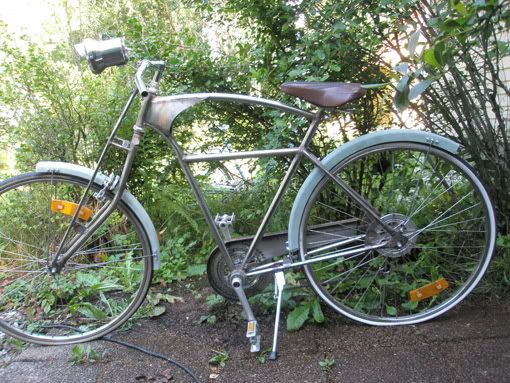
Galtbacken said:I wasn't happy with where this bike was heading (didn't like the look of it), and when I test rode it I didn't like how it felt either, so I took a few deep breaths and reached for the grinder.
:shock: Ouch!! It must have been hard to start cutting this bike apart. I thought it was cool before but I like the new version too. What was it that you didn't like about the 'feel'?
Both are awesome!
Thanks for the kind comments!
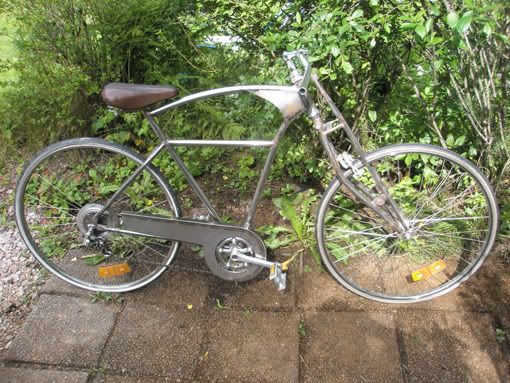
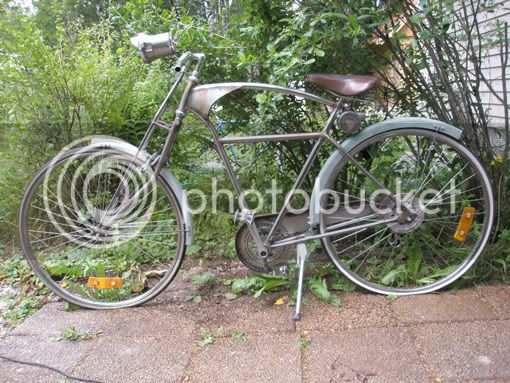
Build a tallbike...nah! :wink: I like the look of a bike when the seat is close to the top tube, and that's why my bikes are slightly taller than a regular bike. I'm six foot tall and this bike is made so that I get a comfy riding position with the seat pretty much all the way down, and because of the angle of the seat tube I can also put both feet on the ground while still sitting on the seat.
Well cutting it up wasn't that bad, I mostly just felt disappointed at myself for not getting it right the first time. What I didn't like about the feel was that I had to lean to much forward to reach the bars, so I didn't feel comfortable riding it, and somehow the bottombracket must have turned slightly to one side while I welded it (I guess I had a moment during welding that I didn't pay proper attention :? ) and although I could only feel that if I focused on it, it bugged me. I want it to be a great ride.
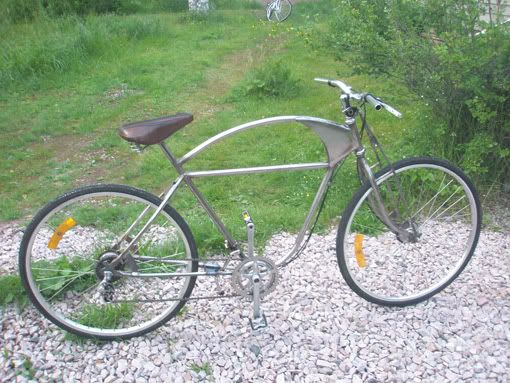
As far as the look of it, I didn't like how it looked from the front and back. The fork and the seatstays were too wide giving it a beefy look. I didn't want that, I wanted a slim faster looking bike. I wasn't really pleased with the arch of the top tube either, would have looked better if it'd been slightly less curved. Anyway, after changing the design and adjusting the measurements to make it fit me better I'm much happier with both the look and the feel of it!
Build a tallbike...nah! :wink: I like the look of a bike when the seat is close to the top tube, and that's why my bikes are slightly taller than a regular bike. I'm six foot tall and this bike is made so that I get a comfy riding position with the seat pretty much all the way down, and because of the angle of the seat tube I can also put both feet on the ground while still sitting on the seat.
Well cutting it up wasn't that bad, I mostly just felt disappointed at myself for not getting it right the first time. What I didn't like about the feel was that I had to lean to much forward to reach the bars, so I didn't feel comfortable riding it, and somehow the bottombracket must have turned slightly to one side while I welded it (I guess I had a moment during welding that I didn't pay proper attention :? ) and although I could only feel that if I focused on it, it bugged me. I want it to be a great ride.
As far as the look of it, I didn't like how it looked from the front and back. The fork and the seatstays were too wide giving it a beefy look. I didn't want that, I wanted a slim faster looking bike. I wasn't really pleased with the arch of the top tube either, would have looked better if it'd been slightly less curved. Anyway, after changing the design and adjusting the measurements to make it fit me better I'm much happier with both the look and the feel of it!
Some progress photos:
Shortened this piece to make the chainguard centered.
Like so...
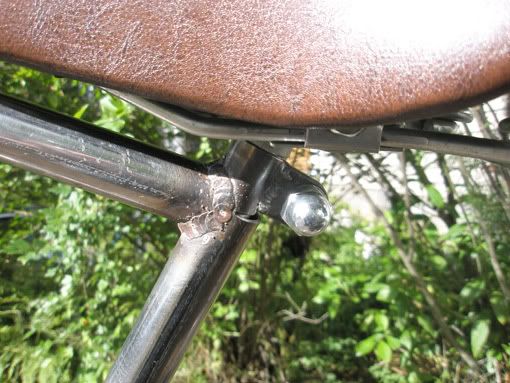
Seat clamps.
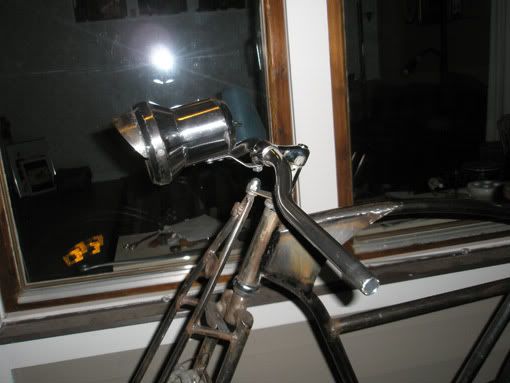
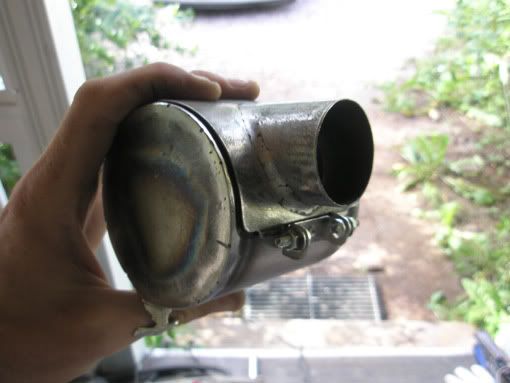
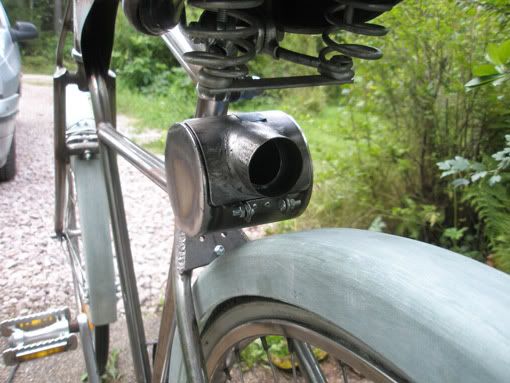
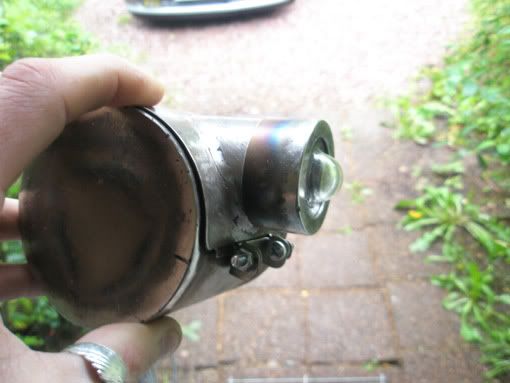
Same model of headlight as for the J.B.40.
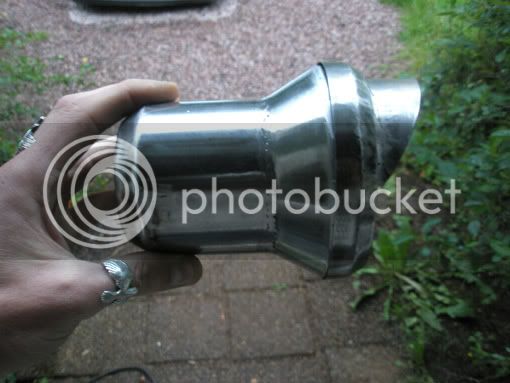
Headlight attachment.
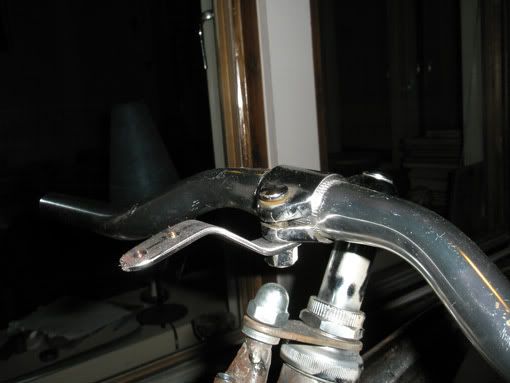
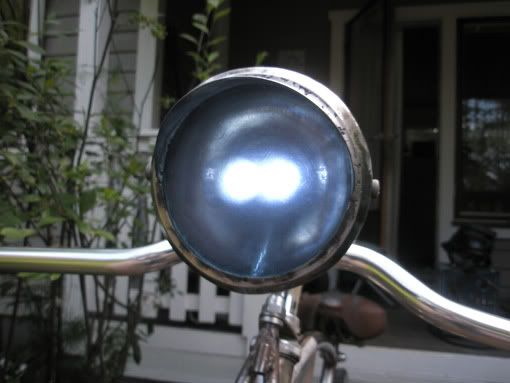
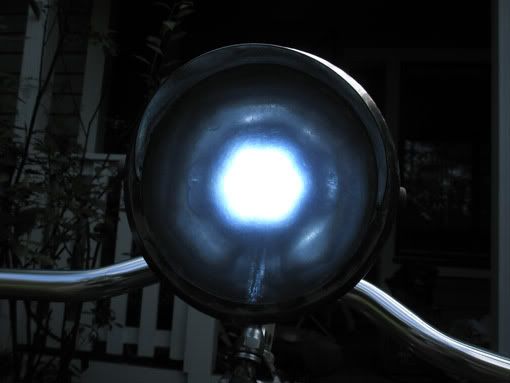
Low beam...

...high beam!
Low beam...
...high beam!
That's all for today, I'll be back with photos of the fenders mounted next time.
Shortened this piece to make the chainguard centered.
Like so...
Seat clamps.
Same model of headlight as for the J.B.40.
Headlight attachment.
Low beam...
...high beam!
Low beam...
...high beam!
That's all for today, I'll be back with photos of the fenders mounted next time.
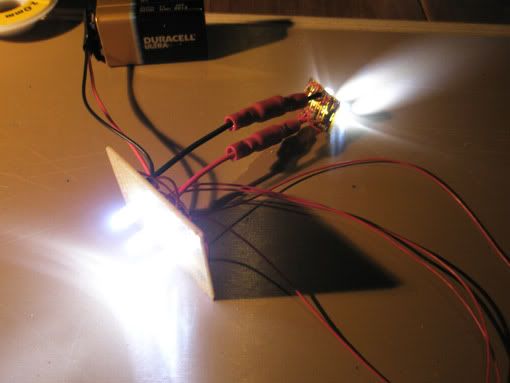
Did you make the headlight shell and all? I like the look and I was thinking of making one in riveted brass and aluminum for a Triumph chopper I'm building...
Later Travis
Later Travis
that chain guard is of the hook man awesome design!
Gdcast said:Odd thing has been happening to me this days.
With any new "project" I start, first I think how to do it, and then I take my time to try and figure out how The Galtbacken would do it. Of course is impossible to achieve the same level, but is very helpful to get better results. Thanks for keeping inspiring us!
Exactly what I do when I feel myself getting lazy and letting the quality start to slip!
Galtbacken, you are a legend Mate!
Travis: Cool you like it, thanks! Yes, I made the shell as well. If you look in the build thread for the J.B.40 there's a photo of the templates for this light on the first page. In case you'd like to see what the parts that go in to the shell look like, and maybe get some ideas.
Gdcast: Thanks! Yepp, I'm going to paint it! It'll be mostly black and then I'll paint parts of it in a bronze colour and add a few accents with an off white colour. Striping and logo will be gold and blue. I'll also use glossy clearcoat on the black parts and some kind of semi flat on the rest, se how that turns out.
dragsterIII: Thanks, glad you like it! I like how it came out myself, kind of clean and simple but it fits the rest of the bike well. I'll try to remember to take better photo of it, where it shows more if you like...
deorman: Pretty much so... :lol:
Dman: Oh man, thank you! I don't know really how to reply to something like that but it gives me a good feeling to hear that my builds can inspire others to build nice stuff! You build bikes that are full of inspiration yourself!
Done some more work on the fenders:
Fender struts welded.
Made these to go on the inside of the fenders for reinforcement.
Fenders in place!
I'll just need to trim the edges on the fenders and then they're done! Oh, wait a minute...I'll have to make some kind of contraption on the rear fender to hold a red reflector. I see some more cloth and polyester work coming up... Stay tuned!
Yes, I made the shell as well. If you look in the build thread for the J.B.40 there's a photo of the templates for this light on the first page. In case you'd like to see what the parts that go in to the shell look like, and maybe get some ideas. Gdcast: Thanks!
Yepp, I'm going to paint it! It'll be mostly black and then I'll paint parts of it in a bronze colour and add a few accents with an off white colour. Striping and logo will be gold and blue. I'll also use glossy clearcoat on the black parts and some kind of semi flat on the rest, se how that turns out. dragsterIII: Thanks, glad you like it!
I like how it came out myself, kind of clean and simple but it fits the rest of the bike well. I'll try to remember to take better photo of it, where it shows more if you like...deorman: Pretty much so... :lol:
Dman: Oh man, thank you! I don't know really how to reply to something like that but it gives me a good feeling to hear that my builds can inspire others to build nice stuff! You build bikes that are full of inspiration yourself!
Done some more work on the fenders:
Fender struts welded.
Made these to go on the inside of the fenders for reinforcement.
Fenders in place!
I'll just need to trim the edges on the fenders and then they're done! Oh, wait a minute...I'll have to make some kind of contraption on the rear fender to hold a red reflector. I see some more cloth and polyester work coming up... Stay tuned!
wow this bike keeps getting better with each post
following your instructions I am going to make some fenders thanks!
I really like how acute the main triangle of the frame is, gives it a 19th century look with a modern flair
following your instructions I am going to make some fenders thanks!
I really like how acute the main triangle of the frame is, gives it a 19th century look with a modern flair
Thank you very much!
Go ahead and make some fenders! They might not be the most fun part of building a bike, but as I see it they're worth the effort!
Nice to hear that you like how the bike's looking! I love the look of old motorcycles and try to incorporate that into my designs without making them less functional or practical as bicycles. So far I've learnt something with each new bike I've started to build, and I hope that I'll be able to keep on learning!
Thanks for showing interest in this build!
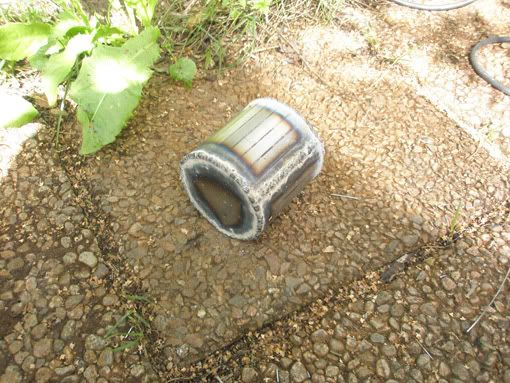
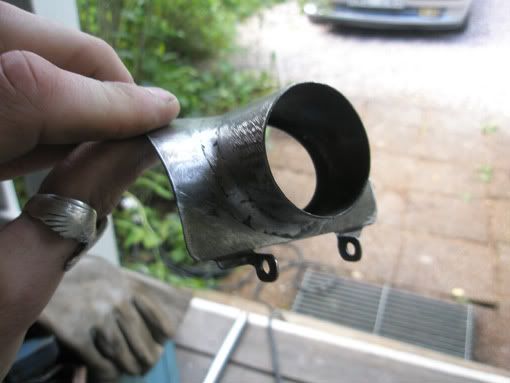
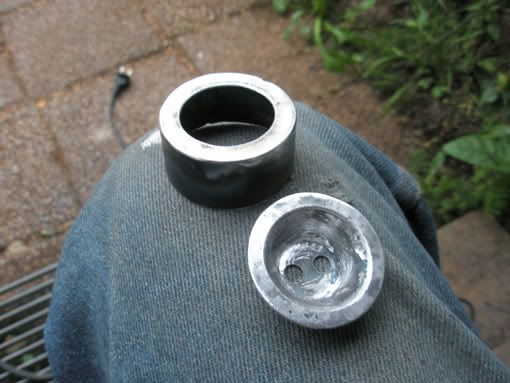
Here's some progress on the rear light/box:
The box.
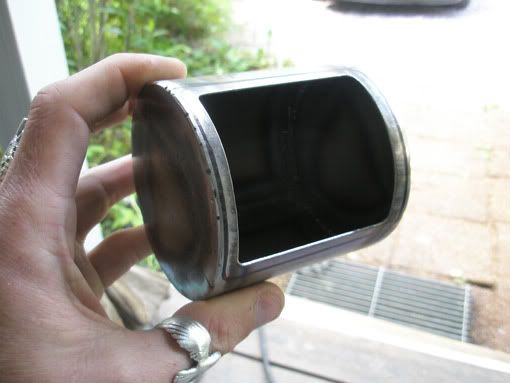
The lid and the shell for the light...
...mitered and welded together.

Hope to be back with more photos soon...
Go ahead and make some fenders!
They might not be the most fun part of building a bike, but as I see it they're worth the effort!Nice to hear that you like how the bike's looking! I love the look of old motorcycles and try to incorporate that into my designs without making them less functional or practical as bicycles. So far I've learnt something with each new bike I've started to build, and I hope that I'll be able to keep on learning!
Thanks for showing interest in this build!
Here's some progress on the rear light/box:
The box.
The lid and the shell for the light...
...mitered and welded together.
Hope to be back with more photos soon...
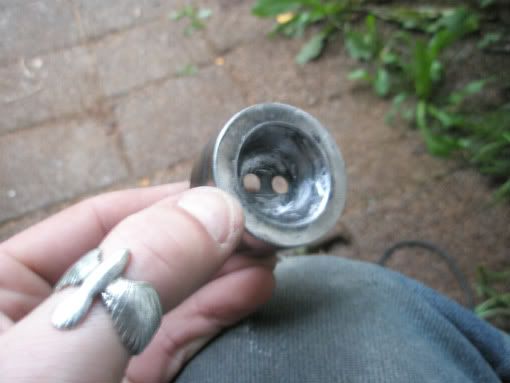
Made some more progress on the rear light today, before I had to go to work.
Cut some holes.
Made hinges.
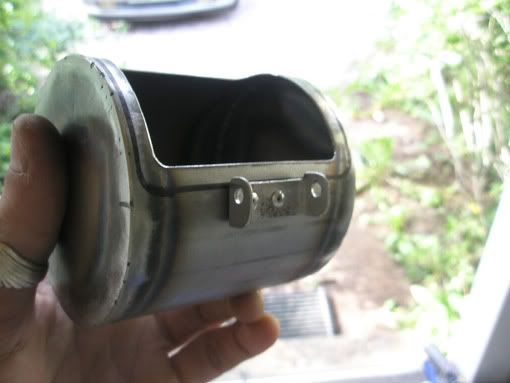
Bracket.

At first I had planned to make some device and attach it to this, hence the top two holes, but as shown in the previous photo I chose a different solution.

Just a few small parts left to make for the rear light and then it's done.

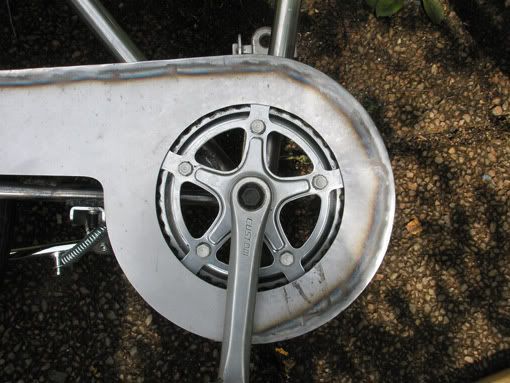
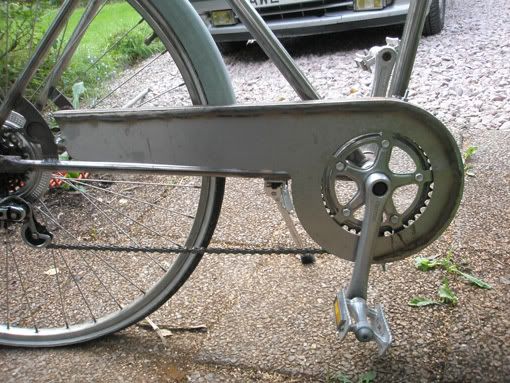
Better photo of the chainguard.
I'll be back...
Cut some holes.
Made hinges.
Bracket.
At first I had planned to make some device and attach it to this, hence the top two holes, but as shown in the previous photo I chose a different solution.
Just a few small parts left to make for the rear light and then it's done.
Better photo of the chainguard.
I'll be back...
yeah I really like the design of the tail light, this bike is awesome, the stance is cool
Thanks! I think I'll make the glass for the rear light like I did on the Mustang, but I'll try to make it come out just a little bit more in the middle...
I'm really happy with the stance too, and it's really comfortable! Big improvement from the first version!
I think I'll make the glass for the rear light like I did on the Mustang, but I'll try to make it come out just a little bit more in the middle...I'm really happy with the stance too, and it's really comfortable! Big improvement from the first version!
Galtbacken said:I'm really happy with the stance too, and it's really comfortable! Big improvement from the first version!
glad your happy with it! now you didnt totally scrap the first frame did you :?: or did you make it into the second :?: cant tell which...
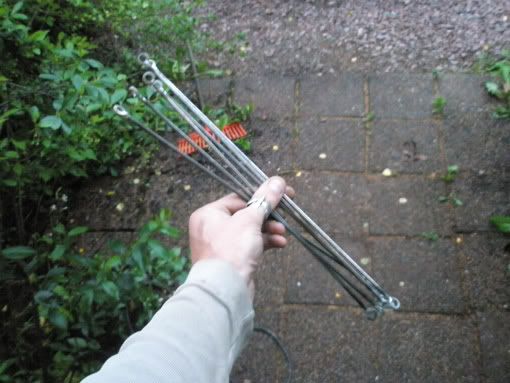
I'll post a photo of what's left of it... :wink:
Galtbacken said:I like the look of a bike when the seat is close to the top tube, and that's why my bikes are slightly taller than a regular bike. I'm six foot tall and this bike is made so that I get a comfy riding position with the seat pretty much all the way down, and because of the angle of the seat tube I can also put both feet on the ground while still sitting on the seat.
you've built a beautiful solution to your aesthetic concerns about seat positioning
that's a beauty of a frame and it looks very strong. thanks for sharing your creative process with us!Thank you, and you're welcome!
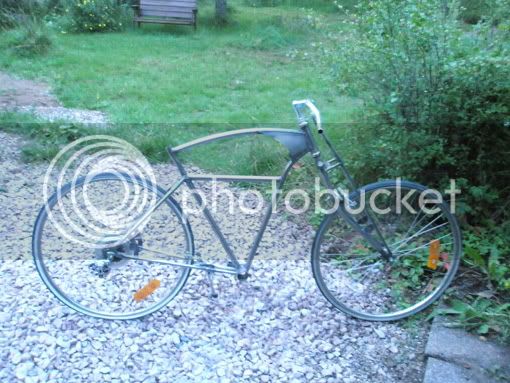
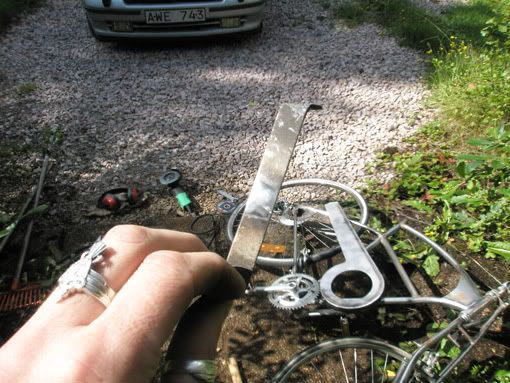
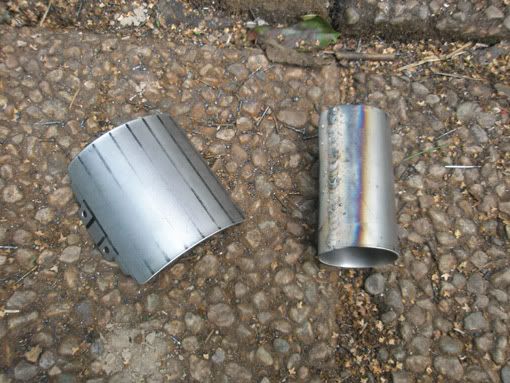
dragsterIII, here's what's left of the first version:
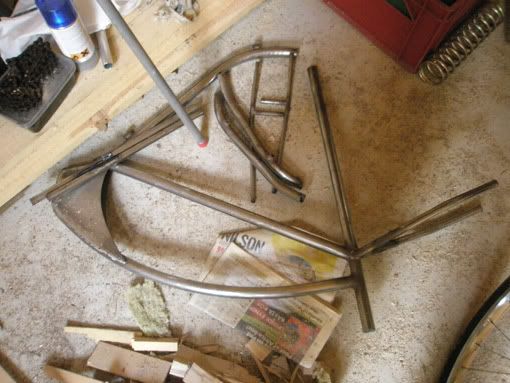
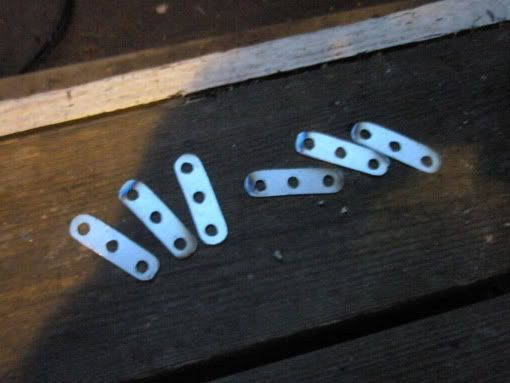
When I started on the second version I decided to only use the parts that I had fabricated from iron bar from the first version (the dropouts, reflector holders, kickstand bracket, such things) but I didn't use any of the old tubes. I figured it would be both quicker and give better results to make the frame from new tubes since there was quite a lot I wanted to make different.
The rear light is almost finished!
Welded the last two parts for it.
Goes on like this.
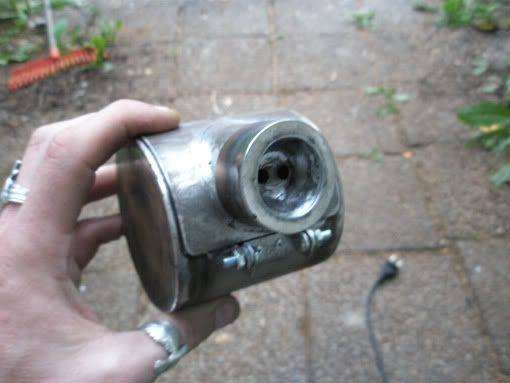
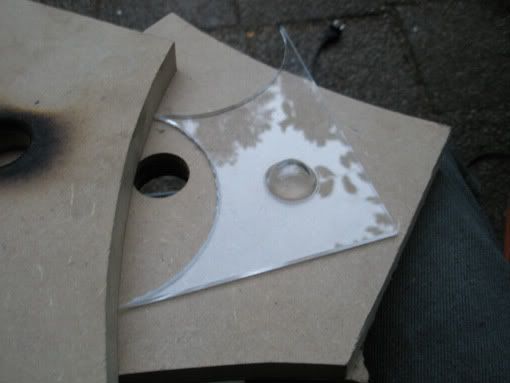
Made the glass the way I did for the Mustang...
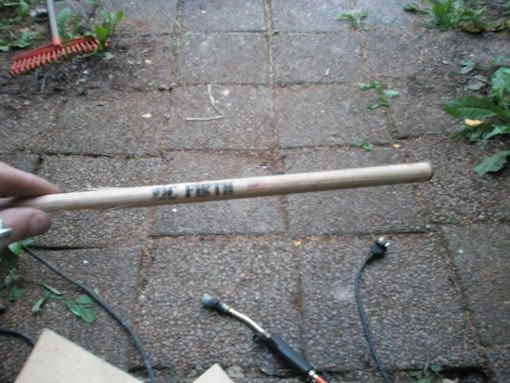
...but this time a Vic Firth 5A was my tool of choice to shape the plexi glass.
Only have to drill a couple of holes and weld on two nuts and it done.
Back soon I hope....
dragsterIII, here's what's left of the first version:
When I started on the second version I decided to only use the parts that I had fabricated from iron bar from the first version (the dropouts, reflector holders, kickstand bracket, such things) but I didn't use any of the old tubes. I figured it would be both quicker and give better results to make the frame from new tubes since there was quite a lot I wanted to make different.
The rear light is almost finished!
Welded the last two parts for it.
Goes on like this.
Made the glass the way I did for the Mustang...
...but this time a Vic Firth 5A was my tool of choice to shape the plexi glass.
Only have to drill a couple of holes and weld on two nuts and it done.
Back soon I hope....