This post is to show my first actual "build". It started as a novelty bike that I wanted to make fit me. Much to my surprise there was an old family friend who was/is a professional weldor. I thought he had retired. I let him have the bike during the cold months and he worked at his leisure. The major work has already been done but I have a before, concept and after so you get to see what was done. I showed the bike in my intro thread but figured this would be the place to share the details.
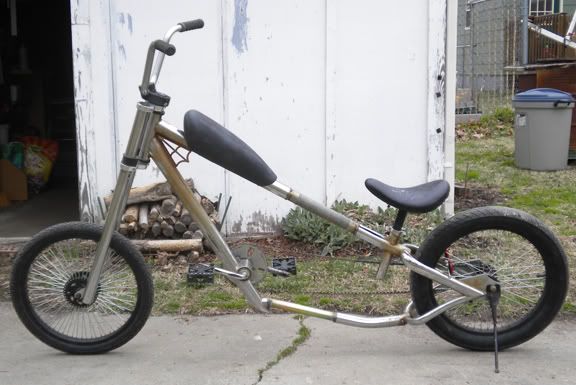
Jesse James WCC kid's bike. This thing was covered with every "biker" theme they could fit on. Flames, spider webs, pin striping, Old English lettering and even a fake revolver chamber for the gas cap. It originally had low rise bars so that a pre-teen would look all hunched over on a fairly stretched "chopper". I stripped the "extras" and chopped a set of BMX bars to make some decent rise bars, so that I could actually ride the bike.

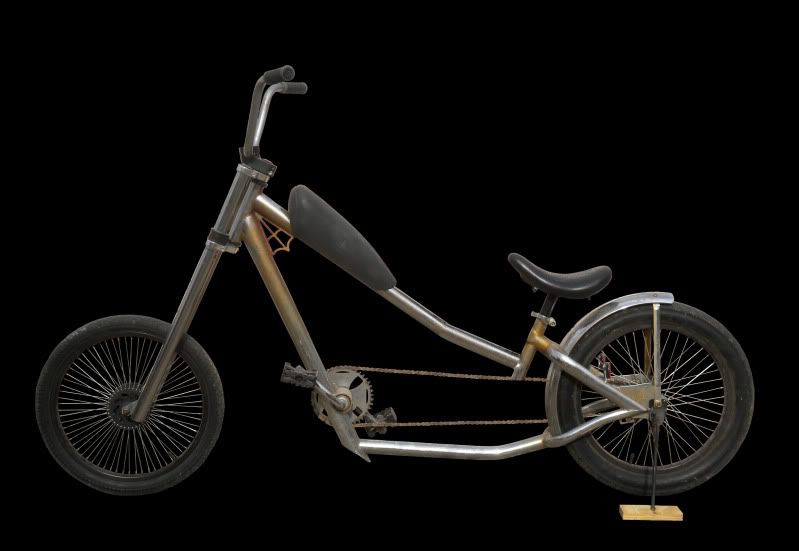
But I'm not a kid, so I started building a concept in Photoshop. The concept shows a 9" stretch on the bottom tube and the top was to be fabbed using donor frames. I used a tape measure in the pictures so I could track scale and perspective so it should have been a pretty coherent design. But my weldor is a weldor, not a biker. So it was left in his hands to do what he does, and I tried to take my mind off of it so the time didn't drag by that it wasn't actually in my hands.
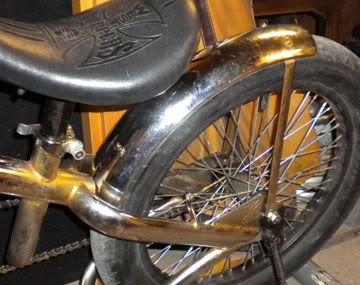
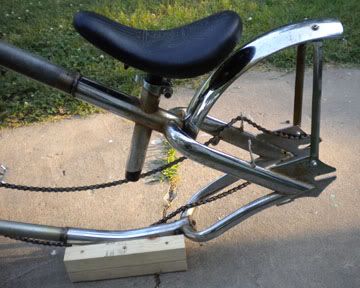
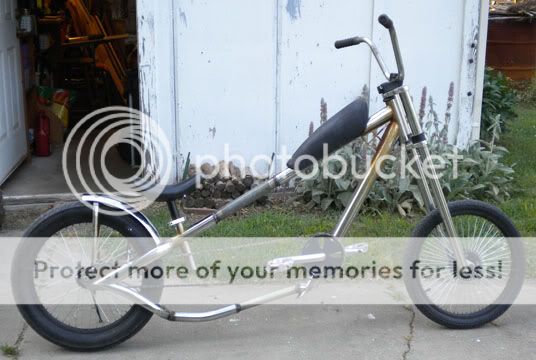
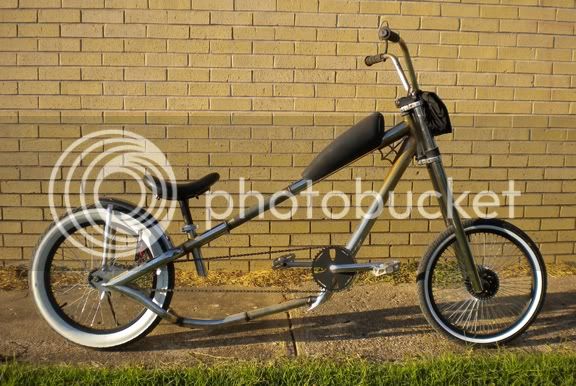
When I went to pick up the frame he had done it quite differently from the concept. I was concerned for the geometry of the bike but it worked out OK. He kept the top tube straight and merged the bottom however he could. The bottom added 9" and the top came out 10.5". It effectively clocked both halves of the bike forward, sharpening the geometry. This is where it could have been bad. But the head tube didn't go TOO far and thus came out as a sharp, responsive bike with out the low speed "chopper wobble." Since I had been advised on another forum to sleeve the tubing, my weldor chose different materials than the spare bike frames I provided. I'm not sure what the bottom is but the top appears to be galvanized pole from a chain link fence :shock: . Regardless, the welds are pretty, the frame is strong, and I ended up with a bike that feels great and I really enjoy riding.
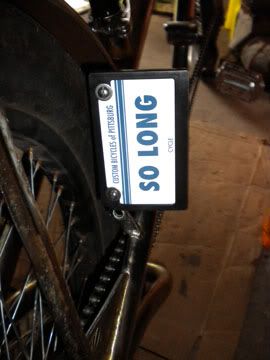
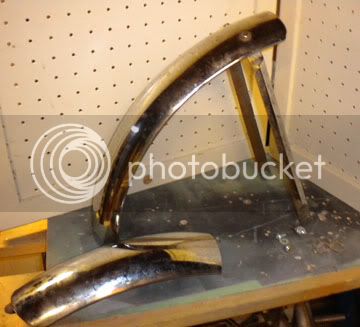
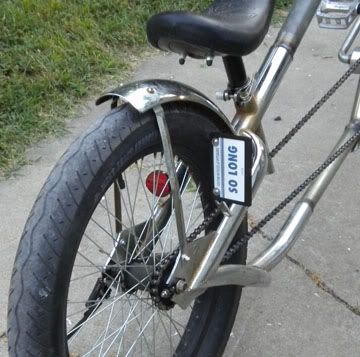
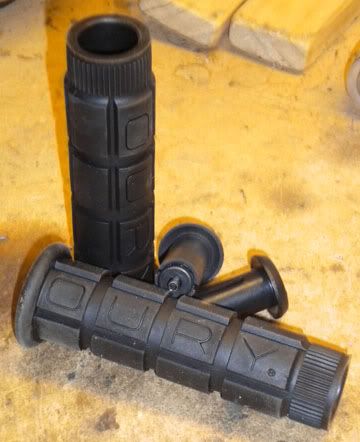
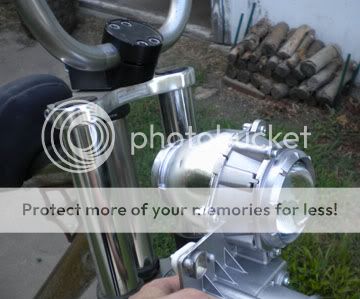
I've found some better platform pedals and am trying to find a slightly longer crank (stock 152s) and the black ones I found were bent. But hopefully I can find some good ones in black, as I really like what it does for the appearance. Instead of adding an idler the chain is taken care of by a single motorcycle style screw and block tensioner that goes on the drop out. The fender will come back but bobbed below the seat stays. It was interfering with the chain and I do love the look of that 3" wide street bike tread. I bailed the right hand rear reflector for a vertical mount plate that I custom engraved in plastic to fit the bicycle plate frames they sell in the store. Might have to convert that over to a RRB plate eventually. The plate reads "SO LONG" which doesn't make sense unless you see the bike from the side, then it's funny. I have a different stem with a flat face and have my eyes on some new bars. These are only 9" rise and I can order some fairly cheap that are 12". A single round mirror for safety and asthetics and a pair of Oury grips (look like rectangular hand grenades).
Wanted to get this posted since I joined and introduced my self. Hopefully better pics will follow soon. The bike is layed up right now as I am working on the fender bob and have to keep pulling the back wheel. When it's done the fender will be completely frame mounted, whereas right now the supports attach to the axle. Any questions, let em fly. If I can help anyone, that's part of why I came here. It was the help of others that got my bike this far. I would like to pass on some of the good will.
Jesse James WCC kid's bike. This thing was covered with every "biker" theme they could fit on. Flames, spider webs, pin striping, Old English lettering and even a fake revolver chamber for the gas cap. It originally had low rise bars so that a pre-teen would look all hunched over on a fairly stretched "chopper". I stripped the "extras" and chopped a set of BMX bars to make some decent rise bars, so that I could actually ride the bike.
But I'm not a kid, so I started building a concept in Photoshop. The concept shows a 9" stretch on the bottom tube and the top was to be fabbed using donor frames. I used a tape measure in the pictures so I could track scale and perspective so it should have been a pretty coherent design. But my weldor is a weldor, not a biker. So it was left in his hands to do what he does, and I tried to take my mind off of it so the time didn't drag by that it wasn't actually in my hands.
When I went to pick up the frame he had done it quite differently from the concept. I was concerned for the geometry of the bike but it worked out OK. He kept the top tube straight and merged the bottom however he could. The bottom added 9" and the top came out 10.5". It effectively clocked both halves of the bike forward, sharpening the geometry. This is where it could have been bad. But the head tube didn't go TOO far and thus came out as a sharp, responsive bike with out the low speed "chopper wobble." Since I had been advised on another forum to sleeve the tubing, my weldor chose different materials than the spare bike frames I provided. I'm not sure what the bottom is but the top appears to be galvanized pole from a chain link fence :shock: . Regardless, the welds are pretty, the frame is strong, and I ended up with a bike that feels great and I really enjoy riding.
I've found some better platform pedals and am trying to find a slightly longer crank (stock 152s) and the black ones I found were bent. But hopefully I can find some good ones in black, as I really like what it does for the appearance. Instead of adding an idler the chain is taken care of by a single motorcycle style screw and block tensioner that goes on the drop out. The fender will come back but bobbed below the seat stays. It was interfering with the chain and I do love the look of that 3" wide street bike tread. I bailed the right hand rear reflector for a vertical mount plate that I custom engraved in plastic to fit the bicycle plate frames they sell in the store. Might have to convert that over to a RRB plate eventually. The plate reads "SO LONG" which doesn't make sense unless you see the bike from the side, then it's funny. I have a different stem with a flat face and have my eyes on some new bars. These are only 9" rise and I can order some fairly cheap that are 12". A single round mirror for safety and asthetics and a pair of Oury grips (look like rectangular hand grenades).
Wanted to get this posted since I joined and introduced my self. Hopefully better pics will follow soon. The bike is layed up right now as I am working on the fender bob and have to keep pulling the back wheel. When it's done the fender will be completely frame mounted, whereas right now the supports attach to the axle. Any questions, let em fly. If I can help anyone, that's part of why I came here. It was the help of others that got my bike this far. I would like to pass on some of the good will.