You are using an out of date browser. It may not display this or other websites correctly.
You should upgrade or use an alternative browser.
You should upgrade or use an alternative browser.
Retro Racer
- Thread starter Galtbacken
- Start date


Help Support Rat Rod Bikes Bicycle Forum:
This site may earn a commission from merchant affiliate
links, including eBay, Amazon, and others.
Hey Dan Jose, just do it! I recommend everyone to give it a go, it's really alot of fun!  Thank you for the kind words! And you need to teach that cat how to spell...
BrigmasterA: I know the feeling from seeing other builds here and just wishing that they'd added a bunch of new pics everytime I check! This place is really inspiring! And if I didn't have my regular job to do I'd already finished this bike! :lol: But now at least I'm almost done with the drawing assignment I've had hanging over my head, that's also held the build back a little.
Gold Street: I'll make sure to take lots of photos of the saddle make over, so you can see how I go about making that, and if I mess up you know what not to do!
Thank you!
Thank you for the kind words! And you need to teach that cat how to spell...BrigmasterA: I know the feeling from seeing other builds here and just wishing that they'd added a bunch of new pics everytime I check! This place is really inspiring! And if I didn't have my regular job to do I'd already finished this bike! :lol: But now at least I'm almost done with the drawing assignment I've had hanging over my head, that's also held the build back a little.
Gold Street: I'll make sure to take lots of photos of the saddle make over, so you can see how I go about making that, and if I mess up you know what not to do!
Thank you!
Thanks! It worked well for this build, but I'll probably make some changes to the head tube holder. Put a bolt with washers there to hold the head tube in place, and maybe shorten the same to make it a little steadier. I'll post photos of the changes as I make them!
Now I have only seven hours of work before I can go home and continue the build...
Now I have only seven hours of work before I can go home and continue the build...
So Gold Street, hang on, here we go!
After the glue was dry I removed the string and trimmed the edges
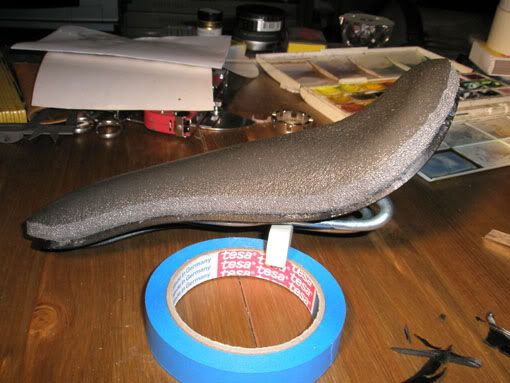
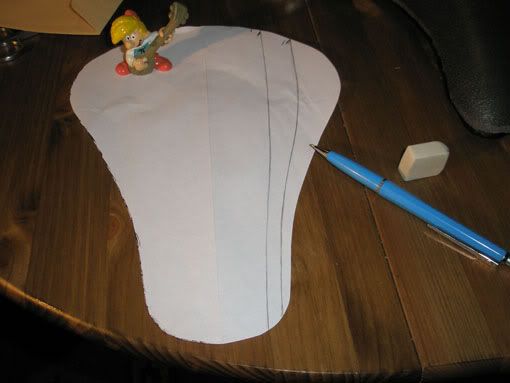
then I folded a piece of paper down the middle and taped it to the seat,
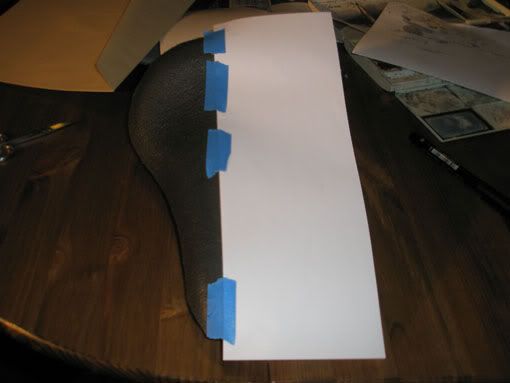
turned it over and traced the outline
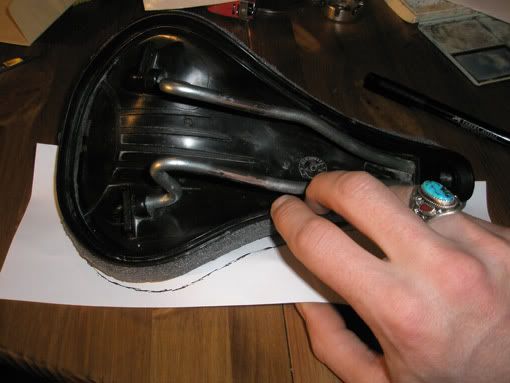
and cut it out.
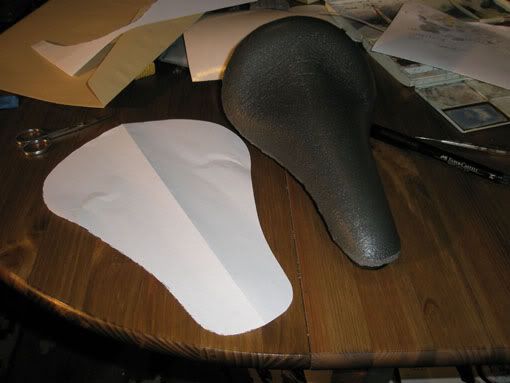
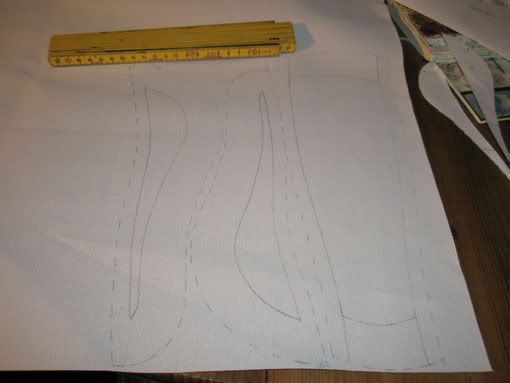
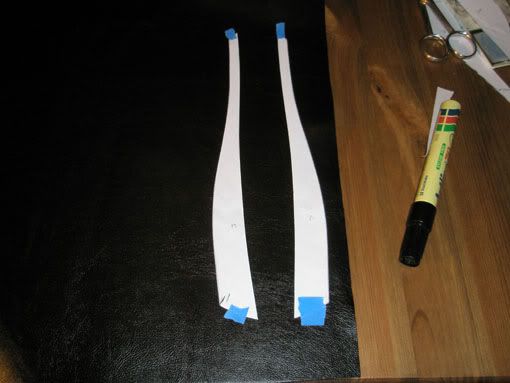
Next I drew the colour-pattern I wanted to make, on one side with a pencil,
folded the paper and scratched along the lines on the back of the paper with a coin to copy the pattern to the other side
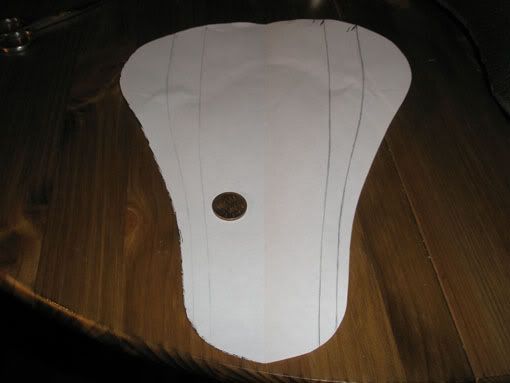
and cut the pattern.
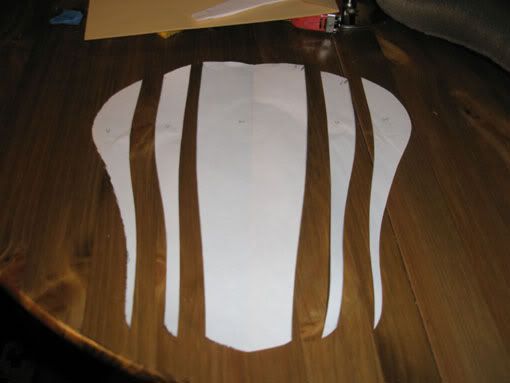
Here are the vinyl-coated fabrics I got for the saddle. I bought more than I need for this saddle, so that I have plenty left if I want to make other stuff too.
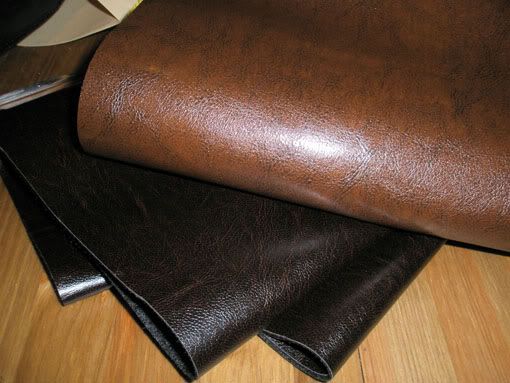
I traced 3 of the paper patterns onto the wrong side of the lighter coloured fabric and added 30mm seam allowance on those sides that will wrap around the saddle, and 10mm on the remaining sides.
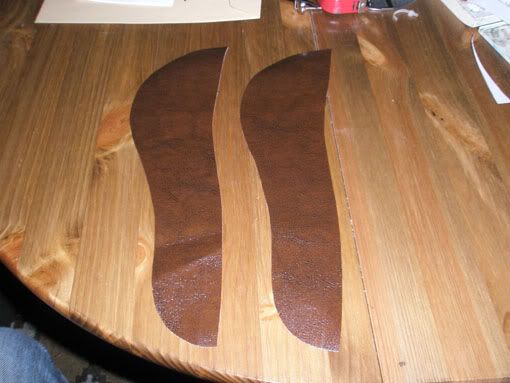
The darker fabric had a black wrong side, so I traced the pattern on the right side with a marker. The same seam allowances.
Somewhere in the process I must have hit an off-switch in my head because I made two left-side pieces. Had to make a new right one... :roll:
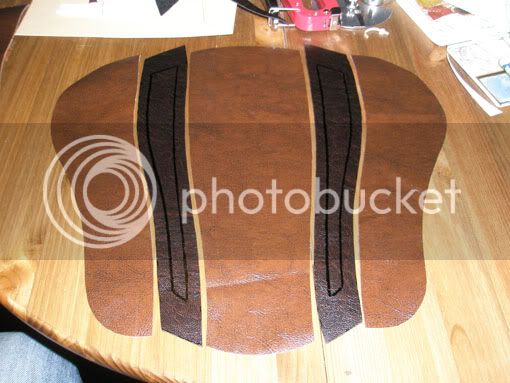
Here are all the pieces that will make up the cover.
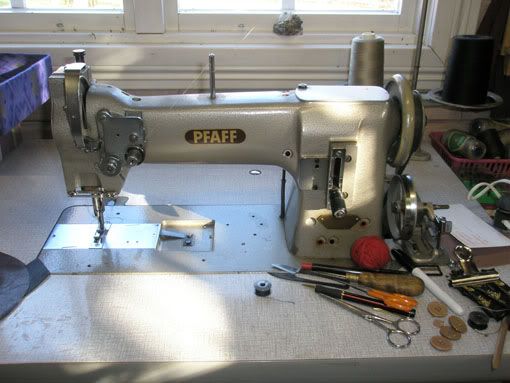
Off to my mother's workshop! She's a retired crafts teacher and she's got one of these! It'll stitch through pretty much anything and it goes like a race car!
I cut off the corners on all but the dark pieces to make the cover follow the shape of the seat better.
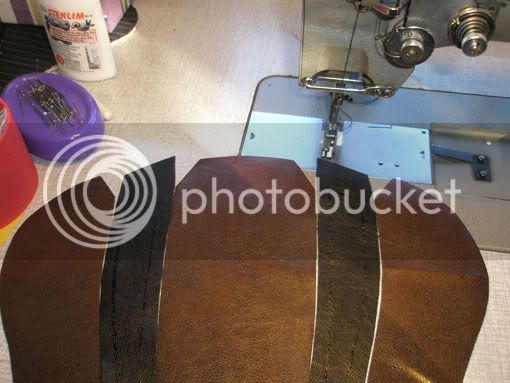
First I stitched the pieces together, right sides facing each other

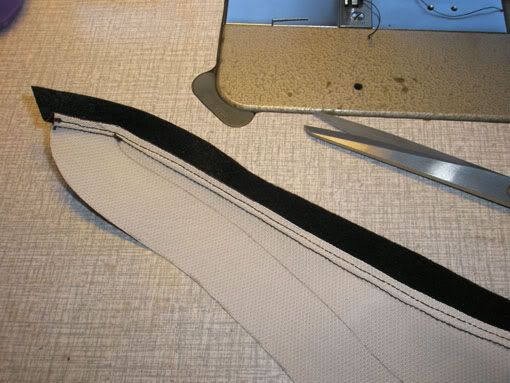
then I turned it over and stitched it from the other side
and then turned it back and cut off excess fabric.
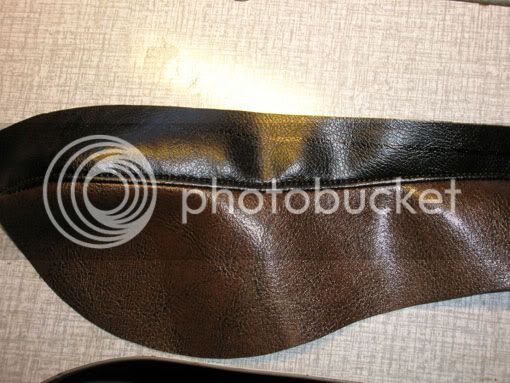
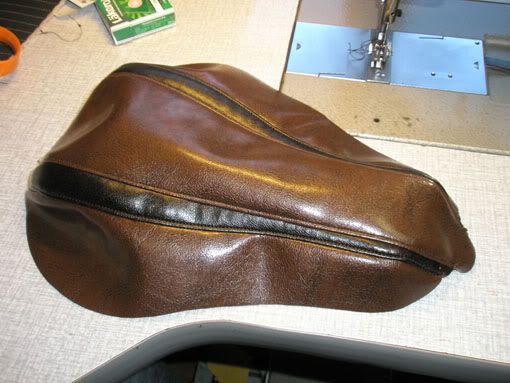
Here's the finished cover.
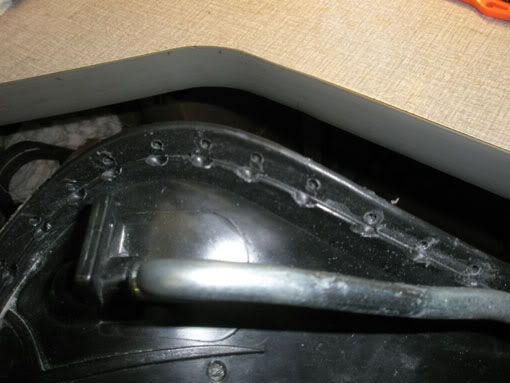
At first I didn't know if I would use staples or rivets to attach the cover to the saddle, but I decided to use rivets. So I drilled holes along the edge of the saddle and used the Dremel to grind some clearances for the back of the rivets.
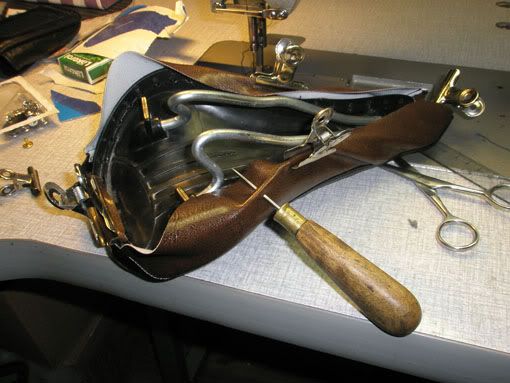
Before I had put any rivets in, I found that it was good to hold everything in place with clips. Used an awl to make holes for the rivets. I didn't make all the holes at once, since I wanted to be able to stretch the cover where needed as I went along.
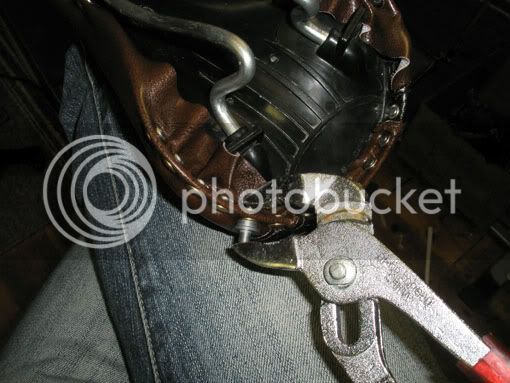
I used regular jeans rivets. All the tools needed are in the package,

but since the saddle is made so that those tools don't quite reach I used a different technique. This part took the longest time to do.
Here's the finished saddle!
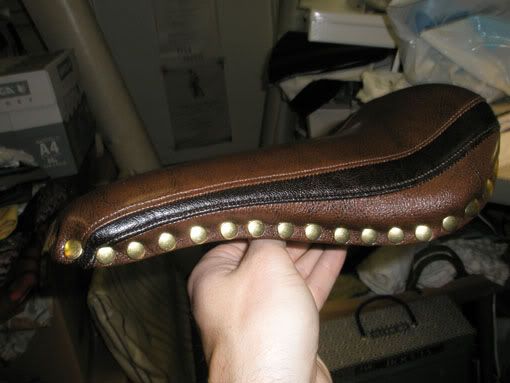
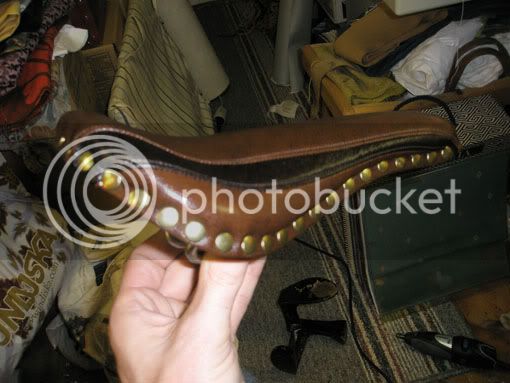
I'm really pleased with how it turned out! I think it'll look good with the rest of the design of the bike.
Hope this can be of any help! I'm sure there are other and perhaps better ways of doing it, but this was how I did it.
That's all for now,
all well!
After the glue was dry I removed the string and trimmed the edges
then I folded a piece of paper down the middle and taped it to the seat,
turned it over and traced the outline
and cut it out.
Next I drew the colour-pattern I wanted to make, on one side with a pencil,
folded the paper and scratched along the lines on the back of the paper with a coin to copy the pattern to the other side
and cut the pattern.
Here are the vinyl-coated fabrics I got for the saddle. I bought more than I need for this saddle, so that I have plenty left if I want to make other stuff too.
I traced 3 of the paper patterns onto the wrong side of the lighter coloured fabric and added 30mm seam allowance on those sides that will wrap around the saddle, and 10mm on the remaining sides.
The darker fabric had a black wrong side, so I traced the pattern on the right side with a marker. The same seam allowances.
Somewhere in the process I must have hit an off-switch in my head because I made two left-side pieces. Had to make a new right one... :roll:
Here are all the pieces that will make up the cover.
Off to my mother's workshop! She's a retired crafts teacher and she's got one of these! It'll stitch through pretty much anything and it goes like a race car!
I cut off the corners on all but the dark pieces to make the cover follow the shape of the seat better.
First I stitched the pieces together, right sides facing each other
then I turned it over and stitched it from the other side
and then turned it back and cut off excess fabric.
Here's the finished cover.
At first I didn't know if I would use staples or rivets to attach the cover to the saddle, but I decided to use rivets. So I drilled holes along the edge of the saddle and used the Dremel to grind some clearances for the back of the rivets.
Before I had put any rivets in, I found that it was good to hold everything in place with clips. Used an awl to make holes for the rivets. I didn't make all the holes at once, since I wanted to be able to stretch the cover where needed as I went along.
I used regular jeans rivets. All the tools needed are in the package,
but since the saddle is made so that those tools don't quite reach I used a different technique. This part took the longest time to do.
Here's the finished saddle!
I'm really pleased with how it turned out! I think it'll look good with the rest of the design of the bike.
Hope this can be of any help! I'm sure there are other and perhaps better ways of doing it, but this was how I did it.
That's all for now,
all well!
Wow. That seat is amazing man. I really dig it!
Thanks! I'm pleased that I managed to maintain the slim look of the plastic core, that made it look like a saddle fit for a racer!
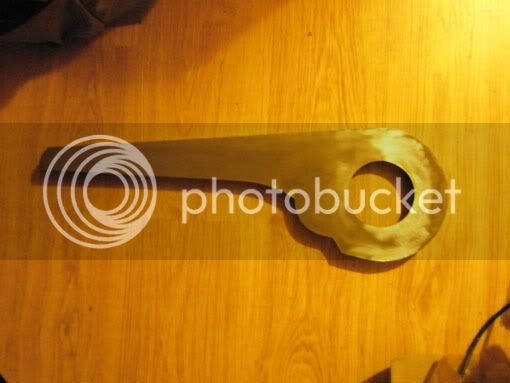
Today I've made the template for the chainguard with a minor change from the original design. And I've figured out a little different way of how I'll try to mount the rear fender and tail light. I'll post pictures as I make more progress...
I'm pleased that I managed to maintain the slim look of the plastic core, that made it look like a saddle fit for a racer! Today I've made the template for the chainguard with a minor change from the original design. And I've figured out a little different way of how I'll try to mount the rear fender and tail light. I'll post pictures as I make more progress...
Wow, very nice work!
cant wait to see the completed pics.
cant wait to see the completed pics.
Thank you Ratfink and Outlaw!
Today I cut sheet metal and welded the chainguard.
I also removed the old paint from the fenders I'll be using, but then it got a bit too cold and dark to do any more work outside so I'll start trying to make templates for the tail light instead. I'm not sure if I'll be able to construct it the way I see it in my head but I'll give it a go...
Thanks for the kind words! I'm really excited about this build, so far it seems to turn out even better than I imagined! The wheels I'm using are 27" with Torpedo 3-speed, 1 1/2" tires.
The wheels I'm using are 27" with Torpedo 3-speed, 1 1/2" tires.Wow x 8 man! that seat caught me off guard you put alot more into it than expected but I am very impressed, looking forward to watching the rest of the build.
HOLY CRAP, that seat is nice.
Hehe, you didn't see that one coming huh? :lol: Me neither, turned out better than I thought!
Haven't done much on the frame the last few days, just made some mounts for the chainguard.
Sometimes I wonder if I subconsciously think that life is too easy, because I seem to come up with design ideas that are really challenging for me to construct. I got an idea for the shape of the rear light, so that it would feel closer to the fender. Since I'm not a good mathematician I have to rely on my "3-d"-thinking when I make the templates...
Here's what I came up with, these are the templates for the parts that will become the rear light...hopefully...

To give you a better idea what I'm trying to achieve

Tomorrow I have a day off from work, so I'll try to get more done on the bike then! Fun fun fun!
Thank you all for the good feedback!
Haven't done much on the frame the last few days, just made some mounts for the chainguard.
Sometimes I wonder if I subconsciously think that life is too easy, because I seem to come up with design ideas that are really challenging for me to construct. I got an idea for the shape of the rear light, so that it would feel closer to the fender. Since I'm not a good mathematician I have to rely on my "3-d"-thinking when I make the templates...
Here's what I came up with, these are the templates for the parts that will become the rear light...hopefully...
To give you a better idea what I'm trying to achieve
Tomorrow I have a day off from work, so I'll try to get more done on the bike then! Fun fun fun!
Thank you all for the good feedback!
Oh well, I got some things done yesterday, but I managed to mess up when I measured where the chainguard should be (when I put the chain on it scratched against the top of the chainguard) and ended up having to weld on an extra piece of sheet metal on the guard. So what originally was smooth enough to just prime and paint I now have to use bondo on. Yes, I used some bad language. Yes, I thought of throwing the chainguard in the trash. Yes, I learned a lesson and moved on! :lol: Don't have any photos of the mistake, because taking pictures weren't exactly on my mind at that moment, but I've got some pictures of the chainguard with the extra piece welded on. I'll post that later...plus some more stuff...
Thanks cman! I think that it might look good, we'll see if it will fit the bike...
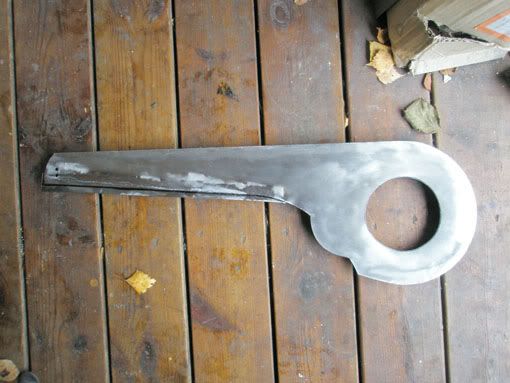
Here's what I had to do with the chainguard. There's two holes in it in this picture, the top one ( I'm going to weld that shut) is the first one I drilled. The lower one is in the right place for the chainguard to fit the frame correctly, but then it's too close to the edge to look good so I welded on that extra strip at the bottom. When I had welded it I found that I had bought 0,7mm sheet metal that I used, and I made the rest of the chainguard with 0,9mm. Doesn't sound like much of a difference, but it was tricky to weld. Had to tap it here and there with a hammer to make it straight. After this picture was taken I cut it and smoothed the edges. Fits fine now.
I have been thinking a little about the shifter. It doesn't feel right to make a bike pretty much from scratch and use a not so exciting stock shifter, so I came up with this...
Looked like this
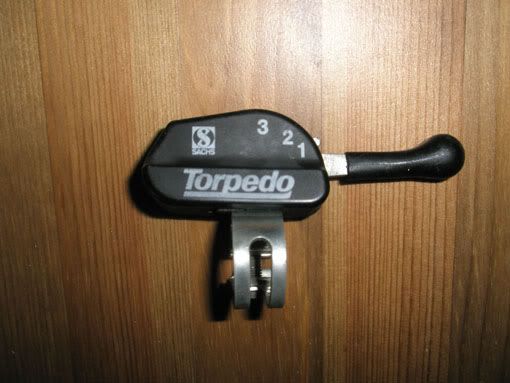
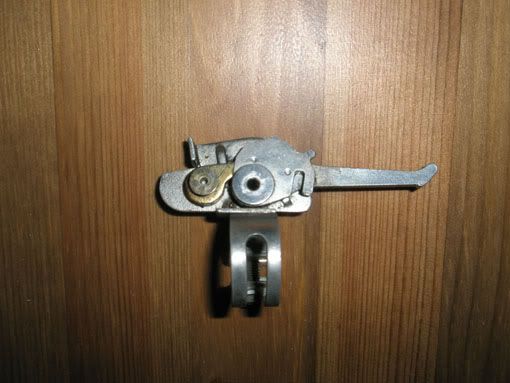
and when I've taken off all the plastic parts it looks like this. I think I'll leave the handle with no cover on it. I like the look of it!
Here are the templates for the casing that I'll make
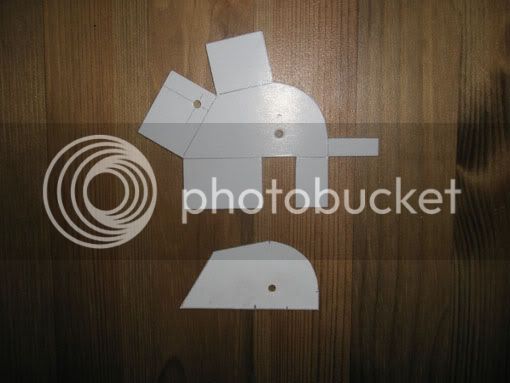
Maybe I'll make modifications to it once I see how it looks on the bars...maybe I won't... I asked the guy I'm making this bike for if he wanted a suicide shifter, but no! :lol: That's perfectly ok by me, I think it'll look good with the shifter on the handlebar. And I think it's definitely a more practical placement.
The fender for the rearwheel had a slightly bigger radius than the wheel, so it pointed up a little at the end when I shortened it. When I was wondering how I was going to fix that, I came to think about how metal seems to shrink when you weld it. This was the idea I came up with and decided to try: cut little notches along the rim of the fender and weld them.
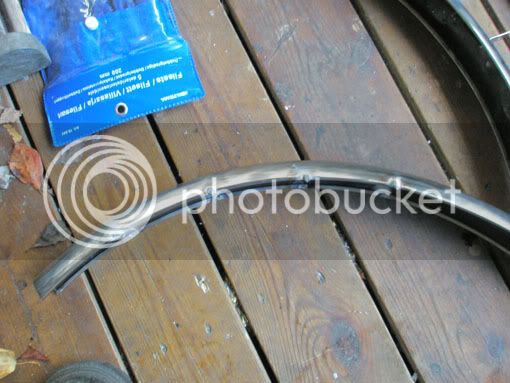
It worked great, it fits like a glove...or whatever fits a wheel.
That's all I've done since yesterday. I'll try to get up early tomorrow and get some more things done before I have to go to work.
All well!
I think that it might look good, we'll see if it will fit the bike...Here's what I had to do with the chainguard. There's two holes in it in this picture, the top one ( I'm going to weld that shut) is the first one I drilled. The lower one is in the right place for the chainguard to fit the frame correctly, but then it's too close to the edge to look good so I welded on that extra strip at the bottom. When I had welded it I found that I had bought 0,7mm sheet metal that I used, and I made the rest of the chainguard with 0,9mm. Doesn't sound like much of a difference, but it was tricky to weld. Had to tap it here and there with a hammer to make it straight. After this picture was taken I cut it and smoothed the edges. Fits fine now.
I have been thinking a little about the shifter. It doesn't feel right to make a bike pretty much from scratch and use a not so exciting stock shifter, so I came up with this...
Looked like this
and when I've taken off all the plastic parts it looks like this. I think I'll leave the handle with no cover on it. I like the look of it!
Here are the templates for the casing that I'll make
Maybe I'll make modifications to it once I see how it looks on the bars...maybe I won't...
I asked the guy I'm making this bike for if he wanted a suicide shifter, but no! :lol: That's perfectly ok by me, I think it'll look good with the shifter on the handlebar. And I think it's definitely a more practical placement.The fender for the rearwheel had a slightly bigger radius than the wheel, so it pointed up a little at the end when I shortened it. When I was wondering how I was going to fix that, I came to think about how metal seems to shrink when you weld it. This was the idea I came up with and decided to try: cut little notches along the rim of the fender and weld them.
It worked great, it fits like a glove...or whatever fits a wheel.
That's all I've done since yesterday. I'll try to get up early tomorrow and get some more things done before I have to go to work.
All well!
You know, that shifter lokks way cool without the cover... I'd be tempted to run it 'naked'!
You're right Brig, the more I look at it the more I like it without the cover! Looks like a part for a racer! I think I'll still make the cover to see how that will look, and leave the option open. Thank you for that suggestion, it's a good one!
I'll post a picture of the bike with the fenders and chainguard later, I'm at work right now...hrm... :roll:
I'll post a picture of the bike with the fenders and chainguard later, I'm at work right now...hrm... :roll: