You are using an out of date browser. It may not display this or other websites correctly.
You should upgrade or use an alternative browser.
You should upgrade or use an alternative browser.
RaTTle Can tutorial
- Thread starter user 135
- Start date


Help Support Rat Rod Bikes Bicycle Forum:
This site may earn a commission from merchant affiliate
links, including eBay, Amazon, and others.
Surface prep is key.
make sure frame is CLEAN.
Lacquer Thinner will take any and all grease off of anything!
Paint is cheaper than Labor..do not buy junk paint
Krylon Fusion is good..Duplicote is good.
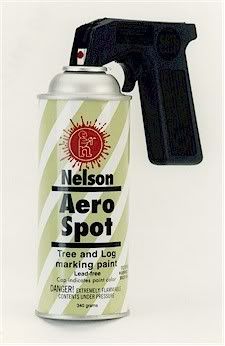
get one of these handles..they are like $3.00
and they will keep your finger off the tip,
give you a nice even presure on the tip,
and they are nice in the hand.
I know it's hard...but don't hog it on!!!!!
3 or 4 thin coats are WAY BETTER than 2 heavy.
spray in even passes with gun about 6 to 8 inches from surface
pulling it away and past the work at the end
of each stroke....feather it out in other words.
and as much as HEAT is nice..air movement is even better.
aim an oscolating fan at it after each coat..it makes a world
of difference for the drying and curing of the product.
did I say don't hog it on ?
yaa...don't hog it on!
hope this helps,
peace,
Kev.
make sure frame is CLEAN.
Lacquer Thinner will take any and all grease off of anything!
Paint is cheaper than Labor..do not buy junk paint
Krylon Fusion is good..Duplicote is good.
get one of these handles..they are like $3.00
and they will keep your finger off the tip,
give you a nice even presure on the tip,
and they are nice in the hand.
I know it's hard...but don't hog it on!!!!!
3 or 4 thin coats are WAY BETTER than 2 heavy.
spray in even passes with gun about 6 to 8 inches from surface
pulling it away and past the work at the end
of each stroke....feather it out in other words.
and as much as HEAT is nice..air movement is even better.
aim an oscolating fan at it after each coat..it makes a world
of difference for the drying and curing of the product.
did I say don't hog it on ?
yaa...don't hog it on!
hope this helps,
peace,
Kev.
Now that I live in the Phoenix area it isn't a big issue for me, but when I lived in Montana...
I'd let the paint can soak in warm water for a while. Warm paint seems to flow better. You just have to make sure the paint can is totally dry before you start painting.
I'd let the paint can soak in warm water for a while. Warm paint seems to flow better. You just have to make sure the paint can is totally dry before you start painting.
thehazmatguy said:Now that I live in the Phoenix area it isn't a big issue for me, but when I lived in Montana...
I'd let the paint can soak in warm water for a while. Warm paint seems to flow better. You just have to make sure the paint can is totally dry before you start painting.
very good advice!
Clothespin's advice is solid 
One tip I'd like to add is spray the hard to reach spots first (like where the chainstay meet the bottom bracket etc), then progress to the broad areas. I've found this method really helps prevent hogging on too much paint while trying to get "that last little bit" covered up.
Krylon has an epoxy enamel spray paint that seems to be pretty tough - comes in flat black too :mrgreen:
-Mp
Check out my bikeoverhaul blog in my signature. That bike was entirely painted with rattle cans. You're right preparation is key. A well sanded and clean surface will make a huge difference in the quality of the work. Time between coats and wet sanding as well.
Check it out.
Check it out.
first off WOOT my 100th post yee haa darn i talk too much. onto the subject at hand though i have become rather good at rattle can jobs. i found it really helps to hang the frame in a way that you can get all around it. by that i mean being able to spray everything and all angles. do lots of thin coats and with primer i will empty a whole can on a frame just to make sure it is covered. double and triple check all the nooks and cranys, even go so far as to take the frame outside after being dried to check it again in the sun. nothing sucks worse than building the bike then standing back only to see a big bare metal spot say by the chainstays. :shock: well that and getting a bike all mocked up then noticing it is bent in half but thats another story :mrgreen:
here's what I do
the way I do it, I hang the frame in the garage, in the up right riding position. I make sure that it's warm enough outside and inside the garage. I also make sure to check the weather report to make sure it isn't going to rain. humidity can screw up a paint job. I've had best luck with automotive "touch up" paint, in the tall rattle cans. I strip the frame to bare metal, primer, base or reflector coat, color coat, then clear. and like it's been said, don't glob it on! leave the paint to cure over night (atleast 24 hours) before handling, and leave it set and cure for about a week or two before assembly. I learned that from experience.
krazi
Xddorox mentioned an epoxy enamel and would highly recommend this if easy obtained. I have used epoxies with aircraft painting (not professionally but on my own planes) and this stuff is durable. AlsoI would like to add the following to what has already been metioned:
Mistake # 1- not shaking the can long enough!
Mistake # 2 - not holding the can the proper distance! as Clothespin mentioned "spray in even passes with gun about 6 to 8 inches from surface" .
Mistake # 3 - holding the can directly in front of your face! You can't possibly see how the paint is "wetting" the surface if the can is spraying directly in front of your eyes. If you are right-handed, hold the can at chest-height about one foot to the right of your head (the reverse if left-handed). As you spray you will be looking at your work piece at a "grazing incidence" angle and will easily see how the spray is falling onto the surface.
4. Paint in sections
5. Wetting-understanding wetting is probably the most crucial part in painting.. basically making sure the paint is applied and looks wet in the same area both evenly consistently. The higher the sheen the more it matters. So yea, flat is a lot easier to paint than a high gloss however, all rules should apply to maintain a quality paint job.
I have painted complete cars with spray cans. granted these cars had mannequin heads as a hood ornament and the roofs cutt off with hacksaws but have since learned to paint many things since my early punk rock days...
those are pretty durable too , i dropped a wrench on my frame after only 20h of painting it ,and it did not even leave a mark

One thing I will add to this old thread is make sure your paint can, the frame, and the air temp where you are painting are all the same temp. Differences in temps can cause hazing in the paint. Gary
+1 but the real trick is "paint inside" (same temp/no wind/appropriate lighting/no flys/curing time at the same temp also)B607 said:One thing I will add to this old thread is make sure your paint can, the frame, and the air temp where you are painting are all the same temp. Differences in temps can cause hazing in the paint. Gary
OneHorsePower said:+1 but the real trick is "paint inside" (same temp/no wind/appropriate lighting/no flys/curing time at the same temp also)B607 said:One thing I will add to this old thread is make sure your paint can, the frame, and the air temp where you are painting are all the same temp. Differences in temps can cause hazing in the paint. Gary
Agreed. I live in bugville and could not imagine painting bike parts outdoors. Gary
every bike ive ever built has been done with a rattle can....and like everyone else said its all about the prep
i use the trigger attachment as well...its pretty awesome your finger wont hurt after a while lol when you are spraying i like to do extremely light "mist" coats...about 4 or 5 let it dry and do the same with clear coat...than i use rubbing compound it makes it real nice
these are some of the things ive rattle canned
Love the contrast between the new paint and the patina on the springs. I plan to do this on my paint scheme as well. Leave the majority of the bike patina and paint the small detailed areas. Looks good and thanks for posting those!
no oe mentions the difference between enamels and lacquers. Sand between coats ONLY works on lacquers. Recoaat time is critical on enamels. Read the CAN...and less of the internet. Just my .02
I tried one time to mix Krylon and Rustoleum once. Base coat Silver Metallic Rustoleum then Red or Blue Krylon X-Metals. Talk about two super cool colors.
X-Metals also come in yellow and green, they didnt look as good as red or blue.
X-Metals also come in yellow and green, they didnt look as good as red or blue.
Lacquer and enamels. Good point voyageral. I painted a frame with Krylon (enamel), then later decided I wanted it a different color. I got Duplicolor (lacquer) and painted it. The duplicolor "cracked", spider webbed kinda like a car windshield that had been hit. Bottom line...don't put lacquer over enamel. You can put enamel over lacquer in some cases. Gary