* GROUND ZERO * (Now I can have a cold one!)

Rat Rod Bikes Bicycle Forum

Help Support Rat Rod Bikes Bicycle Forum:

This site may earn a commission from merchant affiliate links, including eBay, Amazon, and others.
Re: * GROUND ZERO *

KOTA said:
Ya got some neat parts, Rob. Just have ONE question....I'm sure you know what it is....There isn't an OLD man lying on the side of the road....MISSING a wheelchair, is there? :roll: I don't have a problem if there is. Just curious.


Hahaha well I was gonna save it for the "older" members of the site :shock: but looking at this year's entries, they're all going to go out in a blaze of glory....

I've been trying to give away this wheelchair for a project, to build a trailer, a sidecar, anything, get it out of my yard.... nothing has come of it so I'll try chopping it up!

Now important stuff- I just picked up a front drum brake tonight! Pics soon and this thing is ON!

--Rob
 
Re: * GROUND ZERO *

Update 5/18/2011:

Located my rims- Magna donor bike, 24" wannabe mountain bike. So cheap, these Chinabikes... the paint is coming off in sheets.

zerodonorbike2-1.jpg


Pretty nice looking square shouldered rims. The tires were even rotten, in one spot, rubber just turned to cracks. 36-hole rims with a nice little drop-center ridge.

zerowheels1.jpg


The front will get to roll on this:

zerodrumbrake1.jpg

zerodrumbrake2.jpg


Of course it's getting a little detailing... but I like the black side covers as is. I "Spoke" to my wheel-builder yesterday... he's building one of his own but should be able to put this together for me.

Test fit of the tires on rims, and the wheel in the frame. I love the look! 24x3 Kenda's with GIANT sales tags on them. Tires are a great fit and THANKS to Dr.T for the tube advice! 8)

zerowheels2.jpg


Ok, I admit it, I bought a new part. :shock: Orange BMX pedals!
zeropedals1.jpg


Here's what the seat will look like, just playing with my covering material.
zeroseatcover1.jpg


Looking at options for mounting the tank, came up with the following: Headlight bracket will screw to seat bottom. Bent the ears open, cross bar made from fender stay will mount to the bracket. Keg will clamp to the cross bar.

zeroseatapart2.jpg


Started painting some of the details. The keg needed a little advertising covered up on its end...
zeroseatapart3.jpg


Technical problems: #1, wife is already kicking me out of the living room, with good cause.
#2: This ain't gonna fit. :(

zerowheels3.jpg


Looks like the bracket is brazed on crooked anyway... I'm going to remove it, spread the frame and have it re-welded. I need a good 1/4 inch on each side. Bottom stays are very tight but with wheel towards rear of dropouts, there is clearance for those monster tires.

Stay tuned!!!

--Rob
 
Re: * GROUND ZERO *

Small update with some progress and mockups:

The tires are just SOOOO much bigger than the 24x1.75 all terrain tires that come on these rims. It's amazing to see them side by side.

zerotirecompare.jpg


The rims cleaned up much better than I expected. A little work on the wire wheel and now I almost want to use them as is...

zerowheels4.jpg


Rim disassembled. By the way, it's a Park FR-1 freewheel tool for most of these Shimano/China freewheel hubs.

zerowheels5.jpg


Playing around with a test fit of the drum brake into the rim. It didn't quite work out because I wasn't paying attention to which spokes went where- the dish of the rim gave me short ones and long ones so some were too short... I will let my friend finish the buildup of this wheel.

zerowheels6.jpg


I finally found what I was looking for, a wheel I pulled long ago with a Sturmey coaster-3 hub. Of course, it came off an English bike... with a 40hole rim. :( Back to square 1. I've been hanging onto this beauty for a while... may be time to use it. Not 100% sure yet, still want multi speeds.

zerorearhub1.jpg


The seat is just mocked up here, but very close to the finished product. Springs painted, seat frame painted, brackets made up and drilled. My bracket came out too long, may have to trim that.
Bracket bolted to bottom of seat, keg clamped to bracket. Sits nicely tucked behind the old Troxel.

zeroseatkeg1.jpg

zeroseatkeg2.jpg

zeroseatkeg3.jpg


Working on breaking the frame tomorrow, and I did get the bars out of the wheelchair frame. Still have to figure out how I might make them work.
Hopefully the forks go together real soon!

--Rob
 
Re: * GROUND ZERO *

All right it was a long day off playing around with parts and pieces.

First of all, I located a hub like I wanted to use. 1967 Schwinn Speedster rear wheel, Sturmey TCW III coaster brake. In all its rusty goodness!

zerowheels7.jpg


Now on to solving problems! First problem, the frame upper stays won't clear the tire.
I knocked out the bridge between the rails, and used all my high tech bending tools at my disposal.

zeroframestretch1.jpg


Jammed a 2x4 into the stays, bent them closed around it, pulled frame open a bit, did it again on the other side. Net result about 3/4 inch more space between the stays.

zeroframestretch2.jpg


So with that, and a donated piece cut from a horrible junk bike that's been in my yard for 3 years, my friend made the frame solid again.

zeroweld1.jpg

zeroweld2.jpg

zeroweld3.jpg


Just waiting for it to cool down so I can put it back in the car...
zeroweld4.jpg


And off to work, into the sandblast cabinet for cleanup:

zeroframeblast2.jpg


And hang it in the shop for paint:

zeroframeblast3.jpg

zeroframepaint3.jpg


What's this? The solution to my OTHER problem! My other welder friend has left me a present!

zerofork2.jpg


Big fork, small steer tube! This is starting to look like a project!
zerofork3.jpg


So now that's painted:
zerofork4.jpg


The best is yet to come!

--Rob
 
Re: * GROUND ZERO *

That sprocket looks like a Wald to me. I used one on my Electra Deluxe and have four more that are still in their packages. They are identical to yours. 8) Either way, that's a nice looking sprocket.
 
Re: * GROUND ZERO *

5/21/11 Update:

I got to make some progress with several of the little projects within this project...

The rims got lightly sandblasted so they'll take paint well. I had to get creative by the time I was able to paint them, because it started getting cold and foggy outside, and I didn't want to stink up the house with spray paint when everyone was home. I painted them hung from a board across my basement doors and it worked out fine. Now they're in the furnace room drying.

zerowheels8.jpg


I was able to spend a little quality time with my drum brake. Inside, it was a mess. Everything was crusty and pitted, and the braking surfaces almost had a liquid layer of rust. The bearings will be replaced when I find some- the rolling elements are quite pitted. It all got cleaned out with an ultrasonic cleaner and looks as good as it ever will. Cleaned up the moving parts, the brake shoes, the lever and bushing. Masked off the drum and painted the middle ribs. Painted the lever and hardware orange.

zerodrumbrake4.jpg

zerodrumbrake5.jpg


When I got home, I located and cleaned up some bearing cups. The interesting thing is, without the rust and old paint holding them in, the cups all want to fall out!

The fork is mocked up to check length. I need about another 1/4" to make things work. Since making the steer tube longer is not really an option, I'm going to need to make the head tube on the bike a little shorter. (I think more bandsaw pics are in my future!)

zerofork6.jpg


Starting to kind of look like a bike!
zerofork5.jpg


Drum brake test fit. Not yet sure how the mount bracket will be secured or what I will need for that. Will need some spacers on this axle to match the forks.

zerodrumbrake5.jpg


On Monday, I'm going to get the wheels put together... then this thing will really take off!

--Rob
 
Re: * GROUND ZERO *

My wheel builder will be so happy to get these, now that it's all cleaned up.

I was too busy to take a lot of pics but I partially disassembled and cleaned all the external parts of the Sturmey TCW coaster hub today. Stripped the rim (I have a great rat quality Schwinn S-5 rim if anyone's interested!) and actually saved every spoke... original butted Schwinn spokes from 1967. Great shape considering the rim looked quite rusty.

Cleaned the sprocket, covers, coaster arm, the shell, lubed it, and prepped it for paint. Painted the center of the hub.

zerohubandtank.jpg


I like how it came out! Black on the sprocket to match the sides of the front drum.

sturmeyorange.jpg


Now about that tank... I very lightly sandblasted it to try to clean it up. It's pretty well pitted. The right side tank perforated in a few tiny spots. Glad I'm not trying to sell it.

Now the big question: When I paint the tank, should it be all orange? Or black with just orange on the raised panels on the sides? It's getting white graphics and stripe...

I'm open to suggestions!

More tomorrow, stay tuned!
--Rob
 
Re: * GROUND ZERO *

Update 5-23-11:

The wheels are off to the builder. Delivered the painted hoops, the Sturmey hub with all its hardware, the drum brake (stamped OMEON by the way??) and the spokes and nipples from the MTB wheels.

Should have results back in a day or two. We're doing a swap- I'm going to sandblast his buildoff frame for him.

I have to make a modification to the frame to shorten up the headtube, and then it should be final paint for the frame.

Things in the works: Making handlebar mounts to fit the OCC clamps. Finishing the seat assembly. Installing crank. Building a shifter (top secret project). Painting the tank.

And this:

zerorack1.jpg


Bike needed a little more street cred right? Found this in the woods where I work- the old plant has an 1860's stone spillway and millpond on site... people go back there and stuff gets dumped. Looks to be a wooden shelf from a big gas grill. Lovely wood slats - mahogany maybe? Anyway it's been out there a while and is nicely weathered without being rotten. I saw it, figured it's just about the perfect length for a bike rack, and grabbed it. Needs a little cleanup and modification but not much. Made me think of the wooden slat bed in a hot rod truck!

P4305466.jpg


Stay tuned for more 2 wheeled adventures!

--Rob
 
Re: * GROUND ZERO *

Colors are NICE!...Black and orange ALWAYS look good together. A flat bed, oh yeah!
 
Re: * GROUND ZERO *

OK now that I can think again and form sentences... been killing brain cells from paint fumes ... :shock: :mrgreen:

Decided to paint the tank black and do orange highlights on the raised side panels. Raining cats and dogs here again. Black industrial paint. Furnace room. Fun in a can. Don't try this at home.

zerotank1.jpg

zerotank2.jpg


Tore down the seat, trimmed my cloth cover down, spray glued the material and reassembled. Always makes me wonder how they built parts like this so cheaply in the 50's and 60's.

zeroseatkeg6.jpg

zeroseatkeg4.jpg


Picked a cool sticker out of my collection...

zeroseatkeg5.jpg


Got a lot done though its been a weird day:

Picked up 5 bikes from a donor for our bike share program... 1 Schwinn mountain bike, 2 Specialized, 1 Diamondback MTB, and something called an Asama Bahama.... :?

Shipped out 3 front sprockets in the mail today. Might be seeing them on some buildoff bikes, who knows?

Sold one of those bikes but received back a bike I sold last week... an awesome ladies Panasonic 500 10-spd. Electric blue 80s-90's 27inch bike. The girl who bought it decided a mountain bike would be better. So she basically traded up to the Schwinn Mesa- a really nice front-suspension bike. I quickly threw a rear tube in it and put it on the road.

Bike shop called me up (probably because I have more bikes than he does :roll: ) for some guys looking for an old frame for a fixie. The young guys were missionaries and total gearheads. Sold a 1974 Schwinn LeTour frame that's been gathering dust for a VERY long time. Almost sold one of my Continentals but alas, they remain unsellable.

Almost threw my back out removing one of the pedals on the LeTour. Good thing we did, as there was no way they were going to remove that with normal tools. A 15mm wrench with a pipe on it was required to remove the stuck old pedal. I hope they have better luck with the bike.

Then, my wheel builder sees one of my old mountain bike frames and wants that: a grey and yellow-green Marin "Lite" mountain bike circa 1987. So that will be going over to his cool little basement shop for rebuild and maybe some parting out... crazy laydown old style triathlon bars on it.... a weird collectors item from the early mountain bike era.

I'm exhausted writing it all down!
--Rob
 
Re: * GROUND ZERO *

Lots and lots and lots to go over and update...

A new shifter, frame issues resolved, fork assembled, crank installed, so much done today.

Here's a teaser pic:

mockup1.jpg


The real wheels are coming soon...

--Rob
 
Re: * GROUND ZERO *

Absolutely LOVE it!
 
Re: * GROUND ZERO *

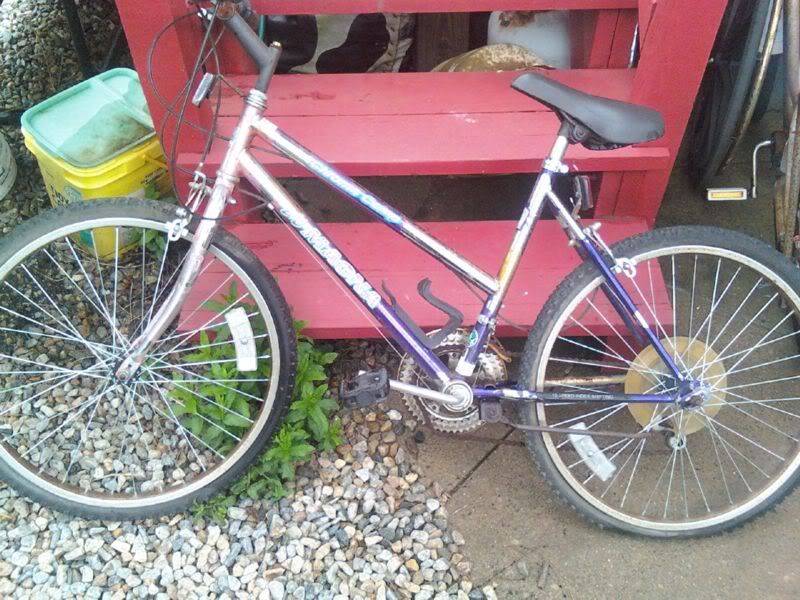
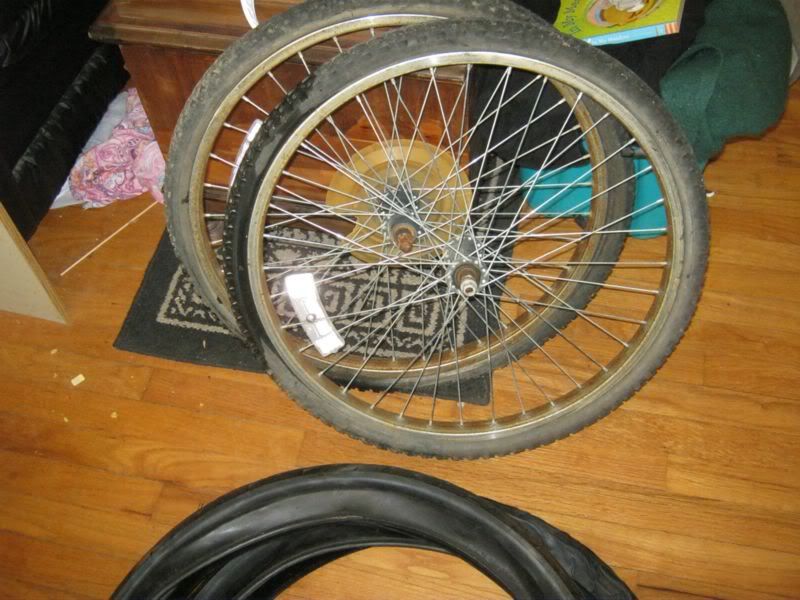
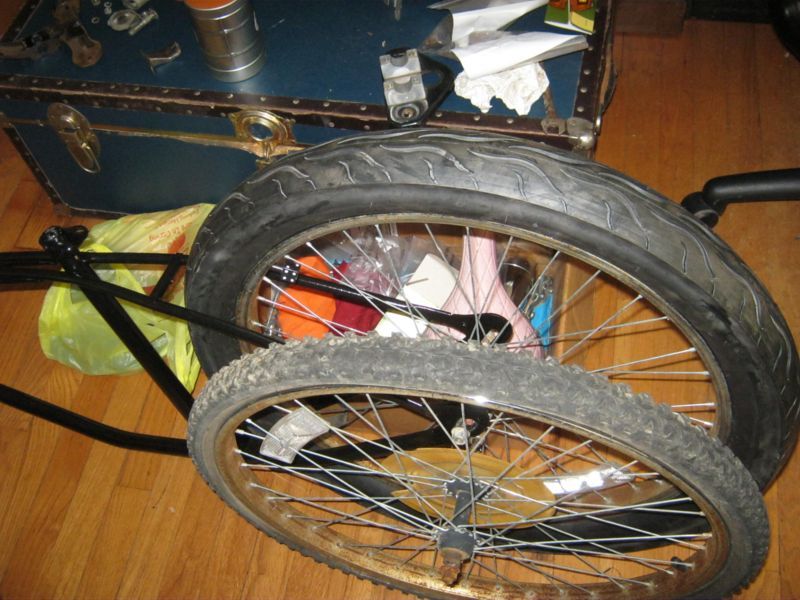
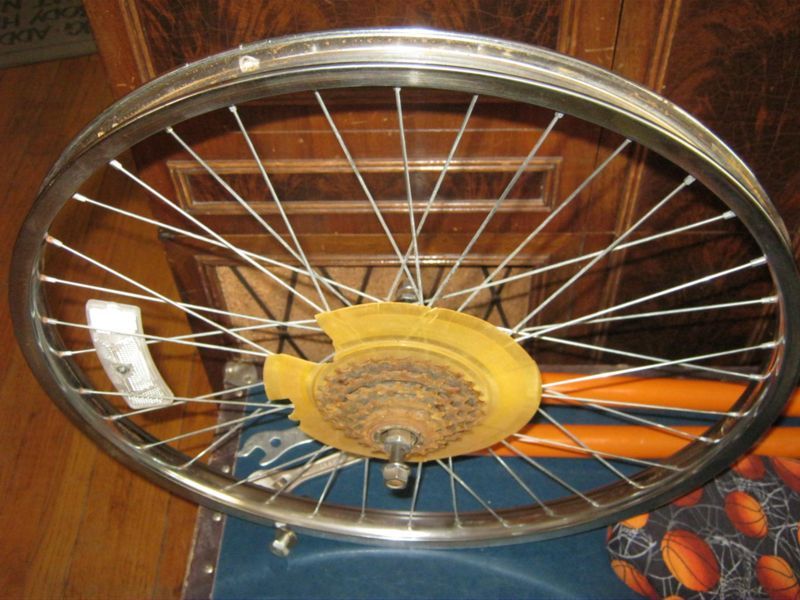
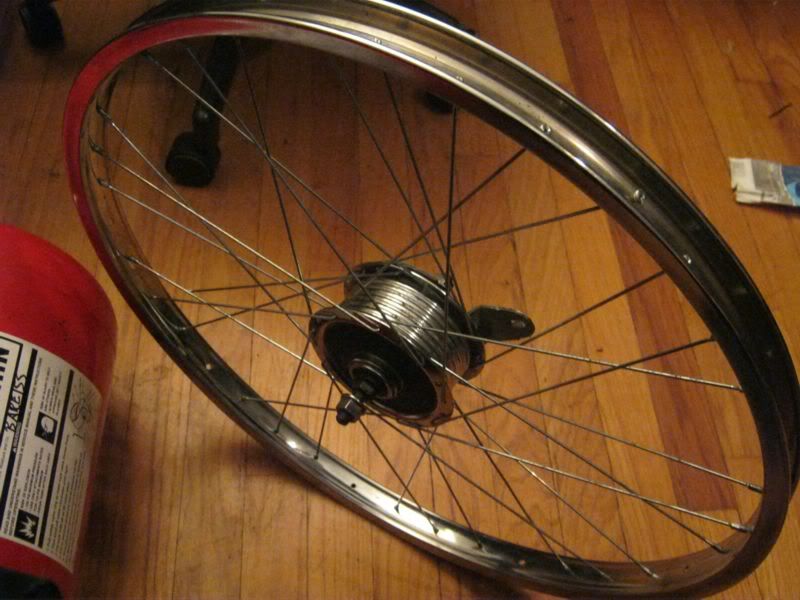
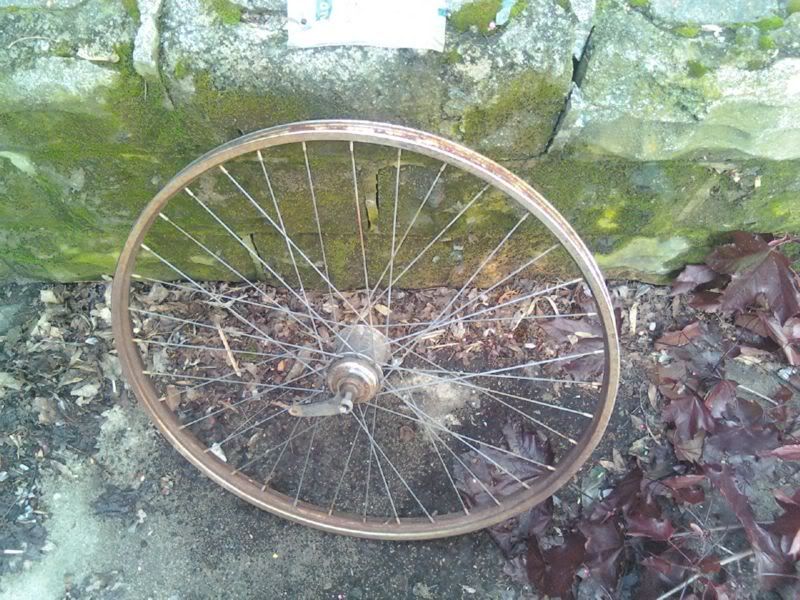
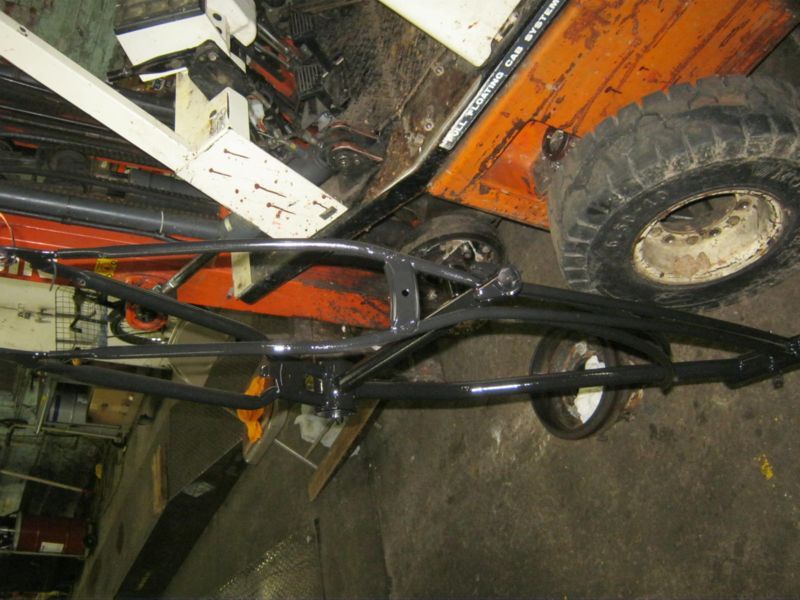
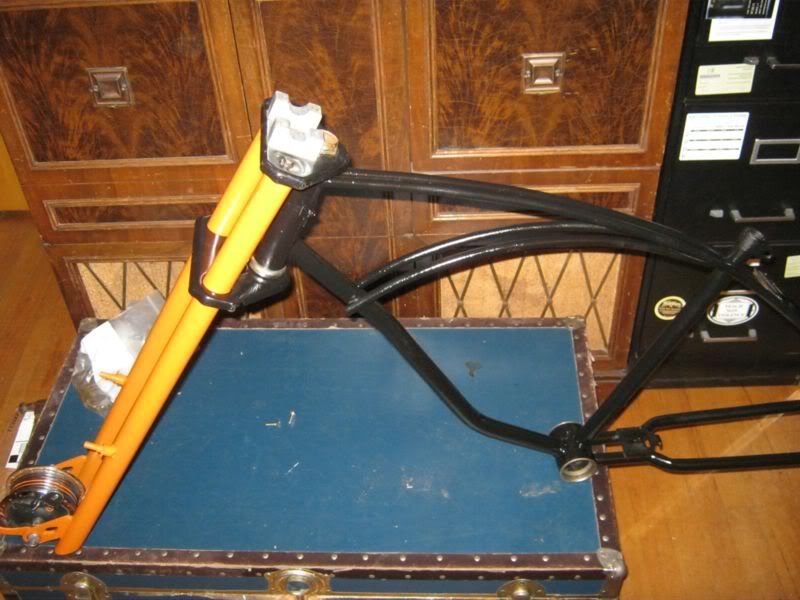
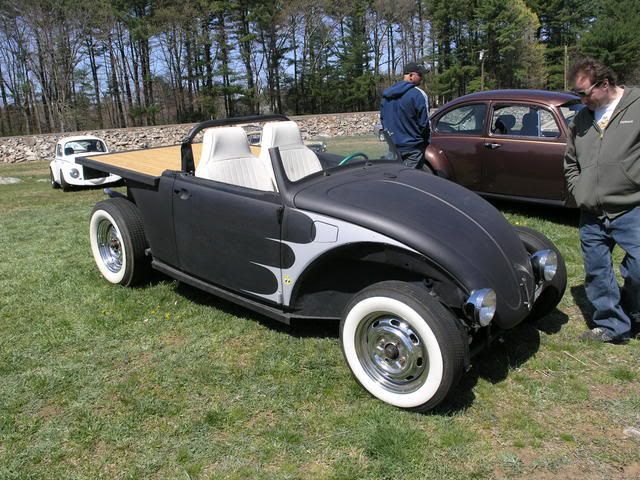
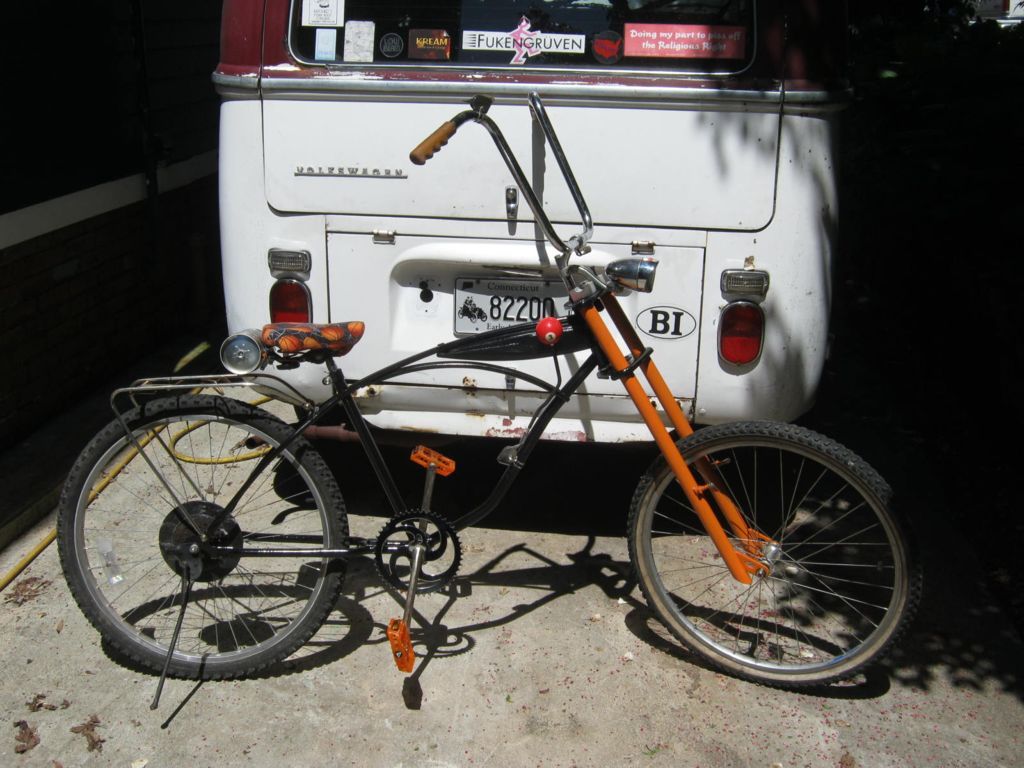
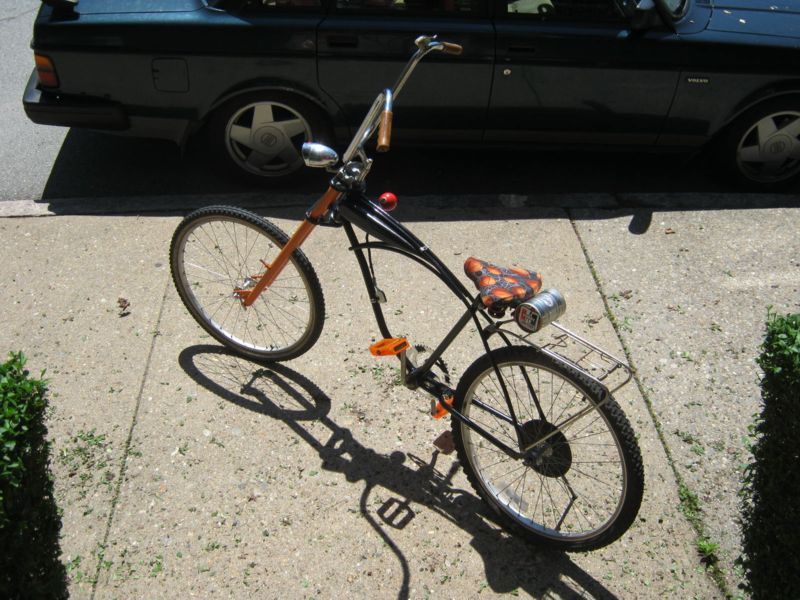
More pics of today's mockup- All these pics are with some old mountain bike wheels I had hanging around. The rear dropped in nicer than any bike I've assembled in a long time. :D

mockup3.jpg


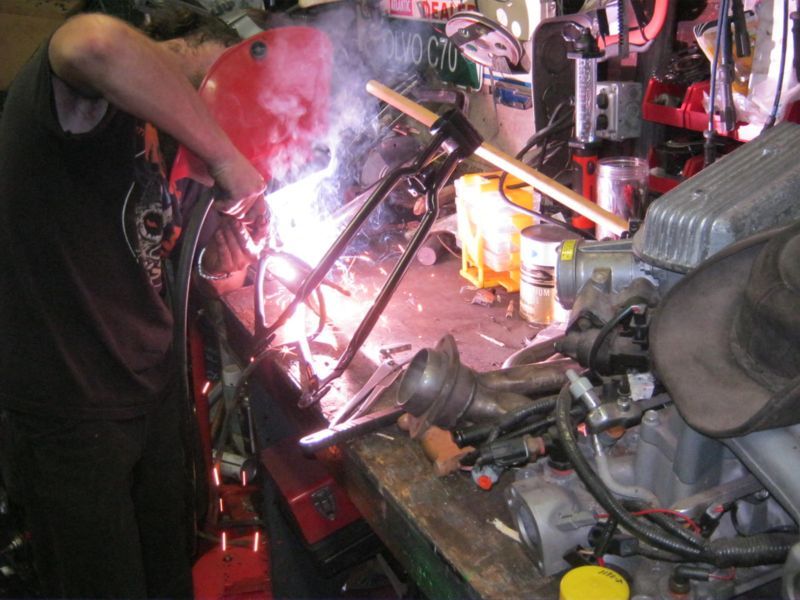
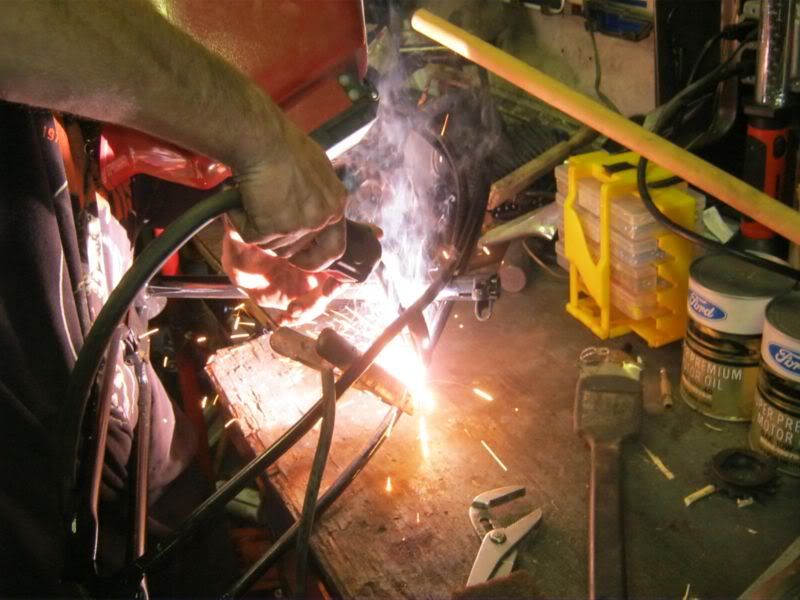
The progress in the last 2 days has been amazing! Some of the stuff that got done:

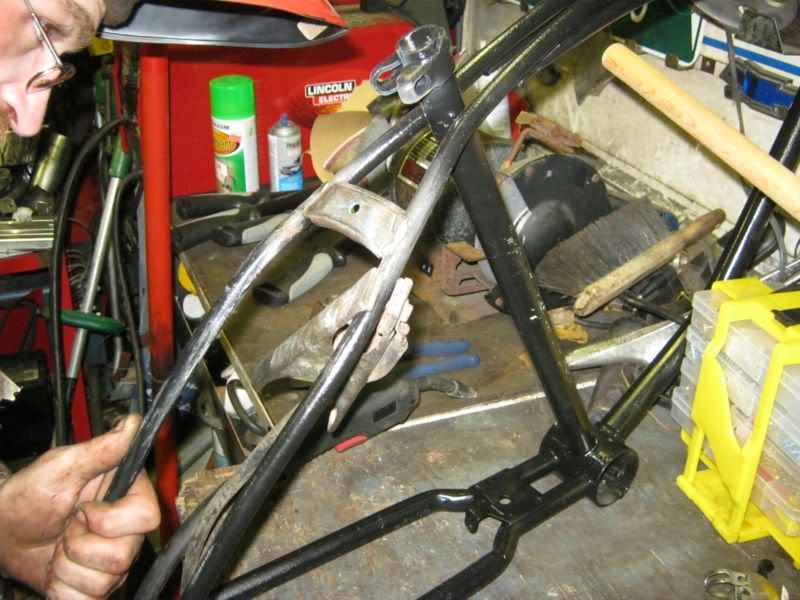
:arrow: Cut the headtube down to fit the shorter welded steer tube from the OCC fork. About 1/2 inch taken off the bottom of the frame.

:arrow: Ground out the welds on the inside of the head tube, because the bearing cup wouldn't quite sit straight. The brazing is very thick inside each tube joint.

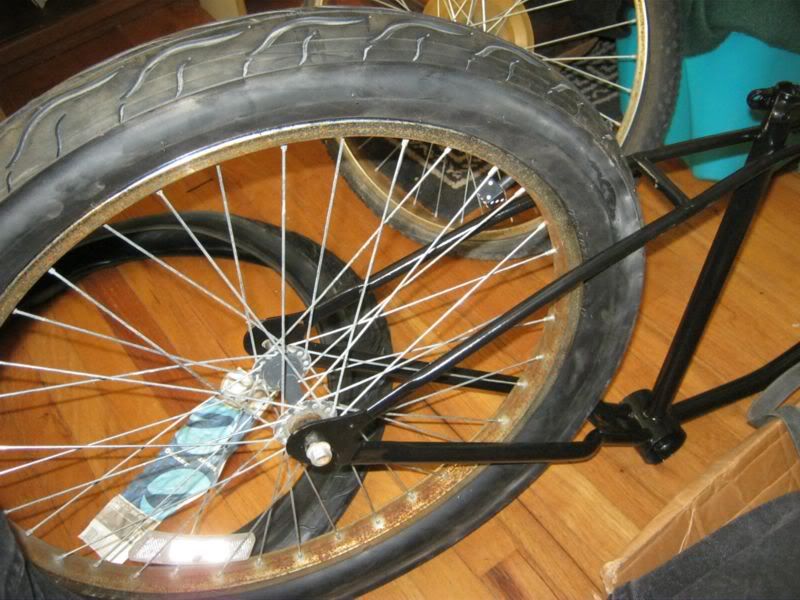
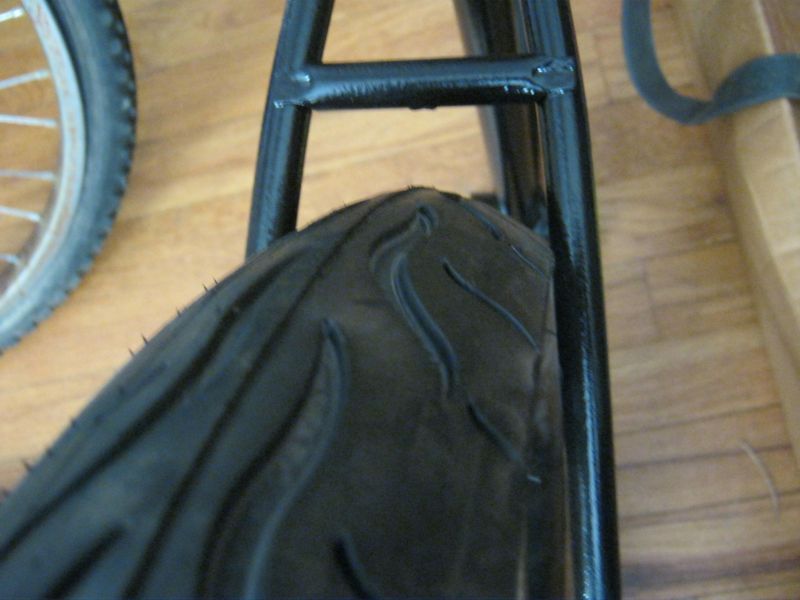
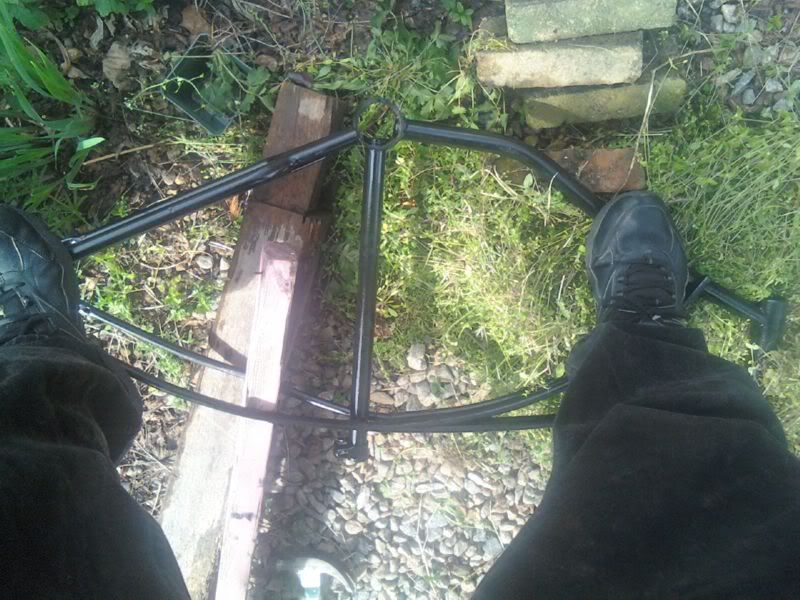
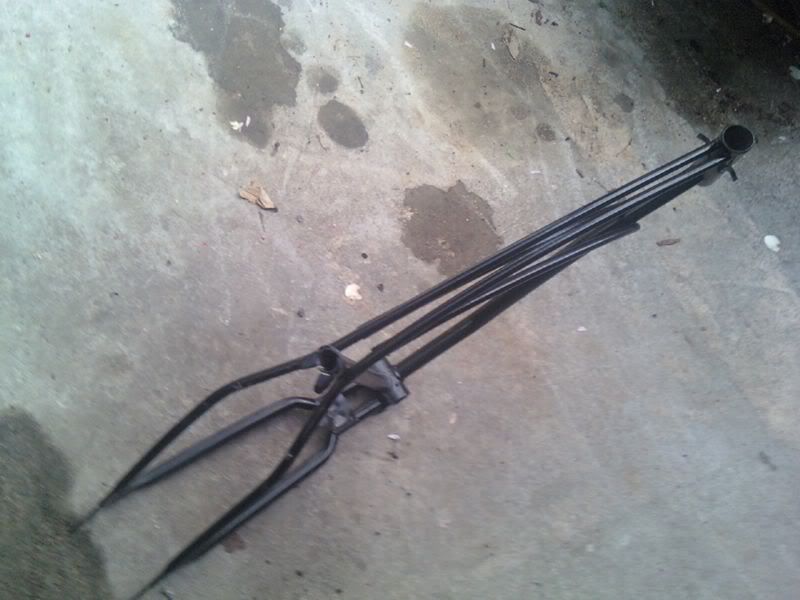
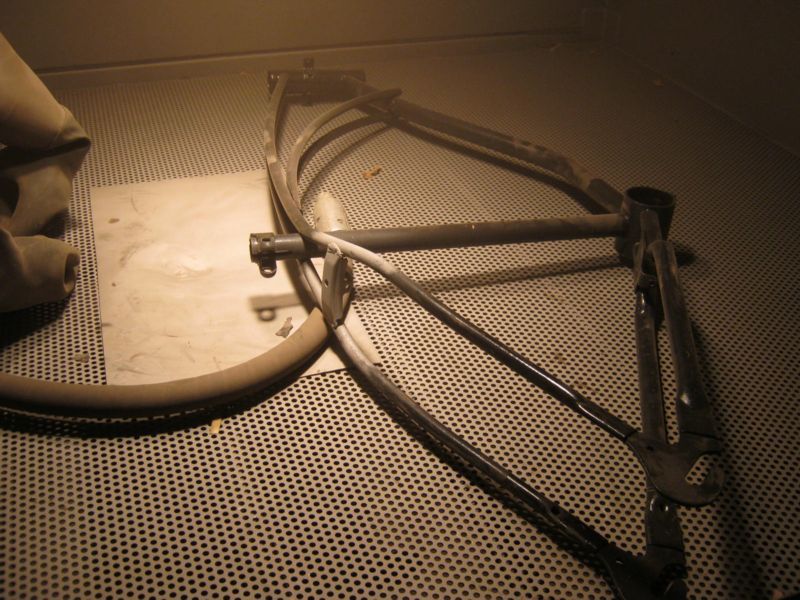
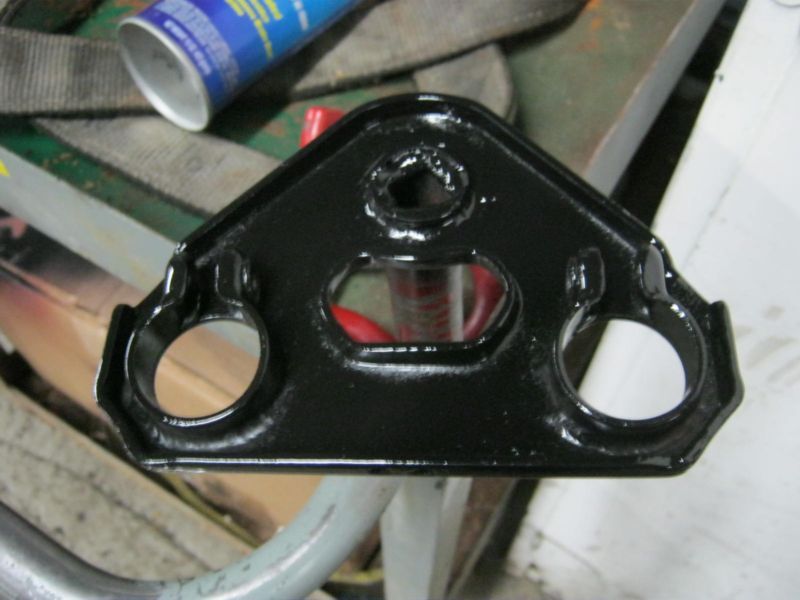
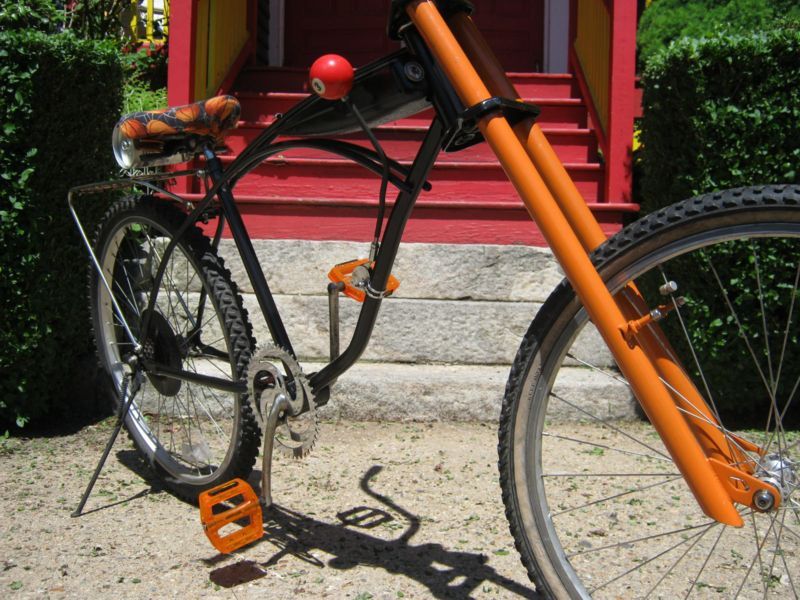
:arrow: Used one of the triple-tree handlebar clamp blocks in the vise to support the lower chain stays, and crunched the tubing on the lower stays to ensure clearance for those 24x3 tires. Repainted the whole frame (and then it got a big gouge in one of the top tubes, of course...).

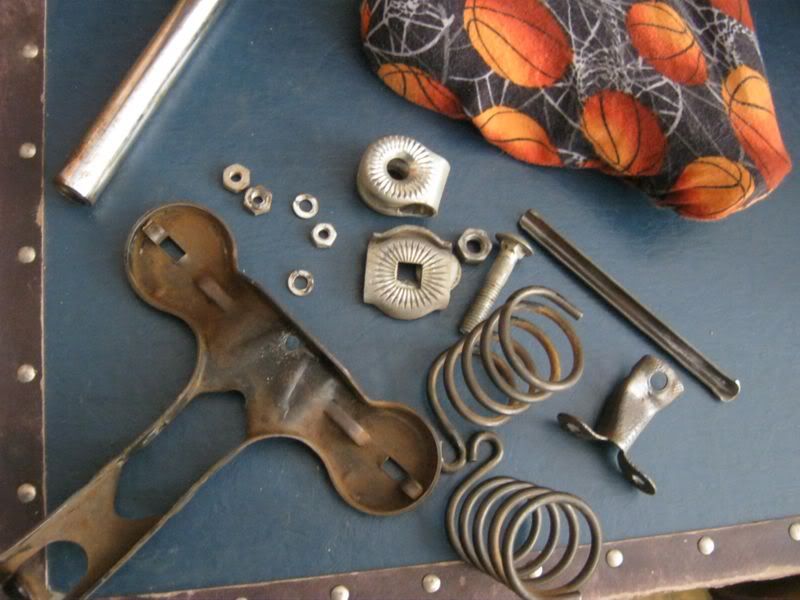
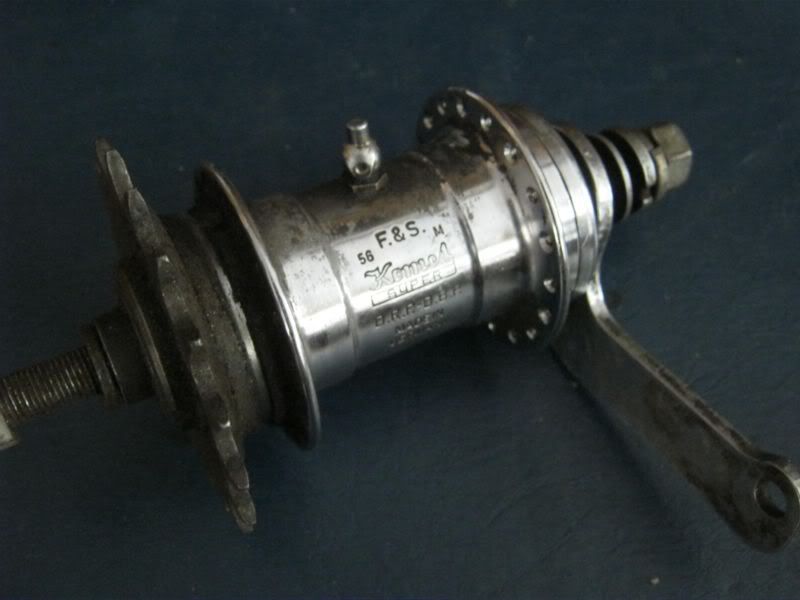
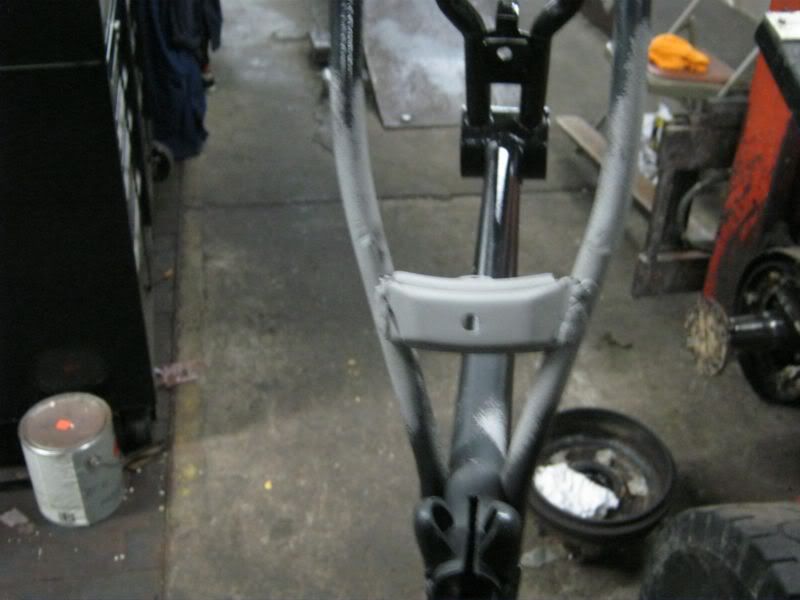
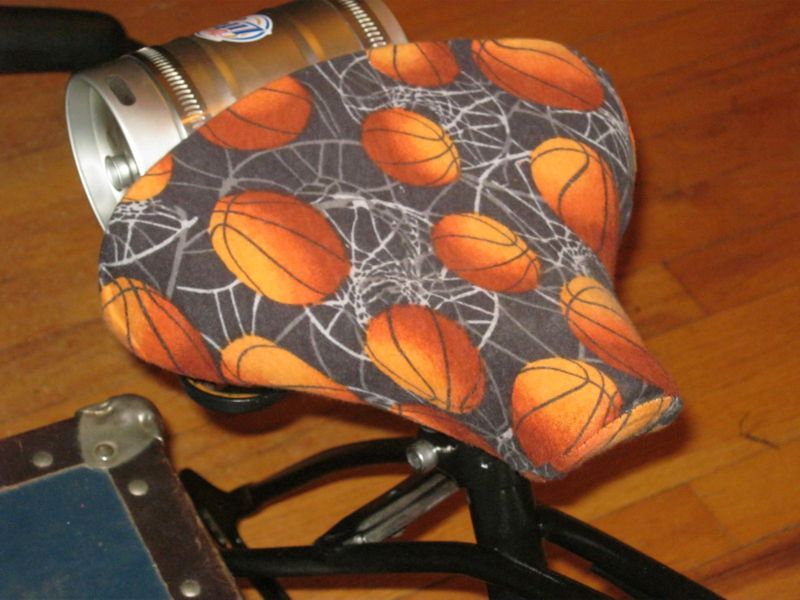
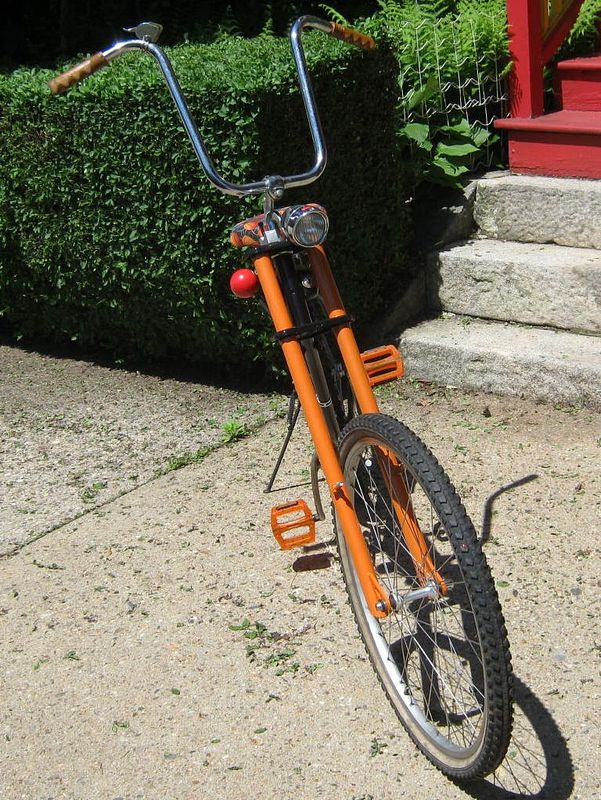
:arrow: Built a shifter by grinding and threading the thumb lever of an old Sturmey trigger shifter. Cut 1/4-20 threads on it (M6 would work well too). The shifter material is very hard and smooth and I had to "start" threads by touching the sides of the lever with the grinding wheel to make little cuts. It's also rather hard to hold it in a vise because you can't grip the lever directly and the whole thing is springy. A piece of 1/4 inch threaded rod and a tubing bender created a shape that steps outboard from the frame, then back towards the rider. My machinist friend at work had a "3" ball from a pool table sitting on his workbench and said I could use it. Perfect, a 3-speed with a 3-ball. Turns out that the plastic they're made out of is very easy to drill and tap. I went for a hole 90° from the number so it shows on the side.

mockup4.jpg


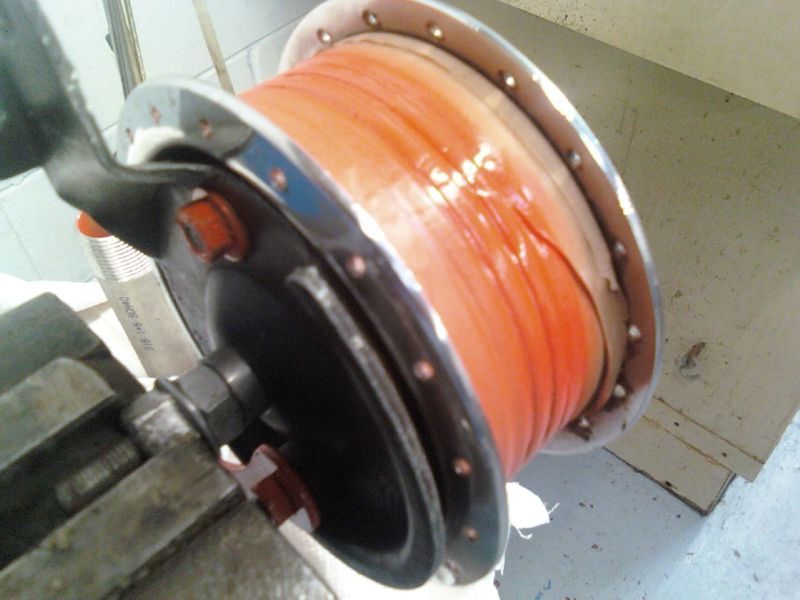
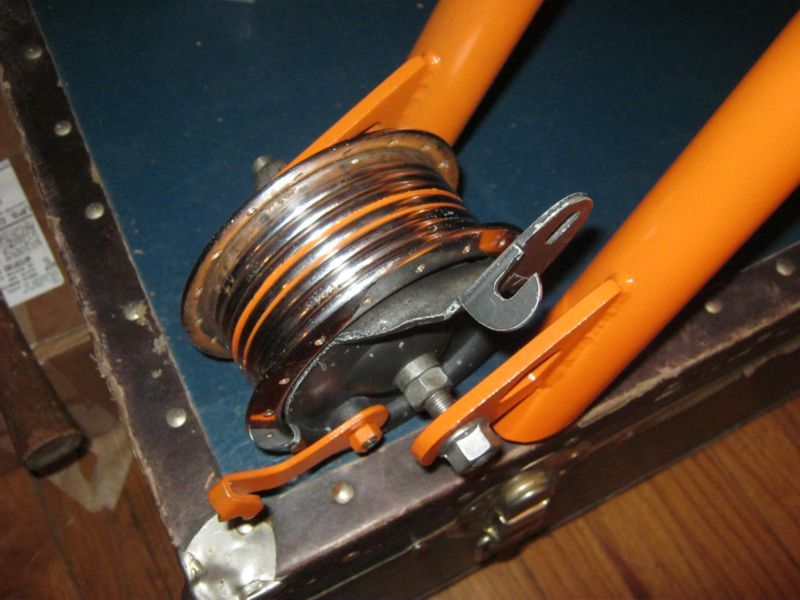
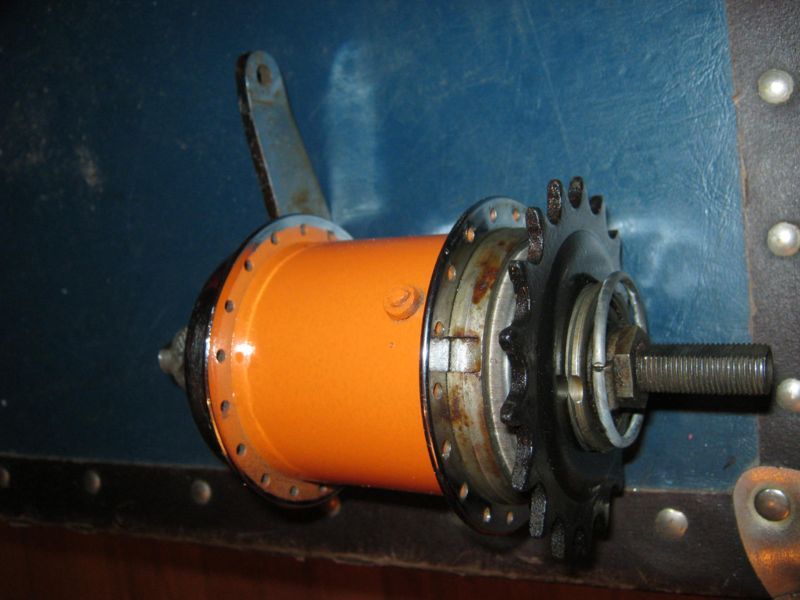
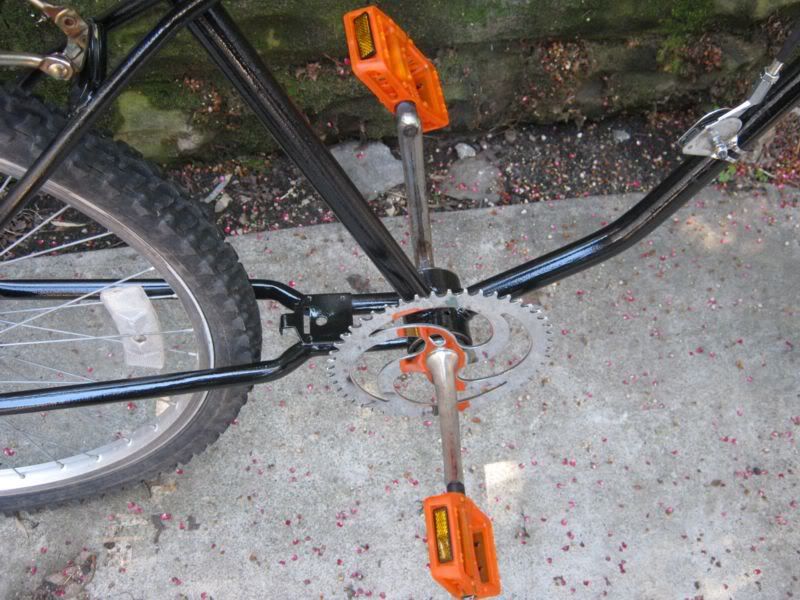
:arrow: Assembled the crank and sprocket, no issues. Lots of spacers to push it to the drive side for fat-tire clearance. Installed the crank. Cleaned up the whole bottom bracket set on the wire wheel, mostly came out rust free. One bearing ball kept insisting on popping out and going in the dirt. No issues with clearance or assembly. Finally got to see those kool pedals in action.

mockup6.jpg


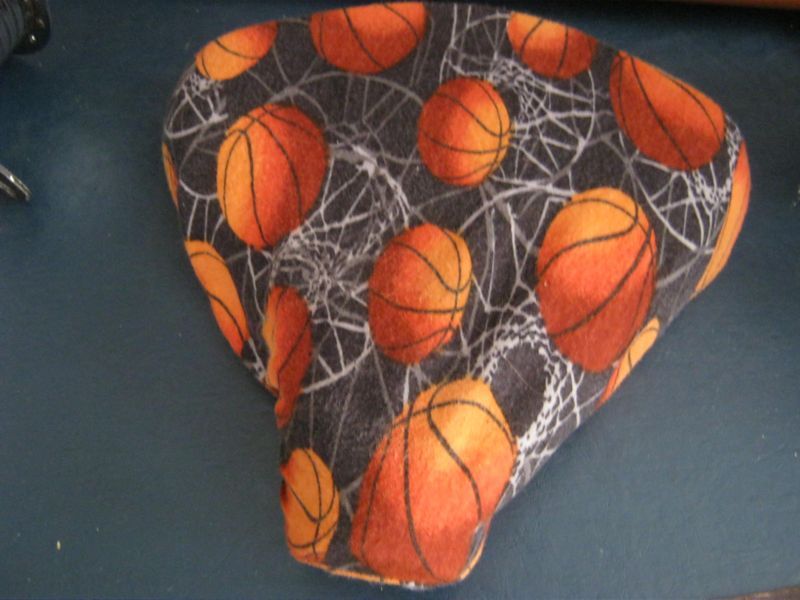
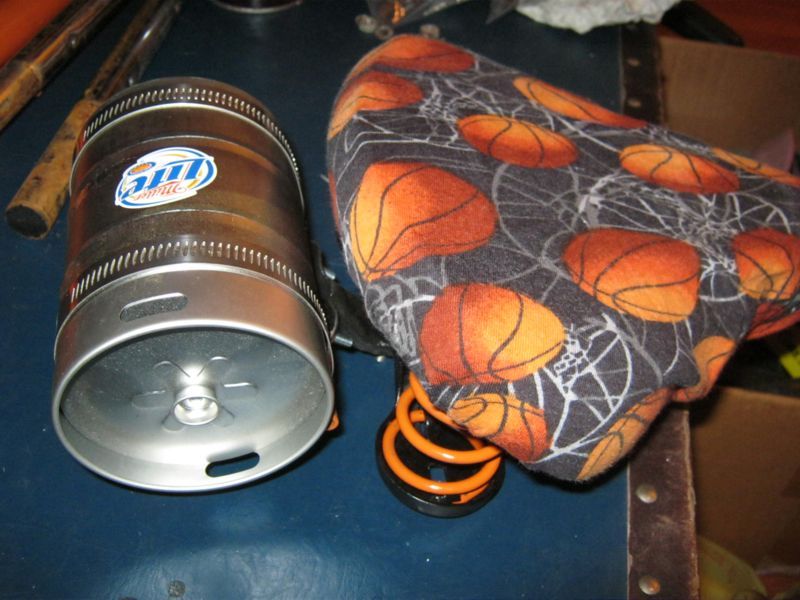
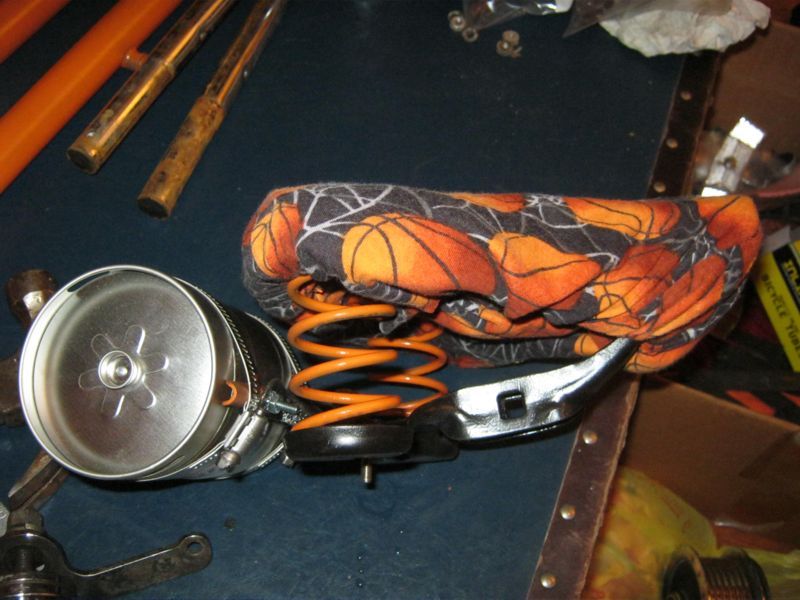
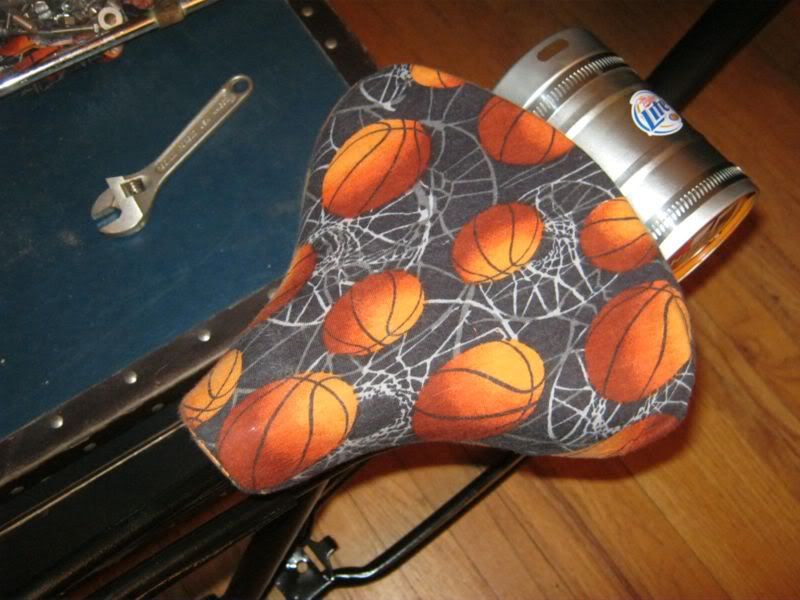
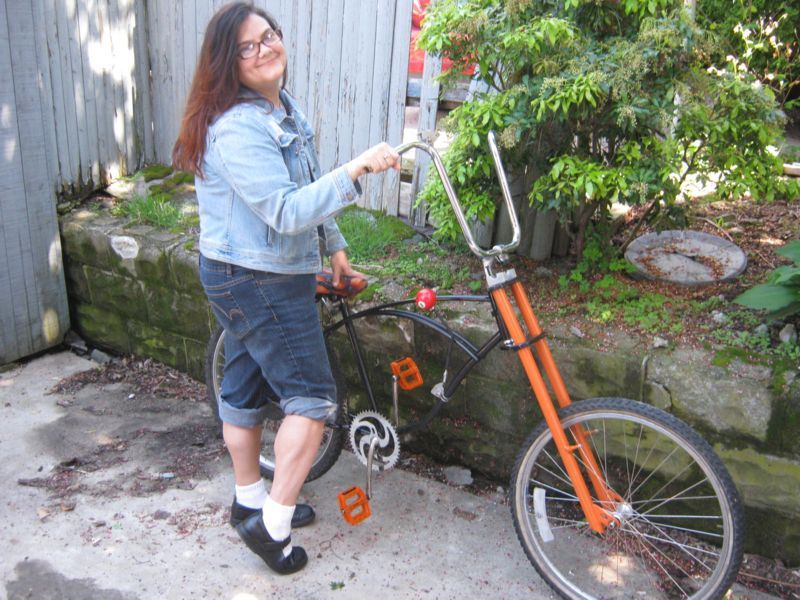
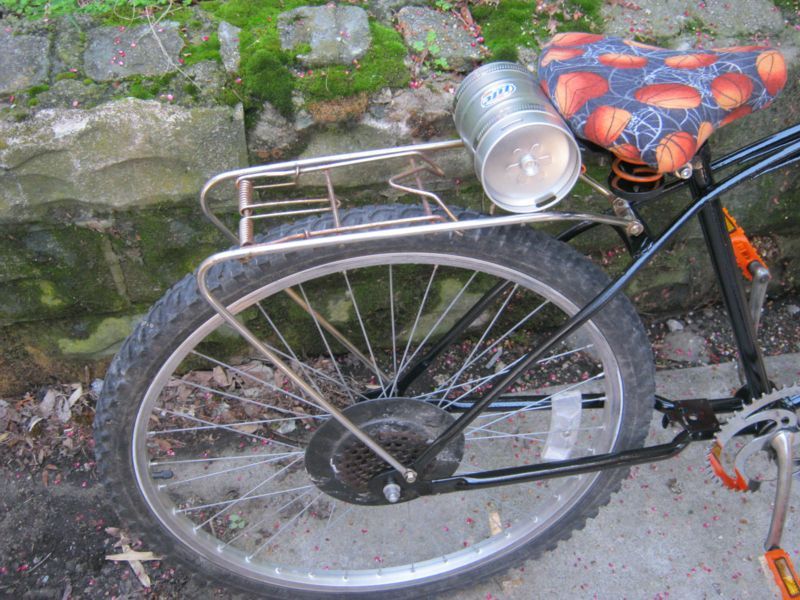
:arrow: Got my seat mounted on it, looking good. Got my spokesmodel to show off the new ride! :oops:

mockup9.jpg


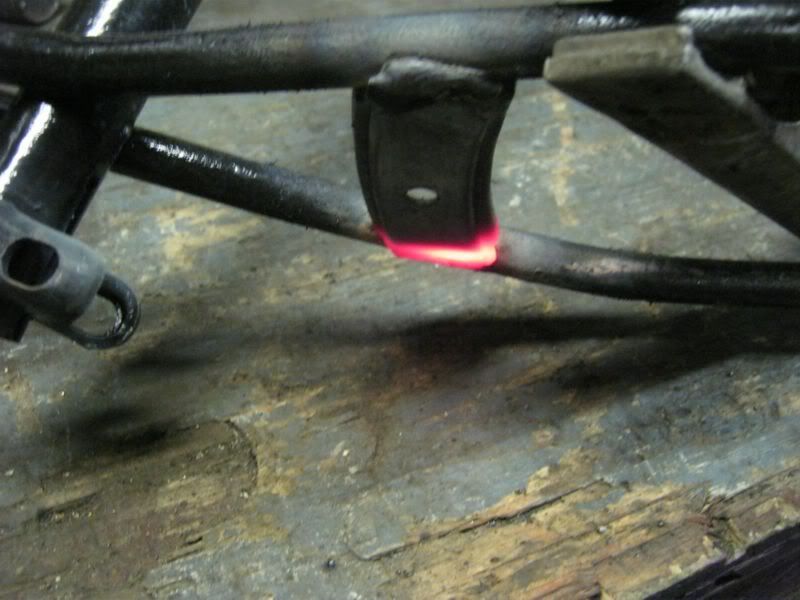
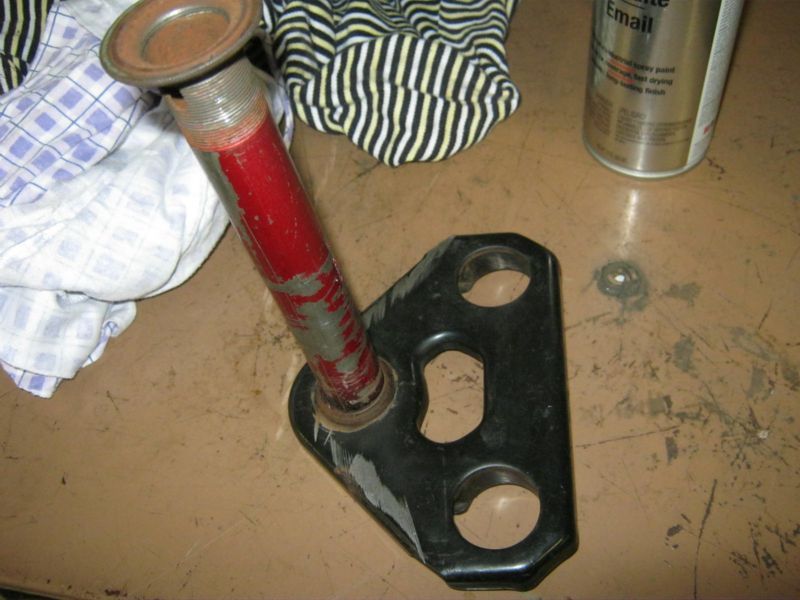
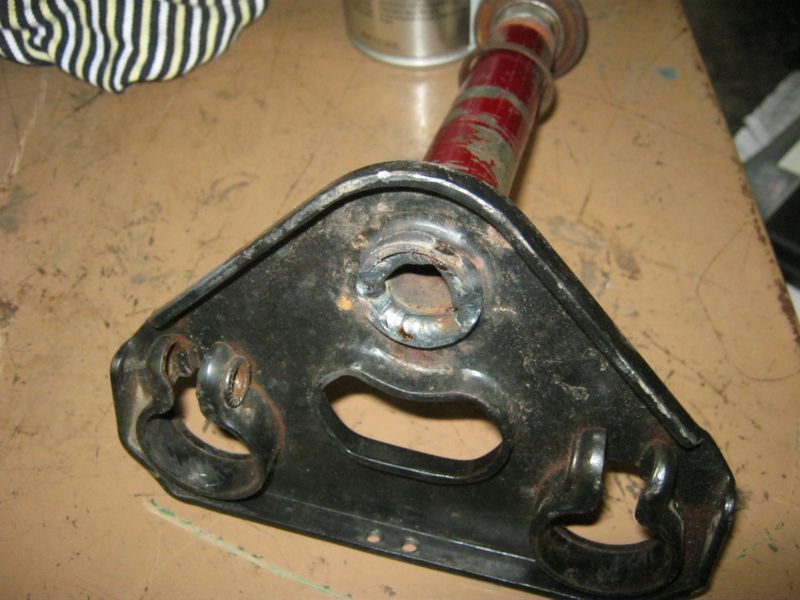
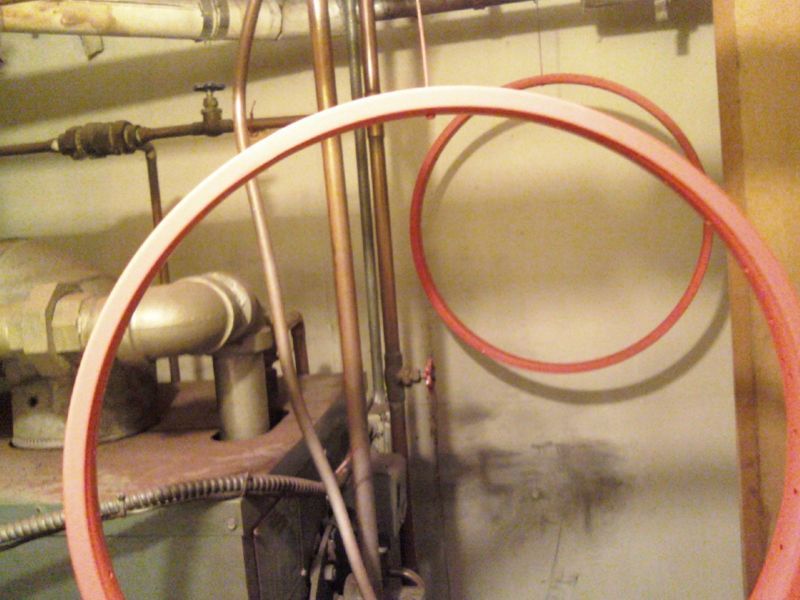
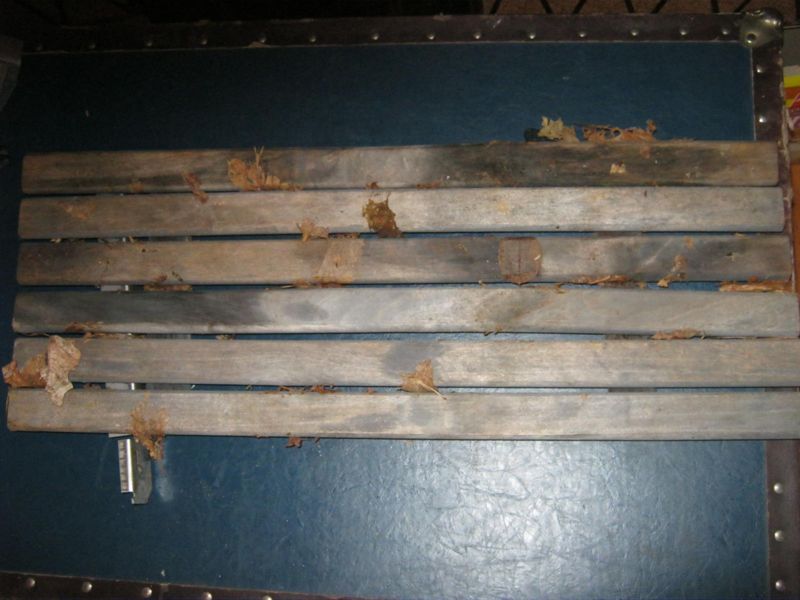
:arrow: Found the perfect base for the wooden rack. This oldie but goodie has been in my basement at least 10 years, no idea what it's from. With the added brake bridge on the frame, and gentle re-tapping of the dropout holes for M6 threads, it looks like it never left. The wood deck may be done in another day or two.

mockup8.jpg


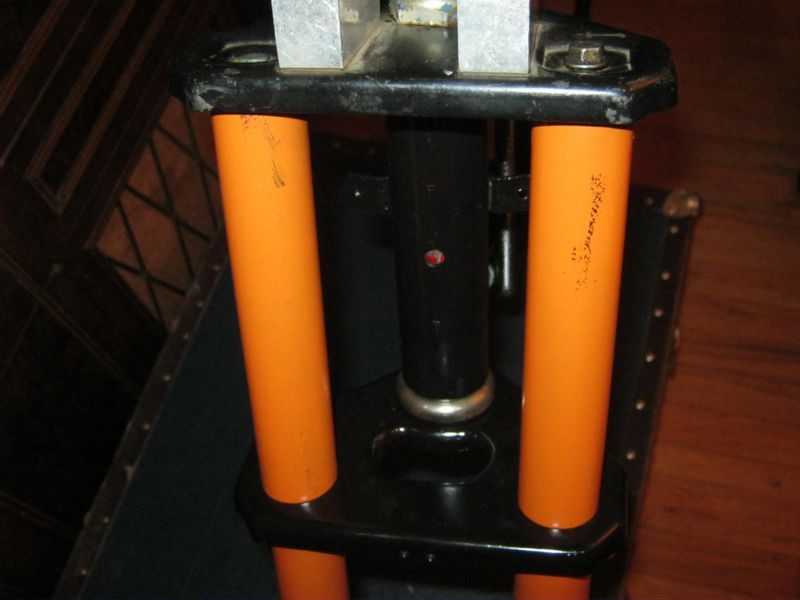
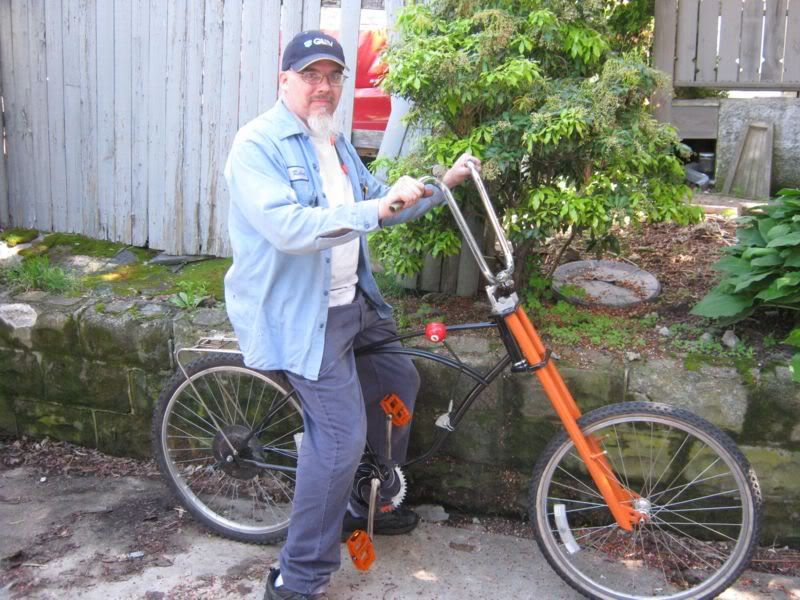
:arrow: Fork assembled, bearings tight, hardware installed, stole bearings out of a donor bike, triple tree tightened up with new high strength bolts, found a Stingray handlebar and stem to get a feel for the angle and height. Found a hideously ugly pair of brown-orange grips... I might keep em. They're awful. :) Finally got to sit on it. Looking a little rough the morning after a long night shift... bike looks good though.

mockup7.jpg


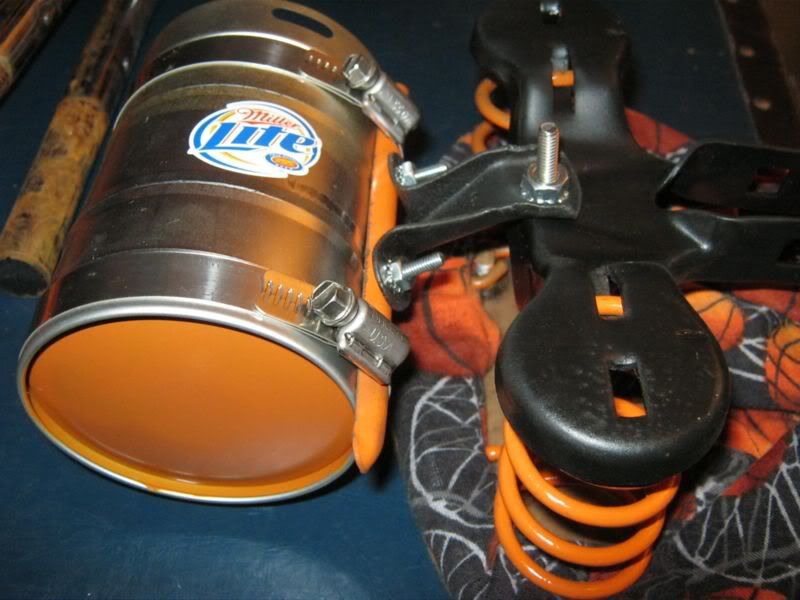
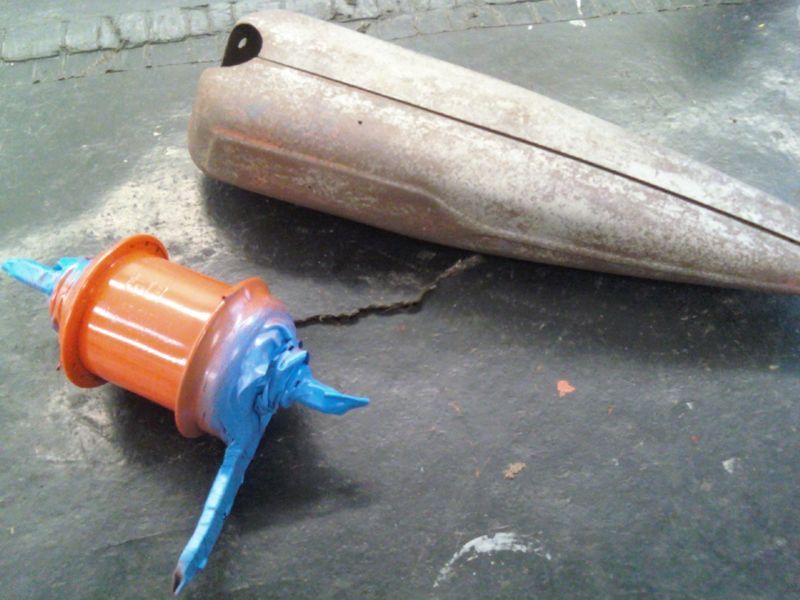
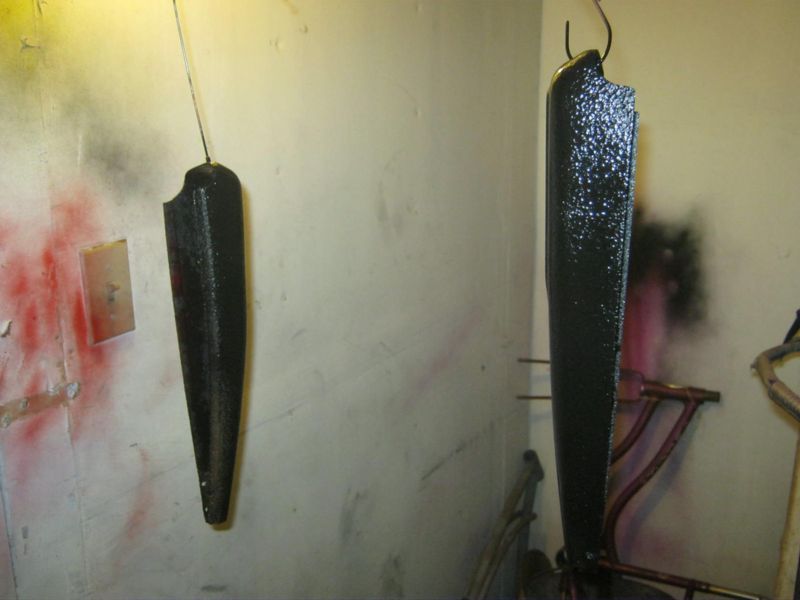
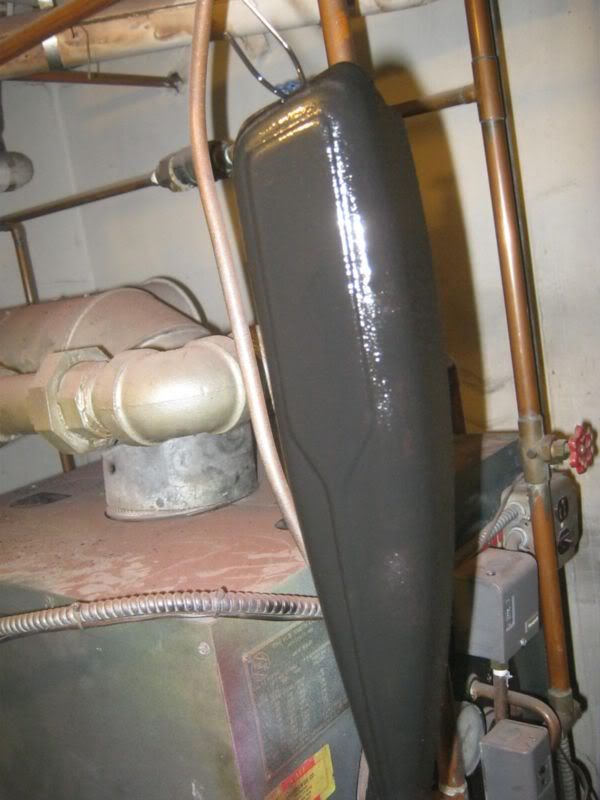
:arrow: Tank pieced together, reinstalled with its kind of trashed retaining screw/reflector things. Need to mount the back of it a little more securely. Not much metal left back there. No detail work done yet on the tank. The black I think will be a keeper.

mockup5.jpg


mockup2.jpg


Stay tuned for more updates!!!!

--Rob
 
Back
Top