Gendron Pioneer tricycle being redone

Rat Rod Bikes Bicycle Forum

Help Support Rat Rod Bikes Bicycle Forum:

This site may earn a commission from merchant affiliate links, including eBay, Amazon, and others.
Joined
Nov 18, 2007
Messages
242
Reaction score
129
Location
Houston, Texas
Rating - 0%
0   0   0
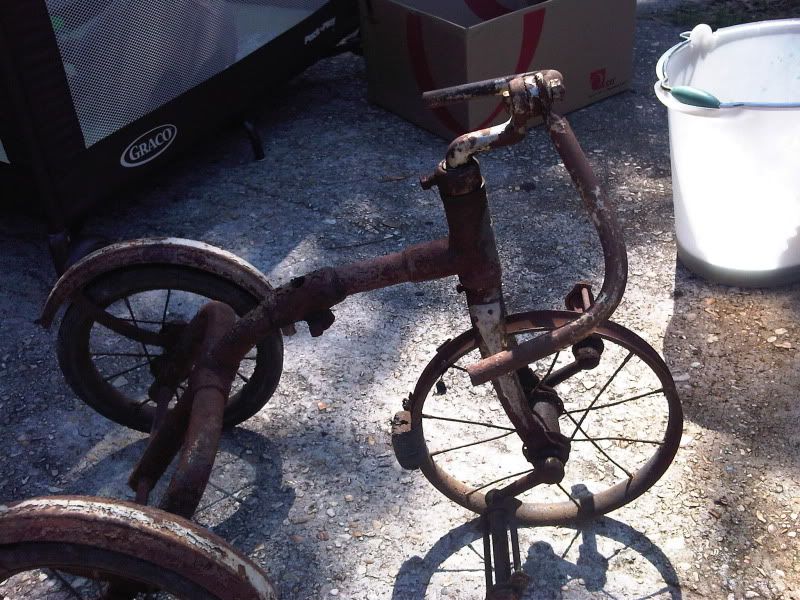
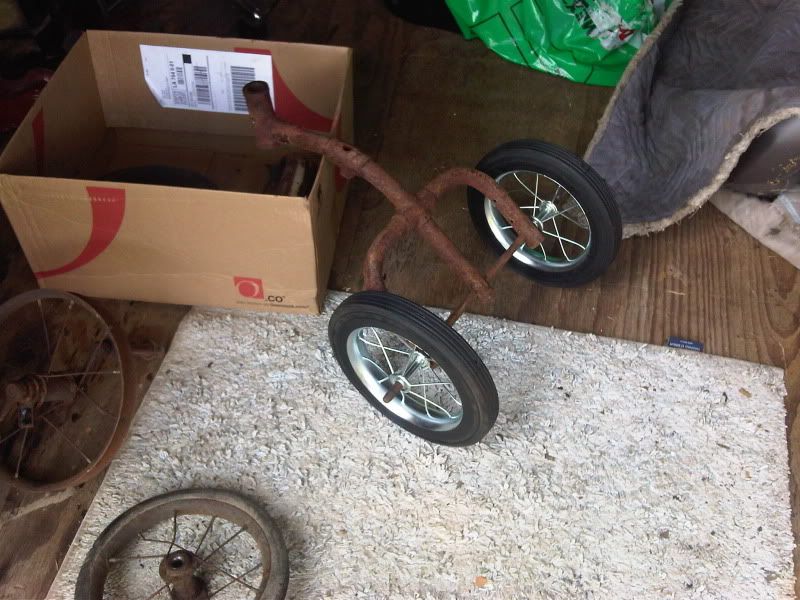
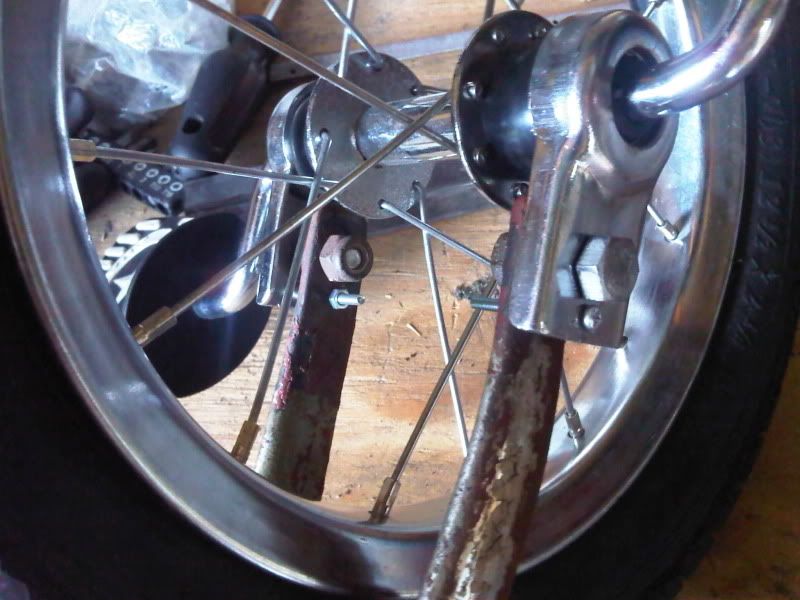
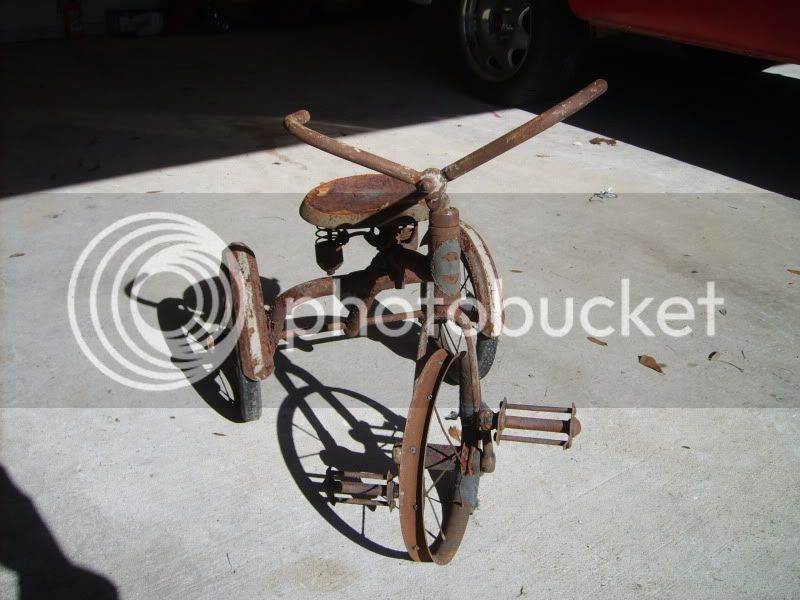
So I got this a few years ago for almost nothing at an outdoor furniture store. Old trikes don't cost much as it is right now, which was a little surprising to me considering rusty old pedal cars are being listed for (not sold I'm pretty sure) stupid money on eBay. Anyhoo, it's time to take it apart and redo it for the little one. Not have too much luck sourcing parts yet. Don't need to be original but should fit without too much difficulty. Anyone have some good trike parts sources? :wink: :lol:

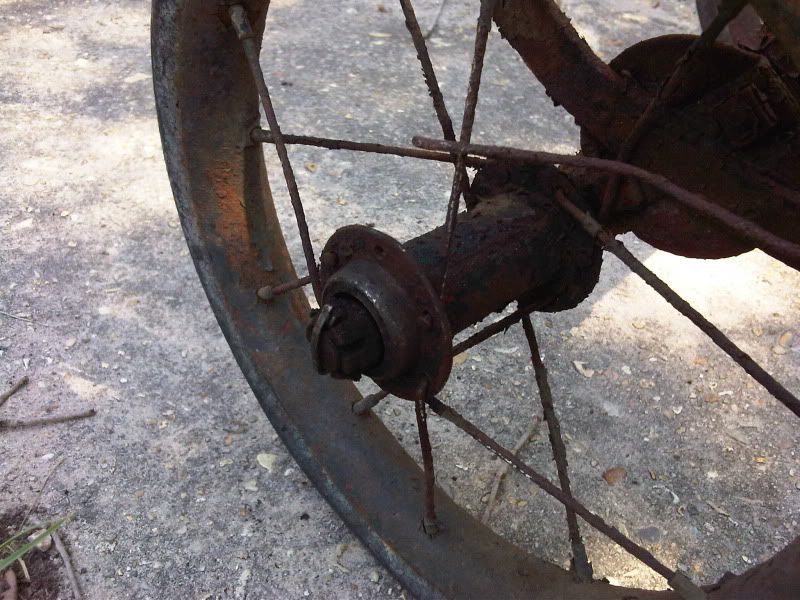
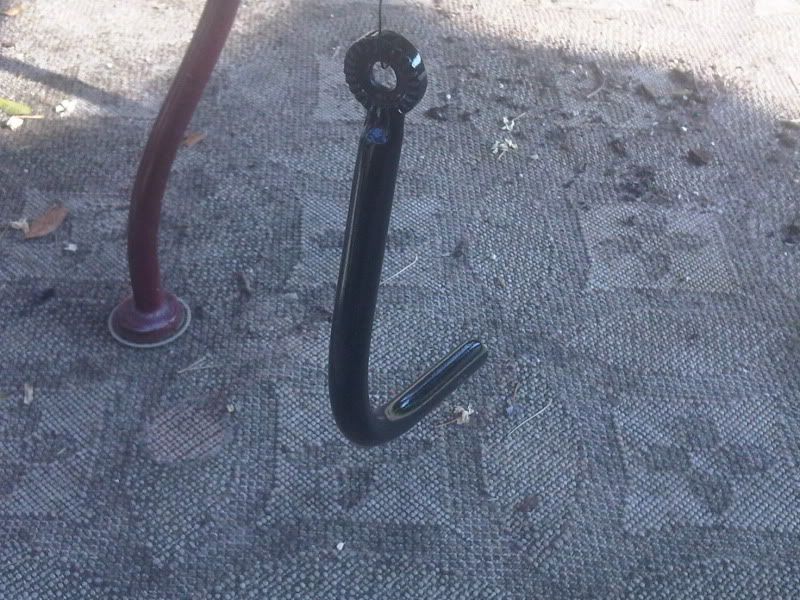
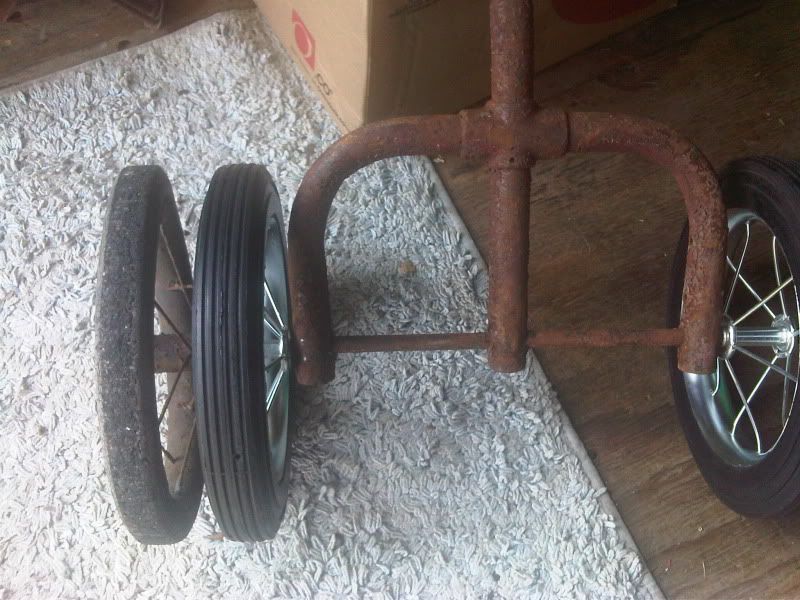
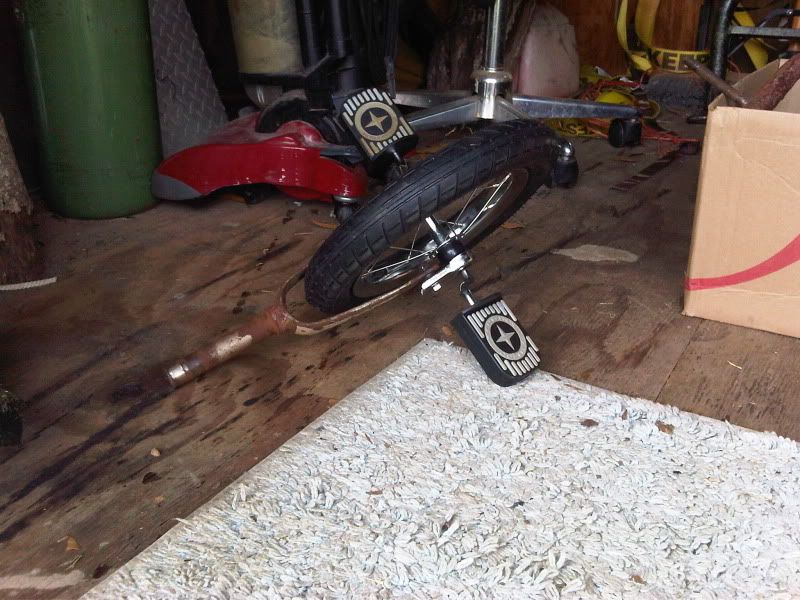
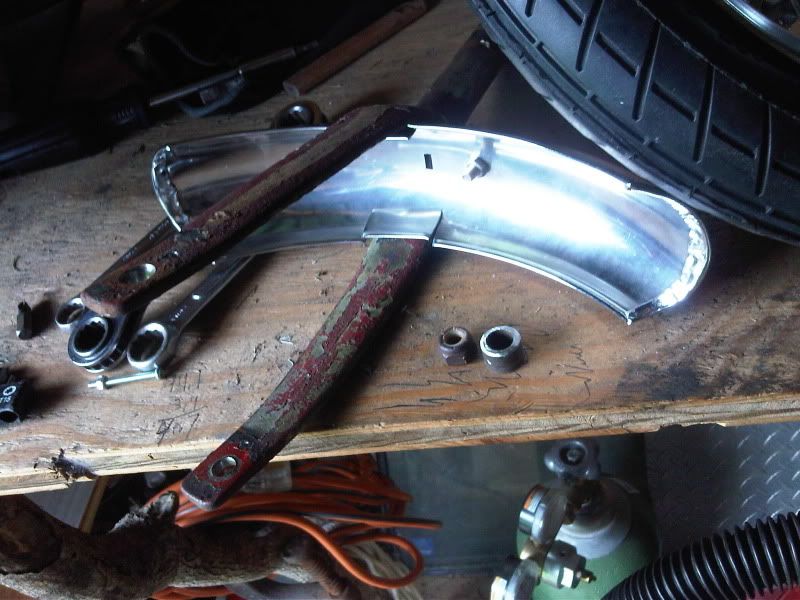
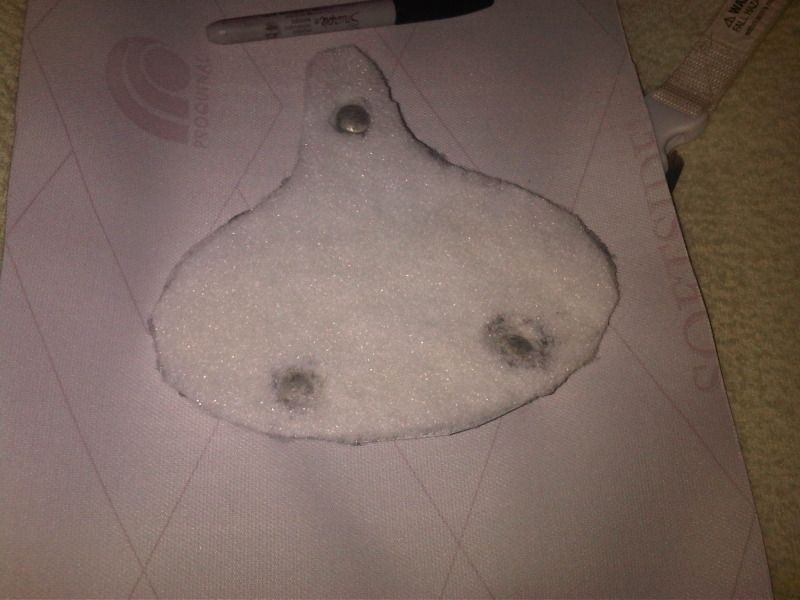
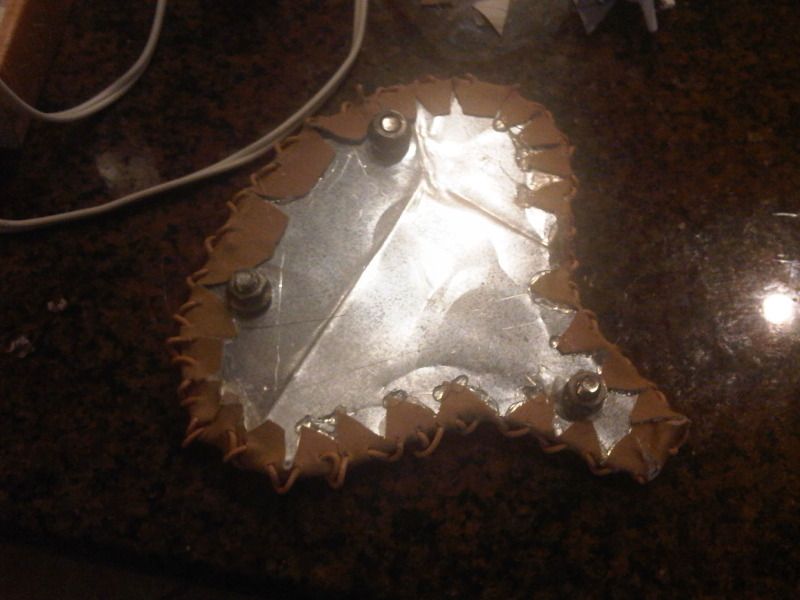
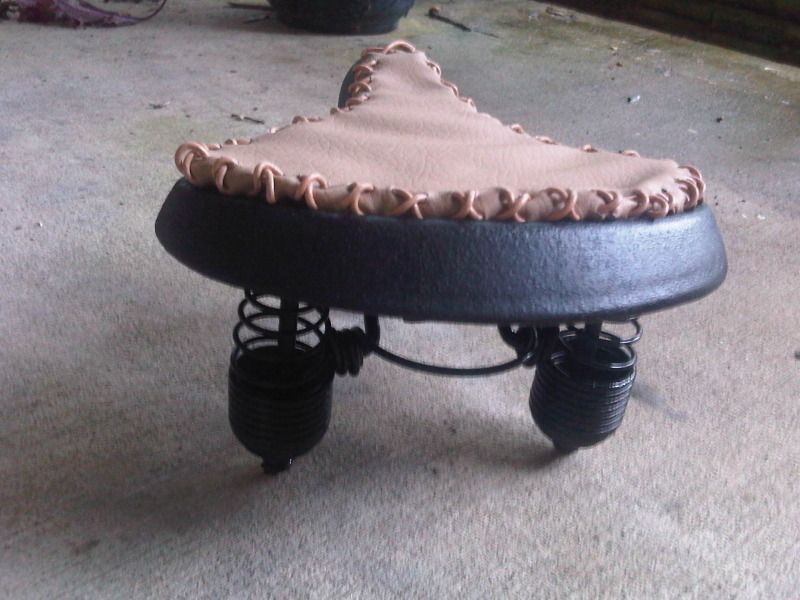
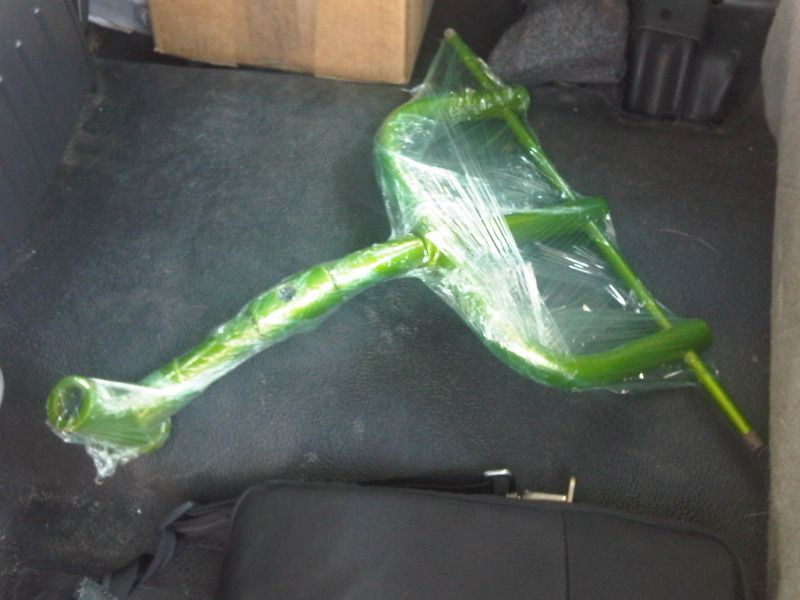
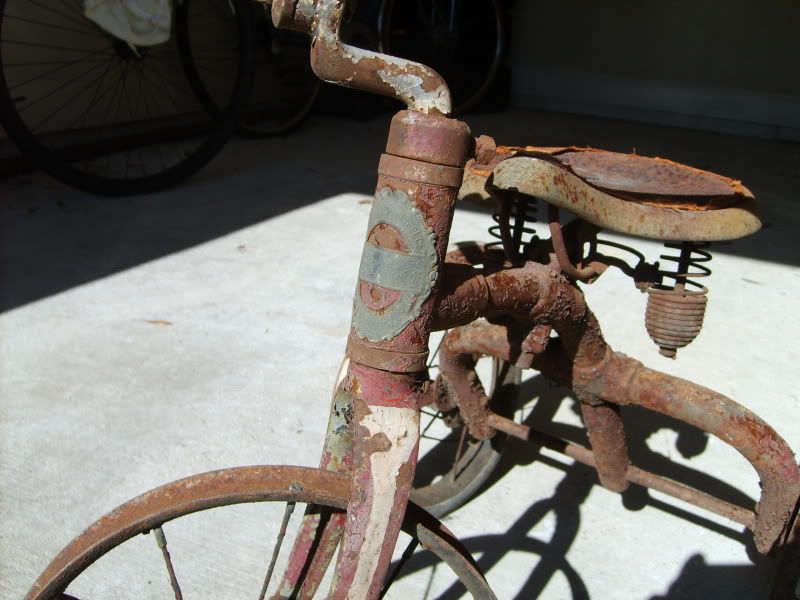
I sprayed all the bolts last night so hopefully too much doesn't get broken in the teardown. Would rather do new air tube tires front and rear than dealing with the hard rubber stuff. The bars, frame, and seat will be reused, not sure if the fenders can be cleaned up enough. Thinking of metallic lime green powder coating the frame and gloss black for everything else, light tan leather for the seat and grips. Don't want to get ahead of myself yet though.

S5000044.jpg


S5000045.jpg


S5000043.jpg
 
Well, so far so good. All the bolts are breaking free with no issues. We'll see how things go though. The seat has some extensive rust damage, but still useable. As any project I don't know how deep the rabbit hole goes yet or when I'll see the finish of this, the proof is in the pudding, right? 'Starting' a project is the easiest thing ANYONE can do, like their decision to rebuild the space shuttle just shook the world. It's seeing it through to the end that separates the doers from the talkers.

Anyhoo, messing around with the handle bars, they have notches in them so you adjust the height. Pretty cool looking like ape hangers but not practical as that's where the little legs and knees will go. BTW, I looked up the date once a while back..around 1918 this thing was made.

IMG00724-20120623-1011.jpg


I got one of the wheel caps off and couldn't believe this, a nut and cotter pin assembly! Quality stuff.

IMG00725-20120623-1050.jpg
 
Got it all apart, no drama. The right rear fender and axle stub were bent but easily adjusted back. One last kinda tricky part, removing the original frame crest. It's held in with two small rivets and I don't want to scuff it up taking it apart. That is the only part I want to keep unfinished when I put it back together again.

IMG00728-20120624-1616.jpg
 
OK, I need help. I'm having very little luck sourcing new wheels/pedals for this project. I'm looking for pneumatic tires and can't even find a supplier of wheels this size. Most 'trike' wheels are low-rider type ones which are 20" and up and of course no front pedal wheel assembly.

:roll: :roll: :?:
 
I might have found a place in New Orleans that has some wheels and stuff. Going to go take a look. Tricycle Fetish has wheels, but they're too small or too big. My friend may let me use his Dad's media blaster at his shop this weekend as well to clean up all of the parts.

I got a new piece of metal cut for the seat last night. It's an inset which will be wrapped with fabric and some cushion material. I used three blind bolts which will secure it to the main part of the seat.

IMG00731-20120627-1900.jpg
 
Well, my suspicions are coming true about getting parts locally. It ain't gonna happen. Went to a place that sells a lot of toys and kids bikes, and even after one of the worker-bees told me on the phone last week that they should have some tricycle parts (wheels, etc.) when I got there they kept saying no. I said I it didn't have to be original, blah, blah, just something that would work, wheels that fit on the frame, new grips, a front fender. No go. I'm not sure what the deal is, and regular bike shops are an even bigger waste of time. When they sell bikes for several $$$$ they're just not going to carry anything I would remotely need. Most people could care less or think you're a flippin' weirdo when you bring a box of rusty parts in their shop. Whatever. I got some new rear wheels on the eBays which are 1/2" under the diameter (9.5 vs. 10") of the ones I have now, it looks like I'll have to do redo the front wheel on my own though, spokes and all.

Reassuring though, I called the powder-coating place and they didn't think it would be an issue doing the frame, forks, and fenders. Great. Gonna cost about $125 but whatever color I want, even metallics.

I started powder-coating some of the smaller parts such as the handle bars and seat post which fit in my $5 toaster oven. Looks great so far.

IMG00740-20120704-0826.jpg
 
The new parts are starting to arrive. Got the rear wheels and they're even better than I anticipated. Fit nice and snug on the shaft, the width is a little narrower but I'll take that up with some spacer material, and the diameter is the same.

My old wheels are for sale:

viewtopic.php?f=2&t=42257

IMG00747-20120707-1615.jpg

IMG00746-20120707-1615.jpg
 
:lol: :lol:

Would have to have a mullet, too.
 
Got the rest of the parts, been out of town. Considering having the seat and grips done like this:

bat_7739.jpg


If I can find an interior shop that will take on the work...
 
i need wheels like that for a build im doing right now... can u PLEASE tell me where you got them?! this should be sweet looking when its done too man!

Easy E
 
I got the wheels on the eBays. They're not an exact match but very close. The hubs fit on the shaft very well and outer diameter wound up being the same, the width of the hubs was narrower though so I had to make a collar spacer to take up the difference. The new rear wheels don't have changeable spokes though, they are fixed in place. They're pretty cheap looking construction, but I don't care. I just needed something that works. There are no bearings in them either, but again I don't really care. This isn't a bike that will be ridden fast and a good packing of synthetic grease should keep everything spinning.

The front wheel I also got new, but from a different seller. I haven't looked at it yet but I know it will take some modification to get the fork ends to mate up with this new wheel/pedal/crank assembly.

I probably could have re-spoked both the rear and front wheels, but I didn't want to do that. Not only the time involved but the spokes are so worn right now I have no way of telling whether or not the rims are bent and I really doubt a bike shop would want to mess with trueing them back straight. Also the hard rubber tires would be a pain the butt to get a very good fit and seal.
 
Had some time to work on it again this weekend. The front wheel assembly is definitely used, it's got some pedal wear and the rim is definitely out of true a little. Oh well. Made some spacers and threaded some bolts in to get it to mate with the forks. Need to adjust it a bit more. The front fender arrived, it's a perfect match to the curvature of the tire though.

IMG00771-20120722-1720.jpg
 
Was able to put some more time into it today and do a test fit mock-up. Hated to do it, but I had to drill two tiny holes into the forks. The single attachment points with the spacers made it flop pretty bad when the bolts are torqued, the two points help make it stiffer.

IMG00775-20120728-1430.jpg


Played a lot with the angle and the spacer widths as the wheel was just barely rubbing on the inside of the forks on one side. It's the little things that eat up so much time. Also had to fit the front fender with a bracket and adjust the angle so it matched the tire. The fender is a little too wide for the forks so I had to narrow it a bit.

IMG00776-20120728-1642.jpg


And the test fit, more tweaking of the rear fenders to get them to line up with the rear wheels and an inner spacer along with the outer ones and it's looking good.

IMG00777-20120728-1817.jpg

.
 
Dropped the main parts off at the powder coating place the other day for the candy apple green treatment, but haven't got them back yet. Also found out the front pedals separate off the front crank pretty easily so I'm going to bake that in black as well. The rear wheels I wound up rattle-canning though as the rubber won't come off of these so easily.

IMG00780-20120805-1709.jpg
 
Well, after almost a week and half of the powder coating shop doing basically nothing and not returning my calls, saying he couldn't get the color I wanted because they didn't make it anymore or he couldn't find it (although I told him the latest code off the suppliers website) I went over there friday, picked up my stuff and walked out. Took it to another place which was much further away but seems A LOT more professional. After talking with them a minute or so, he pulled a sample piece of the EXACT color I was looking for, Sparkle Granny Smith, and said, "No problem, it will be about 5-7 days and cost $125."

Maybe I'm getting older or I've just dealt with this sort of thing enough times, but here is a lesson for you guys just getting into fabrication. If you have to farm something out and you have a bad feeling about that place, you have a second or third option, go with that gut feeling. The second place cannot be any slower than the first and guess what? The first place doesn't care how long it takes or when they feel like getting to it and when you get the bill don't expect any discounts for them having had taken longer.

Sorry, I'm venting here but it's my skepticism built up over all these years of dealing with crap like this. My '66 bus took a year and half to get painted after several coming-to-..... talks and me dropping by unnannouced did stuff actually get done.

Enough of that, continued with the seat yesterday. I got the material the other day which is a vinyl and a fairly close match in color to the grips. Did two layers of cushion with the bolt heads cut out so it's flush. If you don't accomodate for the bolt heads it will show up when you do the outer layer of covering. Just like on a car with bodywork, if it's not smooth it will look like poop even after you paint it. Will probably do one more layer of padding. The cross stitching will take quite a bit of time though, I wish I had an awl but I have something else that should work to open the holes up enough to get the cord through.

IMG00783-20120811-1511.jpg
 
Got the rest of the seat done. Was working on the cord stitching all week, took a very long time so I did it in stages 20 and 30 minutes here and there. Did one more layer of padding on the metal part then sprayed and attached the vinyl to the metal portion and began working the edges over. I've done several, several sets of interior door panels on VWs over the years so you learn little tricks. I did hot-glue starting at the edges working my way towards the center but only in 2 inch sections at a time. If you work the material starting from one side (only one side) and go all the way around it will shift the material off-center. It's better to work one edge, then the opposite (kind of like torquing up a cylinder head). The material looked good when I got everything done...but when I mounted the cushion part to the seat it bows a little and made some unfortunate ripples in the material. Not much that can be done about it, if the material is loosened it only looks worse and no room to go tighter. Hopefully over time things settle in and it forms a little better.

The bottom side, note the notches cut to accommodate the material on the backside. Hot-glue works OK, but a little stronger adhesive was needed at the ends of the flaps.

IMG00788-20120818-1452.jpg


Mounted with the seat post, not perfect, but I'm OK with it.

IMG00791-20120818-1543.jpg
 
Got the parts back today. Took two days longer than they promised but...they turned out great. They had to redo the frame a bit yesterday because when they heated it some bonding stuff oozed out of the connection joints onto the paint. They sanded those parts and redid them at a lower heat. They didn't weld frames like these in the old days. I saw a british bike this past spring and the guy said apparently they would fit the pieces together with some sort of bonding material on the inside, then heat the parts and that was the 'weld' to hold them together.

Anyhoo, going out of town on vacation so won't be able to put it back together right away. Still need to powdercoat the front wheel black as well.

IMG00795-20120823-1356.jpg
 

Latest posts

Back
Top