After seeing Gamebent's LED conversion of a Puch moped headlight here (a little down the page):
http://www.ratrodbikes.com/forum/viewtopic.php?f=6&t=51150&st=0&sk=t&sd=a&start=45
I decided to give it a try. I thought I would post here as a DIY project instead of in the Gallery.
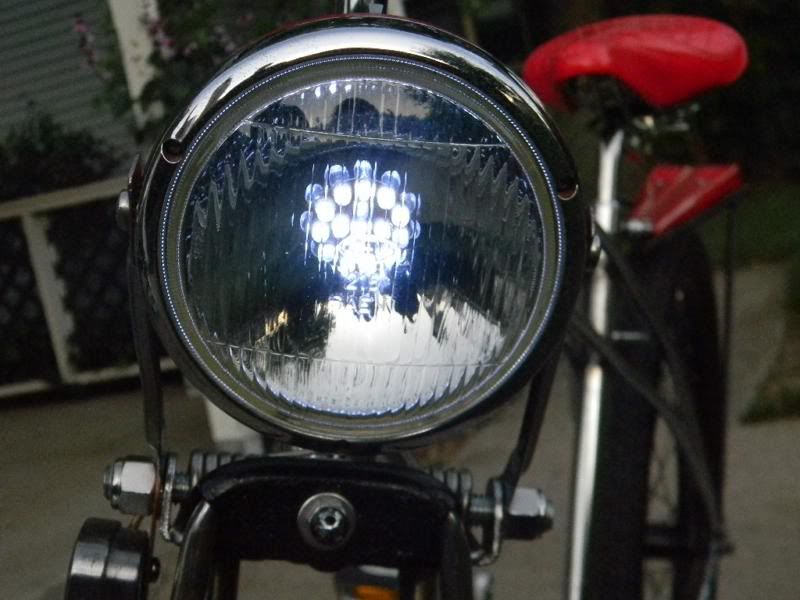
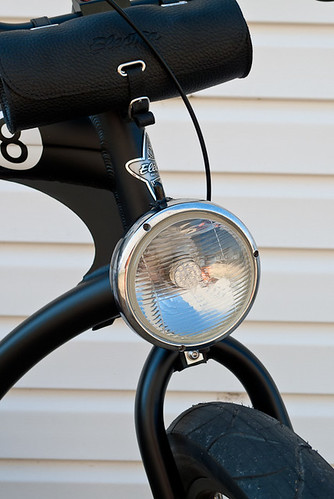
I bought a Puch light and a pair of the 24 LED lamps that Gamebent used off eBay and waited. The Puch looked different than the one Gamebent used so I was a little concerned if it would work. The headlight arrived last week and indeed the housing is much shallower and built differently than Gamebent's. It was, however in great condition and would require no painting.


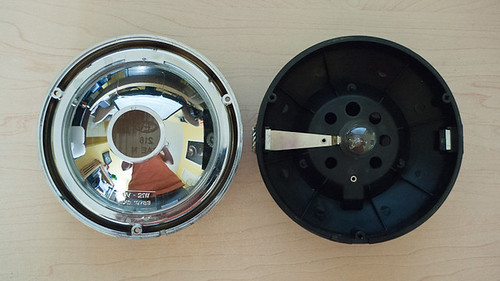
The inside was so small, that I was worried if I could fit a battery and switch inside.
I went to Fry's Electronics yesterday and bought a couple of small switches and a few other things so I was ready to give the conversion a shot when the bulbs arrived.
Good timing as the 24 LED bulbs arrived today. I jumped right on the project.

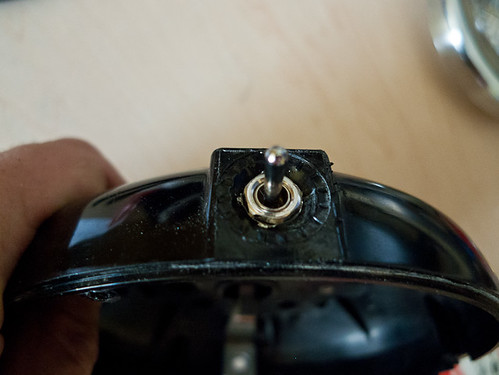
After spending an hour or so contemplating the situation, I decided to use one of the metal side mounts as the position for the switch since my plan was to only use one mounting hole on a bracket to mount to the bike.
I drilled out the threaded hole enough to allow the neck of the toggle to pass through and then ground down the outside metal collar until it popped off allowing me to enlarge the remaining hole enough to seat a nut to grab the neck of the toggle. It looked like this:
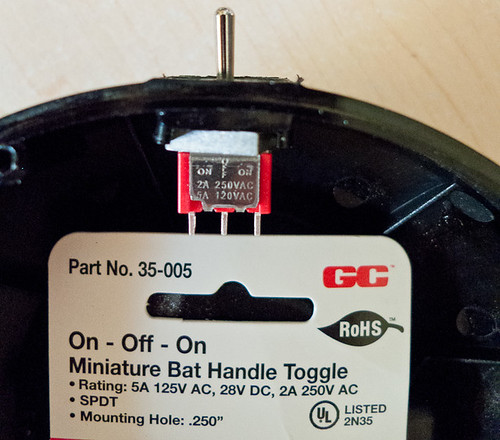
Here's the inside view of the switch with the package hangar cardboard in case anybody needs to know what switch I used. I couldn't find a simple tiny on/off toggle, so I had to settle for an on/off/on switch and just leave one side unconnected.
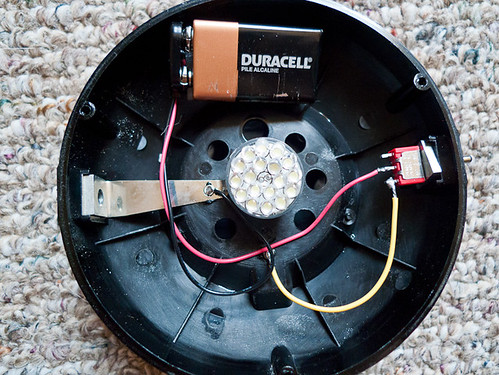
I was lucky that a 9-volt battery just fits inside the light at a slight angle. A thin layer of foam under the battery keeps enough pressure on it that it does not rattle around in the housing. The wiring was pretty straight forward.
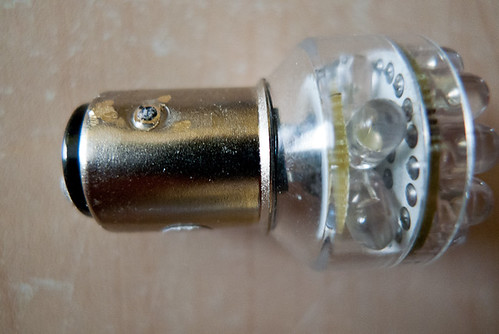
The bulbs that I received had offset nubs to lock into the bulb area instead of opposing nubs like on the original bulb. A Dremel grinder took care of one of the nubs in a jiffy.
Since the outside of the switch/housing was a little ungainly

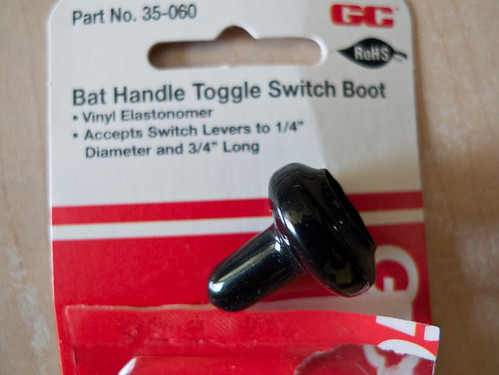
I had also bought one of these:
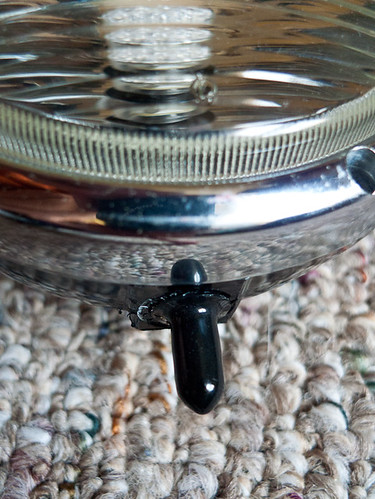
A little trimming of excess rubber and I had this:

A little silicone sealant and I think it looks better and seals the switch against moisture
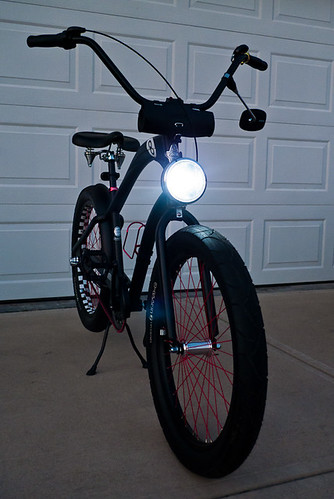
I forgot to take a picture with the light on, but it is really bright!
I have to find a bracket that I like to mount it and then I'll put up a couple of final pictures.
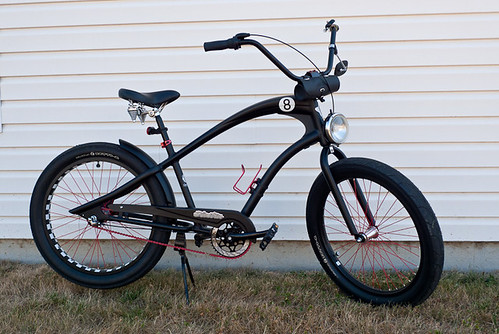
This is the first time I've tried something like this and it was fun. Plus, I have a really bright light for my Straight 8 for about $30 total.
http://www.ratrodbikes.com/forum/viewtopic.php?f=6&t=51150&st=0&sk=t&sd=a&start=45
I decided to give it a try. I thought I would post here as a DIY project instead of in the Gallery.
I bought a Puch light and a pair of the 24 LED lamps that Gamebent used off eBay and waited. The Puch looked different than the one Gamebent used so I was a little concerned if it would work. The headlight arrived last week and indeed the housing is much shallower and built differently than Gamebent's. It was, however in great condition and would require no painting.
The inside was so small, that I was worried if I could fit a battery and switch inside.
I went to Fry's Electronics yesterday and bought a couple of small switches and a few other things so I was ready to give the conversion a shot when the bulbs arrived.
Good timing as the 24 LED bulbs arrived today. I jumped right on the project.
After spending an hour or so contemplating the situation, I decided to use one of the metal side mounts as the position for the switch since my plan was to only use one mounting hole on a bracket to mount to the bike.
I drilled out the threaded hole enough to allow the neck of the toggle to pass through and then ground down the outside metal collar until it popped off allowing me to enlarge the remaining hole enough to seat a nut to grab the neck of the toggle. It looked like this:
Here's the inside view of the switch with the package hangar cardboard in case anybody needs to know what switch I used. I couldn't find a simple tiny on/off toggle, so I had to settle for an on/off/on switch and just leave one side unconnected.
I was lucky that a 9-volt battery just fits inside the light at a slight angle. A thin layer of foam under the battery keeps enough pressure on it that it does not rattle around in the housing. The wiring was pretty straight forward.
The bulbs that I received had offset nubs to lock into the bulb area instead of opposing nubs like on the original bulb. A Dremel grinder took care of one of the nubs in a jiffy.
Since the outside of the switch/housing was a little ungainly
I had also bought one of these:
A little trimming of excess rubber and I had this:
A little silicone sealant and I think it looks better and seals the switch against moisture
I forgot to take a picture with the light on, but it is really bright!
I have to find a bracket that I like to mount it and then I'll put up a couple of final pictures.
This is the first time I've tried something like this and it was fun. Plus, I have a really bright light for my Straight 8 for about $30 total.
")