$9 each... That's $36 plus shipping. I think I'll just make them, but thanks for the link.McMaster-Carr has very fast shipping. https://www.mcmaster.com/products/f...ic-to-metric-male-female-hex-thread-adapters/
- COMPETITIONS
- THE COMPETITION ARCHIVES
- THEME BUILD OFFS
- MUSCLE BIKE BUILD OFF (MBBO #12) 2023
- MBBO 2023 (MBBO #12) - CLASS 1
- MBBO 2023 (MBBO #12) CLASS 1 BUILD JOURNALS
You are using an out of date browser. It may not display this or other websites correctly.
You should upgrade or use an alternative browser.
You should upgrade or use an alternative browser.
ConTENtious
- Thread starter CRASH
- Start date


Help Support Rat Rod Bikes Bicycle Forum:
This site may earn a commission from merchant affiliate
links, including eBay, Amazon, and others.

I was going to vote for the round hole spoke protector, but the other one does compliment the chain ring nicely.
I don't have the right spacers at work. So... Plan C.
Looks like Plan C is brass, from Amazon. Will arrive tomorrow. Crossing fingers that 10mm is enough spacing. I was thinking 15mm but those aren't available. Hopefully 15mm would have been overkill.

Looks like Plan C is brass, from Amazon. Will arrive tomorrow. Crossing fingers that 10mm is enough spacing. I was thinking 15mm but those aren't available. Hopefully 15mm would have been overkill.
Last edited:
Spacers arrived

After I took this pic I realized the pad’s mounting post was bottoming out and wouldn’t allow the spacer to snug down. You can see the space. So I ground it down a bit and it was snug.

So I tried it out

And it worked! So I set up all 4.

Those are clamps holding the pads against the rim.
Next up is to figure out the housing routing and to se the brakes up to see if the double-pull lever works.
After I took this pic I realized the pad’s mounting post was bottoming out and wouldn’t allow the spacer to snug down. You can see the space. So I ground it down a bit and it was snug.
So I tried it out
And it worked! So I set up all 4.
Those are clamps holding the pads against the rim.
Next up is to figure out the housing routing and to se the brakes up to see if the double-pull lever works.
Got the front housing situated. The front hub doesn’t have its brake pads in the drum, so I can’t test it until I build the bike… but what could possibly go wrong?

Aaaaaaaand I stripped the tightening bolt on my Feedback stand. That’s the second one I’ve worn out since I’ve owned this stand for 10 years. Not too bad, but bad timing!!
- Joined
- Jul 30, 2013
- Messages
- 1,929
- Reaction score
- 2,685
You know how it goes...

The Renaissance Man
__CERTIFIED DIVER__ (Open Water & Open Dumpster)
Staff member
Moderator
Pro Member
That's awesome, glad it worked. You also get a bonus in that you can use a wrench on the pad side when you tighten them!Spacers arrived
View attachment 251155
After I took this pic I realized the pad’s mounting post was bottoming out and wouldn’t allow the spacer to snug down. You can see the space. So I ground it down a bit and it was snug.
View attachment 251156
So I tried it out
View attachment 251157
And it worked! So I set up all 4.
View attachment 251158
Those are clamps holding the pads against the rim.
Next up is to figure out the housing routing and to se the brakes up to see if the double-pull lever works.
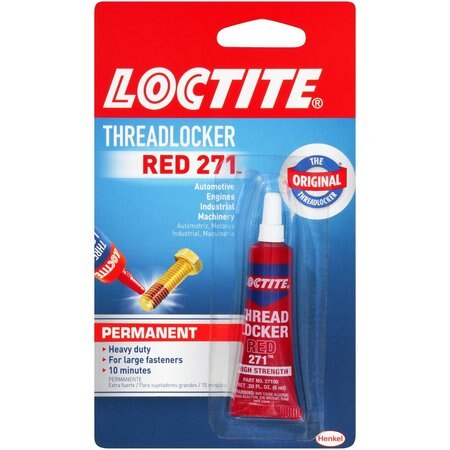
It may not be an issue, but if you think that the spacer might loosen from the stud you could make them permanent with Loctite Red 271. I wouldn't recommend it until you know for sure that everything is dialed in though. Once you use it, there's no turning back.
Pulled off the handle. You can see where the threads are stripped out where I added a super professional looking arrow.

Replacement is on order.
Replacement is on order.
While I’m waiting on the new tightening bolt, I thought of a solution. By adding spacers behind the pads it engages the bolt on fresh threads. So that should hold a while.

I tried a 20” kickstand and the bike almost falls over. So I bought a 24” kickstand and it stands up too straight. So… modification time.
I cut the foot off.

Stuck it in a press brake

And there we go

Stands much better now.

I cut the foot off.
Stuck it in a press brake
And there we go
Stands much better now.
Today was rear cabling day. So I had to set up the seat and sissy. Yesterday I dropped the springs off at the powder coated for some gloss black.

So the sissy set up today was just a mock for position.
This frame and fork has been abused over the years as you may have gathered from the work I had to put in on the fork. The entrance to the seat tube shows a good amount of abuse as well. This won’t do because the top lip is painted and shows inside the chrome clamp.

So I put in a fair amount of work to smooth all that down. I had a NOS clamp, but the bolt was in decent shape. So after an evaporust bath I measured it, cut it (because the stock bolt sticks out WAY too far), smoothed it and polished it. That whole clamp area is going to look a ton better.


Once the seat and sissy were in place I could set the rear shift cable path, and set up the rear brake housing path. I cut them, and crimped ferrules to them, then set up the cables.

The housing on the handlebars is taped down because they’ll be under handlebar tape.
The rear brakes need a lot of adjustments to work properly with the single lever, but the concept has been proven so I can move forward.
I think I’m done with all the mocking up. I’m going to stop and meditate on it to make sure I’ve done everything. If I have, I’ll break it down and the pieces going to chrome shop will get boxed up and I’ll start frame and fork prep for paint.
So the sissy set up today was just a mock for position.
This frame and fork has been abused over the years as you may have gathered from the work I had to put in on the fork. The entrance to the seat tube shows a good amount of abuse as well. This won’t do because the top lip is painted and shows inside the chrome clamp.
So I put in a fair amount of work to smooth all that down. I had a NOS clamp, but the bolt was in decent shape. So after an evaporust bath I measured it, cut it (because the stock bolt sticks out WAY too far), smoothed it and polished it. That whole clamp area is going to look a ton better.
Once the seat and sissy were in place I could set the rear shift cable path, and set up the rear brake housing path. I cut them, and crimped ferrules to them, then set up the cables.
The housing on the handlebars is taped down because they’ll be under handlebar tape.
The rear brakes need a lot of adjustments to work properly with the single lever, but the concept has been proven so I can move forward.
I think I’m done with all the mocking up. I’m going to stop and meditate on it to make sure I’ve done everything. If I have, I’ll break it down and the pieces going to chrome shop will get boxed up and I’ll start frame and fork prep for paint.
That seat clamp area looks a ton better. This is such a cool build. I can't wait to see it in paint and plate!
The Renaissance Man
__CERTIFIED DIVER__ (Open Water & Open Dumpster)
Staff member
Moderator
Pro Member
Looking good!
I've been doing the same thing today. I'm curious to see how you crimped the ferrules. I ended up using my cable cutters to gently crimp round and round in an attempt to simulate the factory-looking crimps.
Today was rear cabling day.
I cut them, and crimped ferrules to them, then set up the cables.
I've been doing the same thing today. I'm curious to see how you crimped the ferrules. I ended up using my cable cutters to gently crimp round and round in an attempt to simulate the factory-looking crimps.
Go back to page 6 of this build. I showed all the steps I do.…I'm curious to see how you crimped the ferrules….
- Joined
- Jul 30, 2013
- Messages
- 1,929
- Reaction score
- 2,685
Apparently, there is a tool for this task, provided you have a spare NINETY DOLLARS creating an unsightly bulge in your wallet.

I blame the Navy for this ridiculous “attention to detail” for things that no one else would notice.
I’m breaking the bike down to get the pieces needing chrome to the player ASAP. These rocker arms for the rat-trap fork would have been fine. I was cleaning up some of the additions I made to one of them and I noticed the edges were rough. Probably because it was cast.

So I had to take my dremel sander to them so they’d be smooth and reflect the chrome better.

THIS is why I always run out of time.
I’m breaking the bike down to get the pieces needing chrome to the player ASAP. These rocker arms for the rat-trap fork would have been fine. I was cleaning up some of the additions I made to one of them and I noticed the edges were rough. Probably because it was cast.
So I had to take my dremel sander to them so they’d be smooth and reflect the chrome better.
THIS is why I always run out of time.
The Renaissance Man
__CERTIFIED DIVER__ (Open Water & Open Dumpster)
Staff member
Moderator
Pro Member
...But it looks so much better! 

BTW that part is stamped steel.
BTW that part is stamped steel.
Nothing wrong with a little OCD: Obsessive Chrome Disorder.
Latest posts
-

-
-

-

-

-
-
Bike from the Dead's Freshly-Exhumed Finds (Everything I've dug up since 6/15/21)
- Latest: Bike from the Dead
-

-
