Black Tie-phoon

Rat Rod Bikes Bicycle Forum

Help Support Rat Rod Bikes Bicycle Forum:

This site may earn a commission from merchant affiliate links, including eBay, Amazon, and others.
Tires that have their width shown fractionally (26x1-1/2") are larger in inner diameter than tires with a width in decimals (26x1.5"). This is basically the difference between a 26" MTB/Cruiser wheel and a 26" road bike wheel. 26" is the nominal OUTER diameter of the tire, though there's a lot of leeway in that measurement. Chart can be found HERE:

http://www.sheldonbrown.com/tire-sizing.html
 
gowjobs said:
Tires that have their width shown fractionally (26x1-1/2") are larger in inner diameter than tires with a width in decimals (26x1.5"). This is basically the difference between a 26" MTB/Cruiser wheel and a 26" road bike wheel. 26" is the nominal OUTER diameter of the tire, though there's a lot of leeway in that measurement. Chart can be found HERE:

http://www.sheldonbrown.com/tire-sizing.html

EXCELLENT info! Thanks a lot, that clarifies things; the tires I got are actually equal to 650Bs - who knew???
I'm guessing that also explains why "regular" decimal sized 26" tires don't fit Schwinn rims. :roll:
Funny how even after all these years being immersed in all things "bike" you can still learn something new.
And thanks once again for the compliments, guys. 8)
 
Ouch! :?
Funny how these weird anomalies creep up on you every once in a while. Just when you think you "know all" about a subject, something like this sneaks up and kicks you in the head!
 
YIKES! Too much time has gone by! Too busy at work, and too busy enjoying the beach and summer activities when I'm not working lately. Suddenly one week left and time to get my posterior in gear!
Have added so many things since last I posted here, and every one seemed like a good idea, but after installation, they all just seemed to be overdone, or mucked up the whole "clean, classy" idea, or too blingy, too lowrider, too something.
Sooo...I've decided to just go with my two "TOP SECRET finishing touches", and leave it at that. :mrgreen:

First off are "diamond cufflinks" to go with the Black Tie ensemble:

024-6.jpg


(Huge thanks to member "Arreaux" for the hot tip!) These are actually "bling" license plate screws from WalMart! The studs fit the holes in the ends of the hand grips perfectly, fastened on the inside by the nuts that would be used to mount them on your car, and they were exactly what I was looking for, after trying several other items that weren't quite right:

025-5.jpg
 
Yup, the big "piece de resistance" finishing item is the requisite bow tie to 'tie' the whole theme together! 8)
I went through several ideas on what to use, and/or ways to rig something that would work (many that were suggested here), from strapping on actual tuxedo ties to bronzing a real tie (I really wanted something metal for the bike application), that would look appropriate in place. Finally, I saw something online, and kind of, uh, "copied" that idea... :mrgreen:
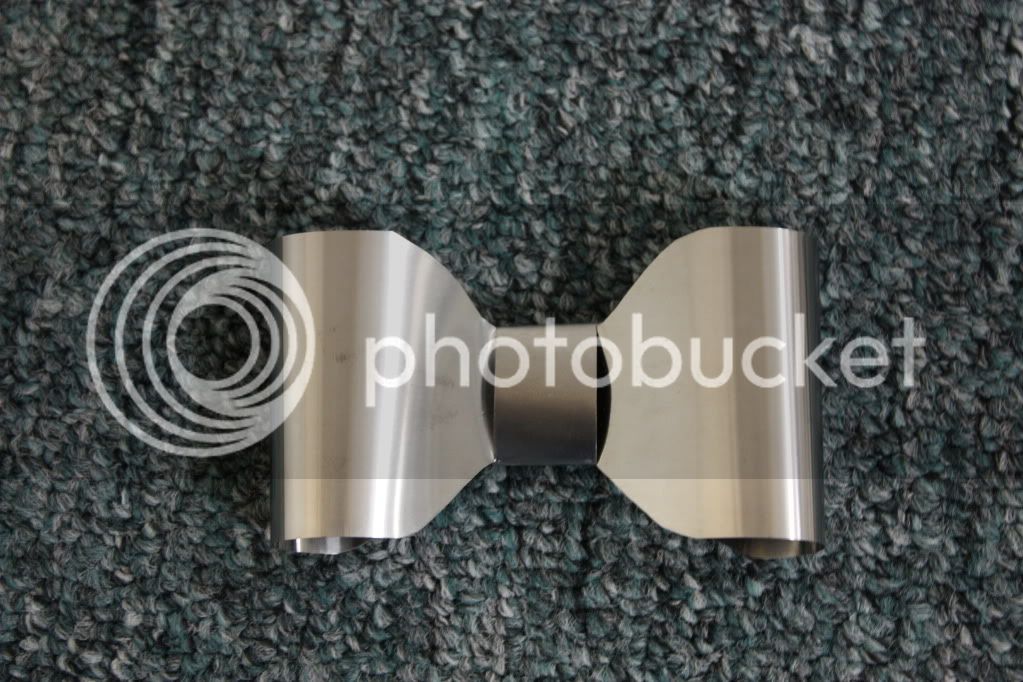
I have a company that sells aircraft and proprietary fasteners, and we have access to some extremely odd materials. I finally got hold of some small .003 thick metal sheets - VERY thin stuff. I found that if you worked with it carefully, it was just firm enough to bend without creasing or folding, and started cutting some patterns to make a tie. I drew them out on paper, folded them in half for symmetry, then traced them onto the metal, and cut them with a pair of titanium scissors we have here (very sharp, and will cut through most anything!). This was unbelievably time-consuming and painstaking work!
While I couldn't be happier with the end result which really turned out nice, I have to say that this was the 4th or 5th try! It's not perfect, but it's as close as I can get with what I'm working with. I was getting a little concerned that I was going to run out of the little bit of material I had before I got it right! Getting the size and shape right were a lot tougher than I expected - I have a lot more respect now for people who sew and make clothes from scratch like my grandmother did!
Here's how it turned out:

026-2.jpg


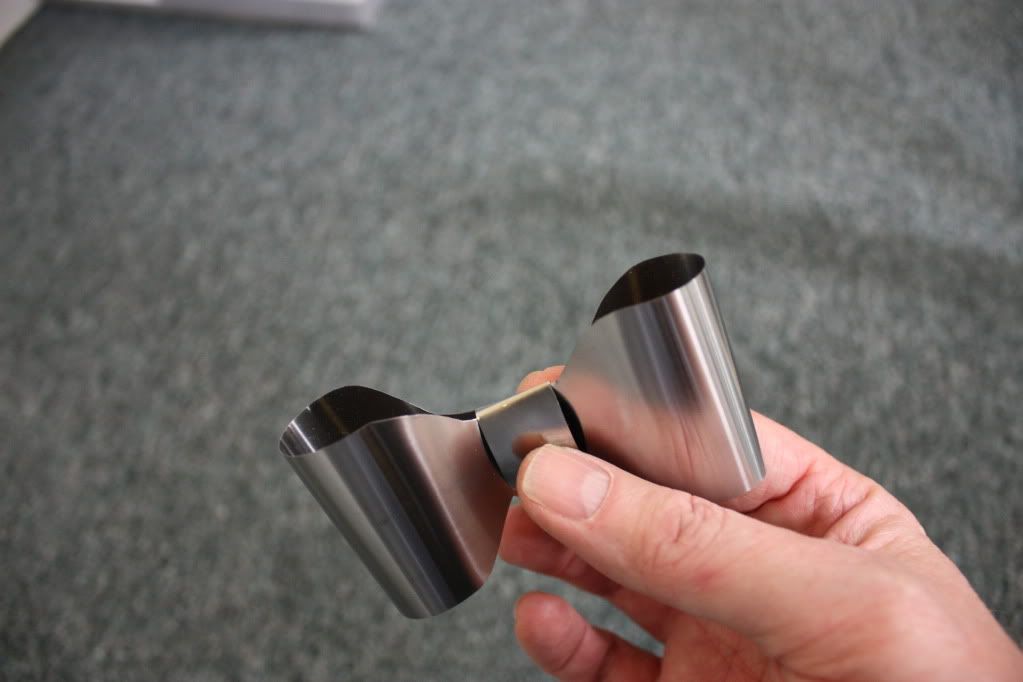
And another shot to show a little more detail:

023-10.jpg


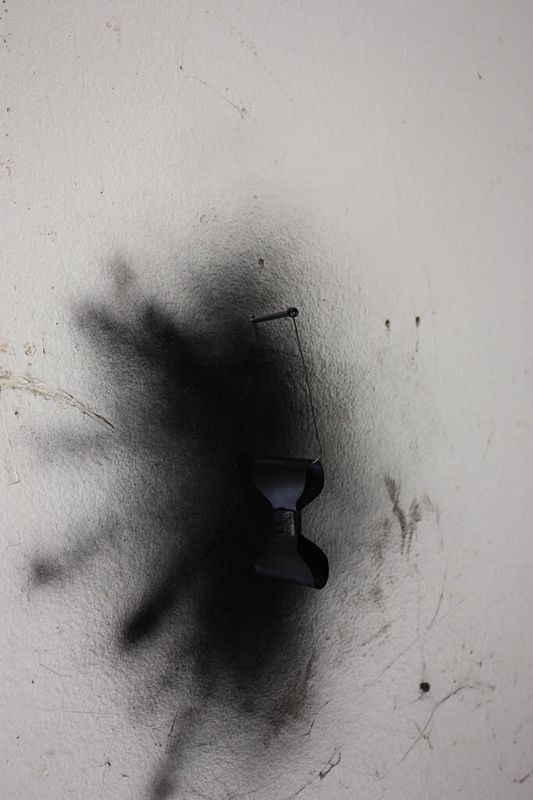
Anyway, after the end product was finally right, I needed to paint it - this is a Black tie affair after all - and went with a semi-gloss paint. I was looking for a satiny finish, so that it would look "real", and also stand out against the gloss of the frame and all the chrome stuff. I used several light coats, using some very high-tech bracket equipment in my warehouse :lol: being really careful not to make any runs, because there was NO WAY this metal would withstand sanding if I screwed up:

029-10.jpg


(And I just realized I must have somehow deleted my close-up shot of the painted piece, so you'll just have to wait to see it on the finished entry below! :? )

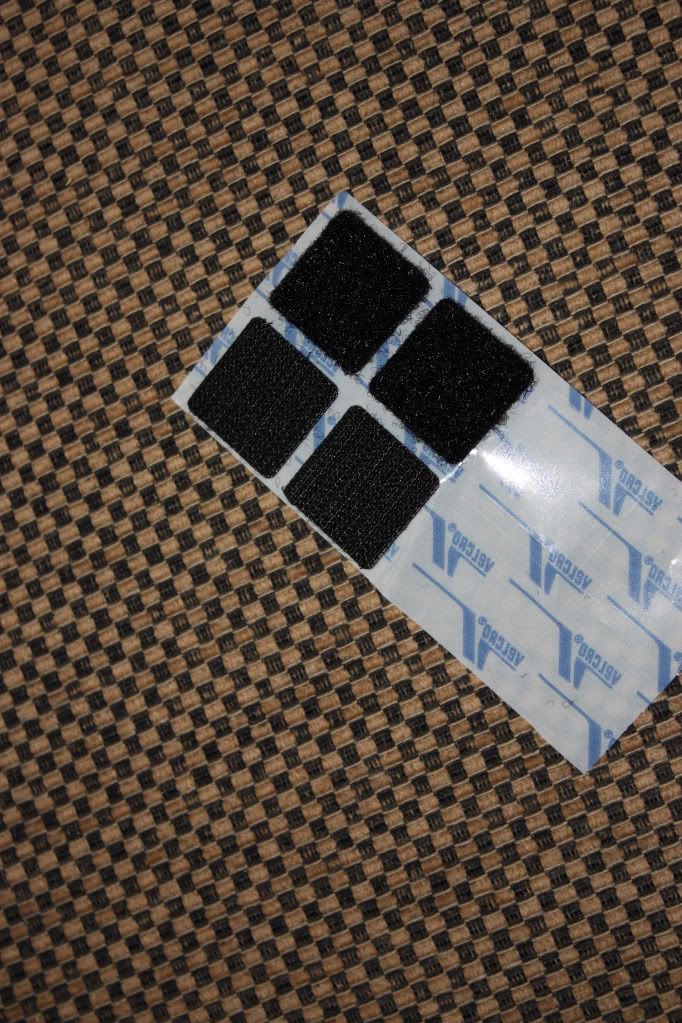
I toyed with attaching it with straps like a clip-on tie would, but it looked kind of funky, and it wouldn't hold up to any kind of mechanical attachment like a screw, so I finally decided on a good ol' Velcro patch. Stuck onto the stem, at the "neck" of the outfit where it should be, it looks pretty much how I originally pictured it in my head.
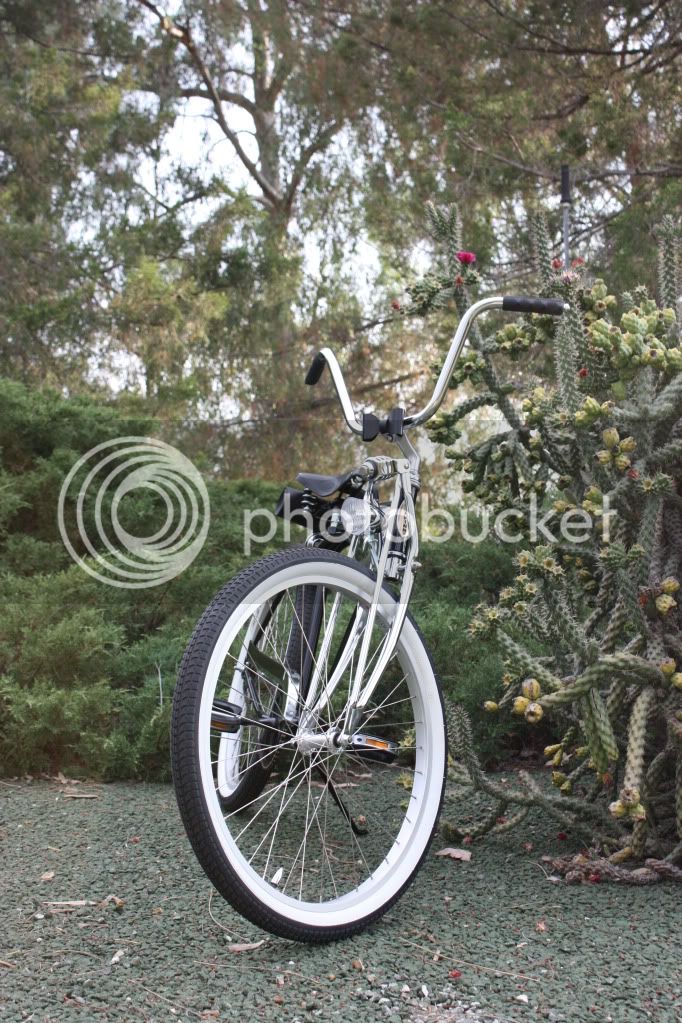
027-4.jpg


Ta-daaaaaa:

057.jpg
 
CLASSIC!! REALLY SMOOTH. HOW MANY VOTES DO WE GET ?!? PEACE
 
Jake Sensi said:
CLASSIC!! REALLY SMOOTH. HOW MANY VOTES DO WE GET ?!? PEACE

Three, but according to what I've seen from following all your comments, you've already promised about 20... and none to me! haha
 
Very smooth, classy, and clean. The theme is noticeable but not so far into the theme that it got busy or cluttered. Congrats... it's beautiful.
 
Back
Top