"Chunkpunk" Doneski!

Rat Rod Bikes Bicycle Forum

Help Support Rat Rod Bikes Bicycle Forum:

This site may earn a commission from merchant affiliate links, including eBay, Amazon, and others.
That's incredibly cool, but out of my league in terms of tools and skillset.
My "tank" may not even turn out to be a tank in the normal sense, but is meant more to fill the inner triangle of bike with things and mechanical do-dads to give it a largely retro futuristic fantasy vibe while at the same time, drawing your attention away from of the fairly normal and modern geometry.
 
Well, looks like I had some time to get the frame painted up over the weekend.

While this was abit of work getting the finish I wanted, I'm not sure if I'll finish out like this, or add abit more detailing in once I get to mock up/assembly stage.

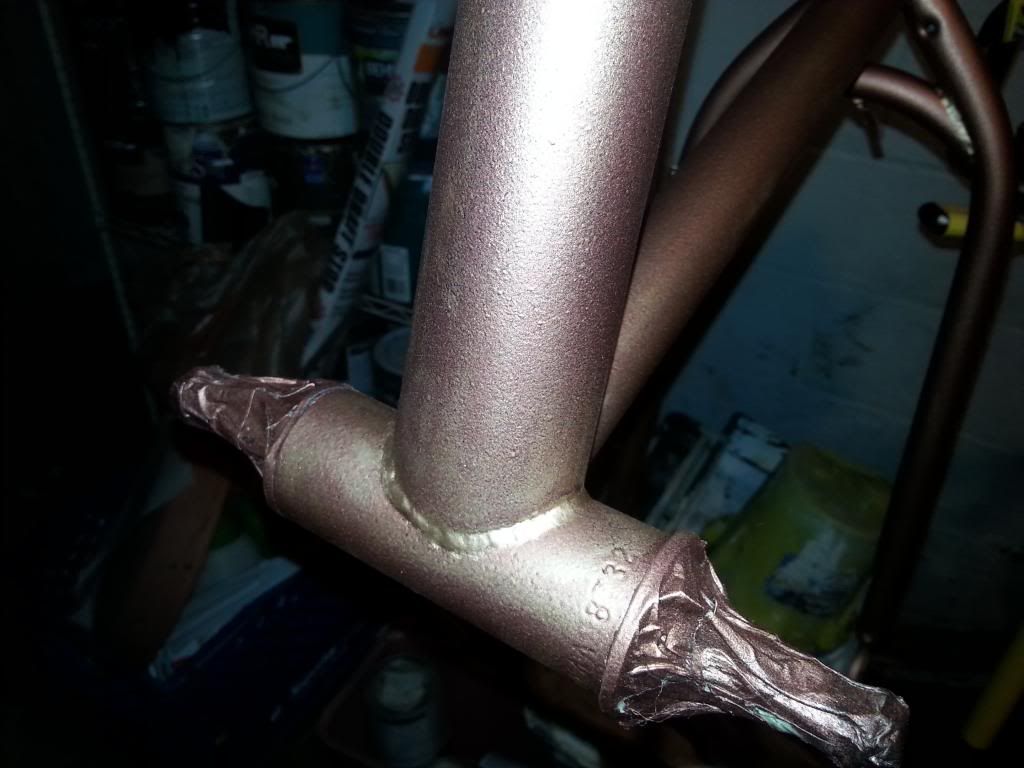
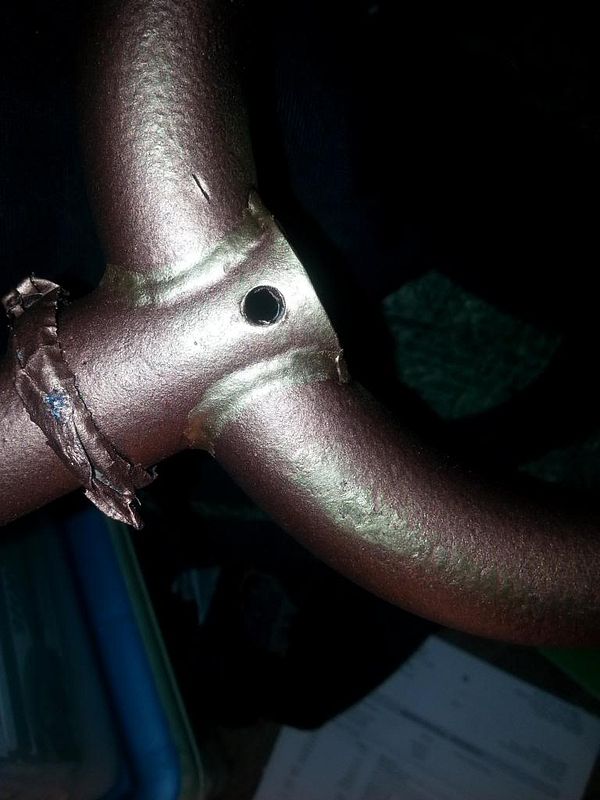
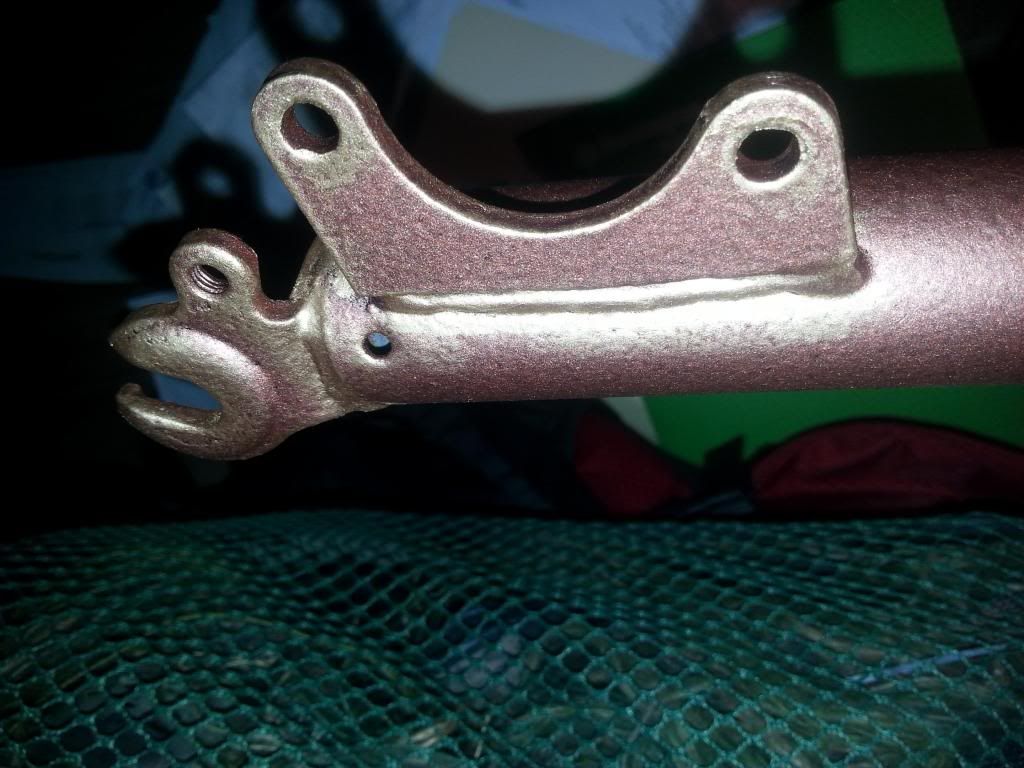
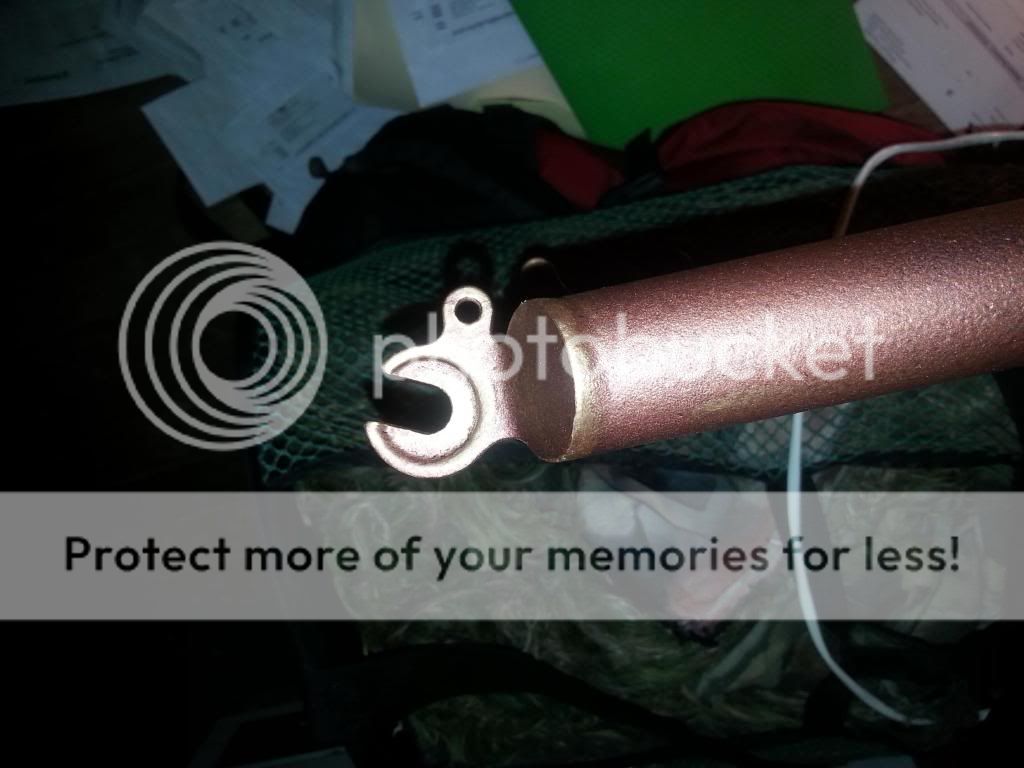
Being that this is a steampunk styled bike, I had to go with, you guessed it right, lots of copper, brass, bronze and leather. Also, another key element to this is age.

My build is almost the complete inverse of what everyone else is doing. They are taking older frames, and redoing them to make them look newer. I'm taking a newer frame(2-3 months old?) and attempting to make it look old. Really old.

Things in my little post-apocolypic, steamy, fantasyland are well used. This means I have artistic freedom in order to make it look like its been used and abused. You'll find with age, things breakdown in a random way, to me, this means I have to use multiple different layers of in order to give the finish an inconsistency to it.

I've used 6 layers of paint on the frame in order to give the bike that inconsistency, as well as some areas of wear would they would be given normal useage.
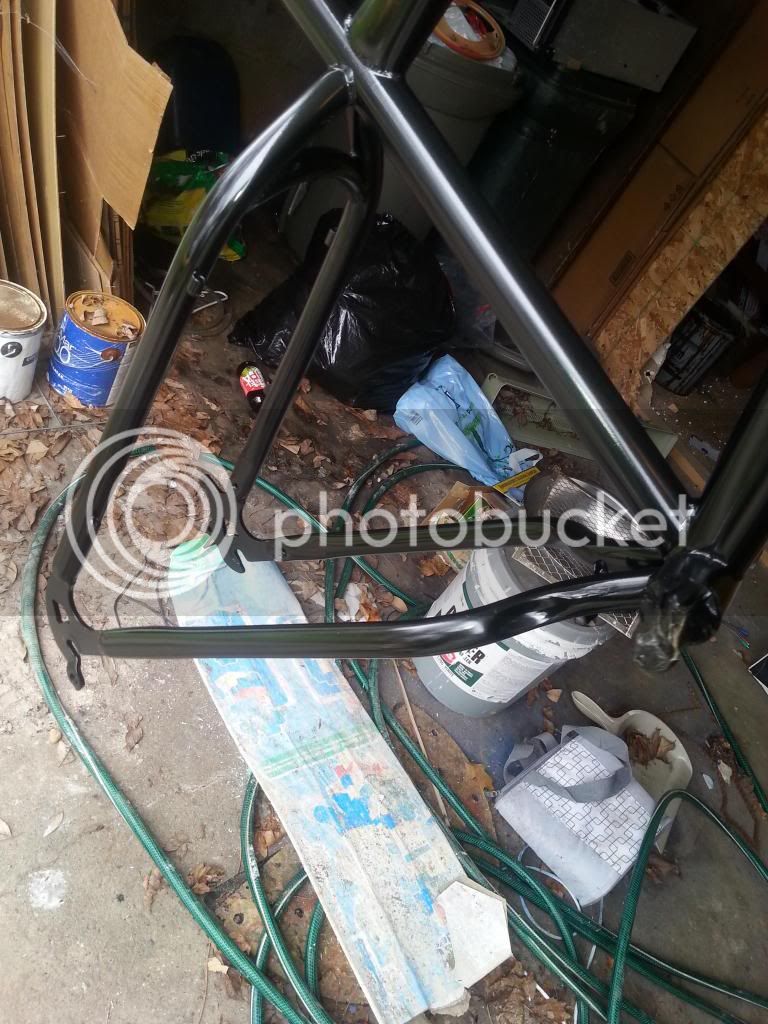
First up, Primer:
I decided to get my bike abit more of a darker, aged look to it, so my base primer will be satin black.
I prefer to use Krylon Fusion for my primer, I find that it has very good sticking power, as well as flexibility to use on plastics. I really like this paint, fully cured and cleared it is extremely resilient.

[/URL]


Looking back on this, I wish I would have used a greenish, oxidized copper for the first layer to give it abit more realistic of an aged look. I still like this, but the slight speckle of green would be abit better I think.

Anyways, for the first layer after the primer, I'm going to use Krylon Make-it-Stone Copper metallic. This is a paint normally used to give a rusty/aged copper look. For a picture frame of something it would look good, but on a bike, I feel it just doesn't provide the depth of color or inconsistency I would like.


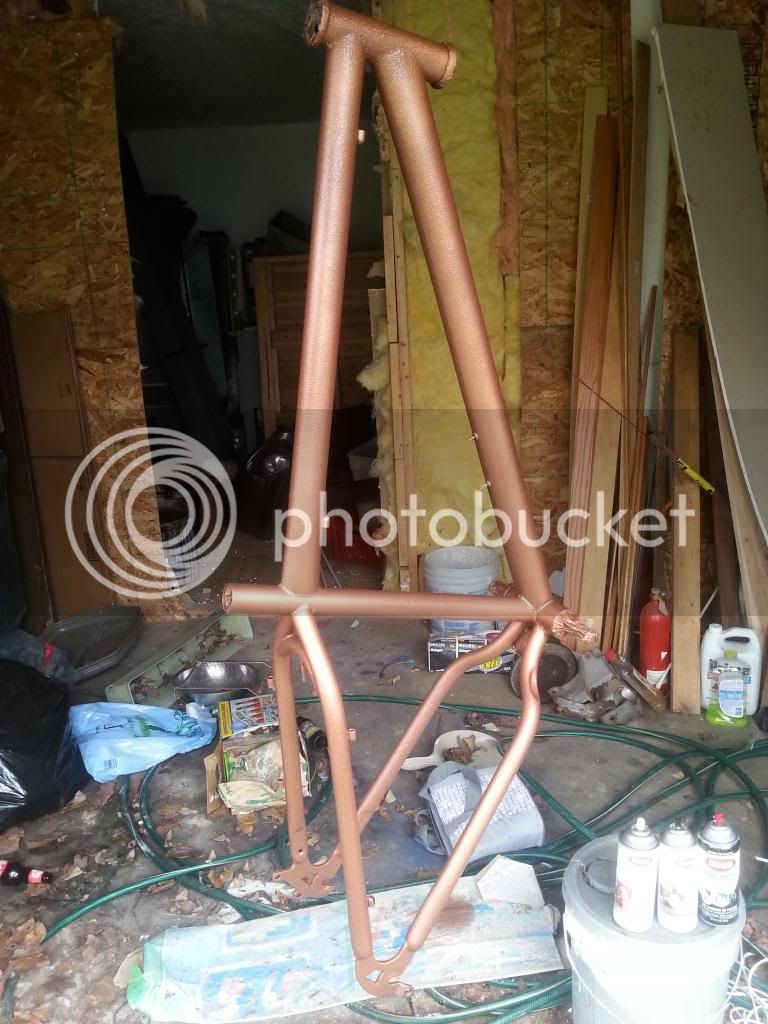
So before this layer was allowed to dry, I took some Krylon Copper Metallic and gave the paint a slight misting. This paint is more brighter and more metallic and is meant as a single sheen. I really liked how it gave the copper more of realistic shine, as well as giving the overall frame more color diversity to show that ageing.


Just after that misting, I put another light misting of the Make it Stone Metallic copper over the whole frame.
(I forgot to take pictures of the frame after this misting)

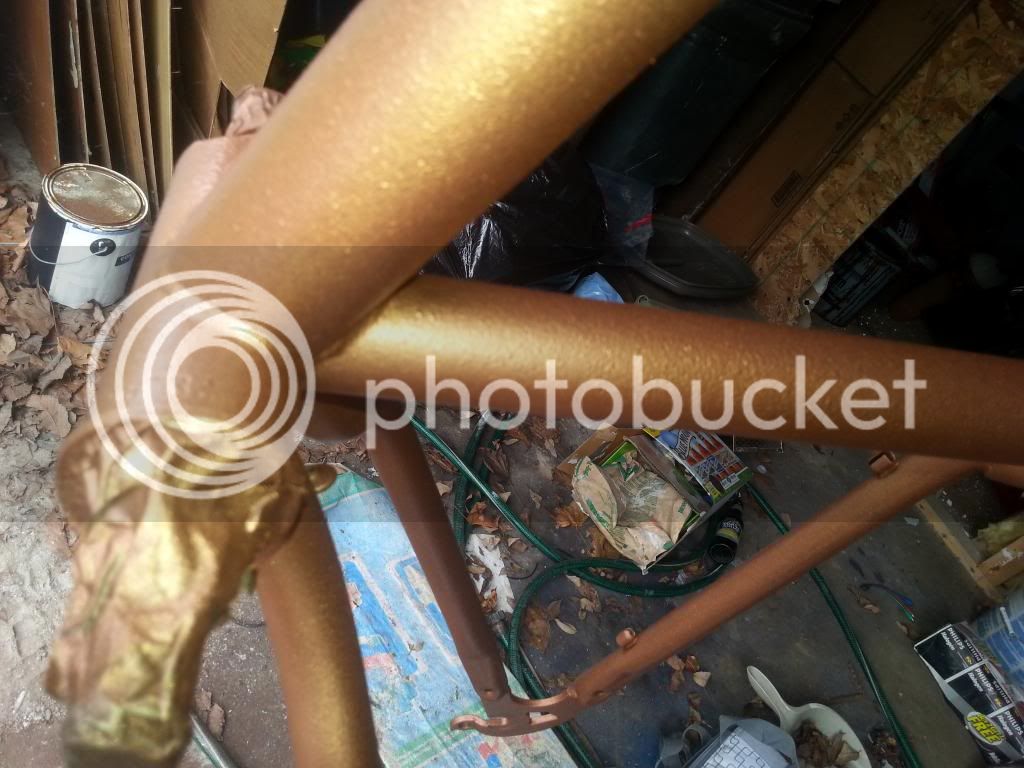
For the final paint on the frame before the clear, I'm using a product called "Rub and buff" Its found in art and craft stores by the gold and copper leafing supplies. While I've never personally seen this used on a bicycle before, I'm sure someone has had to have done it previously. In essence, what this stuff is, is a metallic enamel and wax paint that you apply with your fingers (you can use a brush or another applicator, but it actually reacts with your skins oils) to give objects a worn, aged look. This product is used extensively in the cosplay and propmaking world, and this won't be the only technique that I am learned from them...

For the frame, I'm using "Antique gold"
What I am have done is to take a Q-tip and to go over all the weld lines, to make it look as if it was copper that was brazed together, then I used my finger to go over areas that would typically see higher than normal wear. Such as dropouts, chainstay slapping area, bottomside of the downtube and crank areas, any areas that a bike would typically see rock strikes, as well as being handled, such as the seatpost tube, etc.

I find that it this product does a great job giving the bike that worn out, used look.


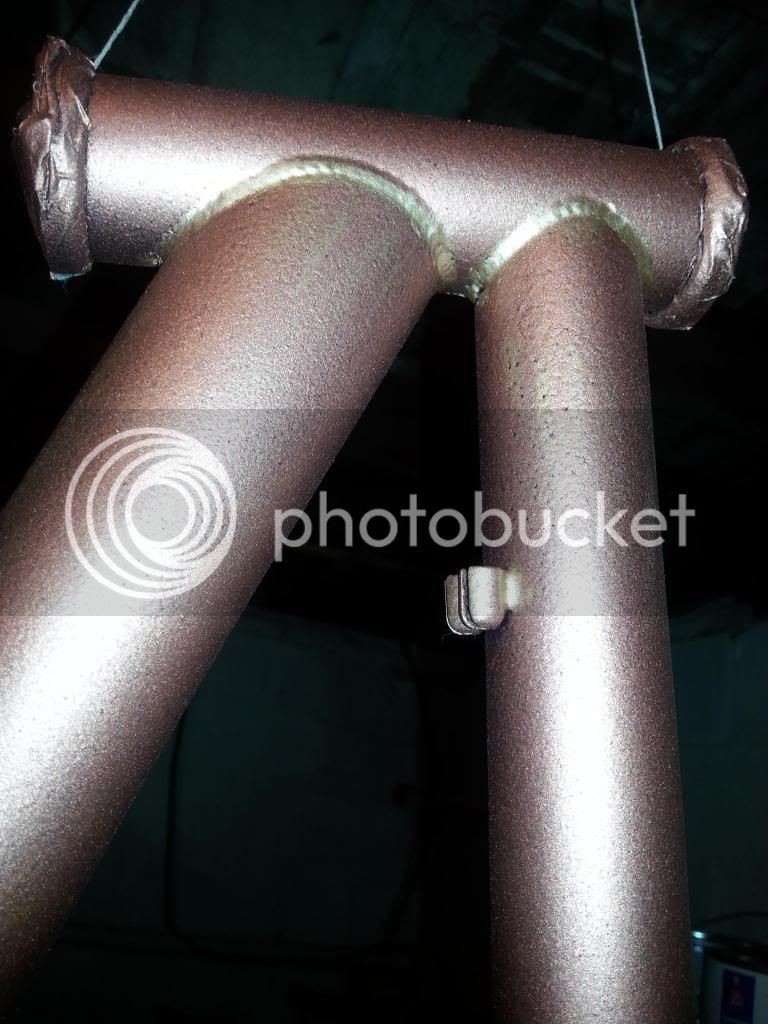
Hopefully you can make out the pictures, I think my cell camera does not do a good enough job of really showcasing the depth of colors used. I will take some better shots when the paint has fully hardened out in sun without a flash.

Overall I'm happy with the frame color and glad I was able to get this done, this was the easiest part of my build. All of the custom stuff is coming soon, I am still waiting on a few different items in order to proceed.

After the initial interest, it looks like I was dropped all the way back to the 2nd last build. I promise that won't happen again. I have quite a few more surprises in store that I'm pretty sure not only will you like, but you will have your pants blown off ;)
 
At this stage I would not be too concerned about final placing. Lurking around the last couple of years there is a good mix of marathon builds, sneaky jump in and lightning fast build, and builds that seem to start one direction and almost develop their own personality that warps the original plan into something fantastic.
At least you are actually out there building. The cosplay and propmaking world can give ideas and techniques that help that alternative feel you are speaking about.
 
Looking good, interesting you're going for aged copper colour on the frame as my build is going aged antique bronze. I'll be keeping an eye on this n see what else happens with it. :)


Sent from my iPhone using Tapatalk
 
Yea, I think copper is nearly my favorite frame color, I went with it because I really like the texture that the make it stone paint gives, makes it look like it has really aged and gotten some surface rust.

I just absolutely love the way the Rub N Buff goes onto and "wears" them. It was also used on my tophat, and will play a role in every piece and part I will put onto the bike.

Wheels will be oil rubbed and antique bronze.

I'm getting really sick of waiting for this slow boat from China. For real, its been 7 weeks since I ordered the part(s) I needed, and still havn't received them yet. And I've been waiting for 3 weeks now to order the tires, but they have been sold out for some time now. Really starting to get worried I won't be able to score a set before the build off ends.

Also,
I plan putting an electric motor onto this bike, most likely next year, as I don't have the resources right now to spend $1000 or so.
I don't feel so bad waiting 2 weeks for my tire now. Who did you order from?
 
Some chinamen on Amazon.

The wait wasn't worth the 20% I saved by ordering from them.
Ended up ordering more from a US supplier, guaranteed 2 day delivery.

I have to put up some pictures of my various tidbits of stuff no one else would think to put on a bike.
Its quite an ecletic collection of, uh "stuff"
 
Ok, did abit more with the rub on the frame last night during the insane storm we had.
Got the SLR out and took some better pictures, these show the variety of color and the texture a lot better.


I'm really happy with the way the paint turned out. Definitely gives it the bike a vintage look. The golden braze lines and wear marks really help age it and break up the uniformity a single paint color would give.

Heres a teaser preview of the next step:

 
Well, it looks like most of the guys have shown their hands, so it looks like I need to up the ante abit in coolness. This is yet another thing I've never seen anyone do on a bicycle...

And so, nothing says I'm tough like a big fat bike.

That is, except a big fat bike, WITH SPIKES, that eats babies.

So, where better to put those spikes other than the wheels?


These are just generic leatherworking screw back spike studs meant for clothing.

I was originally going to drill a hole for each one, but after getting the tires off the wheels and taking a good look at the rim, the way the lip is formed would not allow for a straight hole through, so I had to get some JB weld epoxy to get these on. I put one parallel to each spoke.

I love disc brakes. Without them, I would not be able to do something like this. Coaster brakes could, but honestly, that technology is outdated, and riding around a single speed with coaster brakes has too many limitations for me.

I wanted to do something that was rideable anywhere, multiple speeds, good cockpit positioning, disc brakes. One of my big goals with this build was also to shed some weight from this bike, which comes in at 51lbs stock.

With upgrades to the brakes(avid bb7s), tires and tubes, derailer, chain I will not only have better components, but I'm also going to make a custom made tank and fenders and some bolt ons. All while saving around 8lbs off the stock weight.
 
nice love this hole thing can't wait to see the end product!!!!!
 
I'm digging this bike so...GTB!! Peace


Sent from my iPhone using Tapatalk
 
"Nothing says I'm tough like a big fat bike. That is, except a big fat bike, WITH SPIKES, that eats babies."

Haha, You're right! It looks like this bike is on the way to eating the competition too. Love those wheels!
 
Yup. Not many bikes have the required space there, one of the nicer things about the fat bikes ;)
Would have to get out my calipers again, but I want to say there was around 17mm of space there, and the spikes are only 10mm.

I plan on getting the wheels painted tonite, got the other side of spikes done last night.

From here on out, the build is going to take a turn from the typical bikes everyone has seen.

Heres a couple of previews of the next stuff.


So, just a couple folders here, I'll need these to take you guys to school.

Can anyone guess what I'm gonna use them for?

Heres a hint:


So, just a couple folders here, I'll need these to take you guys to school.

Can anyone guess what I'm gonna use them for?

Heres a hint:

Looking forward to seeing whatever it is that is going to happen here!

Luke.
 
Back
Top