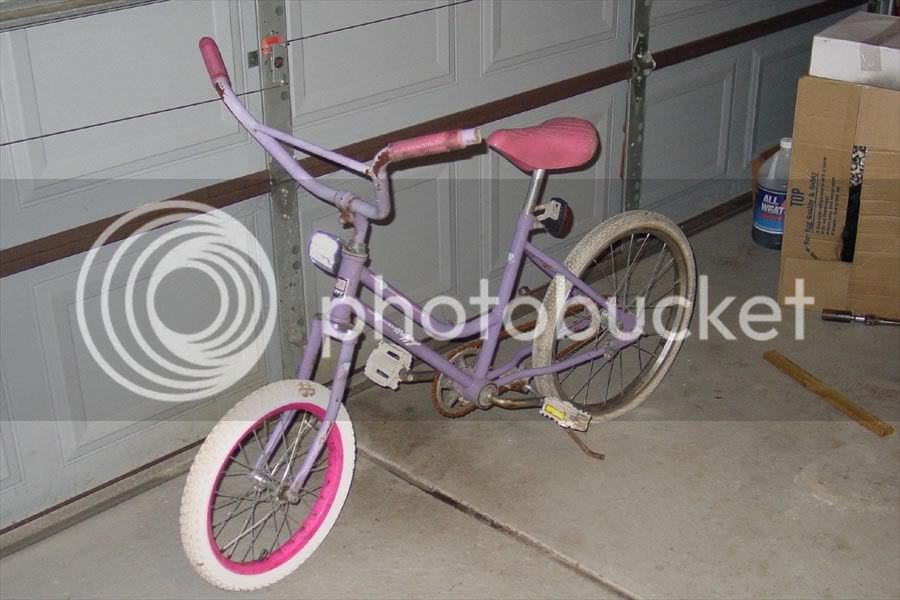
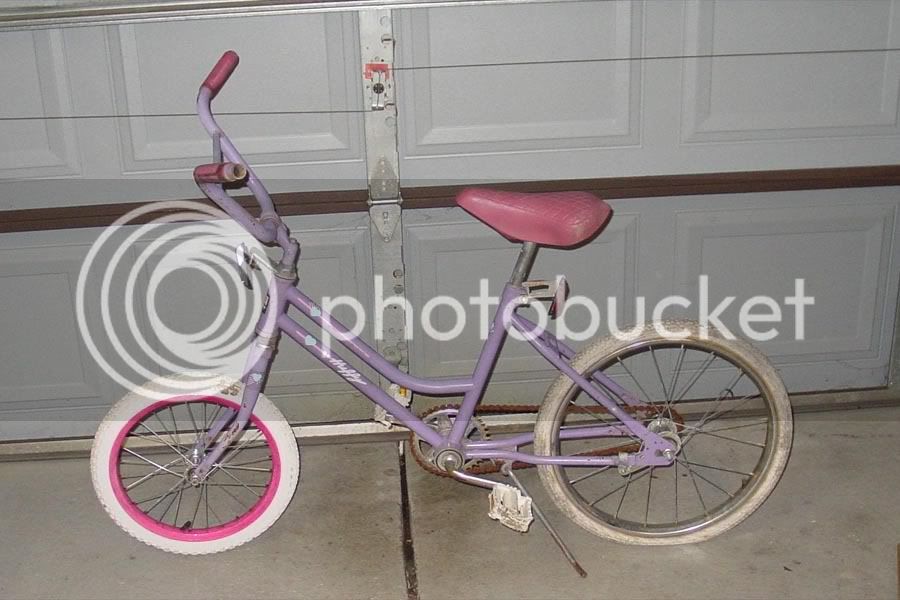
The skelebike was an original concept that I drew on a notebook while not paying attention in Highschool. First off let me tell you that I am not a bike builder or will I ever claim to be. I am more of an unprofessional artist that just enjoys to play around in my free time. My favorite medium to work with is metal and have made many things and customized alot of stuff since about 1993 which is the year I learned to weld and picked up my first welder, a Miller Syncrowave 250. The skelebike was originally called "Death Grip" but over the years while building it, it became easier to call it Skelebike. I did not build a jig to make this bike but opted to just build it off the crooked floor of my garage. I often tell people that it was built on a "balance of crookedness" if that makes any sense. Also keep in mind that I shelved this project many times over the years, through 2 tough on my wife, pregnancys and the relocation of my career, and really have very little detail documented on the bike. The project was started in 2001 from a girls huffy that I garbage picked and I virtually have no money into the actual building except for a tank of argon for the welder and powder coating. So here it is .
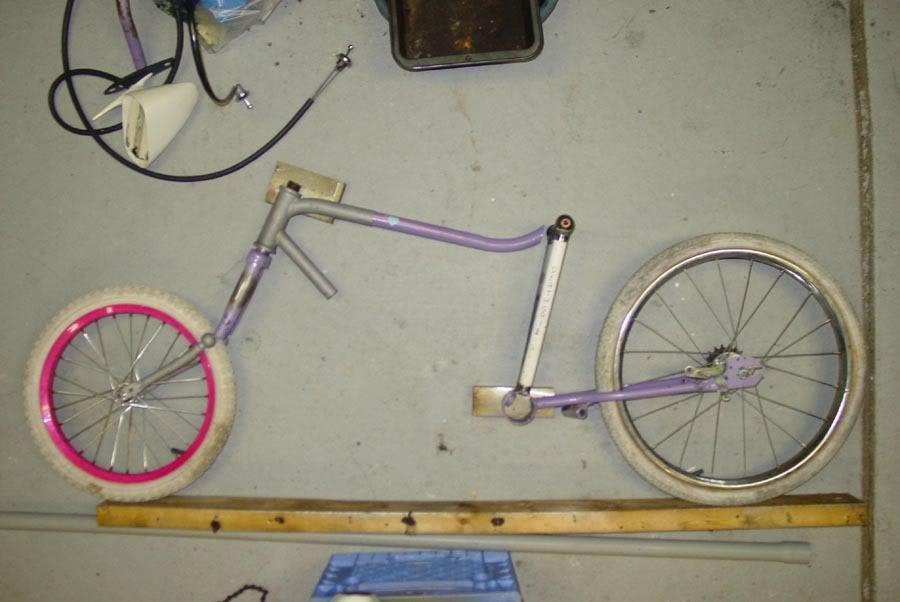
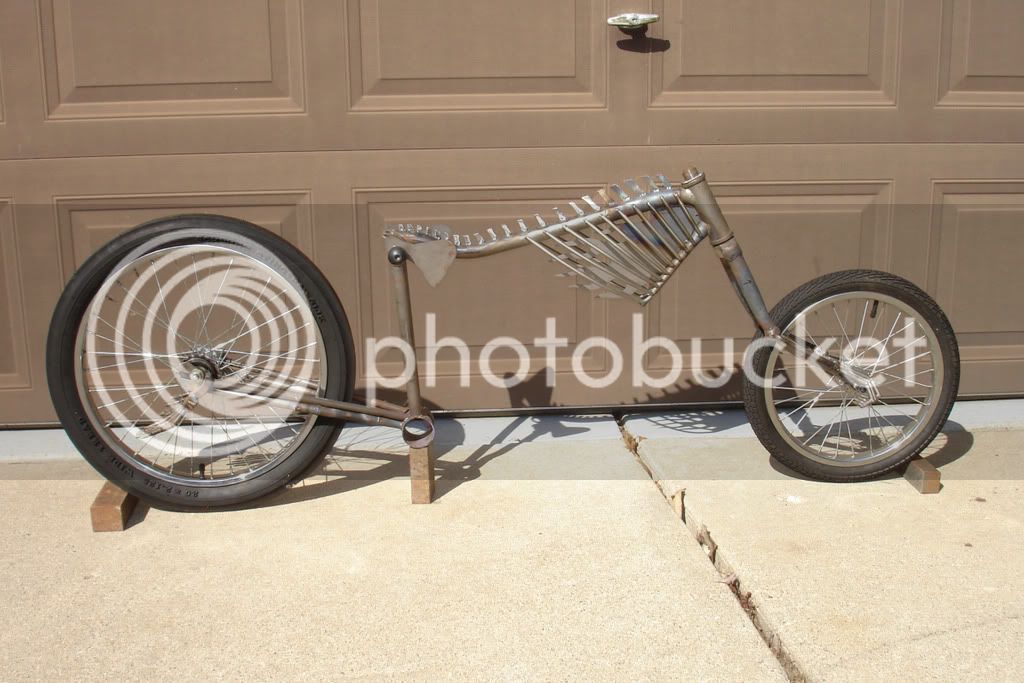
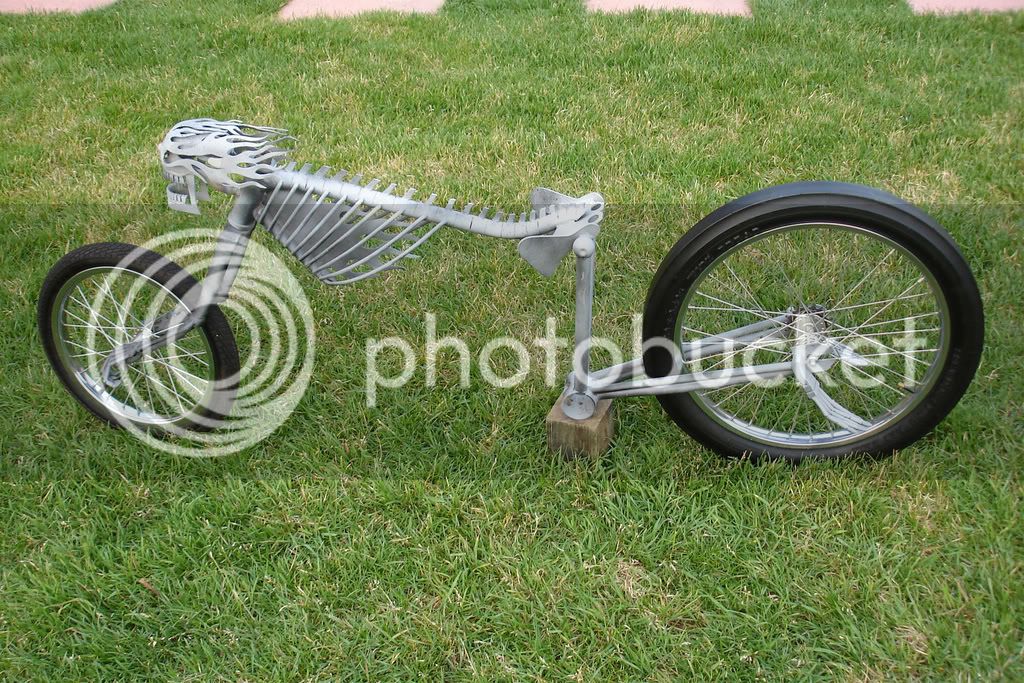
 The first thing I decided to do was lay out the profile of the skeleton on the floor. The top bar proved to be a great shape for the spine and only had to be lengthened a couple inches to be anatomically correct. Also the seat post tube was removed and two sections were added as femur (upper leg) bones. I also raked the front tube to give the arms a more natural bend and added to the length of the arms and made an elbow joint using ball joints which were obtained from my brother who worked in a heat treating plant and let me go through thier scrap metal hoppers after hours :wink: .
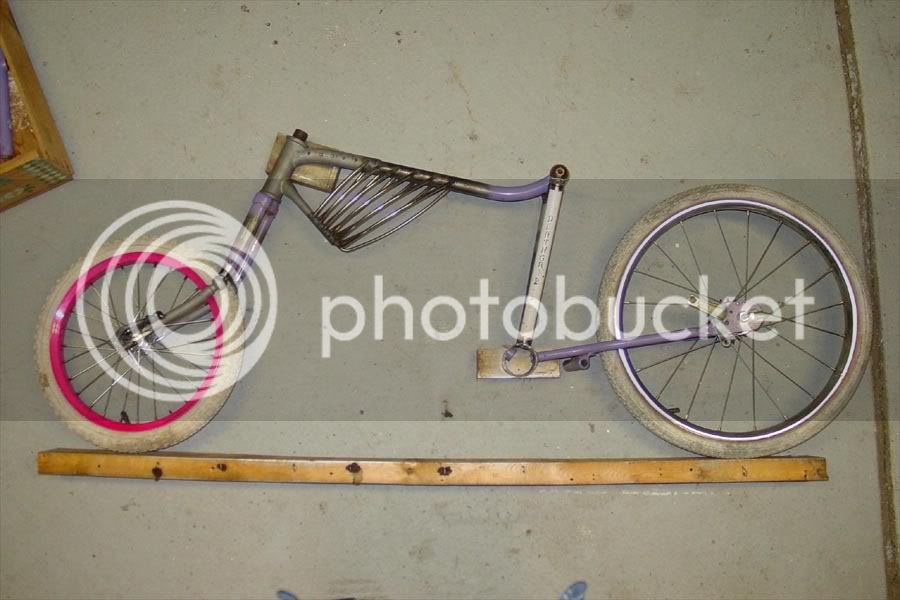
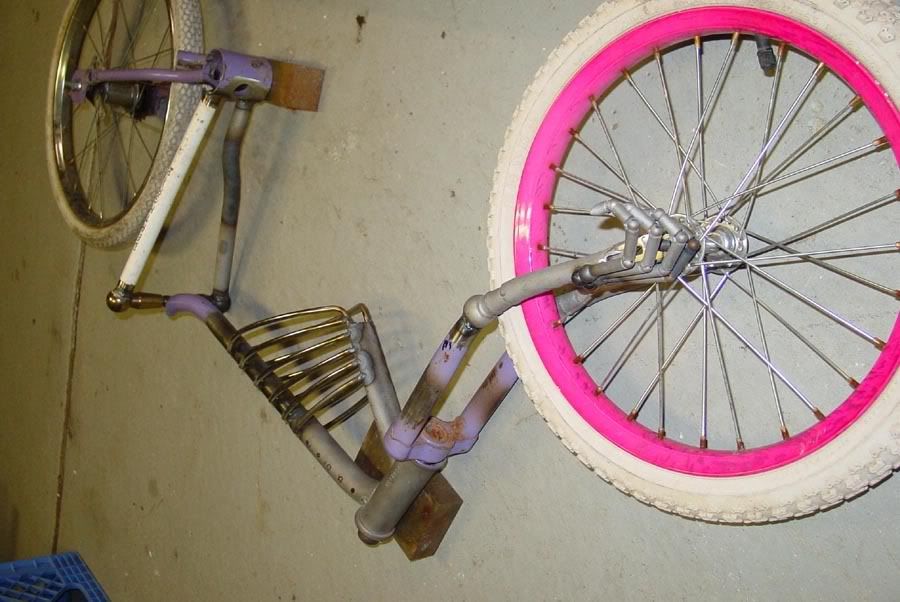
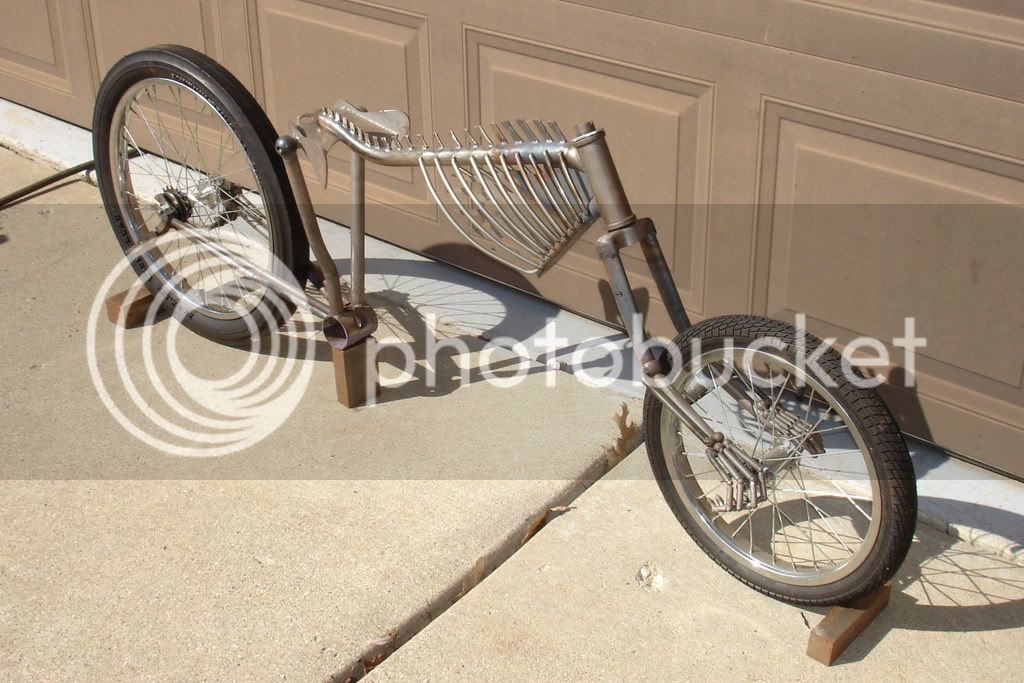
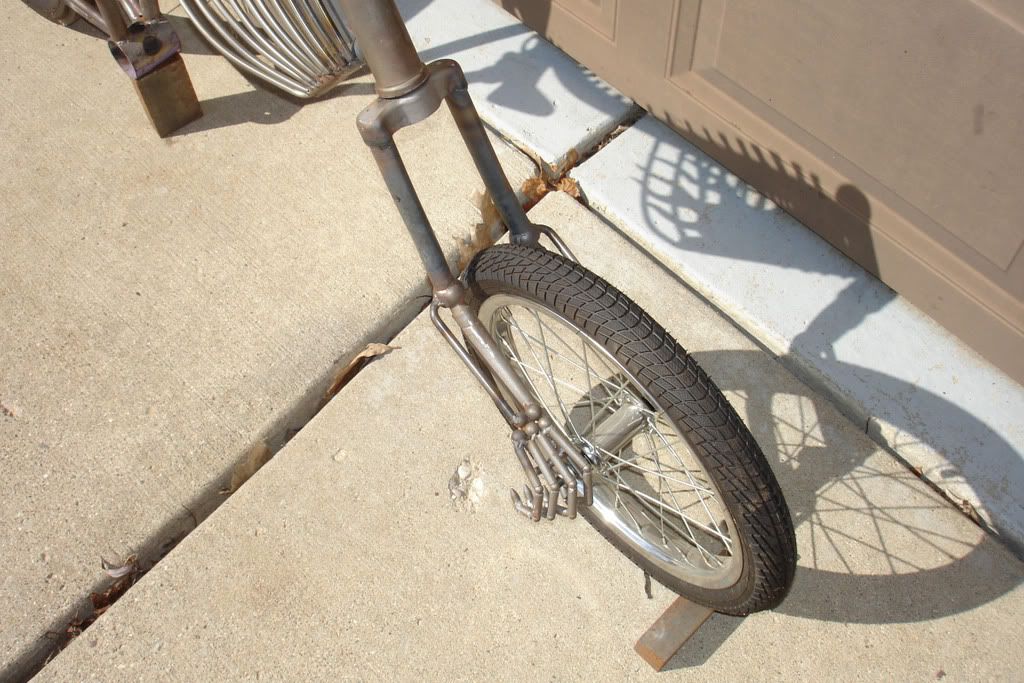
 The next step was to begin laying in the rib bones. Rib bones were made from steel tubing I had laying around. Also started working on making the hands gripping the front tire. The hand bones were made from used engine push rods and ball bearings all stuff ive had laying around my garage.
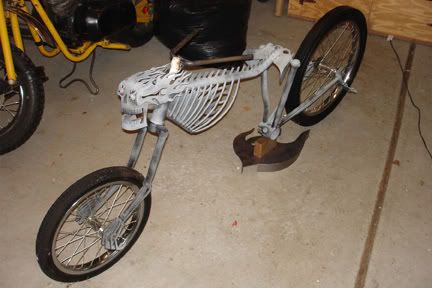
 With everything coming together it was time to stand it up. I always kept the bike in two pieces, separated at the spine and pelvic bone, so it would fit in my sandblaster.
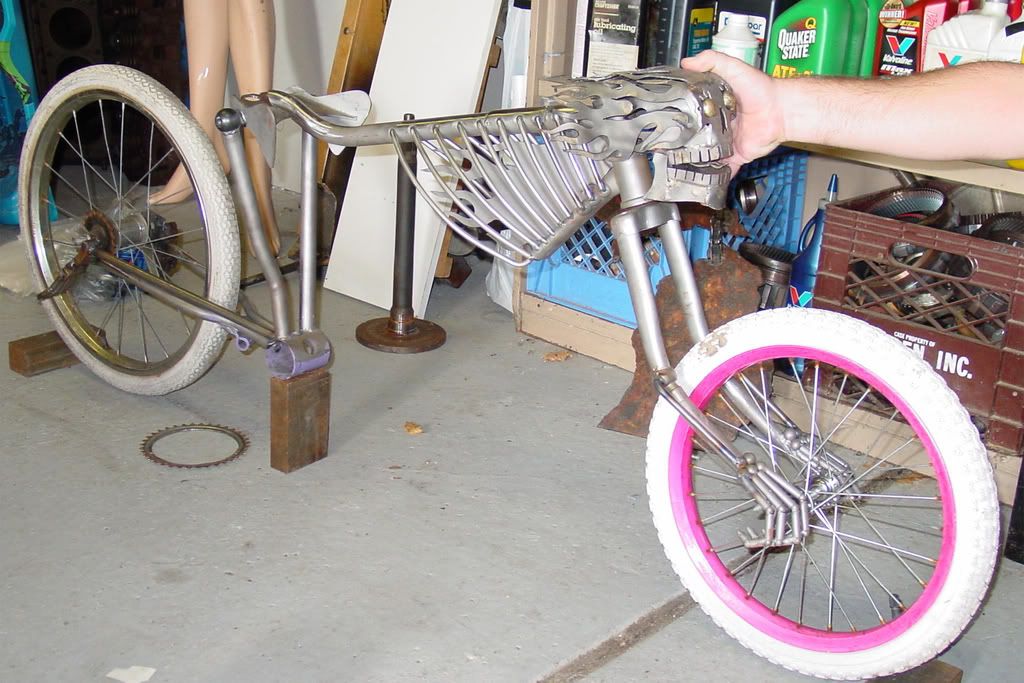
 And that brings me to the pelvic bone. Its made from you guessed it more ball joints and some 1/8th in. plate steel. this is also where I began thinking about the skull. Skulls are one of my favorite things to make from steel and I have a collection of skulls Ive already made. Here is a pic of the one I chose being held up and photographed for fitting.
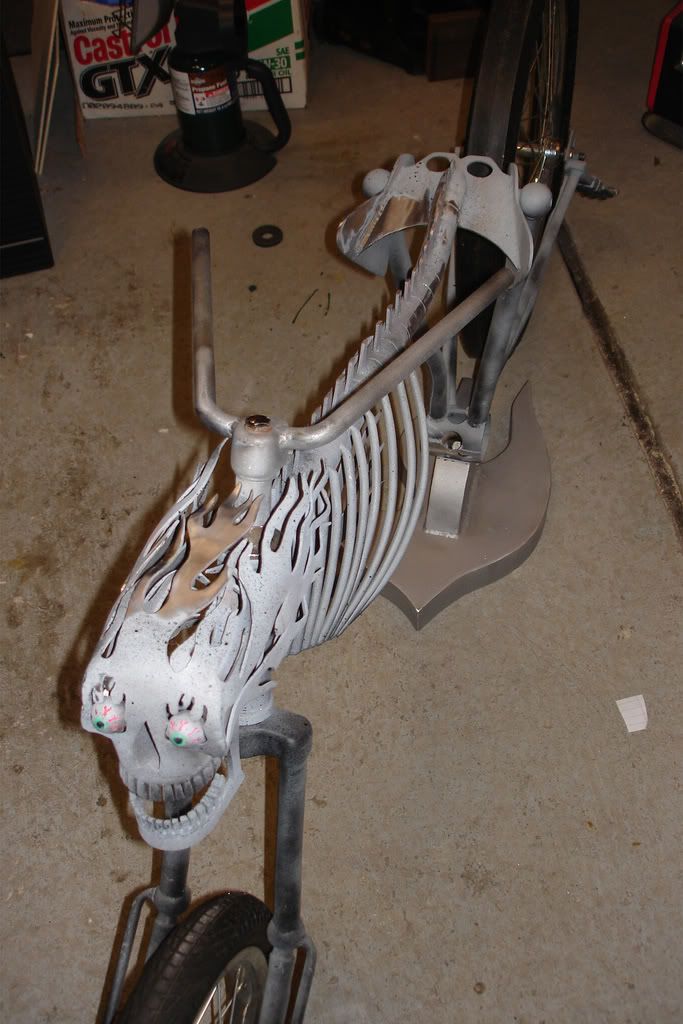
 The skull had to be modified because i didnt like the jaw and teeth so they were cut out and replaced. The feet were also made from push rods but not bearings. While the skull was being modified my friend Pauly came up with a stingray slik for the rear. This thing was like brand new and still had the little knobby things on it so I had no choice but to use it, just for its coolness factor. But unfortunately it was to wide. So both legs had to be remade completely. This was no easy task to keep it straight, but I got it done without a jig.
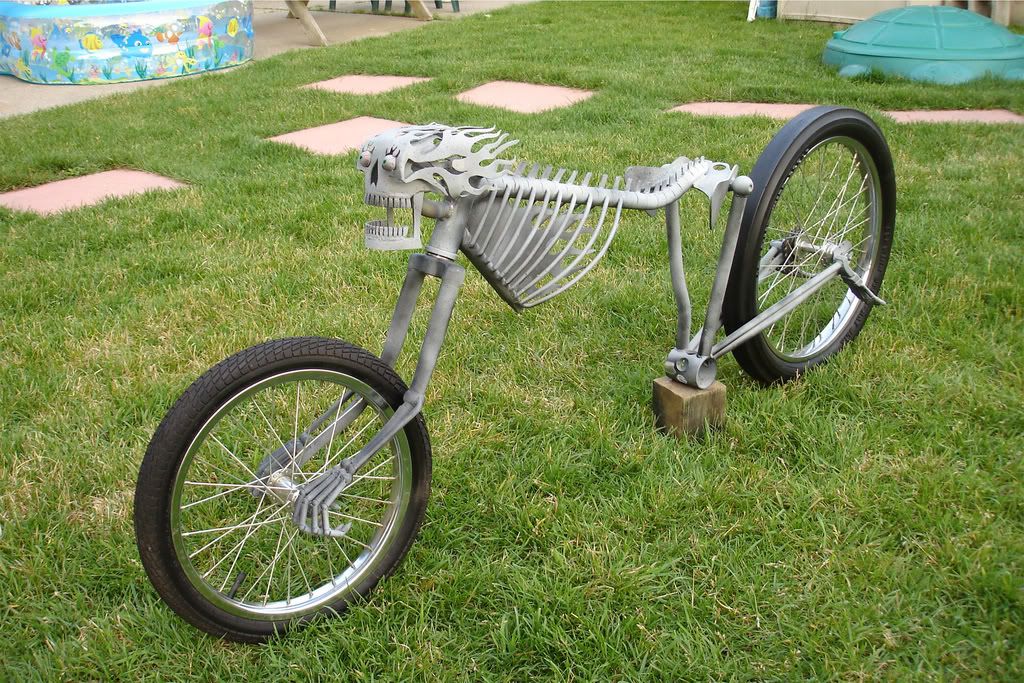
 At this point it was finally far enough along to give it one last sandblast and weld it together before adding the now finished skull. Here are the pics I took of it after joining the two halves together and skull added.
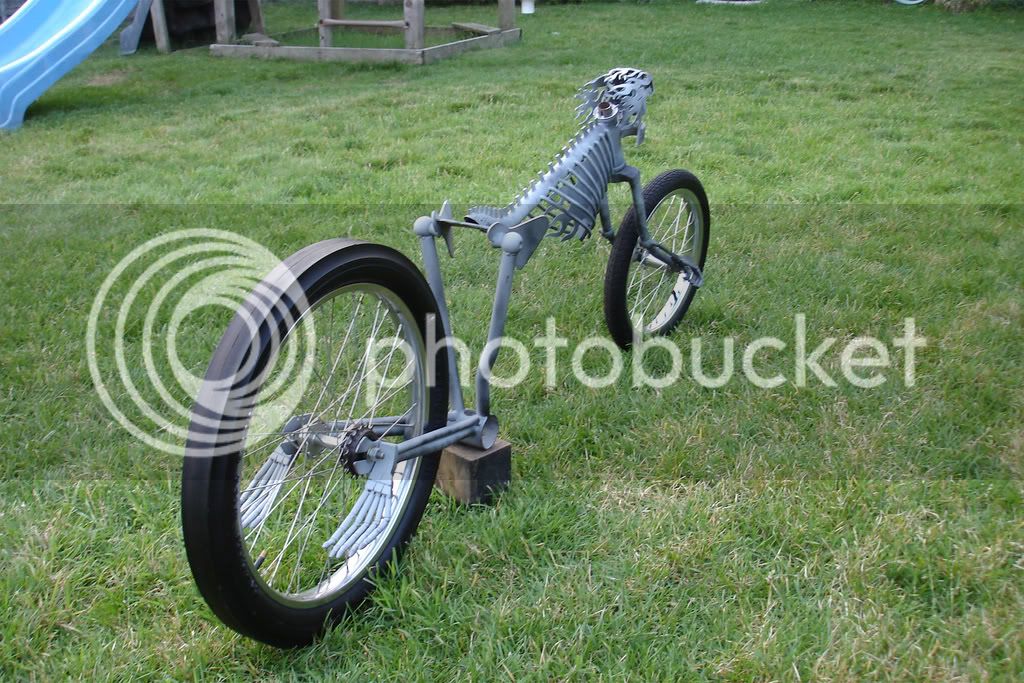
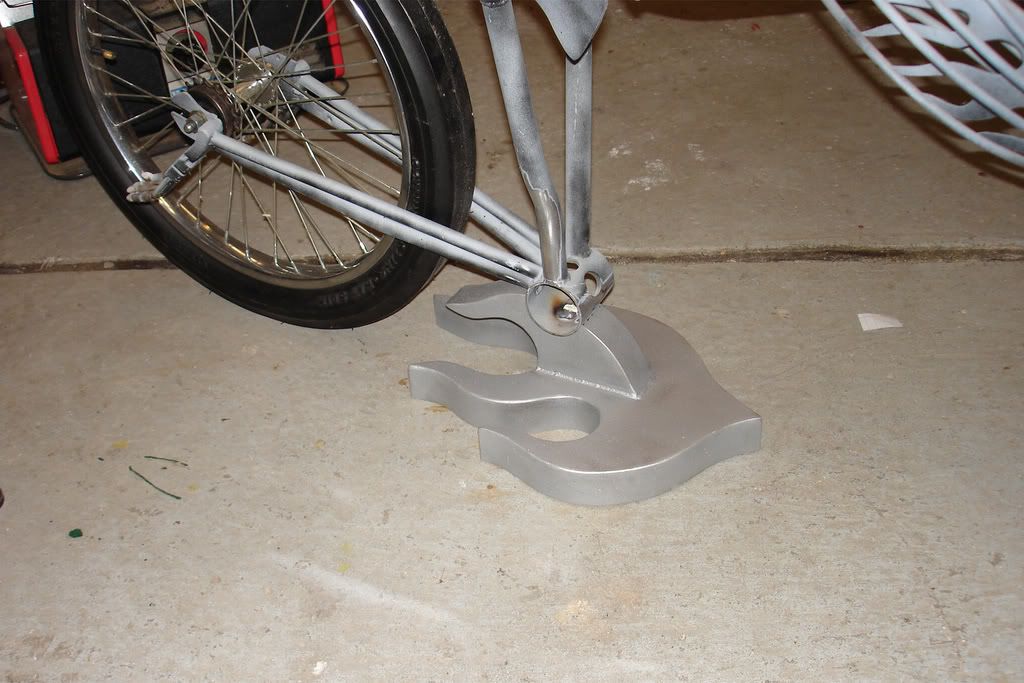
 Next thing to do was come up with a base for the bike to sit on since I didnt want to put a kickstand on. I also began to try to come up with something for handlbars. The first few trys looked like alien antenae so those were scraped. then I came up with a set that I actually liked. So here is the fire shaped base I came up with for it to sit on.
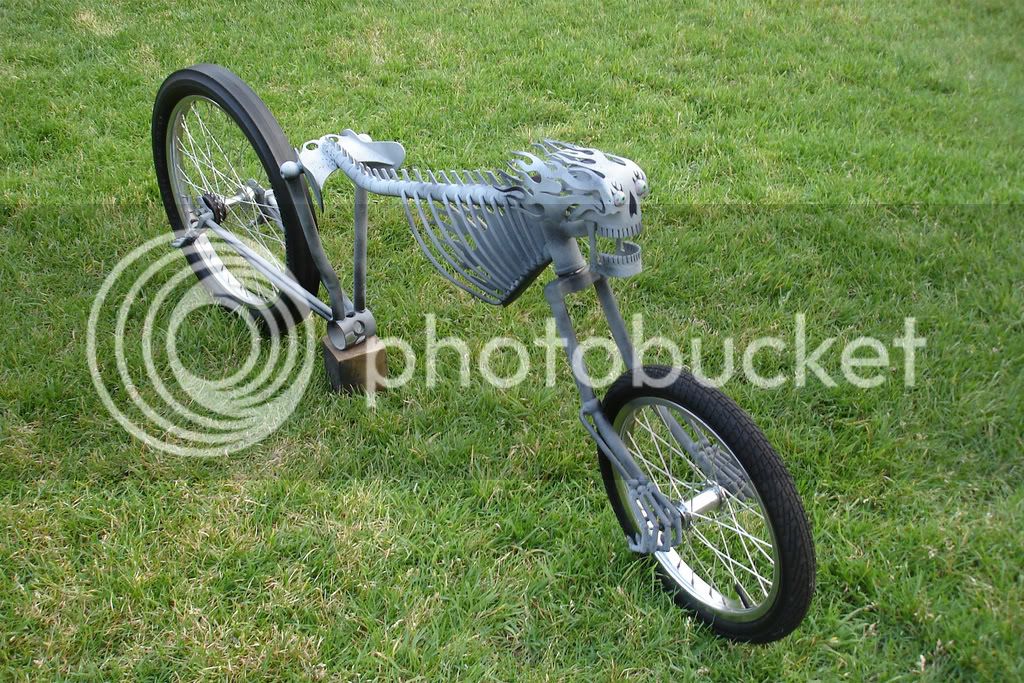
 And with the new handlebars.
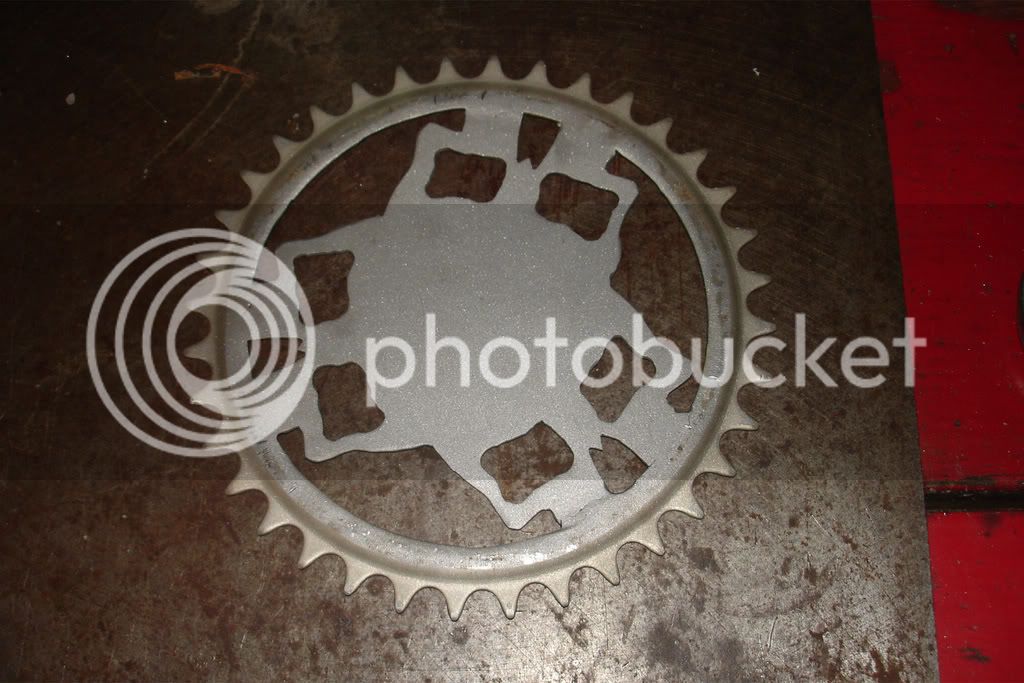
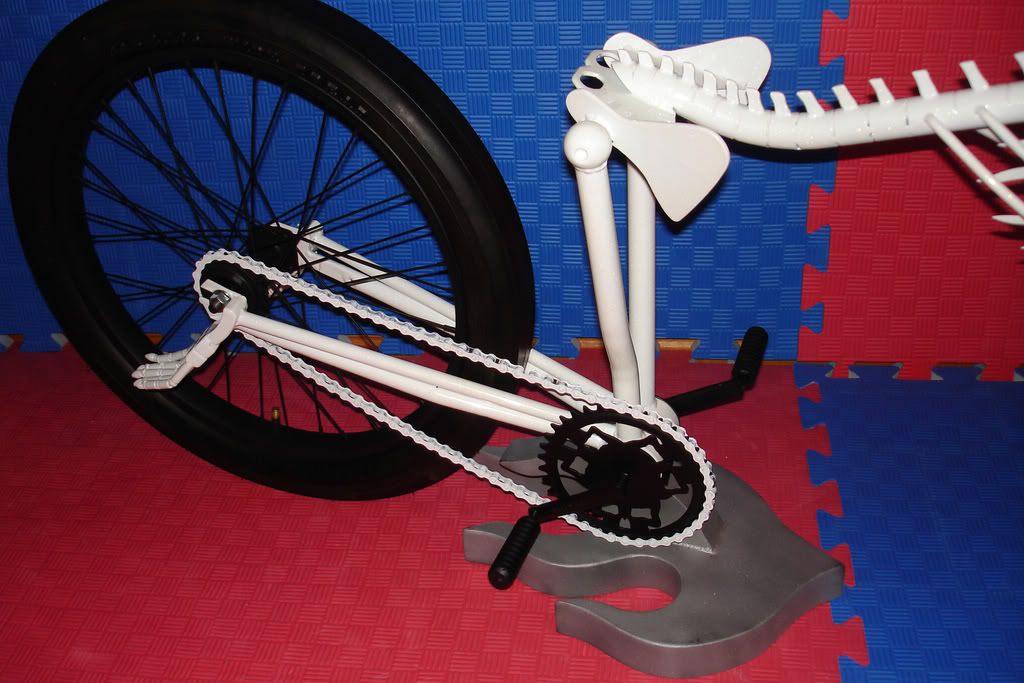
 Over the years somehow the crankset was lost so I had to come up with one in a hurry. This was the last piece I needed to make before the fast approaching Detroit autorama (which I was talked into entering) was here. I found the bearings, cups and the sprocket. Here is the design I came up with for the sprocket.
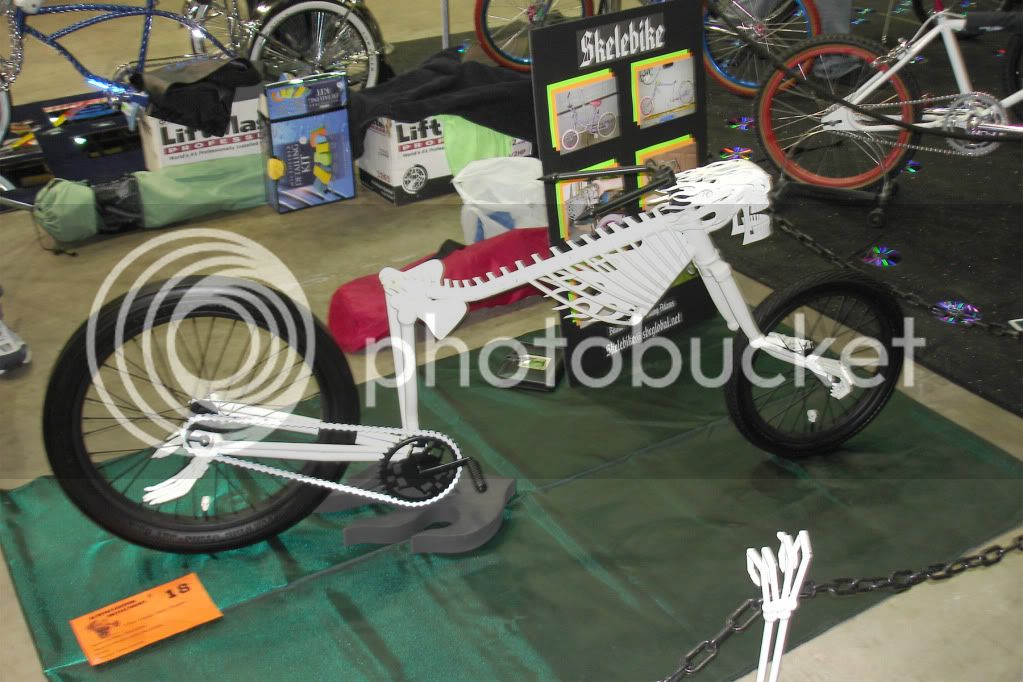
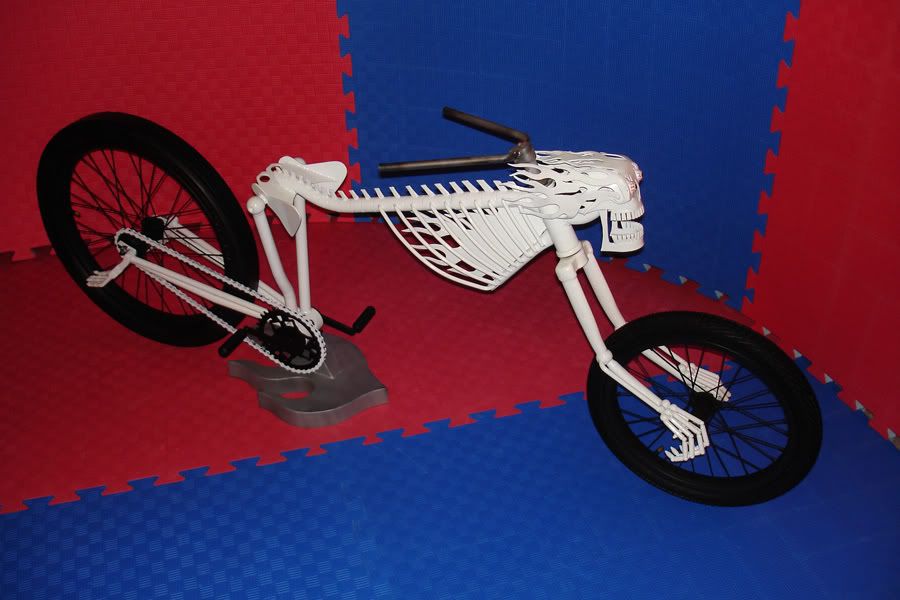
 Next was choosing poeder coat colors. Originally I was going to go with Granny smith green but the decided to go with the real color of bone white with green sparkle. I couldnt find a completely finished pic So here is the finished bike without painted handlbars and base. More to come shortly.
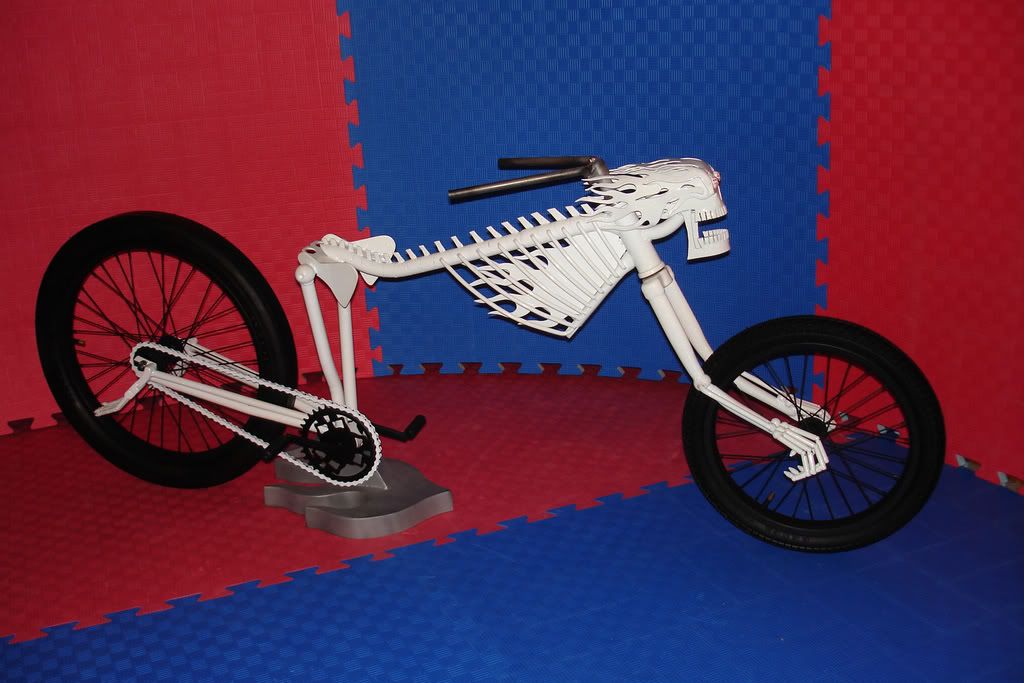
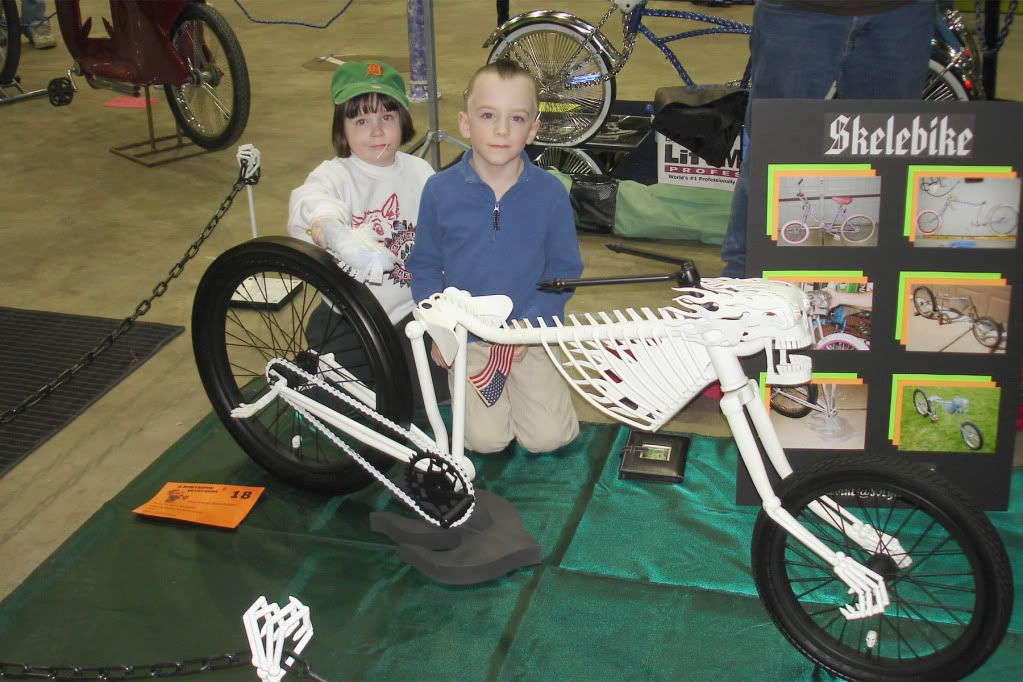
 Here are the autorama pictures. I did not like the way the stand paint came out so its now been paint profesionally black metalic.