Specialized HardSNOT!

Rat Rod Bikes Bicycle Forum

Help Support Rat Rod Bikes Bicycle Forum:

This site may earn a commission from merchant affiliate links, including eBay, Amazon, and others.
Joined
Mar 24, 2009
Messages
187
Reaction score
0
Location
Illinois
Rating - 0%
0   0   0
special_5.jpg


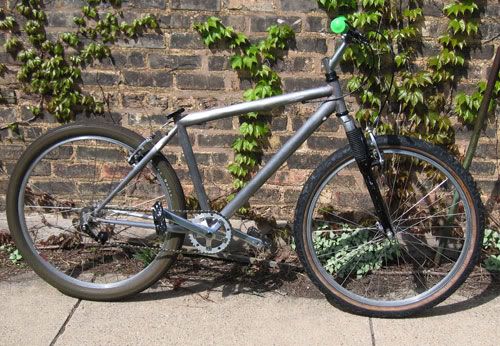
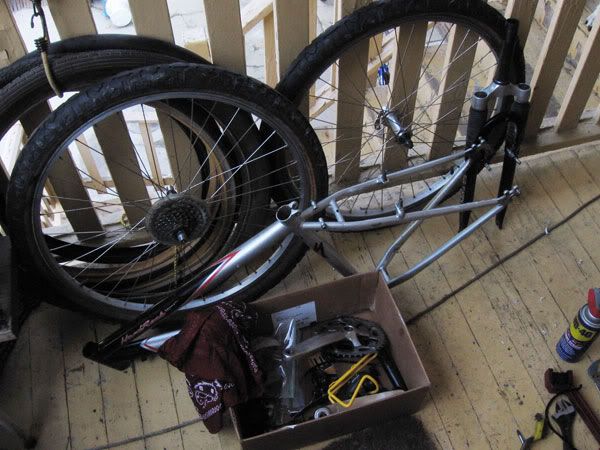
An easy beginning to what should be a leisurely build.

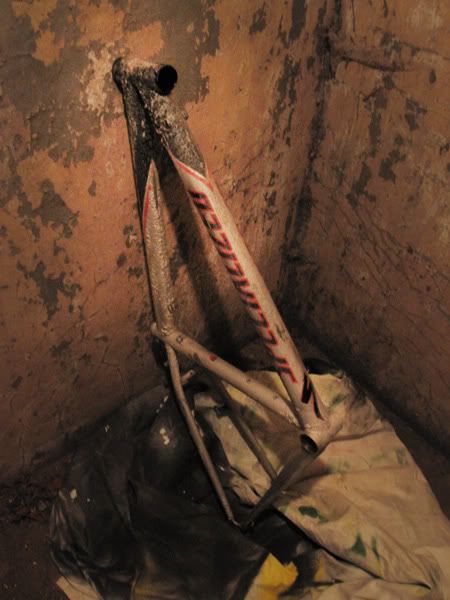
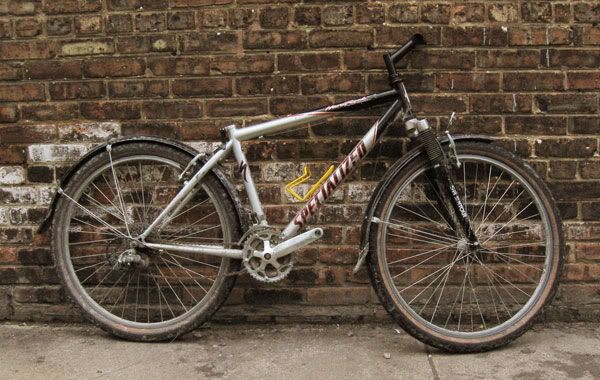
The Hardrock was a recent alley find: http://www.ratrodbikes.com/forum/viewto ... 16&t=18232

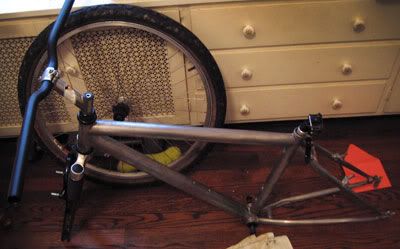
The tear down went really smoothly. One size allen wrench and one sized socket for the whole bike! And for the first time I had all the tools in my toolbox! :mrgreen:

teardown.jpg


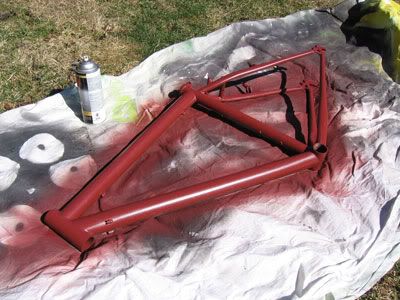
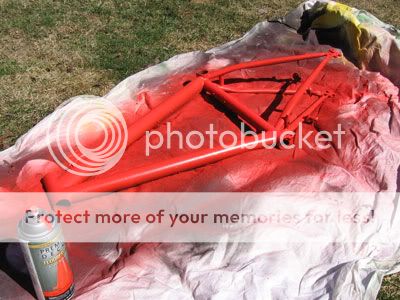
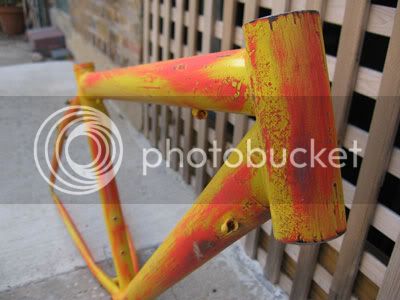
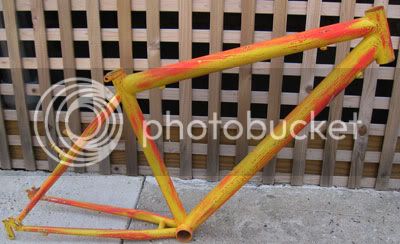
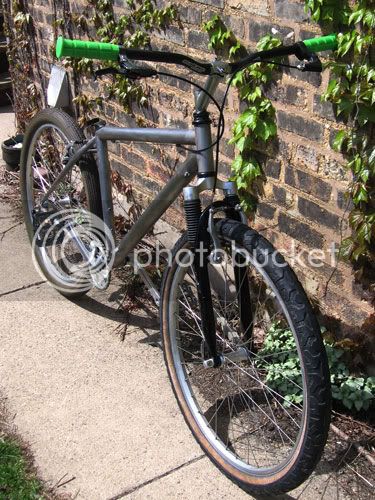
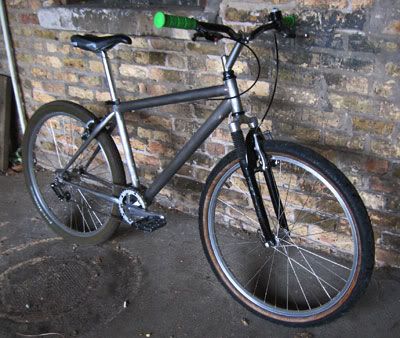
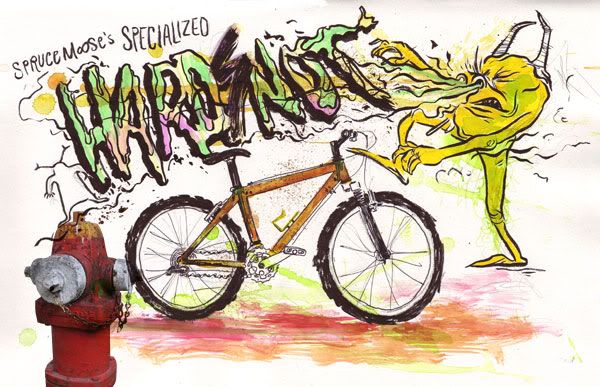
I've got a real solid idea of how I want this bike to look, but I'm not in a mad rush to get it built. I'm going to take my time with the paint next week. It'll be a 3-layer distressed job. From there I'll need brake levers, cables, bars to ride it. Then a seatpost, seat and some grips would be nice. Basically I'm looking to build a bmx inspired mtb with rat rod style. 8) Then I can start jumping off trees! http://www.youtube.com/watch?v=Z19zFlPah-o
 
Well it's been a long time comin', but I'm on my way now. Since I've found the bike I've moved, then got busy with work. The new place has more room and a basement, unfortunately the owners don't want me painting down there--understandable since there's no ventilation. So I'm waiting for the warmish days this winter to paint the Hard Snot. Once it's painted I have a nice warm place to build. :)

Yesterday it was in the 30s and I was feeling a little agitated and destructive. So, I decided to strip the paint with some help from a can of Jasco Paint Remover.

stipper.jpg


I was outside for about 40 minutes with a flashlight scrapin' and sprayin'. The frame is pretty clean although I'll have to do some sanding yet. The beauty of this finish is that it doesn't have to be perfect--the rougher the better. Since it was dark I gave up trying to take decent pictures.

Although I'm building a Specialized I am feeling a little disappointed with the company. I emailed them about my find and build--asking for stuff like opinions and what year the bike was made, but got no response. I guess they don't appreciate us rat rodders...

Oh yea-- So all I have left to finish the bike is some cables and a 30.9mm seatpost. I had expected the build to cost about 200 and I'm at about 90 now. I'm pretty happy about that as I was hoping to build this on the cheap. With all the new tools and fiascos building the Raleigh (http://ratrodbikes.com/forum/viewtopic.php?f=21&t=15378) I could have bought a real killer diller Trek or Electra or Madwagon...
 
It has been a long while since I've worked on bikes, not that I haven't been thinking about it. Finally the weather broke the 50º mark so I can paint! And here is the damage:
This is the frame pretty much stripped. Its pretty rough, but I'm creating a weathered/layered finish so that's just fine.
raw.jpg


Here is layer one, red primer:
PRIMER.jpg


Layer two is fluorescent orange:
flourescent.jpg


Layer three is a nice rich yellow:
yellow.jpg


next will be some sanding and finessing the colors...
 
Nice! this thing sounds like it's going to be fun when it's finished.

But i just have a quick question. I don't know if you even still have those old tires that are mounted on the rims in those pictures but do you know what kind they are? I have one of those exact same tires sitting in my garage right now and I really want to use in on my project bike but it is just so dry rotted I can't even see a name on what's left of the sidewall. It needs to be replaced but I have never seen one like it before... well until now that is. Thanks in advance if you can possibly help.
 
Hey, thanks for the Info, it definately helps. That definately looks like the same tire that I have now except the sidewalls on mine were not rubber, instead they look more like cords and whatever used to be holding them together has mostly worn away. I think one of these will work out good for my project bike, it has kind of a gnarly look but at the same time looks like it will ride really nice on the street which is where my bike will probably end up spending 99% of it's time.
 
Specialized HardSNOT: I might not be fun...

HS-paint-2.jpg


Well the paint job came out pretty well. Pretty much what I was looking for. However, I started thinking do I really want to be rollin down the street on this? Granted I wanted something loud, ugly, but sophisticated--something just didn't click.

HS-paint-1.jpg


I decided on NO and have begun rethinking the HardSNOT. I've recently acquired another MTB--a Schwinn Mesa. That frame is a bit bigger and heavier. This threw a bit of a wrench in my bike-making-machine. Right now, I want to build a bare metal, white tired, single speed. The plan was to do this with the Mesa, but the HardSNOT would really be a better (lighter, better angles) frame for it.

So I started thinking, why not make the HardSNOT a single speed MTB. SS MTBinking seems like a lot of fun plus there is less to deal with and fall apart when you jump around. So the HardSNOT is going to be my throw back to my old BMX days. Goin single speed (NOT fixed!) and I'm going to leave it the raw aluminum--I really dig that stripped down bare metal look and hey aluminum won't rust! Maybe this is what the HardSNOT was destined for from the beginning of the project.

I'll leave my first externally geared project with derailleurs and that stuff for the Mesa...
 
always go with you first instinct. really disappointed your not gonna complete the first build. :( :( :(

love that paint!
 
Sorry to disappoint guys. :oops: I think I just took a good pic, in person the frame didn't look as cool--trust me. I have the paint stripped (again) and have begun reassembling--it's looking pretty tough all black and metal. I'll get some pics up very soon.

Regarding the HardSNOT theme: I had some aluminum snot after sanding down the frame :(
 
Re: Specialized HardSNOT! -- The Bone Machine

stripped.jpg


Well paint is stripped again. Rear cassette removed. Bars, stem, headset, fork, bottom bracket installed. Sadly my $100 is going to turn into $200+ because my stockpile parts aren't fitting. I'll need to find pedals and a new seatpost. Plus I'd like to throw on some Fat Franks, which is a bit pricey.

The new look has me thinking of a Tom Waits album, Bone Machine. And specifically a song called All Stripped Down. Raw metal and simplicity. I think it's the new soundtrack for the bike. It'll be a busy couple weeks--not sure I'll be making too much progress for a while.
 
Conversion complete, although I feel like the chain isn't quite tight enough.

sscollage.jpg


I used a Forte conversion kit and it went very smoothly. The chain wheel is a mis-order from a year ago that I never returned. Speaks to the problem of ordering online. It would have cost about as much for all the shipping (initial, return, then new part) as the chainwheel did. So the setup is 38T front, 20T rear cog. Brakes today--maybe get some temp pedals on there and test it. But I've got a wedding to go to, so we'll see how things pan out.

spur.jpg
 
Bare-bones single-speeder... I dig it. Figure chain slack should allow about 1/4" of movement... too tight and it binds - too loose and you end up with your crotch on the top tube and your feet dragging the ground.
 
You are the BONE MACHINE

BM-1.jpg


Why does there have to be so many different seatpost sizes?

BM-2.jpg


Seatpost should arrive next week. However I rode over to the LBS to get it properly sized and it rides really nice. Of course my legs got quite a workout not having a place to sit. So far its a fun ride! :)
 
The Bone Machine

AHHH I get it! :p :idea:

I was wondering what was up with this chain tensioner. I was searching online for the last week trying to get some tips. The installation instructions are all text and I wasn't fully understanding it. The reason I felt like the chain was too slack was because I didn't install the tensioner properly. In looking at it more closely I realized I didn't lock in the spring correctly. (Basically there is a a little nib on the tensioner that should set on top of a little nook on the dropouts). I'm good to go now! :)

I bought a single speed chain which is a little heftier than a multi-speed chain however there is a lot of wiggle room on the cog and chain wheel which I am uneasy about. However it might not make much of a difference. :?:

I may end up playing with the chainwheel-cog ratio a bit. On long stretches I sorta top out... Maybe I'll put a 40T chainwheel on instead of 38T... But I get movin quickly and it coasts really nice.
 
Running a 1/8" chain on a 3/32" spring-tensioned freewheel setup should present little, if any, trouble. I've seen more than one bike where derailleur front rings were used w/rear coaster cogs, with a little extra slack because they "pop" under load if kept tight, and coaster rings used w/10-spd clusters, w/the master link eliminated.
 
Since I fixed the chain tensioner there's no more clicking so I think the chain is fine. The chain is definitely a bit beefier than a chain for a geared setup. Which I think means it will hold up better to wear and tear.

I think a green seat is a great idea, if I can find a comfortable one... WTB should make me one! :wink:

I do have a "Bike Burrito" which is green. (It's a tool bag which attaches under the seat). I got this as a present, but it can be found on etsy: http://www.etsy.com/shop/bikeburrito

Here is the setup before I got caught in the rain:
withseat.jpg


Man, I knew I would get wet, but I didn't know I would get covered in so much dirt and sand and general crap. So fenders are going on!
 

Latest posts

Back
Top