You are using an out of date browser. It may not display this or other websites correctly.
You should upgrade or use an alternative browser.
You should upgrade or use an alternative browser.
High Horse - Tallbike
- Thread starter Tommy Atoms
- Start date


Help Support Rat Rod Bikes Bicycle Forum:
This site may earn a commission from merchant affiliate
links, including eBay, Amazon, and others.
Re: High Horse
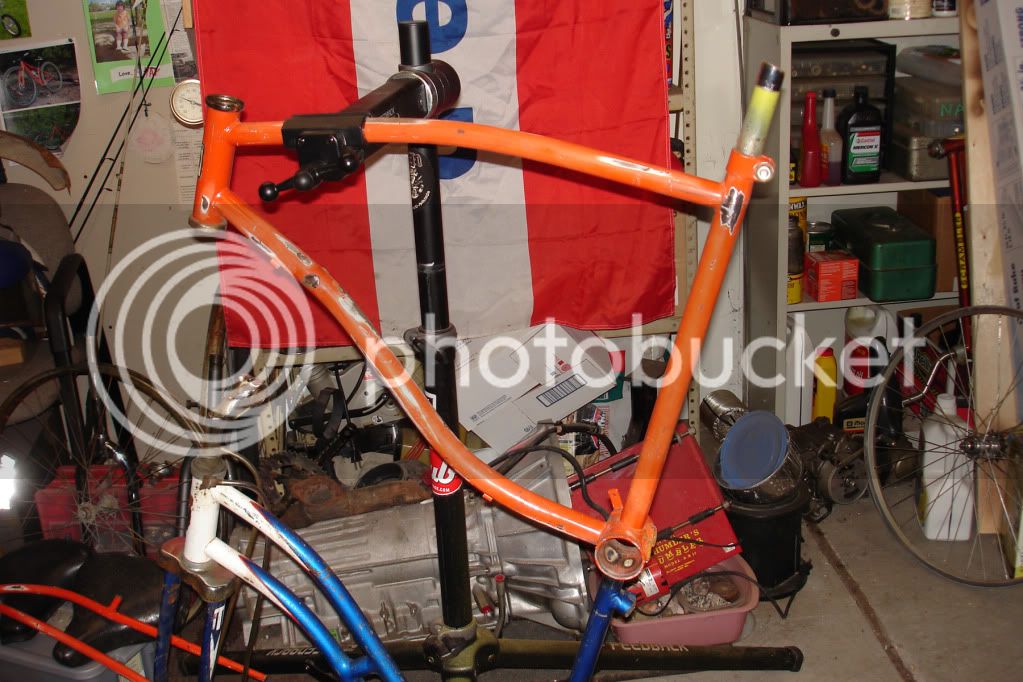
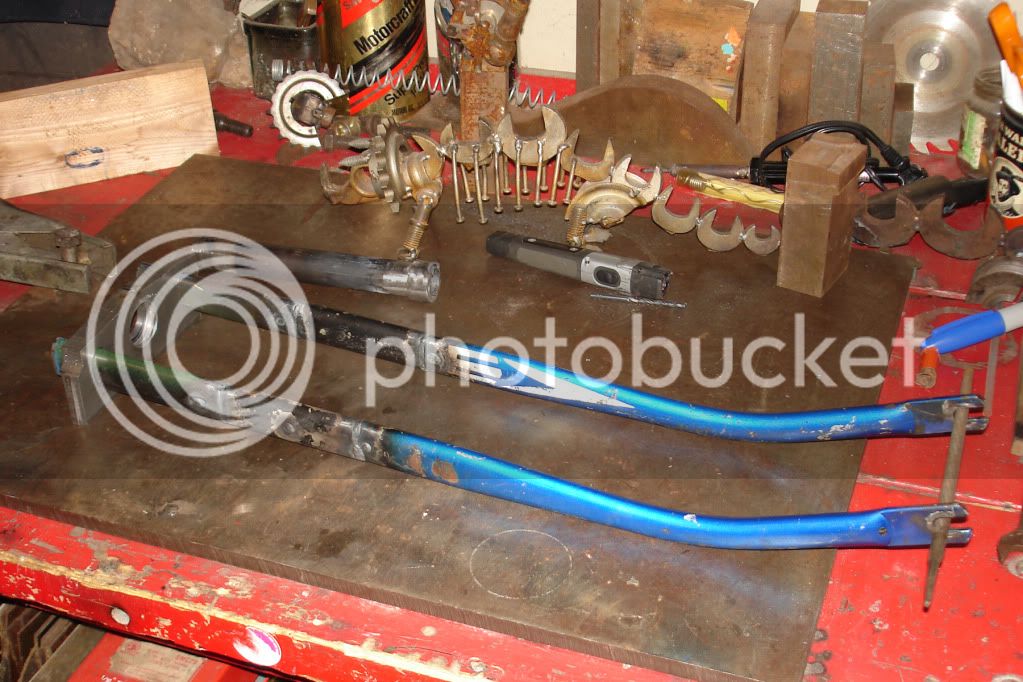
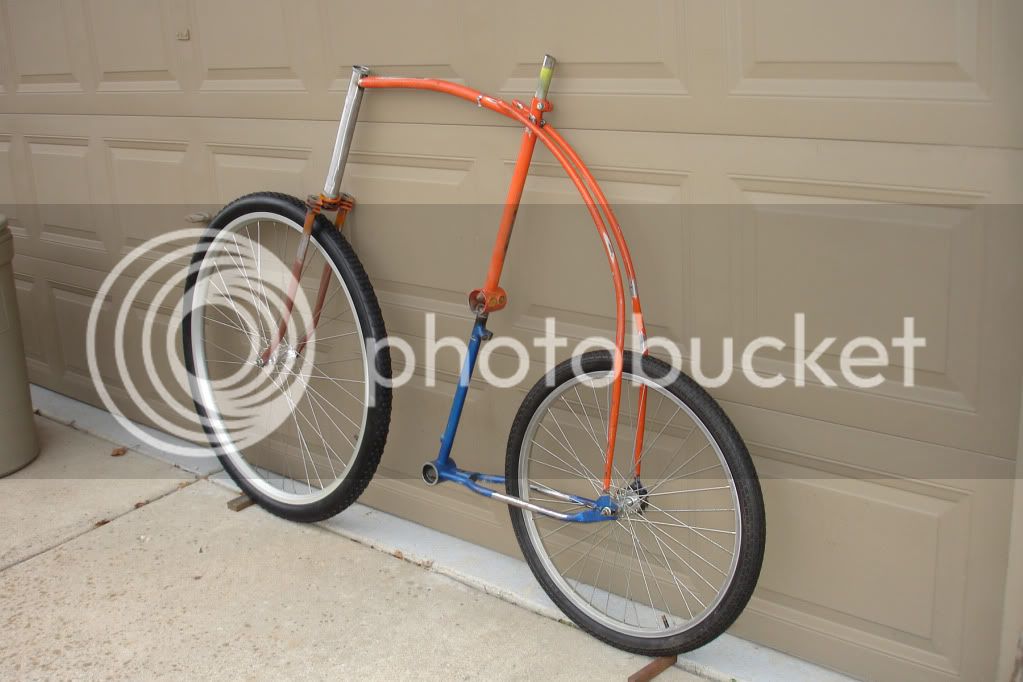
This bike build is also featured in the "Build Challenges" section. viewtopic.php?f=43&t=36674&st=0&sk=t&sd=a I figured I might as well post it here since the bike will probably be worked on well past the challenge. Here are the two frames I started with welded to each other.
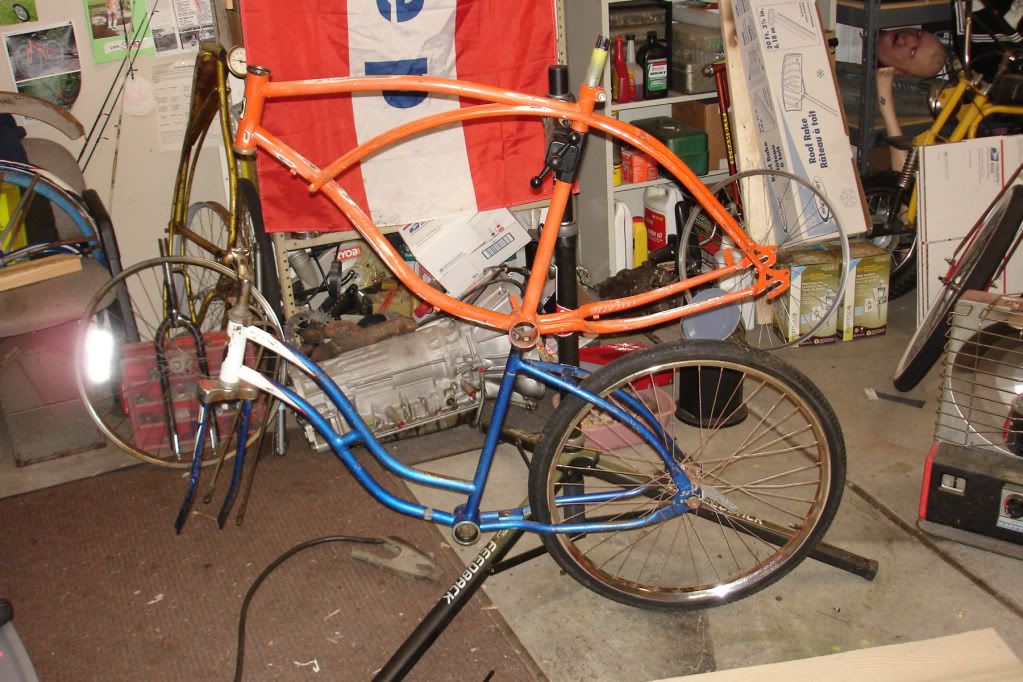 I got these frames from Eric (the flyingdingo) in the dead of winter which is when I like to build.
This bike build is also featured in the "Build Challenges" section. viewtopic.php?f=43&t=36674&st=0&sk=t&sd=a I figured I might as well post it here since the bike will probably be worked on well past the challenge. Here are the two frames I started with welded to each other.

Re: High Horse
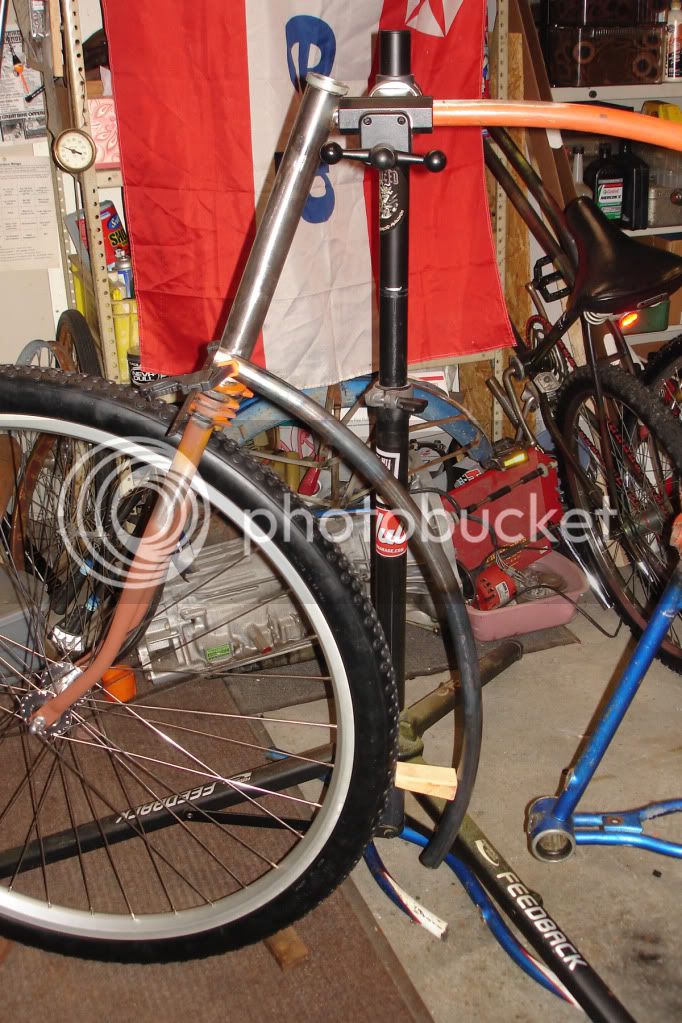
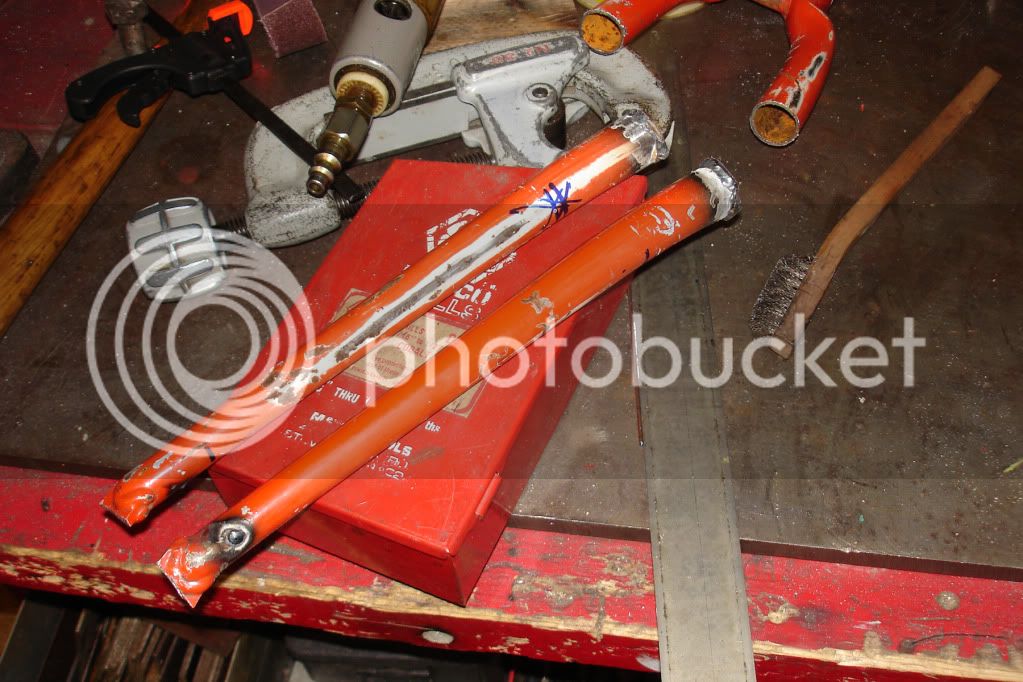
Since I really didnt want to be popping wheelies on a tall bike, I needed to extend the chainstays back far enough to get the seat in front of the rear tire. This is also an area that carries alot of weight so I made sure to install a nice long sleave in the tubing.
Since I really didnt want to be popping wheelies on a tall bike, I needed to extend the chainstays back far enough to get the seat in front of the rear tire. This is also an area that carries alot of weight so I made sure to install a nice long sleave in the tubing.
Re: High Horse
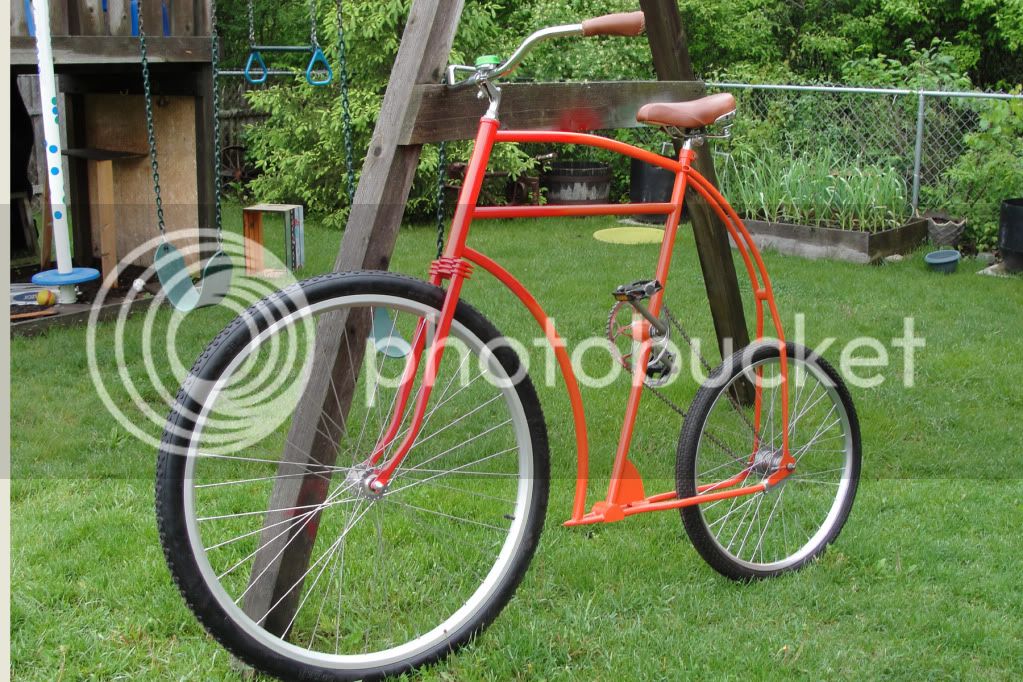
This is when I got the idea for the 36" front wheel. I could just see it would be a really good fit. I new they made them for unicycles but what about regular bikes? After researching I found out that Coker tires has been making a bike called a "Monster Cruiser" since I think 2006. So naturally I got in touch with them and ordered one. The tire and wheel arrived and it literally made me laugh like a mad scientist. The shear size of this bad boy was shocking to say the least.
This is when I got the idea for the 36" front wheel. I could just see it would be a really good fit. I new they made them for unicycles but what about regular bikes? After researching I found out that Coker tires has been making a bike called a "Monster Cruiser" since I think 2006. So naturally I got in touch with them and ordered one. The tire and wheel arrived and it literally made me laugh like a mad scientist. The shear size of this bad boy was shocking to say the least.
Re: High Horse
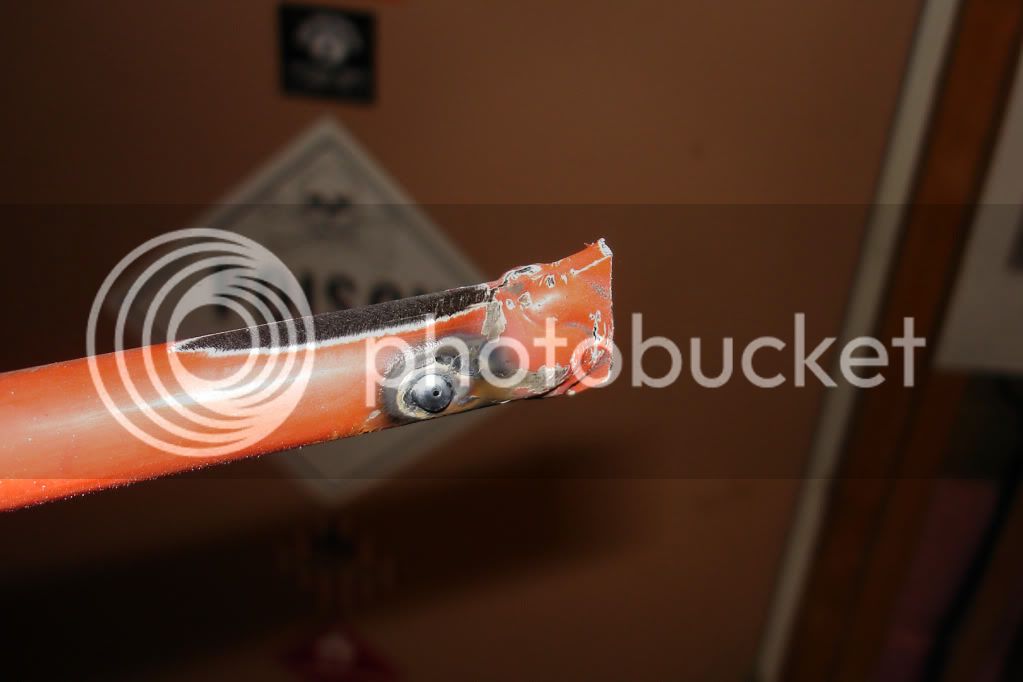
Now that I got the tire I quickly realized that I had to come up a fork plan. I thought about doing a round tube style but didnt think that had an antique look about it. The blade style might be kinda flimsy and I wasn't really sure what metal would be a good candidate. So I decided to use flattened tube style fork made from recycled tubing.
Now that I got the tire I quickly realized that I had to come up a fork plan. I thought about doing a round tube style but didnt think that had an antique look about it. The blade style might be kinda flimsy and I wasn't really sure what metal would be a good candidate. So I decided to use flattened tube style fork made from recycled tubing.
Re: High Horse
I inserted a length of solid rod that fit tightly inside the tubing. I then puddle welded it along the length on both sides, for added strength. I wanted the top of the fork to have the radiator or finned style so I started making the three plates by welding them together on a spot that would be later cut off. Layed out my design with a scribe and started drilling.
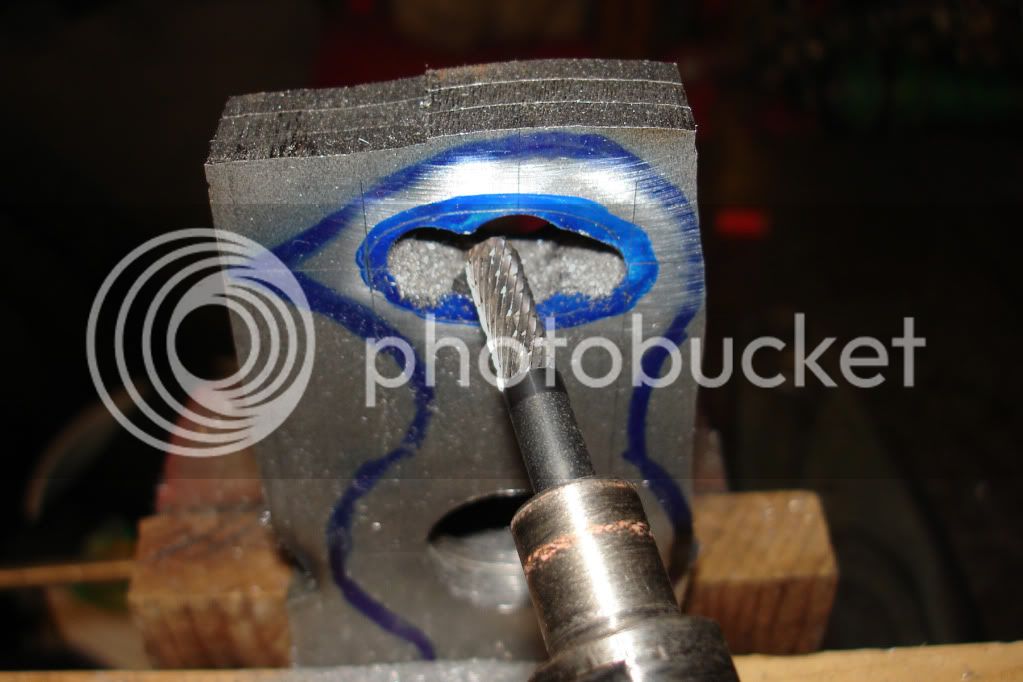
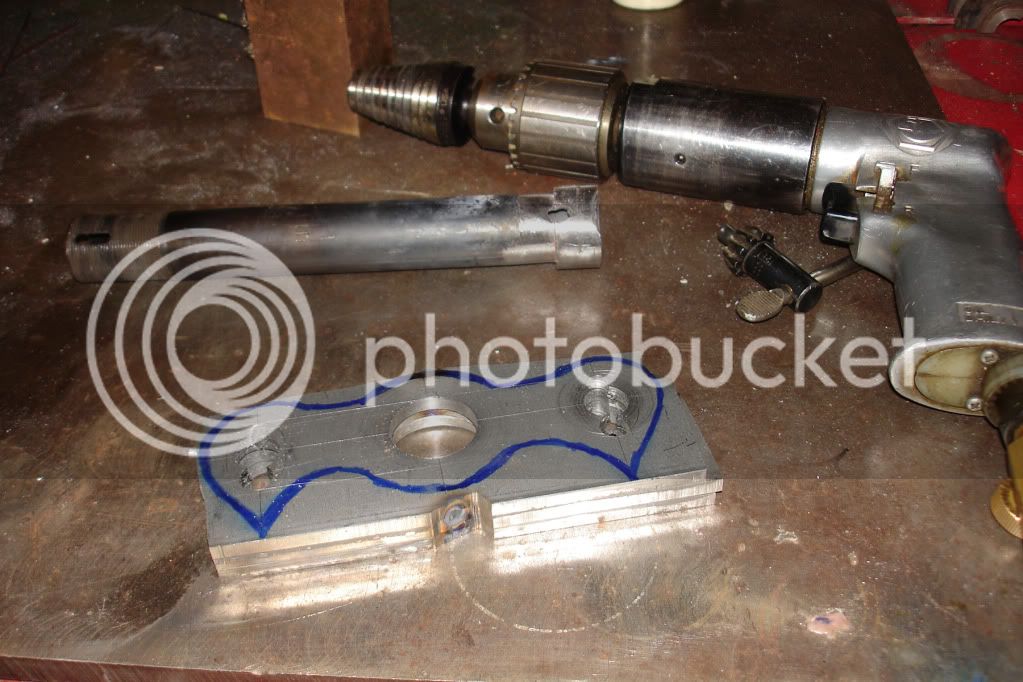
I inserted a length of solid rod that fit tightly inside the tubing. I then puddle welded it along the length on both sides, for added strength. I wanted the top of the fork to have the radiator or finned style so I started making the three plates by welding them together on a spot that would be later cut off. Layed out my design with a scribe and started drilling.
Re: High Horse
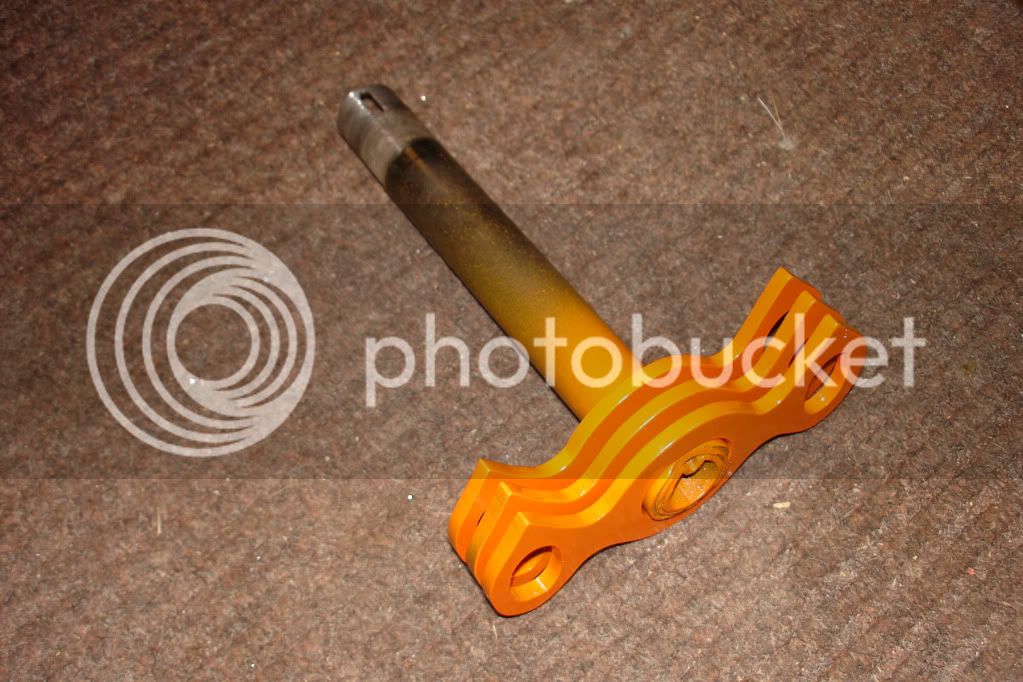
As some of you may know, I do not have some fancy fixture for building stuff. So getting things lined up can be tough sometimes and call for some creative engineering to achieve results. And I am quite anal about things being straight and pleasing to my eyes, so this fork was very challenging for such a simple machine. I didn't want any of my welds to show either so i built it upside down with all sixteen welds underneath.
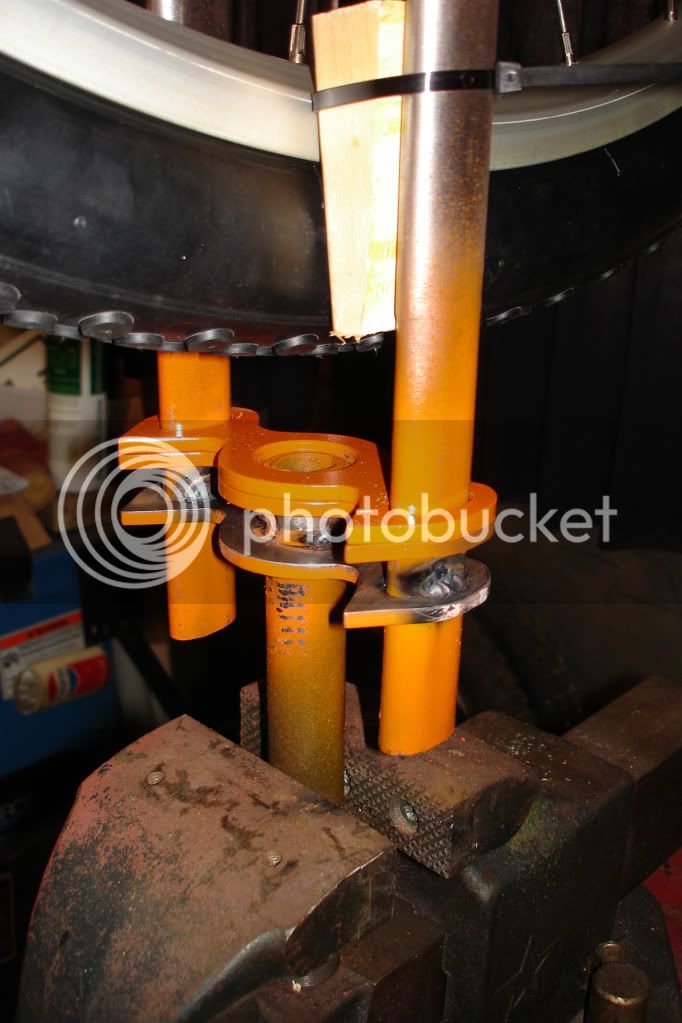
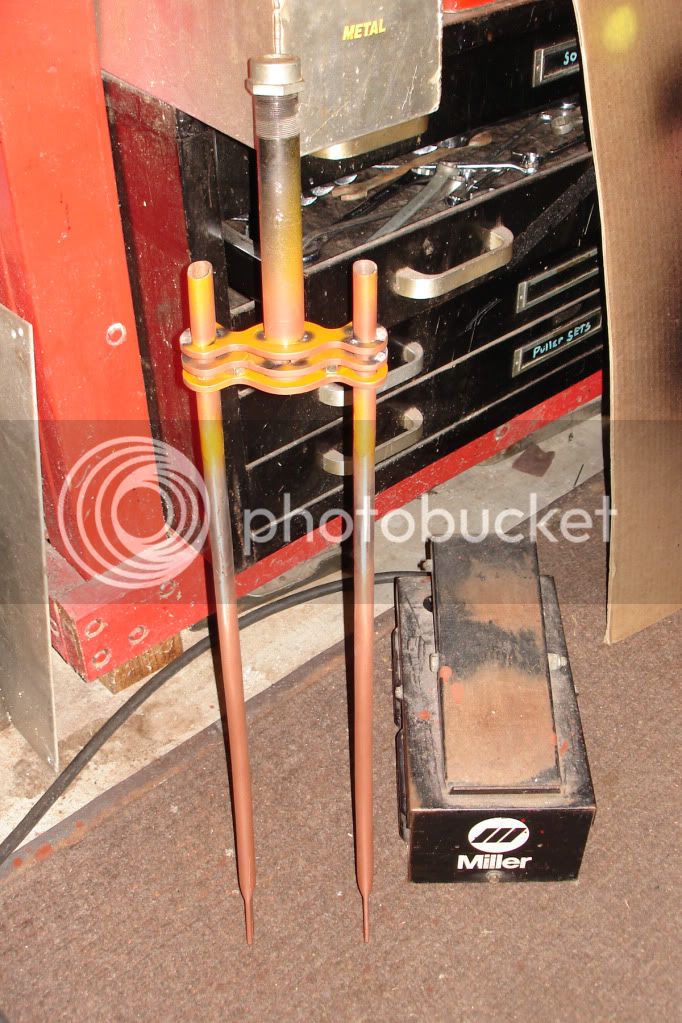
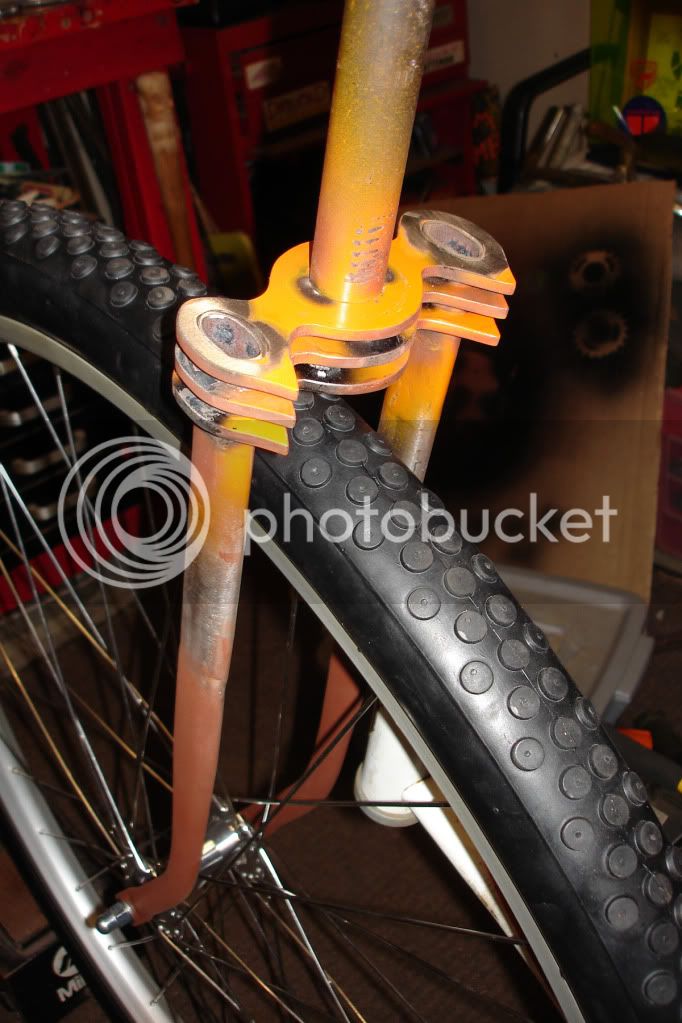
As some of you may know, I do not have some fancy fixture for building stuff. So getting things lined up can be tough sometimes and call for some creative engineering to achieve results. And I am quite anal about things being straight and pleasing to my eyes, so this fork was very challenging for such a simple machine. I didn't want any of my welds to show either so i built it upside down with all sixteen welds underneath.
Re: High Horse
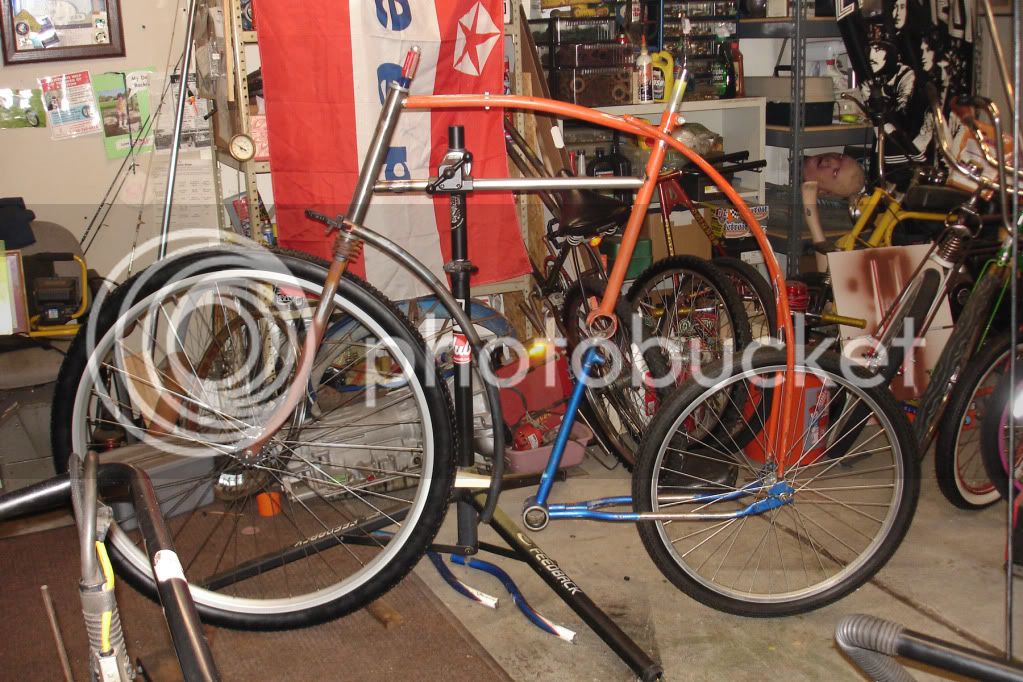
The bike is really starting to take shape. Here is the first shot of it with the front wheel in place. Unfortunately I had to hold it in place so you have to look at my ugly mug as well.
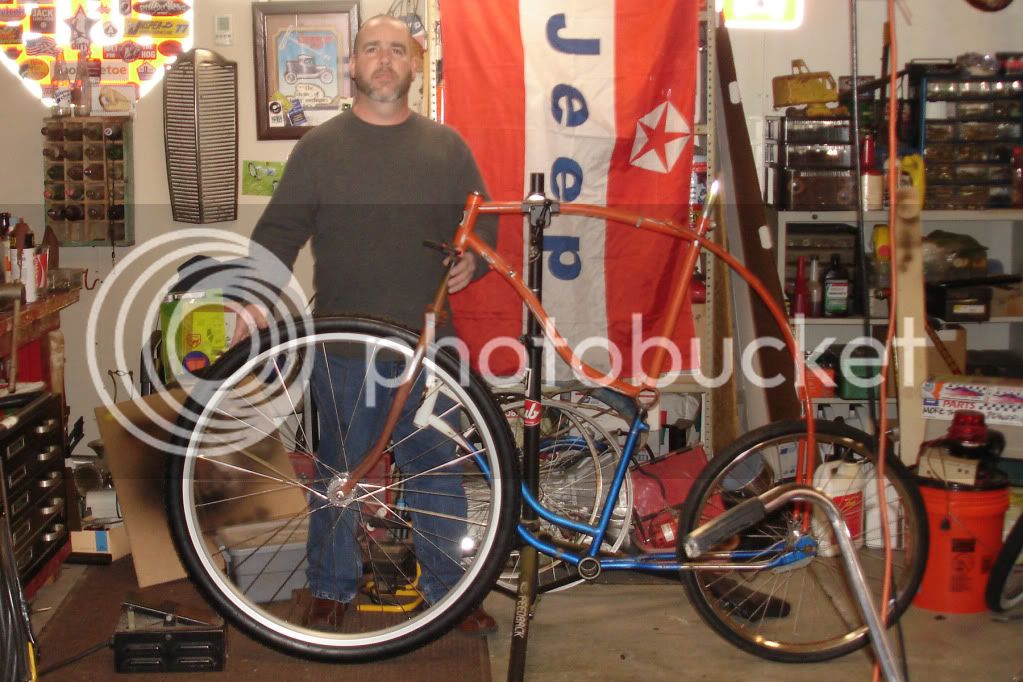
The bike is really starting to take shape. Here is the first shot of it with the front wheel in place. Unfortunately I had to hold it in place so you have to look at my ugly mug as well.
Re: High Horse
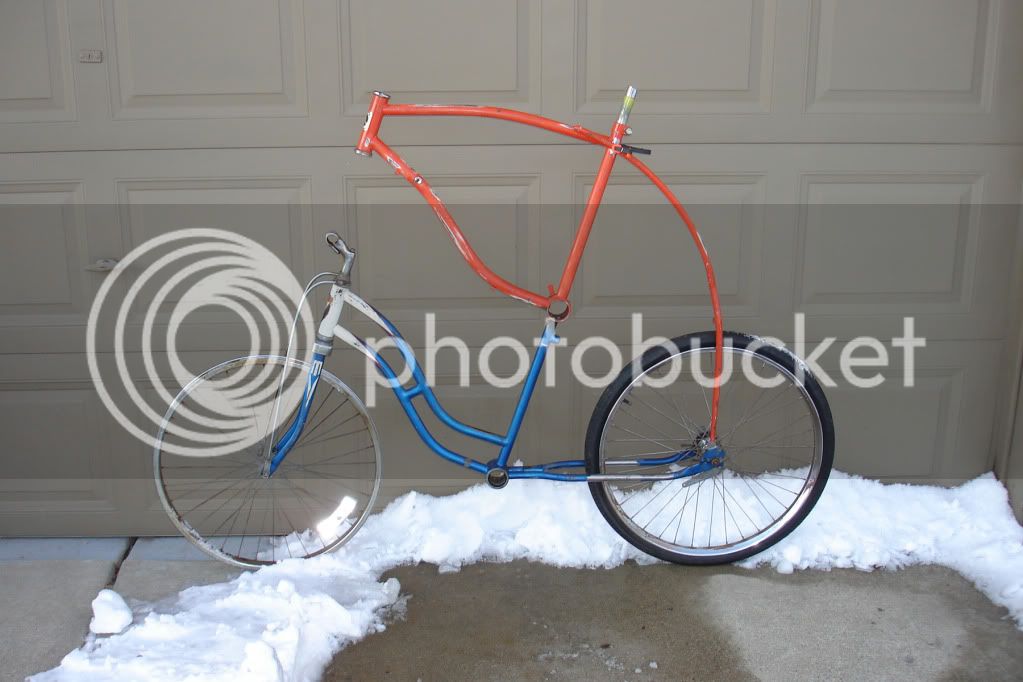
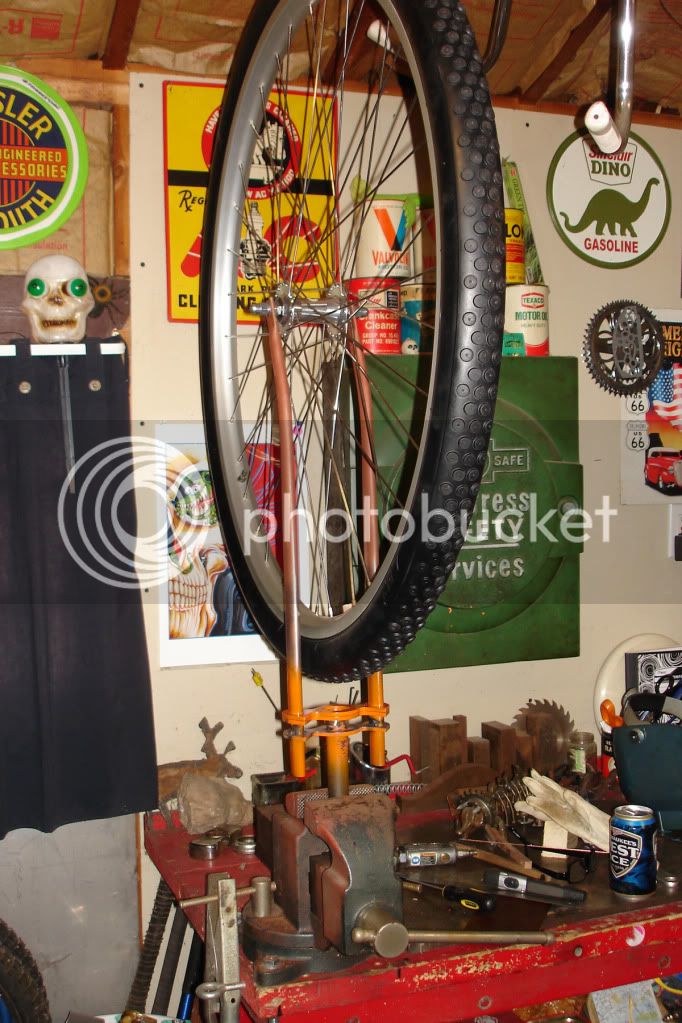
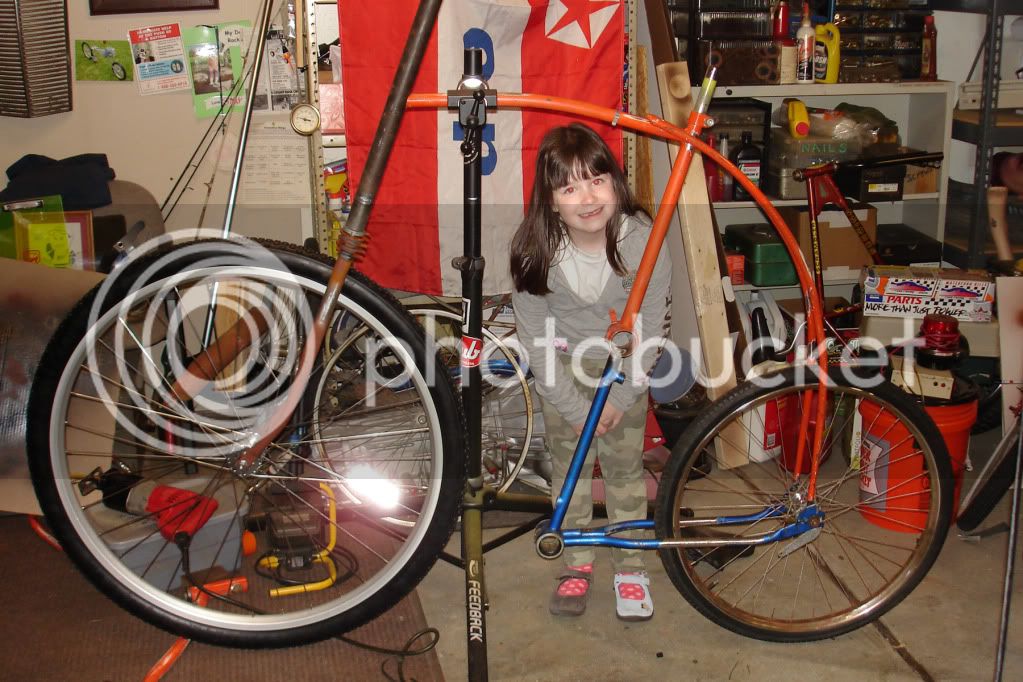
After getting the headtube built I thought now would be a good time to get the correct rear tire on and put it against a better background to make sure everything was where I wanted it. Here are those shots.
After getting the headtube built I thought now would be a good time to get the correct rear tire on and put it against a better background to make sure everything was where I wanted it. Here are those shots.
Re: High Horse
That is definitely the coolest tall bike I have seen. I usually don't care for tall bikes but with the amount of work and attention to detail this is a great bike. Can you tell me where you bought this rotary file? I had one but misplaced it. I have looked everywhere but can't find anyplace that sells them.
That is definitely the coolest tall bike I have seen. I usually don't care for tall bikes but with the amount of work and attention to detail this is a great bike. Can you tell me where you bought this rotary file? I had one but misplaced it. I have looked everywhere but can't find anyplace that sells them.
Re: High Horse
Hey Flamejigger thanks for the comments. Those grinding bits can be found at most industrial tool suppliers. I have many different ones and frankly have gotten alot of them at different stores. check online search under "carbide grinding bits". Hope that helps.
Hey Flamejigger thanks for the comments. Those grinding bits can be found at most industrial tool suppliers. I have many different ones and frankly have gotten alot of them at different stores. check online search under "carbide grinding bits". Hope that helps.
Re: High Horse
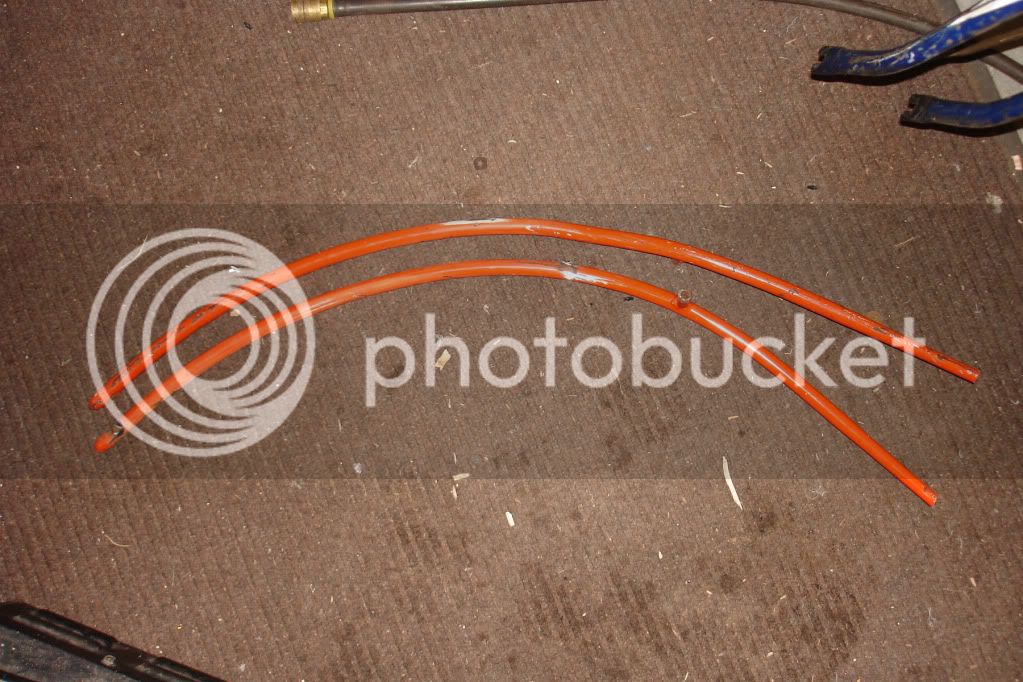
This week I set up one of those chinese made tubing rollers that I purchased at the freight store. It seemed to work OK until I noticed that my tubing had twisted on the ends. Im not sure what caused this but i think it was from taking it in and out of the roller too many times to check it. There is also alot of play in the rollers that might have had something to do with it. Anyways I spent more time with the torch trying to correct the curve than it took me to bend it. So out of frustration I returned the roller to the store and got my money back. From now on I'll stick to recycling old tube rather than purchasing new. Here is the finished bottom tube held in place by clamp. I also made my straight bar to so I could stabilize the front end more.
This week I set up one of those chinese made tubing rollers that I purchased at the freight store. It seemed to work OK until I noticed that my tubing had twisted on the ends. Im not sure what caused this but i think it was from taking it in and out of the roller too many times to check it. There is also alot of play in the rollers that might have had something to do with it. Anyways I spent more time with the torch trying to correct the curve than it took me to bend it. So out of frustration I returned the roller to the store and got my money back. From now on I'll stick to recycling old tube rather than purchasing new. Here is the finished bottom tube held in place by clamp. I also made my straight bar to so I could stabilize the front end more.
Re: High Horse
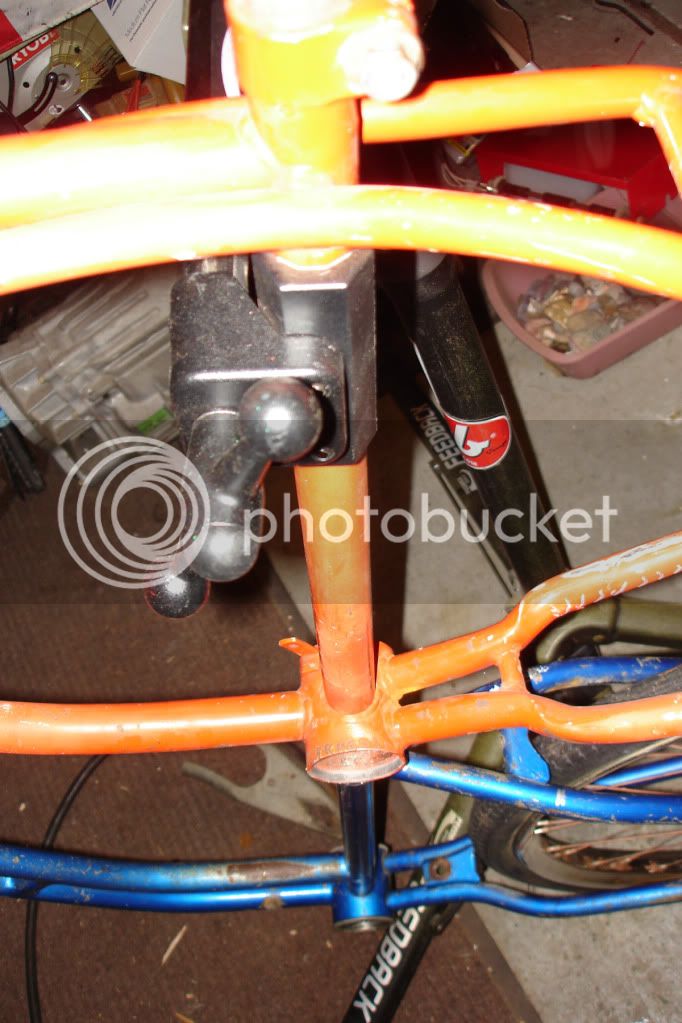
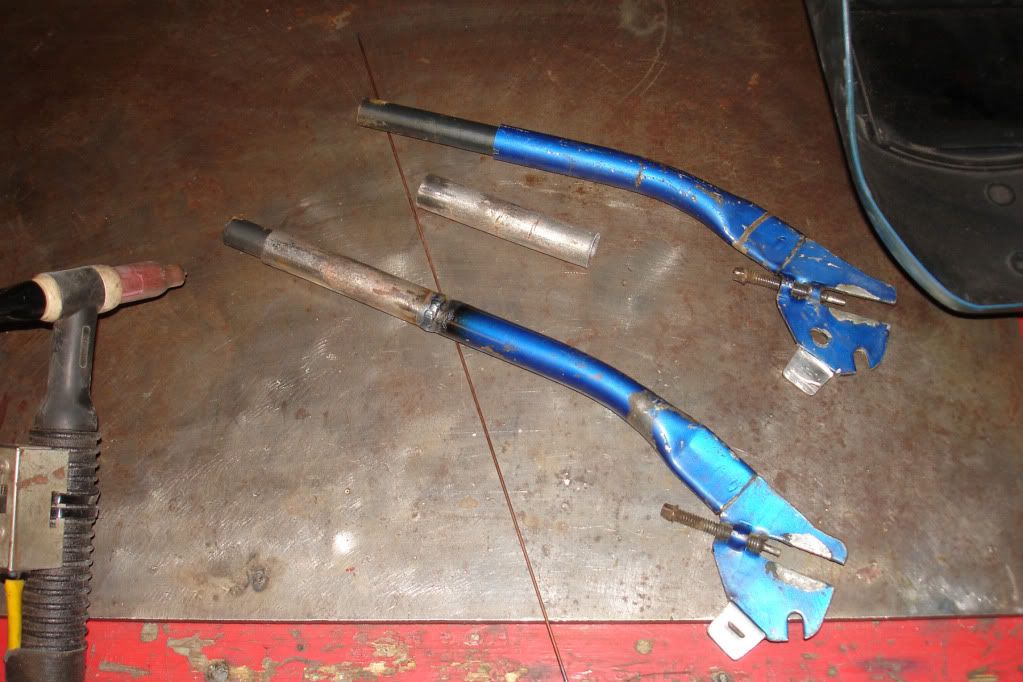
Last night while trying to figure out how I was going to attach the downtube at the bottom bracket, I decided that just a single tube protruding from the bottom bracket would be to predictable. So I thought about making it look like the rear chainstays extended forward and meet at a point and attach the downtube on top of it. Low and behold the parts for this were right in front of me. Yes the chainstays from the u haul bike.
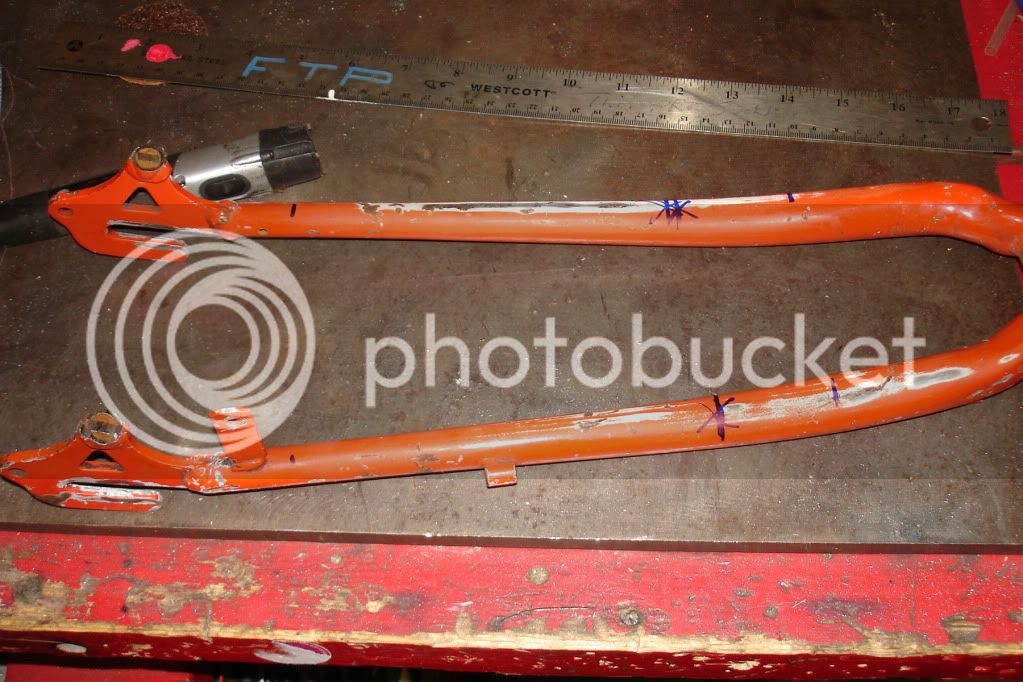
Last night while trying to figure out how I was going to attach the downtube at the bottom bracket, I decided that just a single tube protruding from the bottom bracket would be to predictable. So I thought about making it look like the rear chainstays extended forward and meet at a point and attach the downtube on top of it. Low and behold the parts for this were right in front of me. Yes the chainstays from the u haul bike.
Re: High Horse
Some of you may understand what I am doing here for the rest of you just hang in there. Thats just plain old beach sand from my kids old sand box, poured in then welded shut at the top. You see as I was growing up through the trades I always watched the old guys do thier little tricks that get things done when you dont have proper tools. This is one of them. To bad I am out of propane so you will have to wait till I return from the store to see if it works. HeHeHe
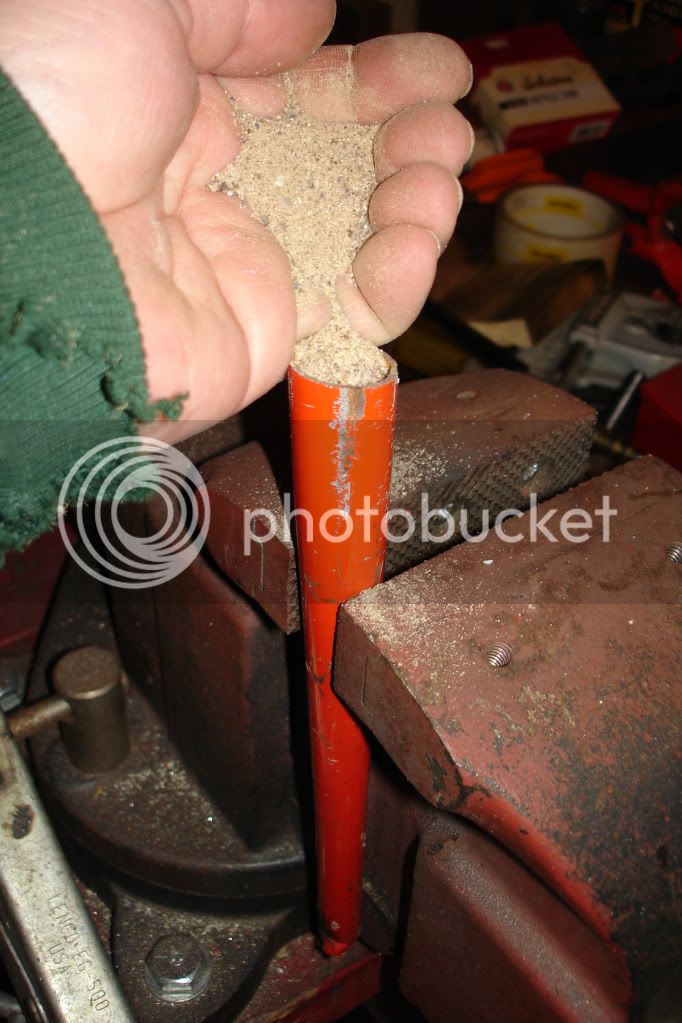
Some of you may understand what I am doing here for the rest of you just hang in there. Thats just plain old beach sand from my kids old sand box, poured in then welded shut at the top. You see as I was growing up through the trades I always watched the old guys do thier little tricks that get things done when you dont have proper tools. This is one of them. To bad I am out of propane so you will have to wait till I return from the store to see if it works. HeHeHe
Re: High Horse
Great stuff!... super cool idea for the coker tire ... Keep up the great work!
Great stuff!... super cool idea for the coker tire
... Keep up the great work!