3-Star Delusion - finally an actual ride...

Rat Rod Bikes Bicycle Forum

Help Support Rat Rod Bikes Bicycle Forum:

This site may earn a commission from merchant affiliate links, including eBay, Amazon, and others.
Re: 3-Star Delusion - rivets and screws

expjawa said:
Thanks. One last bit before I get back to work.

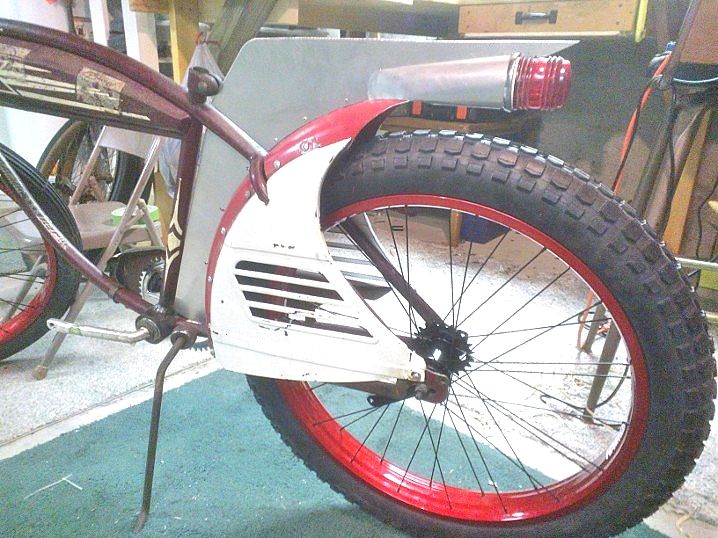
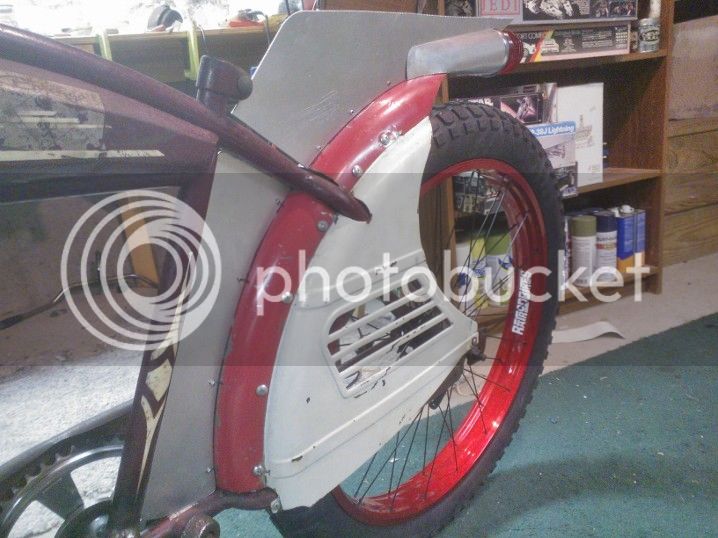
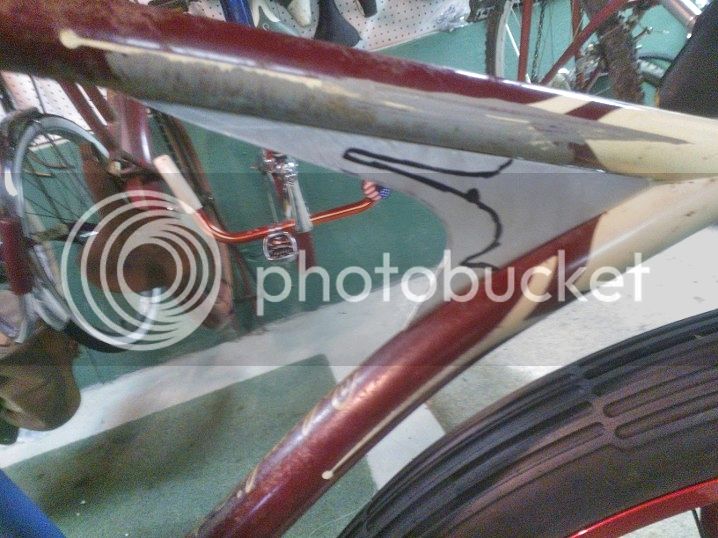
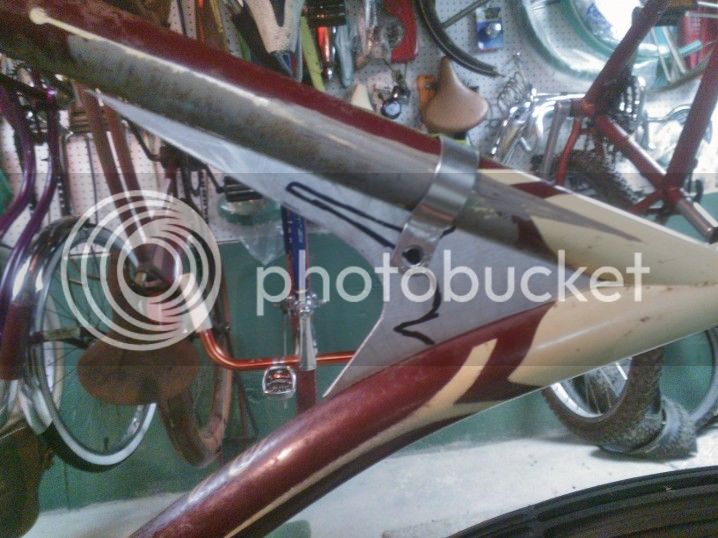
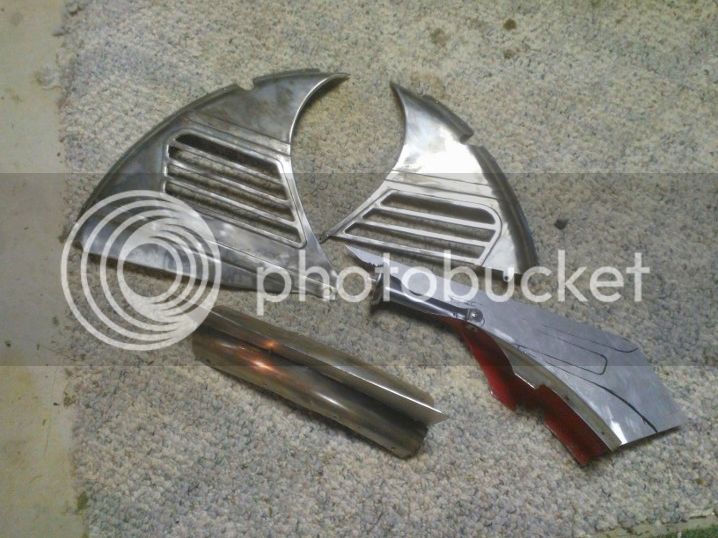
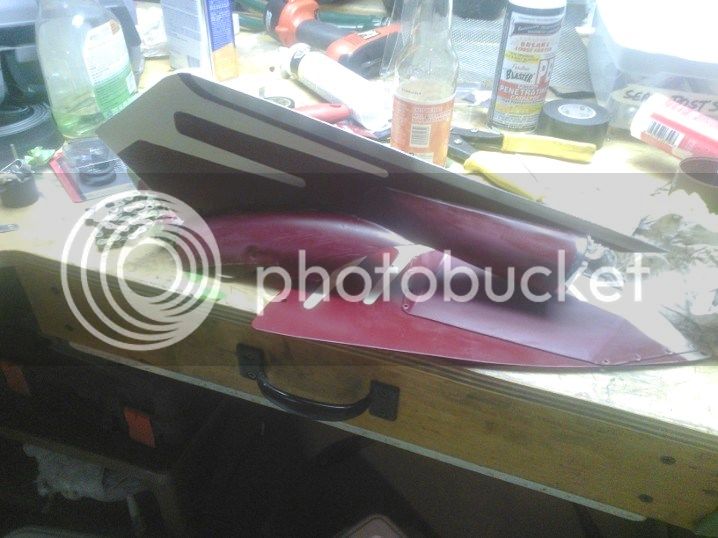
The tail light came out pretty well, I think, but I'm still tracing the idea of better integration into the whole. There are pair of flat pieces cut from aluminum flashing in the above picture that I haven't mentioned yet. These are for an idea I had to better streamline the tail light into the fin, more like the Cadillac design.

I worked out the shape with a few phases of template before I got to what you see here. But with a bit of (careful) hand forming, they make a nice cover over the lamp handle arm.
WP_001527_zpsf709ee72.jpg


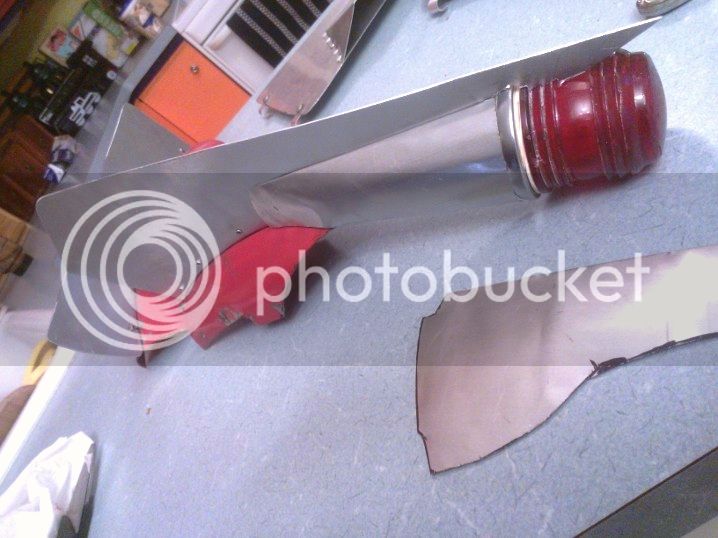
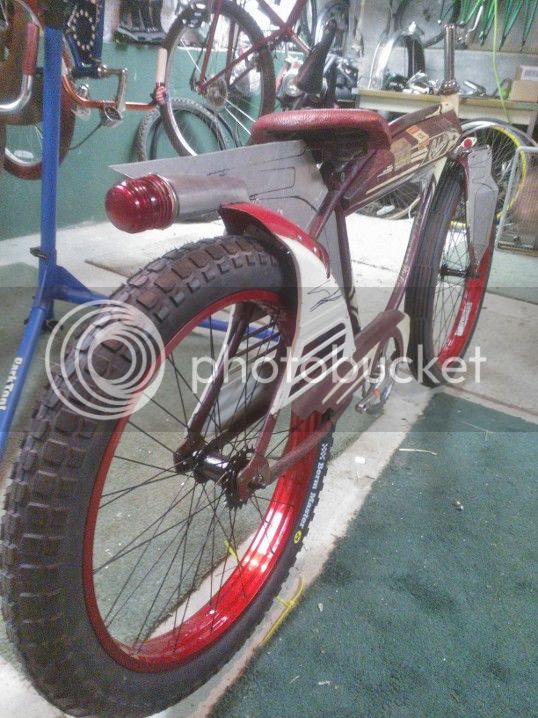
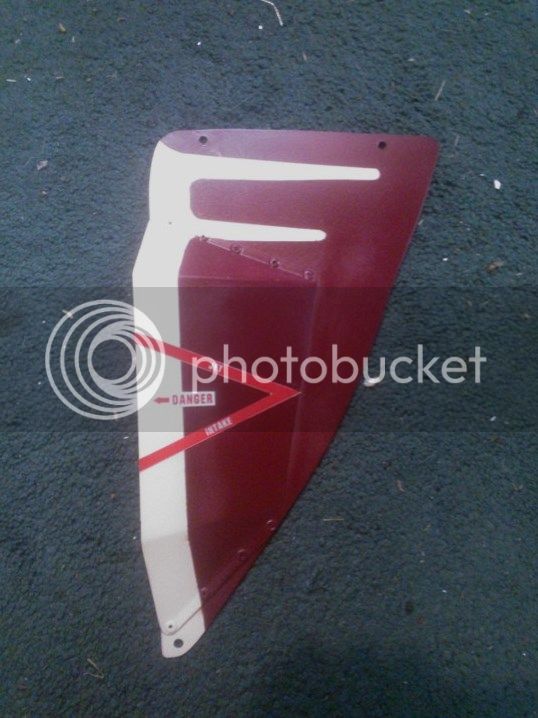
This does, admittedly, hide the visual impact of the pointed fender flowing into the pointed fin. The overall improvement in appearance, though, makes it worthwhile IMHO. I think that you can still see that the fender flows into the shape of the fin, it just does through a streamlined fairing for the light. I like the way this came out, its much more like what I intended when I started. The streamlined tail light is sort of the polar opposite of the very non-streamlined headlight, as KF noted before. So there's a bit of dicotomy there, but I think that makes it all the more rat-like (if I may be permited to consider that sort of thing). I still have to figure out an effective way to keep those flashing fairings in the fin. They're held on with double-side tape in the picture, but it doesn't hold it real well and is by no means permanent. I'll have to think about that one.

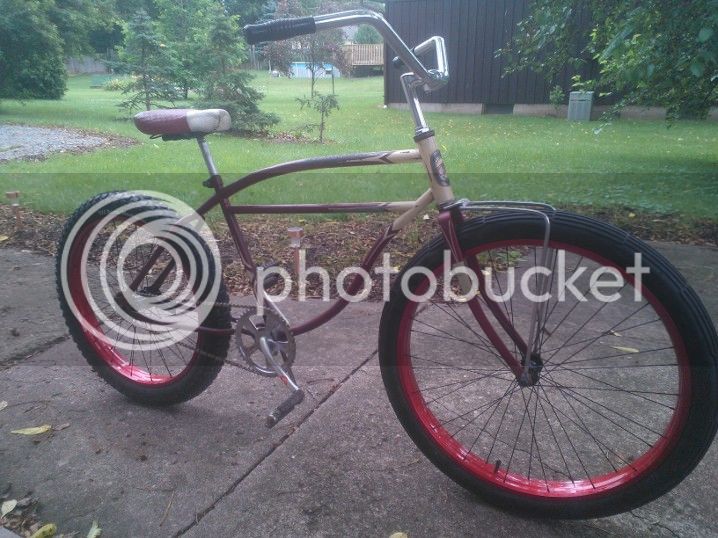
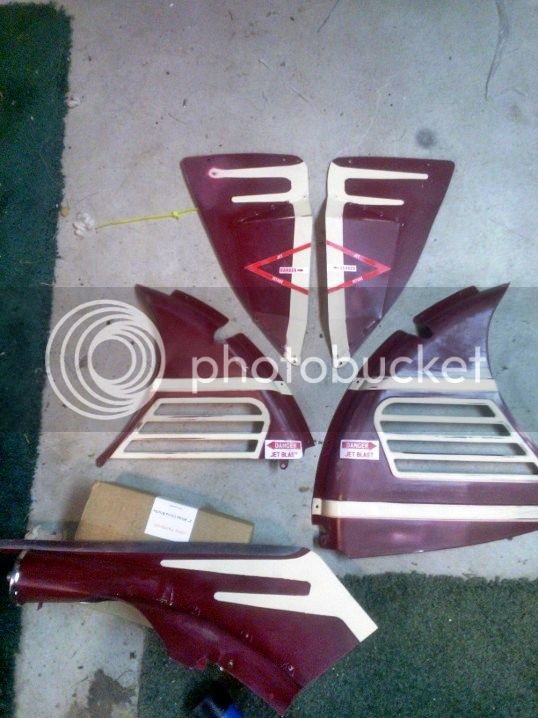
I've since test fitted all the parts back on the bike and taken some added photos. They're still on my phone, however, so I won't post them till later. By them I hope to have everything painted...

I like the way this is going with the light. If you want it to look even more like the jet or rocket exhaust, maybe you could add two more complimenting fins along the light casing that are each 120 degrees from each other (or maybe 90). This will give you three sharp point around the light. Just an idea.
 
Re: 3-Star Delusion - rivets and screws

outskirtscustoms said:
That light and fin are SWEET!

Thanks! I think I've got the assembly of it figured out. I used double-sided mounting tape (not the same stuff used yesterday) to attach the tail light fairings to the fin. I then used paintable caulk to fill in the small gap between them, and to make a small blend fillet at the joint. Now I'm waiting for that to dry to continue painting.

A funny thing occured to me today at about this point:
WP_001537_zpsf99b29a8.jpg

This point, BTW, was when I made up a chain for it. I already had a nearly matching Mesinger saddle on a post nearby. With that. some pedals and bars, the bike was completely rideable, even without all the fancy bits. So I dug out some pedals from a Schwinn, took the nearest bars I had (since the paint was drying on the ones I intend to use) and found some grips that would slide off easy enough later. And I rode it. In fact, I'm going back out to ride it around the block as soon as I hit "submit".
 
Re: 3-Star Delusion - rivets and screws

Love it when a build off bikes get's ridden.
I just realized that I have never put a chain on mine yet. :x
You beat me to the riding part. Drats!
 
Re: 3-Star Delusion - rivets and screws

Does that mean I win the 3-Star mini build off prefinish sub ride-off? :mrgreen: Well, I only really rode around the block. At that point, rain was starting and the was lightning nearby. By the time I got back to the house, things were starting to get wet.

Anyway, I have half a mind to leave the bike way it is, if it weren't for all the work that's gone into the other parts. A couple of years ago, I'd have considered it sufficient for a RRBBO event...
 
Re: 3-Star Delusion - rivets and screws

OK, its been busy over the last few days. I've been working quite a bit on finishing up the sheetmetal work on the bike, getting the painting done, and going to both the Syracuse Nationals hot rod show and the Howe Caverns bike show. But here's where things were left off. Pictures of the bodywork test fitted to the bike again:
WP_001528_zps5be206bf.jpg

WP_001529_zps06e66b05.jpg

WP_001530_zpsa9dd4649.jpg

WP_001531_zps4ea69299.jpg


I haven't said really anything about the smallest bit of the aluminum work yet, though its been shown in most of the photos. I made this little gusset piece to fill in the corner between the lower top tube and down tube. My thought is that it visually helps streamline the bike subtly. Last year I made a big version of the same sort of thing that went between the seat tube and the lower top tube. It looked cool, but was damage prone and makes the bike difficult to carry, as its attached right where you'd want to lift the frame. This is a toned down version of the same idea.
WP_001532_zps101ffc28.jpg

WP_001533_zps6b31870e.jpg

It'll be held on by one P-clamp, that'll be painted to match as not to distract from the shape. Like the rest of the bodywork, this piece is going to be more or less paint matched to the existing parts. I want the bodywork to sort of blend in, look like it's supposed to be there. At the same time, I want to try to age it a little to match the frame. I'll have to play with that some.

Anyway, the next step was to strip the parts and repaint them. I spent some time with the right angle grinder and a wire wheel removing the paint, all while making a racket that I'm sure had the dog cowering in her bed (she's a big scaredy cat). Paint removed:
WP_001534_zpsbec7b833.jpg

I thought about leaving it this way, but again, that's not really what I wanted. In primer:
WP_001536_zps04ea6fed.jpg


After priming, I assembled the tail light fairings onto the fin/fender (finnder?) assembly, then used paintable caulk to blend them together.
WP_001539_zpsfe033fe7.jpg


Of course, while all of this was going on, I was riding the actual bike itself. Like I mentioned before, I threw on some pedals and another set of bars to ride around the neighborhood:
WP_001541_zps3bce5d2b.jpg

It turns out that its rather entertaining as it is. If it weren't for this RRBBO thingie, I'd be content to leave it just like this...
 
Re: 3-Star Delusion - rivets and screws

I agree that the bike looks super sweet without the extras. But I like the way cool extras too!!!!
 
Re: 3-Star Delusion - rivets and screws

One the paint goes on and flows those various items to that light I think you will be pretty happy with you decisions.
 
Re: 3-Star Delusion - rivets and screws

Kroozerdave said:
One the paint goes on and flows those various items to that light I think you will be pretty happy with you decisions.

I expect you're right. Here are the painted parts. The skirt guards:
WP_001552_zps1d07ac13.jpg


Fin/fender:
WP_001551_zps9354eec5.jpg


Front panel (decal also applied):
WP_001549_zps81f82dbd.jpg


After the paint dried, I spent some time oversanding and otherwise distressing the finish. I sanded through to the primer or metal in various places and used a couple different files to mar and scratch the paint. It's kind of hard to tell in this picture, mostly because the picture is crappy:
WP_001553_zpsb74130c1.jpg


And here are the parts with the original chain guard and tank:
WP_001555_zpsb4c35e48.jpg

WP_001554_zps354b2ef7.jpg


The paint match isn't as close as I'd normally like, but under the circumstances, it isn't too bad considering I was using off-the-shelf cans of Rustoleum. The Ivory is actually almost perfect, but the maroon is a little redder than the original paint. It may not matter much though. You might notice that I left a strip along the top of the fin unpainted; this is partially polished up, intended to emulate the chrome trim on the top of the Cadillac's fins. My thought is to clear coat everything, but I'm concerned that it might be too shiny for what it is. I saw an old Chevy panel truck over the weekend that'd been cleared over the faded and surface rusted paint. It looked odd to me. I'm not sure if I can get a matte finish clearcoat readily, I couldn't find anything like that at Home Depot. I could probably get something from a hobby shop, but they tend to come in very little cans...
 
Re: 3-Star Delusion - rivets and screws

I think the new paint flows very well with the old.
Great details too.
As far as the matte clear, there should have a be a couple of different Rustoleum matte clears at Home Depot. I know that I have seen them there.
http://www.homedepot.com/webapp/catalog ... Search+All
 
Re: 3-Star Delusion - matching the original paint

Thanks.

I'll have to take another look over at the Depot for the matte clear. That's definitely a better option than the (expensive) high gloss urethane clear I have at home. The urethane would probably provide better protection for the paint, but the point is for it to sort of look knackered...

One other thing Kingfish - I'm pretty sure that you had a post somewhere regarding repairing the Delta horn. Any chance that you can point back to where I might find that?
 
Re: 3-Star Delusion - matching the original paint

Good job on the matching 8)
 
Re: 3-Star Delusion - matching the original paint

:D


Absolutely Stunning!! :shock:

All I can say is WOW!!!


8)
 
Re: 3-Star Delusion - matching the original paint

SCHWINNRAY69 said:
Good job on the matching 8)

junknutz1975 said:
Absolutely Stunning!! :shock:

All I can say is WOW!!!

Thanks guys, although the poor pictures make it look better than it is, if that makes any sense. But we'll see. Over the next couple days, I expect to get everything fitted back on the bike again before taking it apart again for clear coat. I'll get some more pictures then, hopefully where there's decent lighting.

In the meantime, I've been working with the headlight assembly. I don't have any pictures due to a dead phone battery, but I took the lamp apart, cleaned up the rust (I didn't remove it, just took the high stuff off), scuffed up the paint on the housing and mount bracket so they can also be clear coated, cleaned the lens and polished the reflector. The old blown glass bulb was still intact and functional, as was the cloth-shrouded wiring. I was able to light the bulb using a 9V battery, although its almost certainly a 6V bulb. I plan to replace the bulb with an LED bulb, even though the aesthetics of the incandescent bulb are better. I should probably solder new wiring onto the socket as well. The old cloth coverings look cool, but they're in poor shape. I plan to wire it to a battery pack in the tank, which the tail light will be tied to as well. However, this is the lowest priority on my list of things to finish this bike. If the lights aren't working on 8/4, well, it won't detract too much from the whole.
 
Re: 3-Star Delusion - matching the original paint

kingfish254 said:
expjawa said:
One other thing Kingfish - I'm pretty sure that you had a post somewhere regarding repairing the Delta horn. Any chance that you can point back to where I might find that?

Here you go
http://www.ratrodbikes.com/forum/viewto ... rn#p712387

Thanks King. I haven't tried to mess with it yet, although I may remove it entirely and use the hole for a light switch. That might be favorable, I think, to drilling an added hole into the tank that's otherwise original. I'll have to think about it.
 

Latest posts

Back
Top