You are using an out of date browser. It may not display this or other websites correctly.
You should upgrade or use an alternative browser.
You should upgrade or use an alternative browser.
Tribute to our friends
- Thread starter Fireproof
- Start date


Help Support Rat Rod Bikes Bicycle Forum:
This site may earn a commission from merchant affiliate
links, including eBay, Amazon, and others.
- Joined
- Mar 10, 2009
- Messages
- 1,465
- Reaction score
- 1
Thank you all for all the compliments!  We definitely appreciate it!
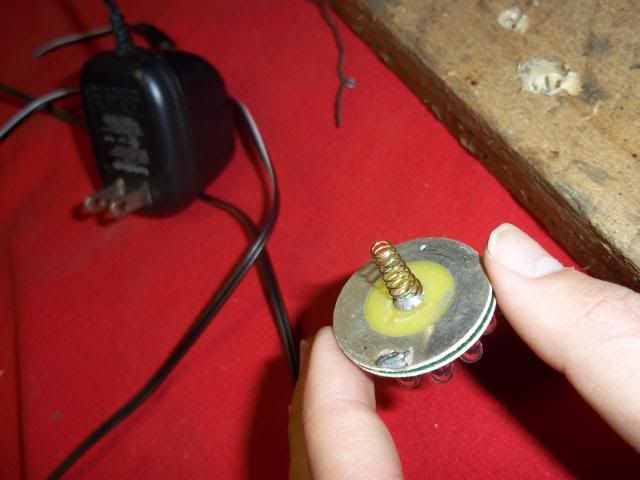
Today we were working on the taillight and got quite a bit done. We are elaborating upon the suggestion by RatRodDad for the taillight.This is the back of the LED light before being worked on. We are going to remove the spring, and replace it with a wire.
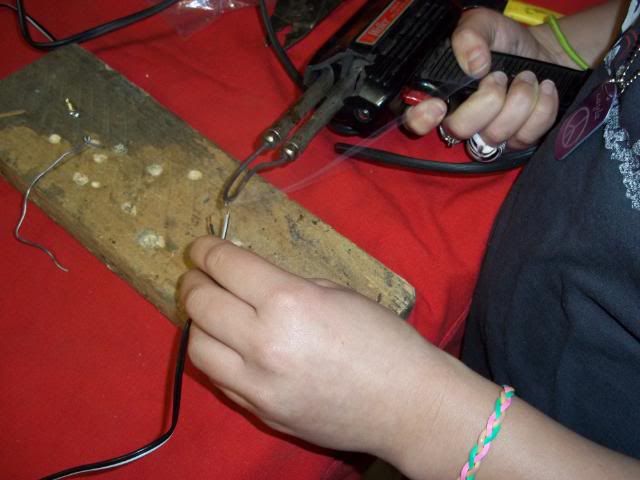
My dad picked up a wall transformer up out of the parking lot at his work (shown in the above pic)(somebody threw a truckload full of junk there) and brought it home( free wire!). We then cut the wire at the ends to find the clean, new wire and stripped the ends with a wire stripper. I got to learn how to use a Weller soldering gun! (He taught me that the #1 most important rule about soldering: your metal has to be 100% clean and shiny.) Afterwards, I tinned the ends of the wire to prepare it for soldering.
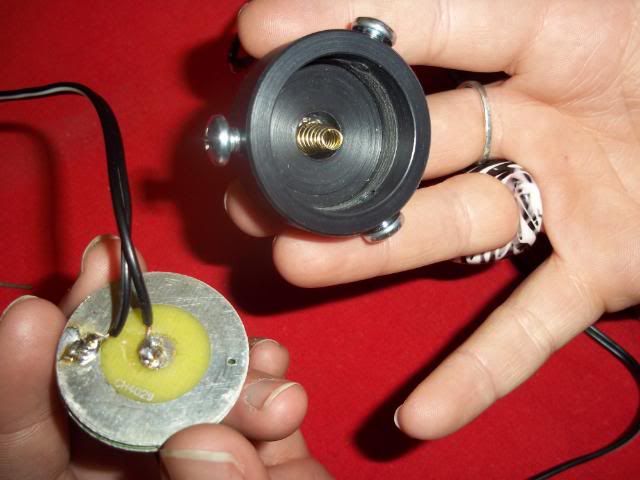
On the left of this picture is the back of this LED circuit board. Notice there is now a wire I soldered there in place of the spring. The white line on the wire will help us keep the polarity correct. The black thing is a cap my dad made in the lathe at work. Notice the spring in the center is soldered to a brass screw. (No use wasting a good clean spring :wink: ) The three screws on the sides will clamp the cap to the flashlight body.
Here is the flashlight assembled with the cap and wire in place. The flashlight will be mounted using this piece, which is a coupler for EMT conduit. Everything works the way it’s intended to and the flashlight will soon be mounted under the seat!
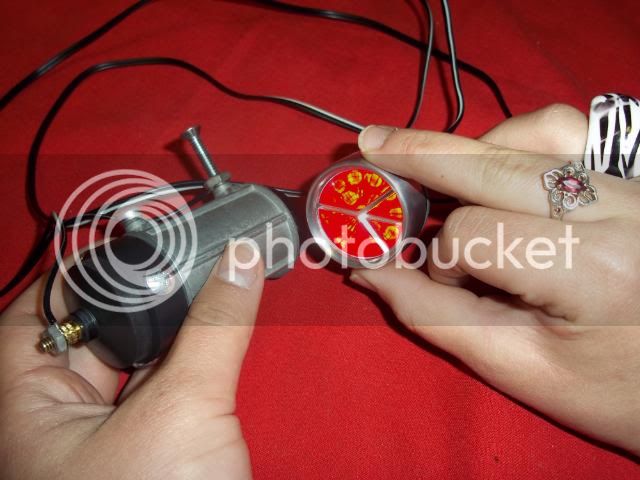
Lampy is now only an inch thick! This same method can be used for converting flashlights for use in a headlight, fender light, under a rack, etc.
We definitely appreciate it! Today we were working on the taillight and got quite a bit done. We are elaborating upon the suggestion by RatRodDad for the taillight.This is the back of the LED light before being worked on. We are going to remove the spring, and replace it with a wire.
My dad picked up a wall transformer up out of the parking lot at his work (shown in the above pic)(somebody threw a truckload full of junk there) and brought it home( free wire!). We then cut the wire at the ends to find the clean, new wire and stripped the ends with a wire stripper. I got to learn how to use a Weller soldering gun!
(He taught me that the #1 most important rule about soldering: your metal has to be 100% clean and shiny.) Afterwards, I tinned the ends of the wire to prepare it for soldering.
On the left of this picture is the back of this LED circuit board. Notice there is now a wire I soldered there in place of the spring. The white line on the wire will help us keep the polarity correct. The black thing is a cap my dad made in the lathe at work. Notice the spring in the center is soldered to a brass screw. (No use wasting a good clean spring :wink: ) The three screws on the sides will clamp the cap to the flashlight body.
Here is the flashlight assembled with the cap and wire in place. The flashlight will be mounted using this piece, which is a coupler for EMT conduit. Everything works the way it’s intended to and the flashlight will soon be mounted under the seat!
Lampy is now only an inch thick! This same method can be used for converting flashlights for use in a headlight, fender light, under a rack, etc.
- Joined
- Aug 3, 2010
- Messages
- 12,545
- Reaction score
- 2,885
that battery pack almost looks like a coil......I'd try to incorporate that in the build. :mrgreen:
Awesome work.
Awesome work.
Very cool. I especially liked using the wire from a tossed power supply for the wiring on the taillight. Recycling at it's best !
I also enjoyed seeing the "dog tag" type necklace with the matching peace symbol on it in one of the pictures. I expect to see peace symbols replace those flowers on your nails at some point.
One other thing. Your Dad forgot to tell you that the most important thing about using a soldeirng iron is "never touch the hot tip or lay it down where it will touch anything else!" :lol:
I have one of these and i am currently brainstorming ideas to convert it into a trike. i already put a rebar sissy bar on it and different handlebars. I am 6 foot 7 and this bike was a little too small for me so i just chopped the seat post and moved it forward a little.
- Joined
- Mar 10, 2009
- Messages
- 1,465
- Reaction score
- 1
Coaster Brake!
Thanks to everybody for checking in on us!
RatRodDad, thanks for reminding us about the safety rule . . . we are careful to stay safe while working. :wink:
Mikef9317, welcome to RatRodBikes! We are honored that your first post is in our build thread! It would be cool if you did an introduction and shared your build with us . . .we would like to see what you are up to! 8)
We now have the coaster brake arm anchored. Here’s what we did . . .
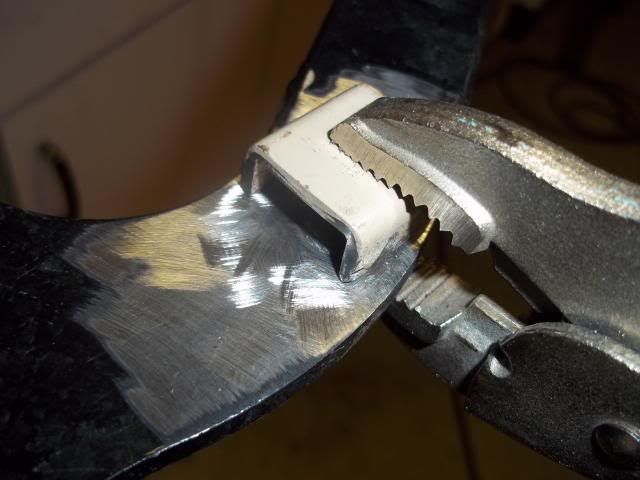
This is the latch from that old locker door we were using earlier. It has a channel-shaped piece that has inside dimensions very close to the size of the coaster brake arm.
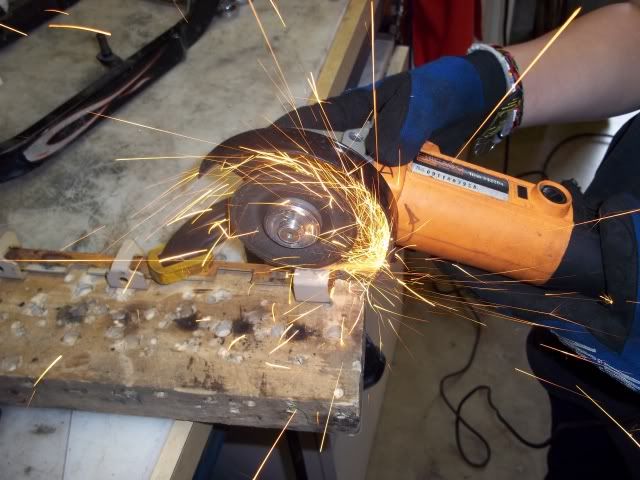
After we cut the part off the latch, we trimmed it and clamped it to the inside of the dropout.
Lots of weld so we could grind it to a pleasing shape.
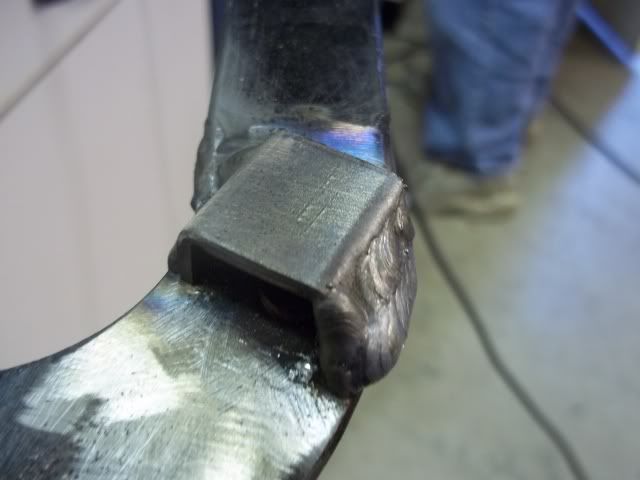
Here it is with the hub in place. The brake arm needed just the very slightest shave in one spot to fit with a tiny bit of clearance.
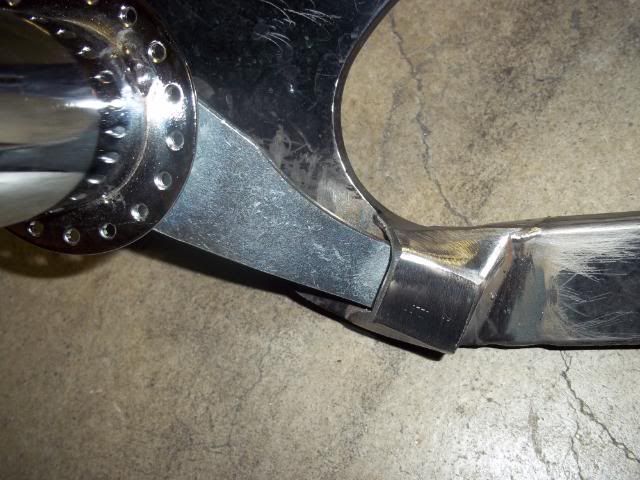
No photo, but the new coaster brake hub is now laced to a rim in preparation for a total mockup.
:!: :!: :!: News flash :!: :!: :!:
We hope to have the bike assembled and rideable to show on April 10 in Stockton! Please cheer us on to make that deadline! We appreciate your comments, suggestions, & complements! After the show, we will take it apart for paint and final assembly.
Thanks to everybody for checking in on us!
RatRodDad, thanks for reminding us about the safety rule . . . we are careful to stay safe while working. :wink:
Mikef9317, welcome to RatRodBikes! We are honored that your first post is in our build thread! It would be cool if you did an introduction and shared your build with us . . .we would like to see what you are up to! 8)
We now have the coaster brake arm anchored. Here’s what we did . . .
This is the latch from that old locker door we were using earlier. It has a channel-shaped piece that has inside dimensions very close to the size of the coaster brake arm.
After we cut the part off the latch, we trimmed it and clamped it to the inside of the dropout.
Lots of weld so we could grind it to a pleasing shape.
Here it is with the hub in place. The brake arm needed just the very slightest shave in one spot to fit with a tiny bit of clearance.
No photo, but the new coaster brake hub is now laced to a rim in preparation for a total mockup.
:!: :!: :!: News flash :!: :!: :!:
We hope to have the bike assembled and rideable to show on April 10 in Stockton! Please cheer us on to make that deadline! We appreciate your comments, suggestions, & complements! After the show, we will take it apart for paint and final assembly.
Can't wait to see this one finished. Alot of cool ideas going into this build.
Great!
- Joined
- Aug 3, 2010
- Messages
- 12,545
- Reaction score
- 2,885
Awesome, can't wait to see it done. Keep up the good work!
This bike is an amazing project. Not just the custom touches but the father/daughter aspect. I just showed my son, who wants to build his own, and he loved it. I already had a couple of the ideas you were using but a little different. That top bar is really cool!!!!
- Joined
- Feb 6, 2011
- Messages
- 106
- Reaction score
- 0
Man i've been checking the site like every day during lunch. I'm jonesing to see some new pics. From what i've seen so far it looks like its gonnas be one killer ride. that head lamb you guys made up is super cool. I'm so happy to see a younger generation carrying on this craft and with a new school version on an old classic at that. Oh and the way you hid that coaster brake arm is way awesome! KEEP UP THE GREAT WORK KID!
Bump for inspiration. What a great project. The attention to detail boggles my mind!
I love how every detail on this bike is approached as its own little project. There's a big lesson here about having fun with the smallest details, and not getting caught up in the "just throw it together" mentality. Don't get me wrong, sometimes a quick and dirty project is the way to go, but the way you're doing it is going to make the final result awesome!
I'm looking forward to seeing the first test ride!
I'm looking forward to seeing the first test ride!
- Joined
- Mar 10, 2009
- Messages
- 1,465
- Reaction score
- 1
Hey everyone, thanks for checking in and for the positive comments! We really do appreciate your encouragement!
It’s been too long since we’ve shown any progress . . . time flies. Since the last update, seems like it’s one step forward, one step back.
First, we lost Lampy to a horrible lathe accident . . . the one you’ll see from now on is a clone.
Then, several work sessions were spent getting the rear fender mounting finished only to discover we needed to cut the new mount off because the tire rubbed. FYI, don’t use a wheel with a broken spoke for measuring tire clearance! They can be out of round . . . duh!
After cutting the new mount off and welding it back in the right place, we decided to follow Outlaws suggestion and make a custom seat. That led to a couple more changes to the frame ( and cutting the fender mount off AGAIN! ), but first, some time off for a wonderful week with the flu. UGH! I think that’s enough drama for one post . . . on with the photos!
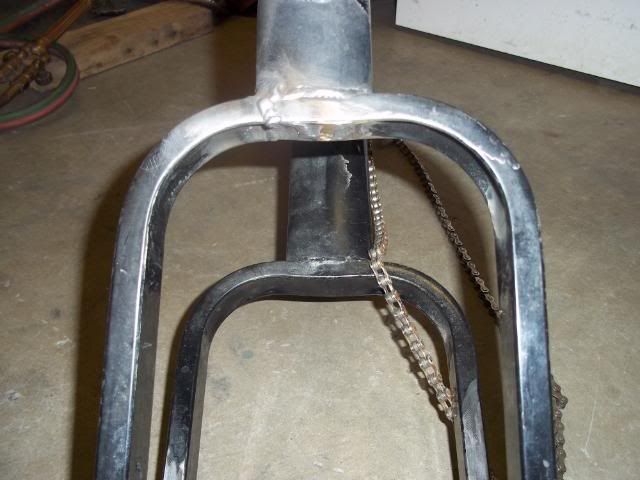
This is how we started a rarely-seen modification . . . narrowing the seat stays. :shock:
Look closely and you can see the ½" we cut out of the left stay. Some heat to the dropout and the stay will go where we want it!
A Quick-Grip clamp holds the stay ready for welding . . . the stay lines up very well!
The left side welded up and the right side awaits its turn. After this photo was taken we did the same cut on the right side, and with one inch taken out of the seat stays, the rear fender is still swimming in there . . . plenty of room!
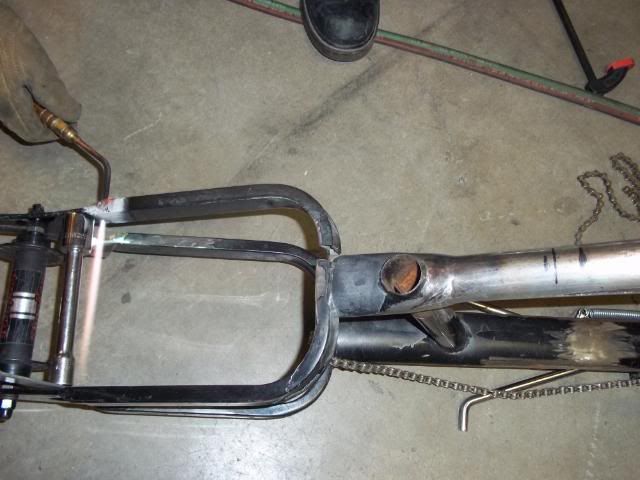
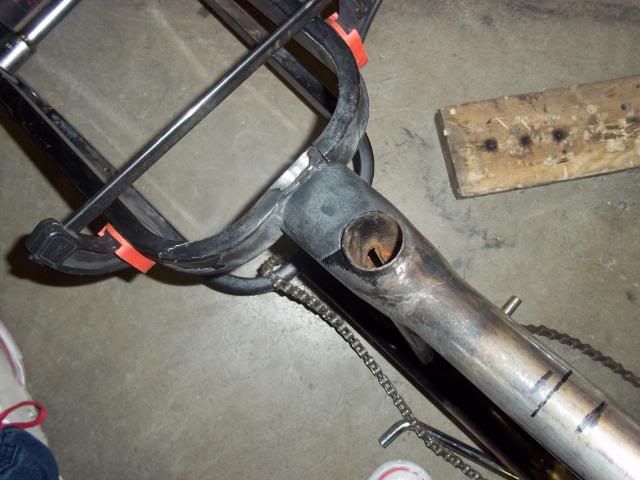
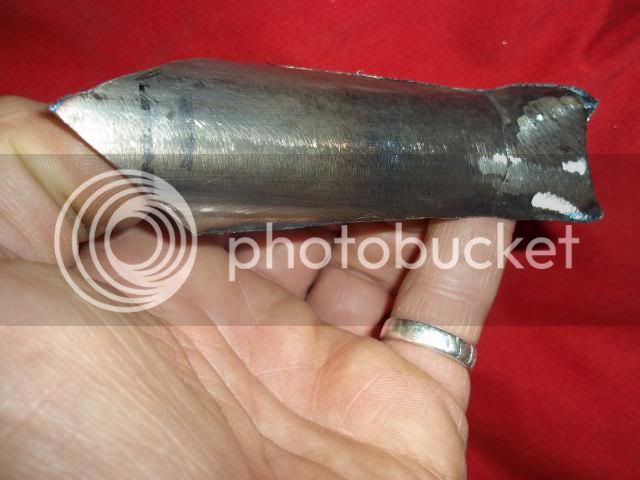
Teaser pic. This hunk of tubing was simply getting in the way of what we want to do, so we chopped it off! Taking care of the hole it left is taking a little longer . . . hope it will be worth the work.
As a famous custom bike builder once said, “That’s why they call them choppers!” 8)
BTW, We are still shootin’ to have it on two wheels for the Stockton show!
It’s been too long since we’ve shown any progress . . . time flies. Since the last update, seems like it’s one step forward, one step back.
First, we lost Lampy to a horrible lathe accident
. . . the one you’ll see from now on is a clone. Then, several work sessions were spent getting the rear fender mounting finished only to discover we needed to cut the new mount off because the tire rubbed. FYI, don’t use a wheel with a broken spoke for measuring tire clearance!
They can be out of round . . . duh! After cutting the new mount off and welding it back in the right place, we decided to follow Outlaws suggestion and make a custom seat. That led to a couple more changes to the frame ( and cutting the fender mount off AGAIN! ), but first, some time off for a wonderful week with the flu. UGH! I think that’s enough drama for one post . . . on with the photos!
This is how we started a rarely-seen modification . . . narrowing the seat stays. :shock:
Look closely and you can see the ½" we cut out of the left stay. Some heat to the dropout and the stay will go where we want it!
A Quick-Grip clamp holds the stay ready for welding . . . the stay lines up very well!
The left side welded up and the right side awaits its turn. After this photo was taken we did the same cut on the right side, and with one inch taken out of the seat stays, the rear fender is still swimming in there . . . plenty of room!
Teaser pic. This hunk of tubing was simply getting in the way of what we want to do, so we chopped it off! Taking care of the hole it left is taking a little longer . . . hope it will be worth the work.
As a famous custom bike builder once said, “That’s why they call them choppers!” 8)
BTW, We are still shootin’ to have it on two wheels for the Stockton show!
Latest posts
-

-

-

-

-

-

-
 Bike from the Dead's Freshly-Exhumed Finds (Everything I've dug up since 6/15/21)
- Latest: Bike from the Dead
-
-
