Diamond Frame Flying Merkel DONE!

Rat Rod Bikes Bicycle Forum

Help Support Rat Rod Bikes Bicycle Forum:

This site may earn a commission from merchant affiliate links, including eBay, Amazon, and others.
Joined
Apr 7, 2010
Messages
329
Reaction score
12
Location
Southeast WI
Rating - 0%
0   0   0
So....

I've always admired the asthetic of the Flying Merkel boardtrackers, and living in Milwaukee adds to the attraction. Building a replica has been floatign around in my mind for some time now, and I finally decided to buckle down and do it. I don't have a lot of moolah, and I will be tryign to do this on the cheap. I have most of the supplies I need already, the last pieces of the puzzle (which are being sorted) are decals and tires.

So without further ado, here we go!

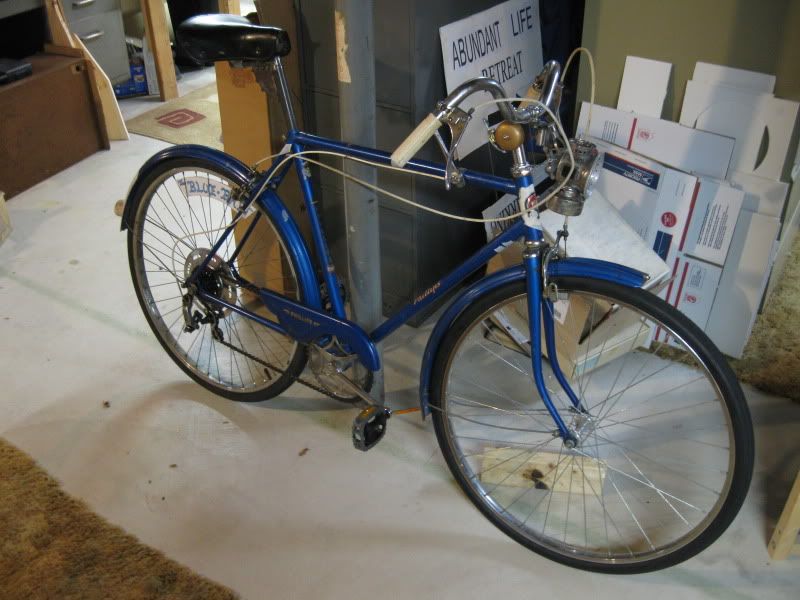
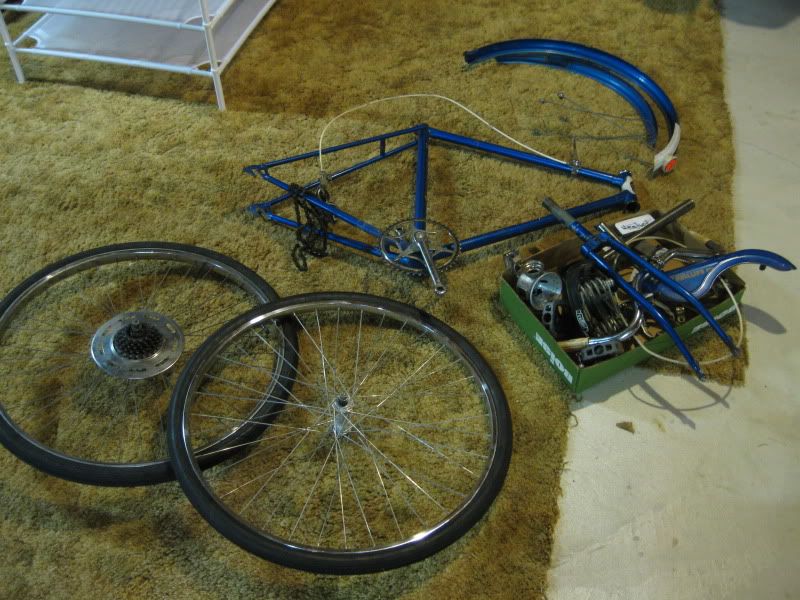
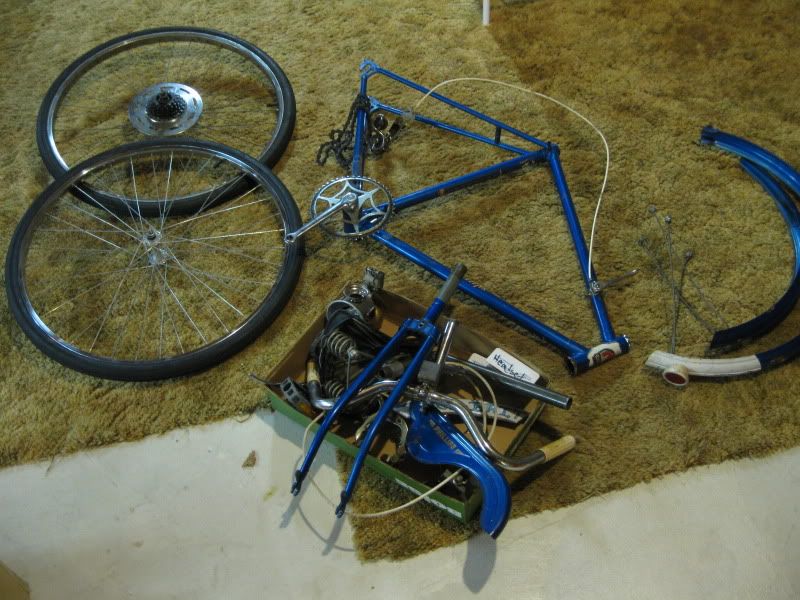
I am choosing to use my campus cruiser 'The Blue Brit' as the startign point for this build. The bike is compact, rides very well, and takes hills with ease (its a 5 speed). Its important to me that this machine be practical and stylish as well, its my daily ride during the warmer seasons. Some folks might shy away from a diamond frame, but I'm thinking with a little work, this will be one stylin ride.

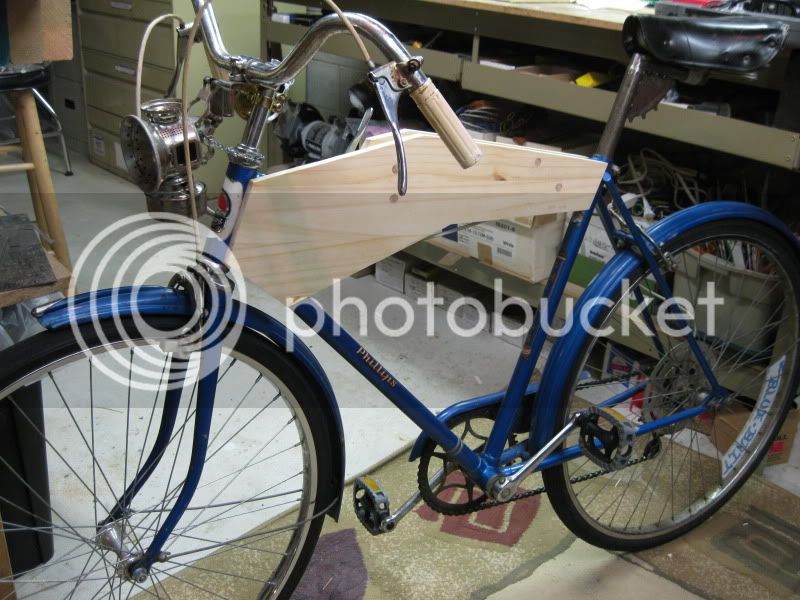
The bike as of now: a Phillips
IMG_1900.jpg


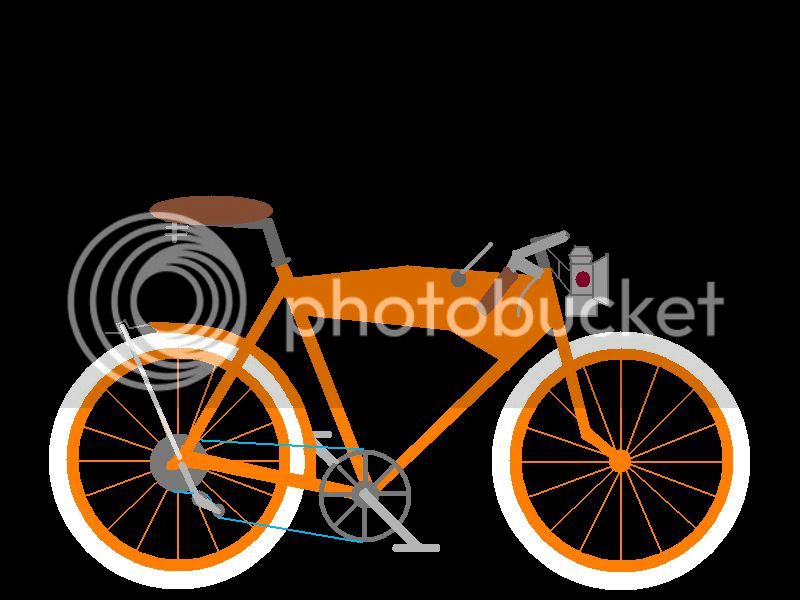
A Microsoft Paint rendition of what I'm sort of aiming for (there will be the classic tank graffic of course)
Flymerk_2.jpg


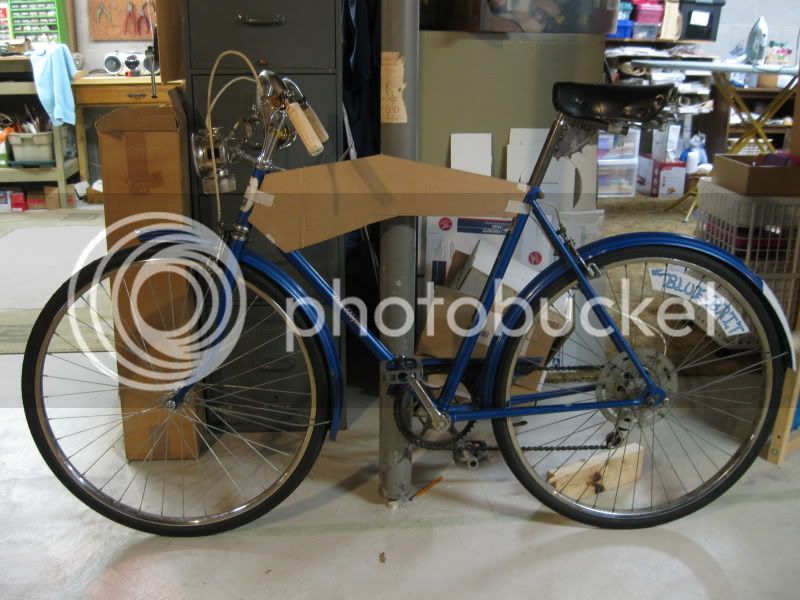
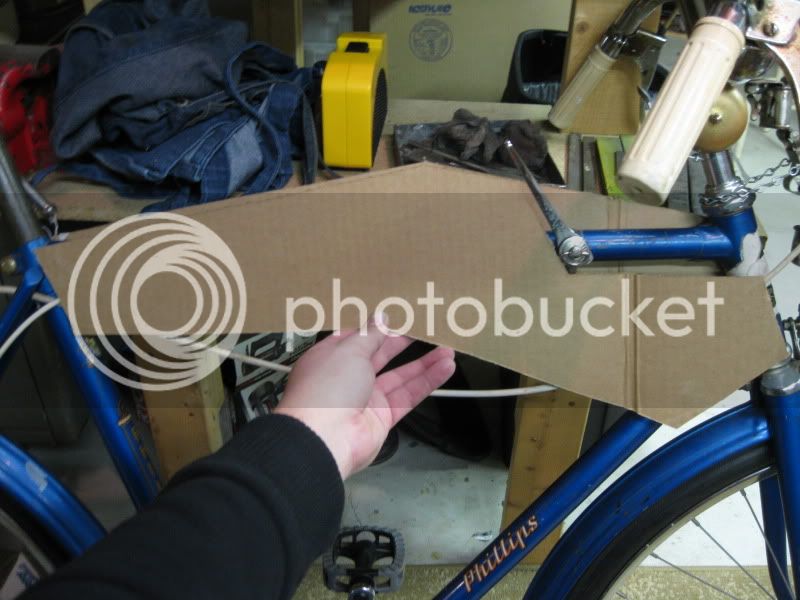
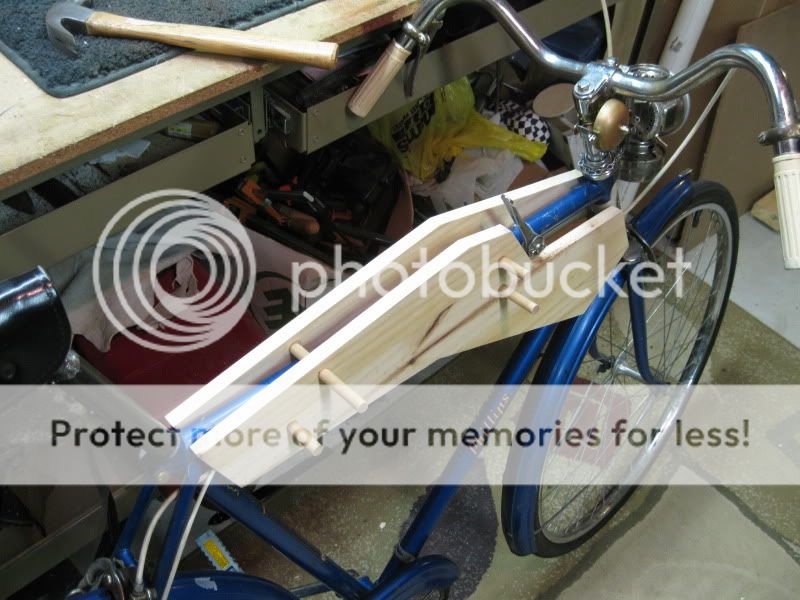
The first thing is to make a tank, to me one of the real focal points of the Flying Merkel. I made templates out of cardboard. BEcause of the the shifter on the top tube (I realize i could move it, but its most practical there) I will be using a cut-away on that side, with a plate to cover it later. Ill add another plate (made of a thin masonite-like material) to the other side to keep it even.
IMG_1904.jpg

IMG_1906.jpg


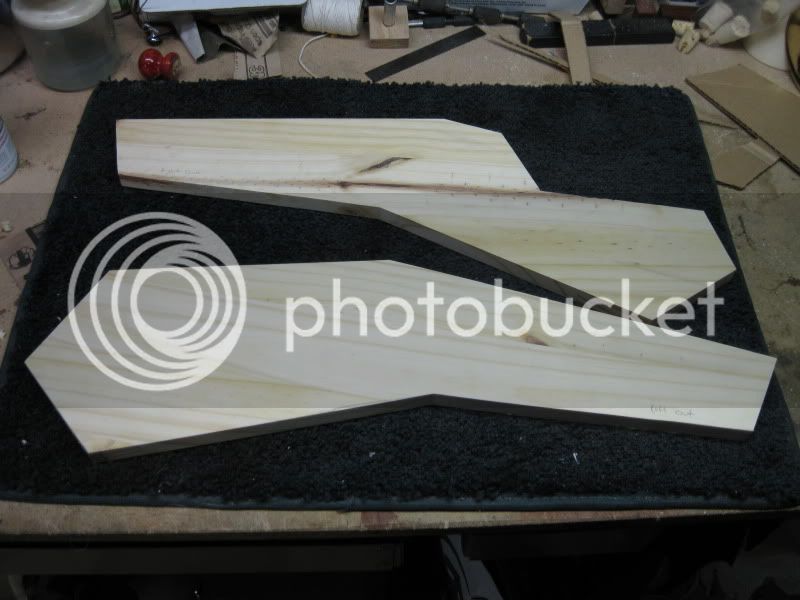
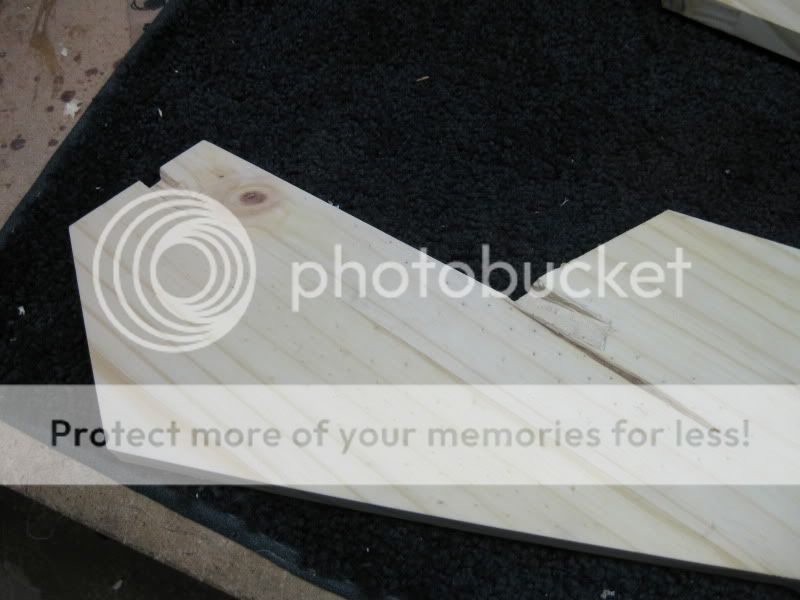
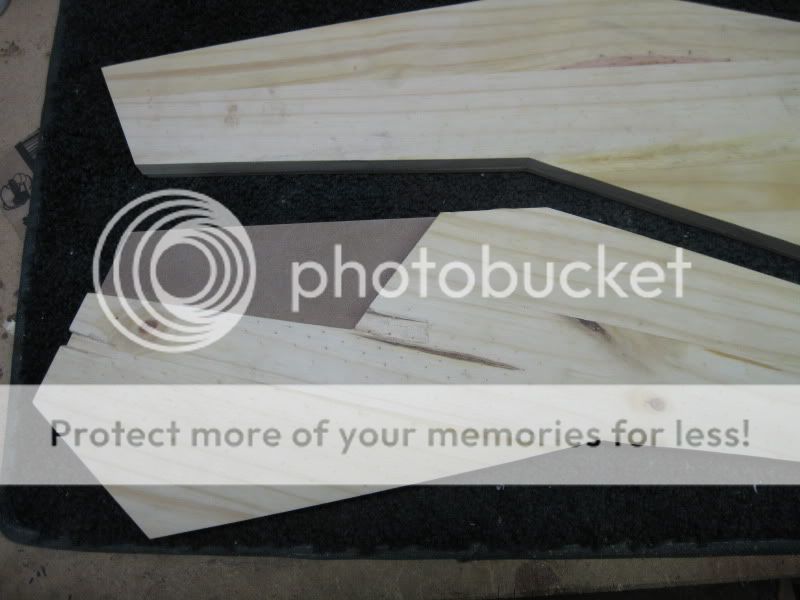
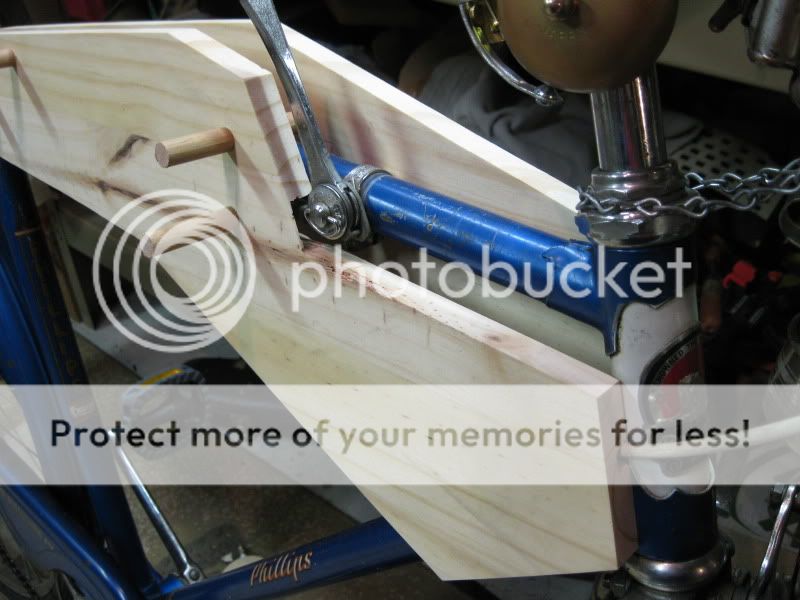
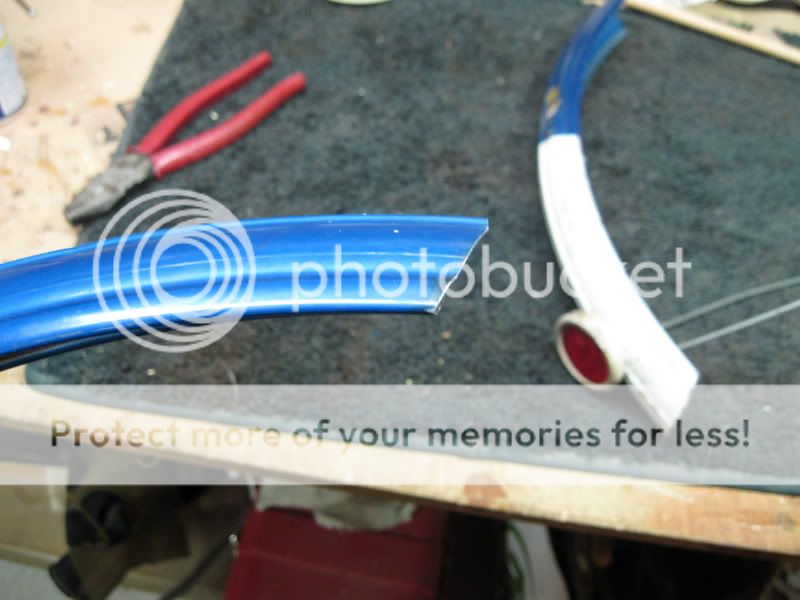
Tanks cut from wood. i have chisled out grooves for the brake and shifter cables.
IMG_1907.jpg

IMG_1908.jpg


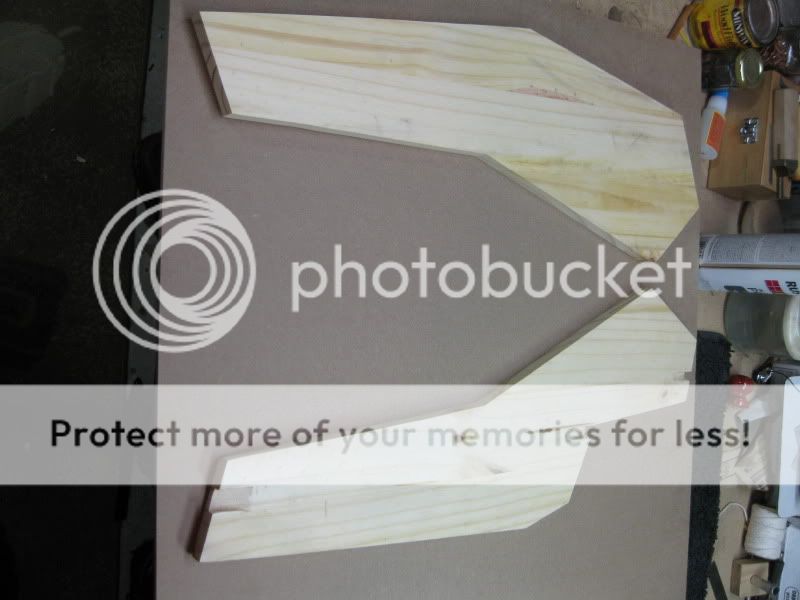
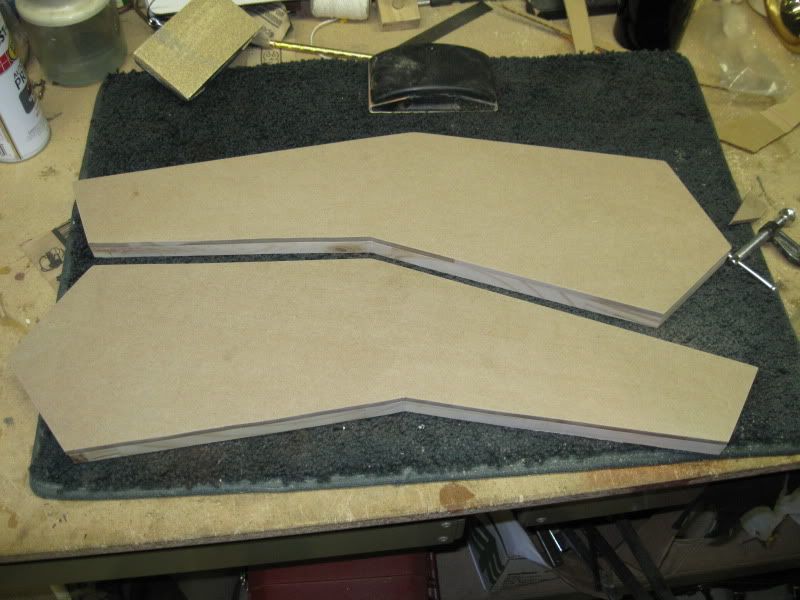
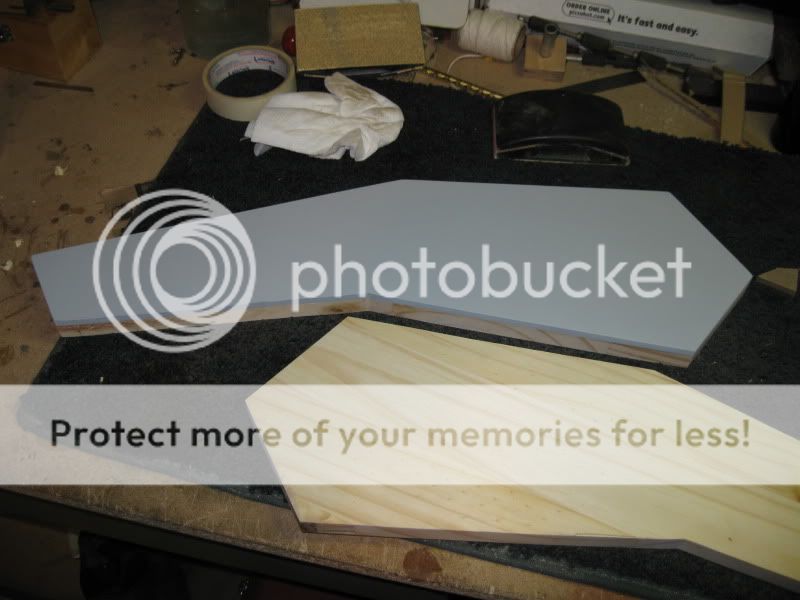
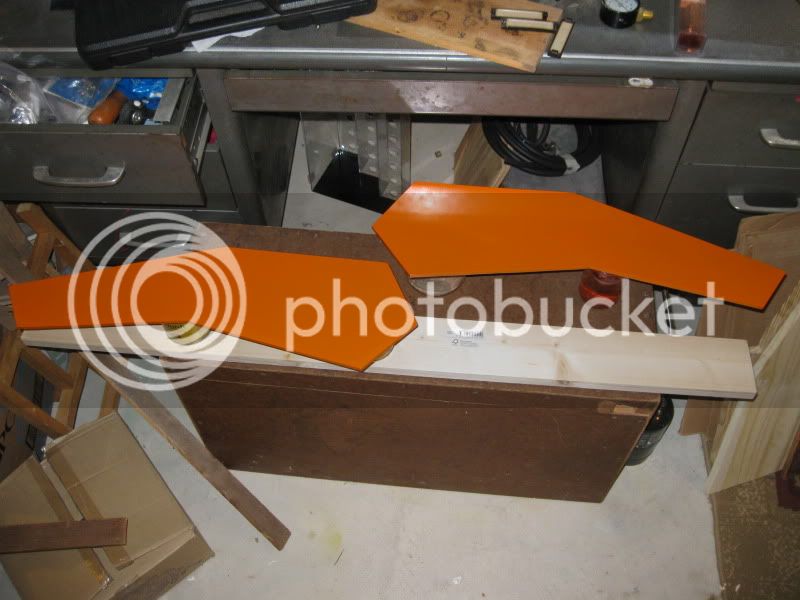
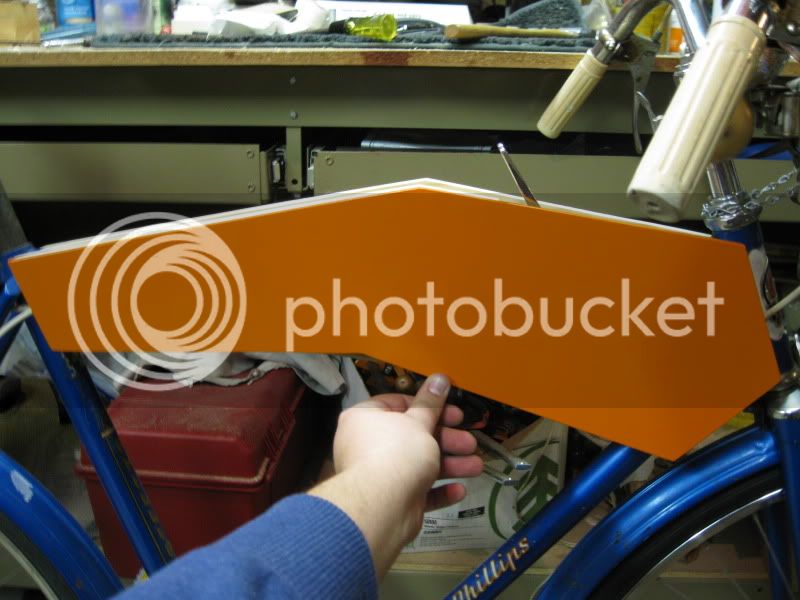
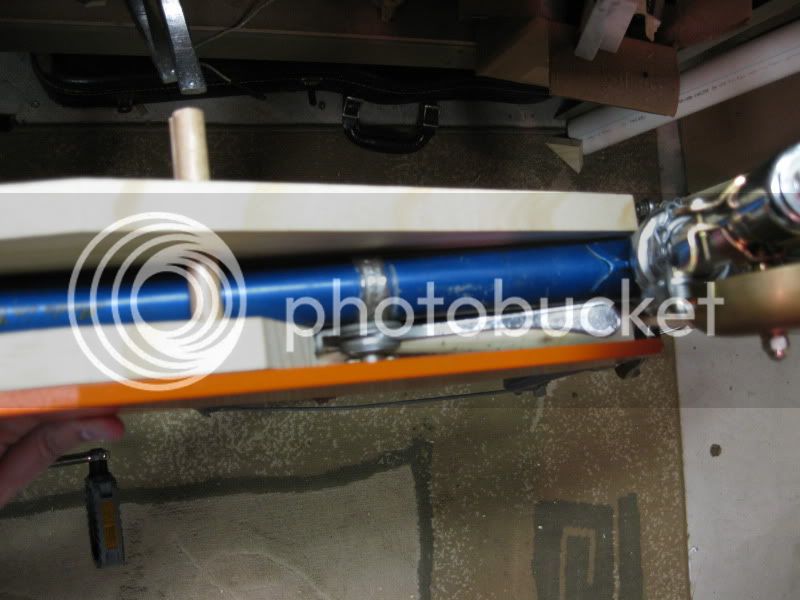
THe plate material, being traced, rough cut, and then sanded flush with the perimeter of the wooden forms.
IMG_1911.jpg

IMG_1913.jpg

IMG_1916.jpg

IMG_1918.jpg


More to come as this comes together, let me know what you think, feedback is always appreciated!
 
Re: Diamond Frame Flying Merkel

A little bit of painting today, some priming on the tank plates and then the first coats of orange. Once the paint is right and set, I'll be sending off these plates soon to get the lettering done by member Axsepul. Meanwhile, I'll be turning my attention to prepping the bicycle itself.

IMG_1919.jpg


IMG_1923.jpg


The bicycle will expierence a few changes. I'm debating on fender options currently. I invision the bicycle with only a rear fender, bobbed like in my paint pic and on the boardtracker. Should I bob the rear and do away with the front?
 
Re: Diamond Frame Flying Merkel

Got the tank boards set up to mount. I used 4 dowels (two above and two below the top bar) to brace the boards. After everything is painted, the fnal step will be to put these boards in place, glue and flush cut the dowels, and then glue the plates with the decals over the boards. I realize this is a little confusing to describe, hopefully the pics will better illustrate my method. In the end: the 'boards' are thick mountings that comprise the tank itself, one which has a cut-away for the shifter. The 'plates' are thinner planks that will have the 'Flying Merkel' script on them, and will be glued to the outside of the boards to conceal the dowels and holes, giving is a nice clean surface.


IMG_1931.jpg


IMG_1926.jpg


IMG_1928.jpg


Here you can see the tank 'sandwich'

IMG_1932.jpg


IMG_1933.jpg


IMG_1934.jpg


Now its time for break down, some fender bobbing, and lots of painting. Stay tuned, let me know what you think :mrgreen:
 
Re: Diamond Frame Flying Merkel 1/21

After some wrenching, light swearing and mild frusteration, here's where we are

IMG_1938.jpg

IMG_1939.jpg


And then a little head way on the rear fender. I decided to bob it, there's no going back now! I'll wind up drilling a hold for the fender supports to be re-attached later on.

IMG_1942.jpg

IMG_1944.jpg

IMG_1945.jpg


A couple of things-

1. Anyone have any bright ideas how to wrestle a 3 piece crank off? I'm guessing this has been discussed before here but a search didnt get me very far.

2. I'm perplexed by this chain. There doesnt appear to be a master link anywhere, and I'm not sure how to get it off for painting. I could wrap it up and just leave it, but Id like to get it off and clean it if nothing else. Anyone ever ran into this before?
 
Re: Diamond Frame Flying Merkel 1/22

You will need a chain brake to remove the chain. It is a small relatively inexpensive tool that will push one of the pins out of the chain allowing you to take it apart. You can then put it back together with a master link during rebuild. http://www.parktool.com/product/mini-ch ... chain-tool

are you going to curve the down tube? That is what makes the original kind of cool.
 
Re: Diamond Frame Flying Merkel 1/22

Ive got a chain splitter, I'll go that route then, I just didnt know if I was missing something obvious. This is only my second real bike build, so I'm still figuring everything out :)

I don't have/have access to the tools needed to sculpt the the tubes, tho I wish I did. I do mostly wood work and brass/copper work. I would have really loved to replicate the Flyign Merkel frame entirely, but I'm using what I got and making the best of it. A true Merkel it won't be, but more like a 'poor college kid' version :roll:
 
Re: Diamond Frame Flying Merkel 1/22

A good goal for the future. I remember the poor college days. Spend one summer with only my bike as transportation. Eating mostly hot dogs and apples.
 
Re: Diamond Frame Flying Merkel 1/22

Haha I'm more on the mac-and-cheese and rice-a-roni plan (What can I say? I like hyphenated foods).

At the risk of embarassing myself, I actually didnt have any plans to cover the top/bottom of the tank, but now you've got me thinking Walker :) A polished aluminum strip might be just the ticket, either that or just a wooden fill strip painted up orange to match. Hmm I'll have to think about this one :mrgreen: The only possible issue I might have is that the 'peak' on the two tank plates are about 2 mil out of skew with eachother (they don't line up perfectly across). Since I hadnt thought of filler at first I didnt bother to do much about this as with the gap, it's pretty much undetectable. And since now the tank plates are packaged up and getting sent off to get decals, it would be hard to adjust it afterwords. Theres time to think about it at least, as that will likely be one of the last details of assembly.
 
Re: Diamond Frame Flying Merkel 1/22

Lookin' good so far.
To open a chain link you only need a nail, a hammer and a nut. Place the nut beneath the pin and with the nail and hammer just drive the pin far enough as to remove the top chain link. Do the reverse when you want to put back togheter.
Keep rollin'
 
Re: Diamond Frame Flying Merkel 1/22

stocksucks said:
Lookin' good so far.
To open a chain link you only need a nail, a hammer and a nut. Place the nut beneath the pin and with the nail and hammer just drive the pin far enough as to remove the top chain link. Do the reverse when you want to put back togheter.
Keep rollin'

Thats an awesome idea, and sounds (to me) better than even the chain splitter. I'll give that a shot! I am currently back at college, so updates may be slow.

I havnt thought about fork straightening or replacing, I realize its bent a bit but its very solid, and in the over 100 miles Ive put on it since Ive had it I have had not trouble with it. If I could find another Phillips fork (for cheap :mrgreen: ) I would replace it. Otherwise, I'm just going to keep running it as it is.
 
Re: Diamond Frame Flying Merkel 1/22

Not much progress to report today, spring semester of college began yesterday. But I did get the tank plates dropped off at the post office to be sent out for decal lettering. I'm hoping my tires and a few other goodies will be showing up here in the next few days as well.

I was out at goodwill last weekend and just happened to spot this laying on the floor. It reminded me of the old hand operated oil pumps on some of the early baordtrackers, and I have some ideas on incorperating/modifying it to fit inthe build. I think its some sort of culinary tool, the other end has 'threads' to screw some sort of adaptor on. Maybe it will make it, maybe it wont, but for $ 0.49 I figured I couldnt go too wrong.
IMG_1947.jpg
 
Re: Diamond Frame Flying Merkel 1/25

Got my tires in today, interestingly enough they are the exact kind (except white) that came on this bike when I got it. I'm guessing they will fit then :mrgreen: The white tires and orange paint job (along with the distinctive tank and script) are some of the real defining features of the Flying Merkel to me, and here's one of the major puzzle pieces.

IMG_1949.jpg

IMG_1951.jpg

IMG_1952.jpg
 
Re: Diamond Frame Flying Merkel 1/25

To remove the cranks, Loosen the cotterpin first, loosen that little nut but don't remove it from the bolt, leave it threaded on but leave space to the crank arm. With a wooden mallet, hit the nut to drive the cotterpin back through the housing. Use a piece of wood and a regular hammer if you don't have a mallet. Once it's free loosen the nut or take it off completely and hammer the pin the rest of the way out. Then just turn the crank on the spindle and it slides off. You will have to replace these cotterpins, I would get them before taking the old ones out, they may be hard to find.
 
Re: Diamond Frame Flying Merkel 1/25

That's my usual method, but there is a tool made specifically made to press them out. Sometimes the cotter pins are reusable, but don't bet on it. When reinstalling, press or mallet whack them tight first, instead of trying to pull them tight with the nuts. The threads are not hard to strip. If I had any cotter crank bikes, I'd probably change it out for a modern square ended axle/spindle :? /whatchamacallit. set.
 
Re: Diamond Frame Flying Merkel 1/25

Thanks for the help guys! I did some more poking around, and I think I understand the 'nature of the beast' better now, I wasn't totally clear on what the 'cotters' actually looked like and how they functoned. I'll attack the cranks next time I'm home (probably next weekend). Good suggestion to search for new cotters first, I've foudn a few places that sell them for not terrible prices if I should need new ones.

I recieved my saddle candidate and truss rods from member Ohdeebee this afternoon. I didnt take any pics of the trusses, they're the Schwinn type. But the saddke is something else! Its going to be a lot of work, perhaps more than I realized. But all the threads and bolts did move, and I was able to reduce it to pieces. It will need media blasting to tame the rust, as well as a re-paint and re-upholster. Plus, the front 'hair-pin' is squashed; its still got a lot of spring in it, but I'd like to try to round it out some more. I'm hoping I can make it work!

IMG_1953.jpg

IMG_1954.jpg

IMG_1959.jpg

IMG_1962.jpg
 
Re: Diamond Frame Flying Merkel 1/28 Crusty Saddle

I think that front spring was made oval.

I forgot to ask where you found the 26" white tires? I've got a few bikes like yours, only 3 speed raleighs, the white will look great on them. I found 27" white tires at Niagara cycles for 15 bucks, but can't find the 26".
 
Re: Diamond Frame Flying Merkel 1/28 Crusty Saddle

Wildcat said:
I think that front spring was made oval.

I forgot to ask where you found the 26" white tires? I've got a few bikes like yours, only 3 speed raleighs, the white will look great on them. I found 27" white tires at Niagara cycles for 15 bucks, but can't find the 26".


You may well be right on the spring. Ive never seen an oval one tho so I assumed it was squashed.

As for the tires, I got them from here:
http://cgi.ebay.com/ws/eBayISAPI.dll?Vi ... K:MEWAX:IT
The seller was great to deal with, and they shipped very quickly. They're 'used' like they say, but mine only look a bit dirty, the little nubs and flashing are still intact. Maybe a tad expensive, but they were the cheapest I could find and just the ticket for this build.
 

Latest posts

Back
Top