Or...your hub shiners could carry the purple color through...
You are using an out of date browser. It may not display this or other websites correctly.
You should upgrade or use an alternative browser.
You should upgrade or use an alternative browser.
Class 2 - Silver Angel
- Thread starter Glen
- Start date


Help Support Rat Rod Bikes Bicycle Forum:
This site may earn a commission from merchant affiliate
links, including eBay, Amazon, and others.
Spray them with : self etching primer. Then:spraay them with your silver paint on them.
Keep buffing and cleaning them till the bare metal shines. Then wax them. They will get grease and or oil on them, not a good mix with rattle can paint. I would fab up some old school hub shiners though...
Carl.
Or...your hub shiners could carry the purple color through...
Thanks for the input guys.

I think I'll go with Carl's advice first with the hub shiners... had forgotten about those and remember them on my bikes as a kid.
Glen.
Love that chainring.
This is one shiny happy sprarkly build for sure!
This is one shiny happy sprarkly build for sure!
Love that chainring.
This is one shiny happy sprarkly build for sure!
Thanks, I certainly hope it's sparkly enough for a 6 year old girl

So anyway, yesterday, forum member @Endlesschain gave me some surplus wheelbarrow handles so I cut the end off one...

It’s the right shape for the ‘convertible top tube’ to make this a boys bike if need be. I trimmed it a bit more and sat it on the frame...

Looks ideal, but now I have to figure out how to attach it so it’s easily removed. There’s a small hole near the head tube that’s obviously for a front locating pin, so that’s ok, but how to do the seat tube end
Glen.
The bar would probably be best with ends swapped;
With the Curve ,toward the front..
& Sitting lower, toward rear stay.
With the Curve ,toward the front..
& Sitting lower, toward rear stay.
The bar would probably be best with ends swapped;
With the Curve ,toward the front..
& Sitting lower, toward rear stay.
I totally agree that it would look better with the seat tube end lining up with the seat stays and that was always my intention, but since the original has it up high near the top of the seat tube, I did it that way to start with to see how it actually looks sitting in front of me.
Here’s the examples I put in my 1st post…
I think the curve is in the right place and it just needs to be shortened a bit to lower it to the stays. I think I can see from those photos how it was attached at the seat tube, but lowering it means I’d have to attach it some other way. I’m sure I can figure out something.
This isn’t an important part of the build, so I will most likely just potter with it and if it gets done, good, but if not, no worries.
Glen.
Ok, I was thinking about the ‘hub shiner’ idea and decided to try painting a hub first to see what it’d look like...

I used nail polish I know... looks pretty doesn’t it
I think I’ll go with this rather than the shiners. I’ll do another coat or two for better coverage.
If I change my mind, I can easily go back to the shiner idea, but I like the way this looks and it’s a bit more glittery bling for a glittery blingy bike.
Glen.
I used nail polish
I know... looks pretty doesn’t it I think I’ll go with this rather than the shiners. I’ll do another coat or two for better coverage.
If I change my mind, I can easily go back to the shiner idea, but I like the way this looks and it’s a bit more glittery bling for a glittery blingy bike.
Glen.
Looks ideal, but now I have to figure out how to attach it so it’s easily removed. There’s a small hole near the head tube that’s obviously for a front locating pin, so that’s ok, but how to do the seat tube end
Maybe one of these could be of help:
https://keesystems.com/store/fittings/kee-klamp.html
(I used one of their products for my EggBeater in BO13)
Put some clear fingernail polish. as final coat.
Last edited:
Maybe one of these could be of help:
https://keesystems.com/store/fittings/kee-klamp.html
(I used one of their products for my EggBeater in BO13)
That certainly gives me some ideas... thanks.
Put some clear clear fing as final coat.
Um... what's "clear clear fing"?
Glen.
Haha. Mistype .That certainly gives me some ideas... thanks.
Um... what's "clear clear fing"?
Glen.
Fingernail polish.
Search for Schwinn convertible top tube and you can see how they did it.
Just make sure you don't google 'tube top' instead of 'top tube'. Your results may differ. 
Search for Schwinn convertible top tube and you can see how they did it.
Ah... yes... that looks easy now that I see it. Thanks Brian.
Just make sure you don't google 'tube top' instead of 'top tube'. Your results may differ.
Hmmm... yes

Glen.
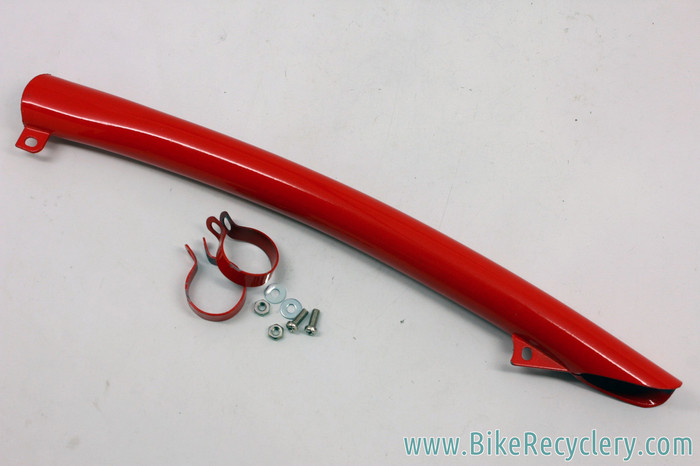
I mentioned previously that the fender braces are not a matching pair, so I got some 10mm aluminium tube and attempted to make one. It’s not finished yet, but is coming along and should work I think...

I just need to shorten it to length, flatten it at the appropriate places and drill holes to go over the axle.
Glen.
I just need to shorten it to length, flatten it at the appropriate places and drill holes to go over the axle.
Glen.
Great work on those custom braces!
Great work on those custom braces!
Just started on the one so far. I'll get it finished then hope I can do the second one as good as the first.
Glen.
How did you form where the fender goes?I mentioned previously that the fender braces are not a matching pair, so I got some 10mm aluminium tube and attempted to make one. It’s not finished yet, but is coming along and should work I think...
View attachment 85457
I just need to shorten it to length, flatten it at the appropriate places and drill holes to go over the axle.
Glen.
How did you form where the fender goes?
The tubing is 1 meter in length so I started by squashing a 100mm section in the middle flat. Then I bent the flat part into a curve shape by hand and used vice grips to bend the more angular parts.
Glen.
Continuing with the fender brace, I taped the original to it to get the right length...

Then I trimmed to length, squished the ends flat, drilled holes to go over the axle and rounded off the ends. Here’s the final result compared to the original...

I’m quite pleased Hopefully the second one will be as good.
Also, I bought some old pedals and they arrived today...

A bit of a clean up and they should look the part I reckon
Glen.
Then I trimmed to length, squished the ends flat, drilled holes to go over the axle and rounded off the ends. Here’s the final result compared to the original...
I’m quite pleased
Hopefully the second one will be as good.Also, I bought some old pedals and they arrived today...
A bit of a clean up and they should look the part I reckon
Glen.