RRBBO13 1939-40 Elgin Sports Model No (1)3 - (Refurbished Eyes for Elgins)

Rat Rod Bikes Bicycle Forum

Help Support Rat Rod Bikes Bicycle Forum:

This site may earn a commission from merchant affiliate links, including eBay, Amazon, and others.
I like that chain bell a lot. I've never seen one before this.
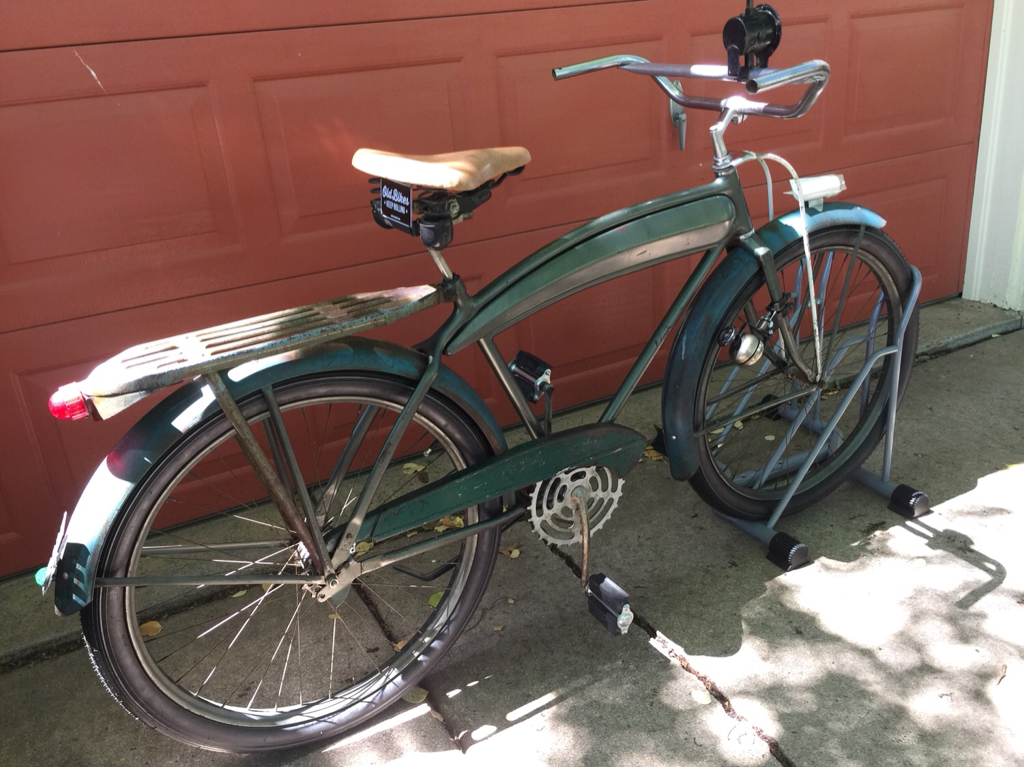
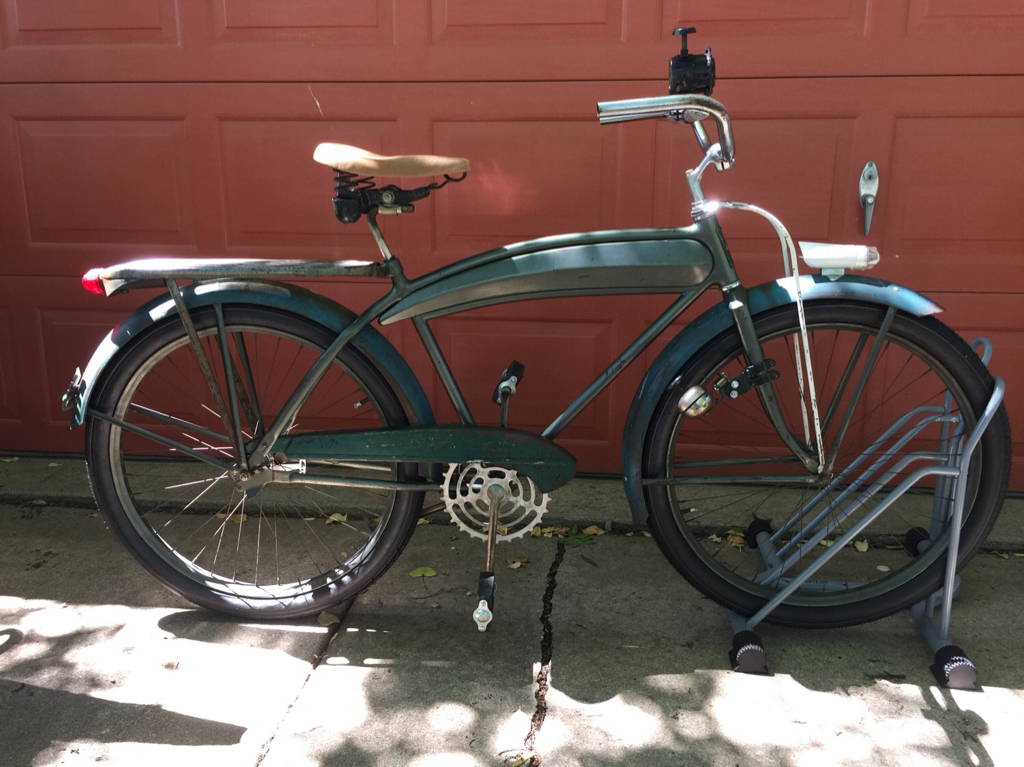
I had one of the sirens when I was a kid. You pull on a chain that puts the little wheel against the tire which In turn makes the sound. One with chain.
a6a479a173242e1df545fdcf38077cc4.jpg

I’ve spray pained over the lettering before and it worked well held up pretty good .
Sent from my iPad using Tapatalk
Yes in my youth I made my own white walls. I’ve also used lacquer thinner to erase print. On this one I just changed out the tires.


Sent from my iPhone using Tapatalk
 
A lot of catching up to do on this page but it was worth the ride . Your bike is coming out great the fenders fit really nice . Everything is turning out great hard to beat the look of a long tank [emoji1303]


Sent from my iPad using Tapatalk
 
Still need to add the skip tooth chain and go for a shake down cruise. Bars could still change and it needs some grips.
Pretty much going to end up like this. It is tempting to take it apart and make it look fresh and shiny. I think it will have to rely on its patina merits as it goes forward.
9b5e9abd0f9b741d68ae13910072fc64.jpg
0448b6694915ff89d423f407d5599dbb.jpg

5dcffeb11a9d8e1cdb86718659eb8f1d.jpg


Sent from my iPhone using Tapatalk
 
Did I miss the ‘two tone’ on the tank?
Looks awesome dude!
Sent from my iPhone using Tapatalk
I’ve noticed the tank effect in several other photos. It’s all one color, just the effect of light, reflections and shadowing on the tank shape. Thanks!
 
Looking good i really like the look of it.
My goal was to keep it simple and subtle. As I look it over I think I may have added more doodads than I had in mind at the start. Glad you like the “look”.
Love the kickstand!
The stand shows up as an accessory item in Sears catalog pages for 1940. The original fenders had the holes for a drop stand retainer so I assume the kick stand was added after the fact. I’d never seen this type before.
 
That full on side profile pic really shows off all the features of this build. I usually go for more of a 3/4 angled shot, and I know you like your wooden fence, but this side shot might be your winner when it's all said and done.
 
That full on side profile pic really shows off all the features of this build. I usually go for more of a 3/4 angled shot, and I know you like your wooden fence, but this side shot might be your winner when it's all said and done.
I usually have the garage door up when working on bikes so the fence becomes the convenient lean-to-background.
I like to do final photos off site but the last ones have been cloudy or afternoon shaded light without shadows or suns glare in front of the garage door. It is always hard to determine what angle to shoot the bikes from, guess you have to determine where the prominent details are. Even then, one photo doesn’t fully depict what the bicycle consists of. The side shot does show most of the bits and pieces but I also like the 3/4 angular views. They seem more dramatic, front or back.


Sent from my iPhone using Tapatalk
 
BUILD CHECK LIST: REVISED 6/12/2018
Get grips, coke or ball end. [emoji736]
Find tube valve caps. [emoji736]
Decide on final bars. [emoji736]
True up front wheel.
Install skip tooth chain. [emoji736]
Move Klaxon horn to bars. [emoji736]
Decide on method and install wheel bell activator. [emoji736]
Experiment with BLO on fenders, rack and chain guard.
Fix kickstand pivot, change out rivet for bolt. [emoji736]
Test ride, verify seat to be used, tweak rattles and or other observations. [emoji736]
Make Build Parts List.
Add chain-guard Bling from flea market. [emoji736]
Add chainguard Bling from flea market???✅
Do final photos.
 
Last edited:
I did some of the check list stuff this afternoon. [emoji736]
I moved the Klaxon Horn and added a chain for the [emoji931]. I haven’t decided on the termination at the bars yet.
4227bd207085a1f8c9c321d7c1a81ad9.jpg

My grips from Thompson Grips arrived today...army green, put them on. Not sure about them...waiting on some good light to evaluate the look. [emoji736]
925c274bfc0b8c326fd9175aa7d2db3b.jpg
3f459a105f73788a1b6c02e6bcf186ec.jpg


Sent from my iPhone using Tapatalk
 
Last edited:
I also drilled out the kickstand rivet and added a bolt with a locknut for tension adjustment. Seems to work better, a more positive position catch up and down. [emoji736]
a27b6b27612a77ea28641f87145f50a2.jpg
4c33968bd834f78fc7d406259594f4ca.jpg
d2143e99df170ad40ace9e008c99b2e9.jpg
dac2c1d2fd3797dc404cb273d5e29b24.jpg
d00f447f5a31eeacc580cd7d43fa75dc.jpg

Drill, cut, file, grind, sand, wipe, rub, brush, scrape, spray, bend, wrench, repurpose, that’s me...no welder, just basic hand and power tools.


Sent from my iPhone using Tapatalk
 
Last edited:
Yes, this is turning into a super cool bike. Like last year's build.
What's the blue thing hooked over the handlebar?

Sent from my SM-G920V using Tapatalk
 
Love your bike MF . Your time has payed off [emoji631][emoji232]
Sent from my iPhone using Tapatalk
Glad you like it! I need to relay your “time has payed off” comment to my wife.
Yes, this is turning into a super cool bike. Like last year's build.
What's the blue thing hooked over the handlebar?
Sent from my SM-G920V using Tapatalk
I appreciate your positive comments, good words to hear.
The “blue thing” is a Park tool for holding the front wheel straight for repair work. It keeps the front wheel from wobbling around in a work stand.


Sent from my iPhone using Tapatalk
 
Last edited:
That 'wheel holder' is invaluable with the bike up in the stand.

Remember that rat-ina job you did to your seat, was it last year's BO maybe? That 100% acrylic paint works on Ian's grips as well. Been there, done that.

I'm sure you have some of that paint left over, right Ed? :)
A couple of rub ins with different hues could give those grips the right flavor.
 
Any suggestions on how to terminate the bell chain at the crossbrace or bars. I don’t remember how I’ve seen it done.
7e14e3df50e028440ab0891824c75a8f.jpg
24f18fe88d1599b4c0ebb35ad617c649.jpg

Right now I just have it wrapped around the crossbrace.


Sent from my iPhone using Tapatalk
 
Can we see a shot of how the bell is mounted below? That might spawn some ideas for a 'terminal' up top.
 

Latest posts

Back
Top