The Copper Chopper!

Rat Rod Bikes Bicycle Forum

Help Support Rat Rod Bikes Bicycle Forum:

This site may earn a commission from merchant affiliate links, including eBay, Amazon, and others.
Those fins are gonna be off the hook!!! You are getting a lot done on this baby!!!!
Love it!
 
Thank you, sir!

Progress goes on with the hammer formed tank, but its much slower than I anticipated. The copper work hardens quickly as its formed, so going from this:
WP_002516_zps2a9e5f27.jpg

To this:
WP_002515_zps01872268.jpg

takes a lot of cycling between hammering and heating it with a torch to anneal it, making it soft and malleable again. You can see that I've got one side pretty near net shape, but its going to require several more cycles before its ready. The other side is much earlier in the process. The long story short is that I do not expect to have the tank finished by this weekend, so it will not be on the bike when the official photos are submitted. I will, however, continue to develop it.

Progress was also made in other areas. I repainted the fender stays, as well as put a coat of hammertone copper color on the kickstand and rear cog. The cog on the wheel:
WP_002514_zps189732be.jpg

I think I've finally figured out how to get the best results with this paint. It needs to be laid down heavy and wet, the sort of heavy that I ordinarily be concerned about it crazing or potentially sagging. But that's what gets it to bring out the hammered appearance. Also, I trimmed and finished off the truss rods:
WP_002517_zps14d049c0.jpg

WP_002518_zps3cf7c00c.jpg

The wire lugs I used turned out to be a little bigger in diameter than I expected, so I wrapped the end of the tube in tape to make more of a press fit. I also sorted out the headlight mounting and made a bracket for hanging it from the trusses out of copper, but I don't yet have a photo of that. It looks pretty cool, though, and has little wings on the sides.
Anyway, in lieu of the copper tank, I cut out a "temporary" copper tank plate. It struck me as funny, while I was making it, that it reminded me of a whale. If it didn't use it, I could add a tail and a spout and make a copper whale sculpture. I know, worthless without pics. Here's the bike with the plate in place (though not fastened down):
WP_002519_zpsb7847b7b.jpg

WP_002520_zps84e7e113.jpg


There are also a few minor other details I worked on last night, mounting brackets for a few parts, putting a brushed grained pattern on the aluminum and copper parts already made, etc. It should look a bit more complete after tonight. So I was thinking about what to call it - how does The Copper Chopper sound?
 
super cool!!! copper is my second fazorite element!!! i once took a bike and wrapped it in 225' of copper tubing!!! sorry to say, no pictures exist of the bike
 
Love the look and the new name!
 
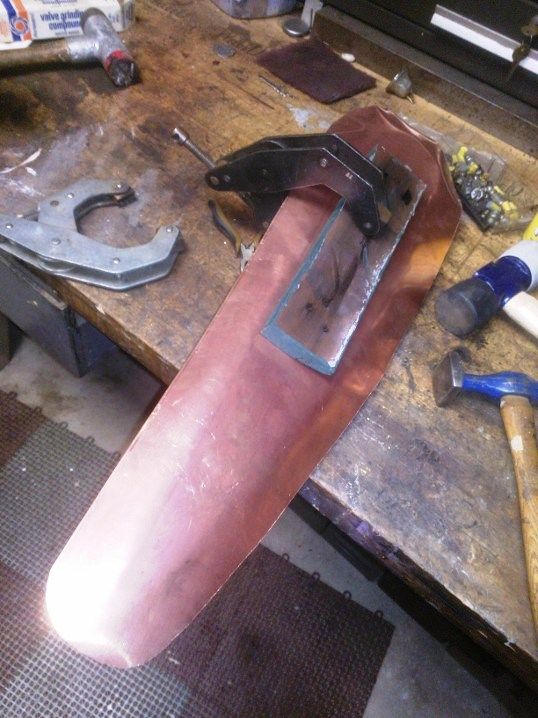
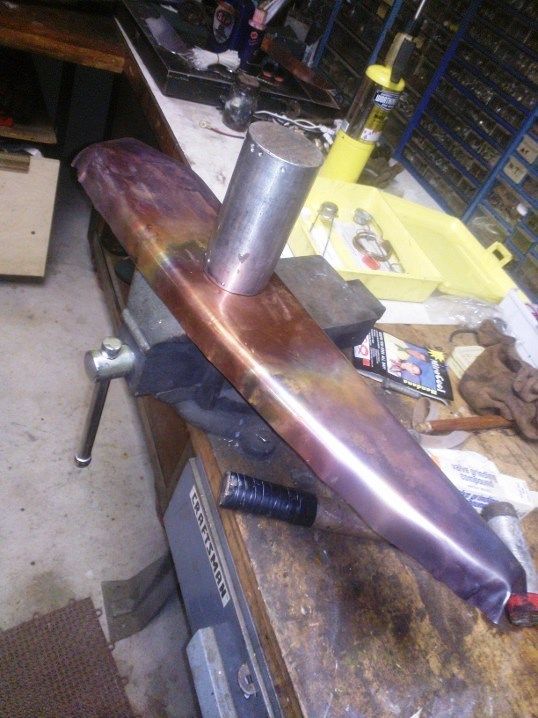
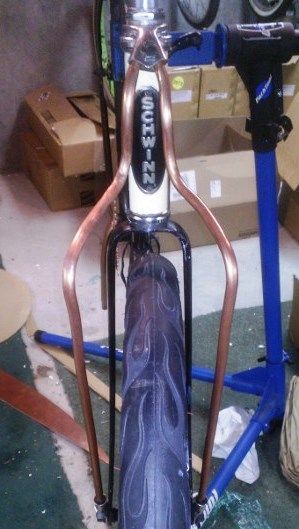
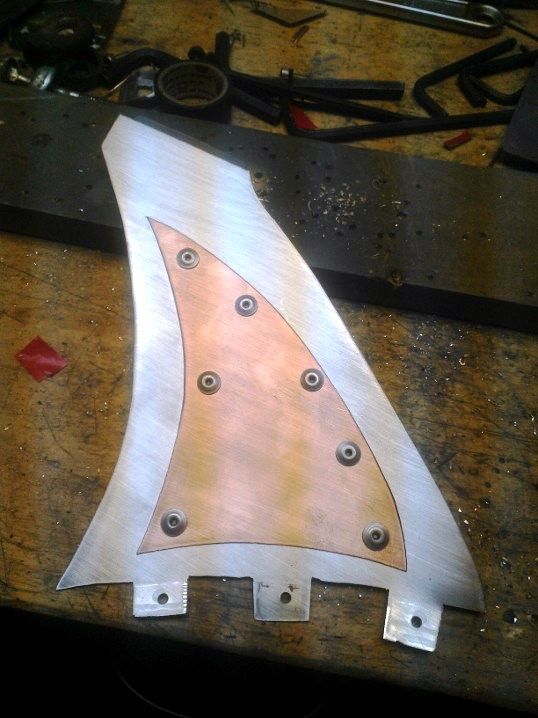
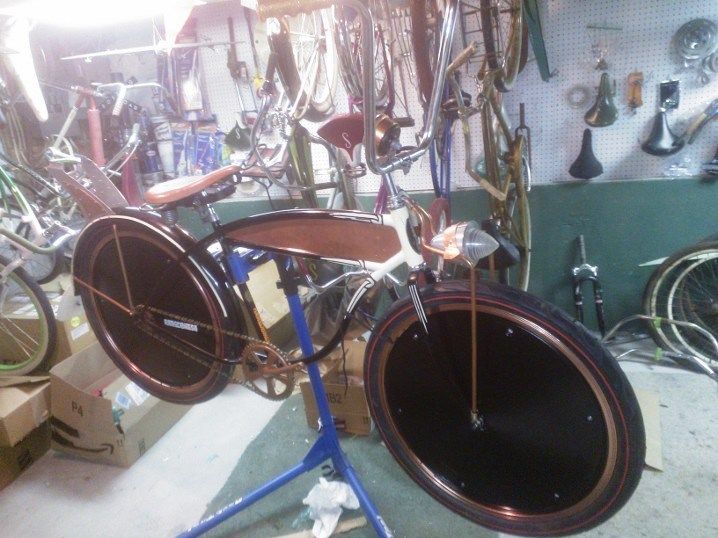
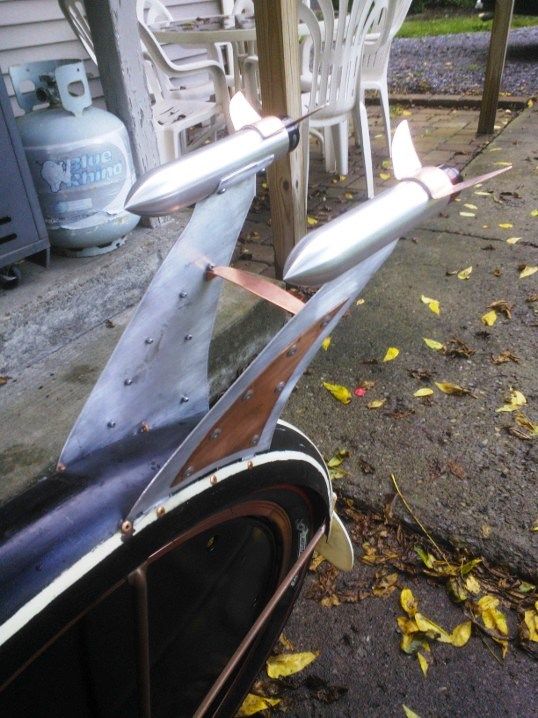
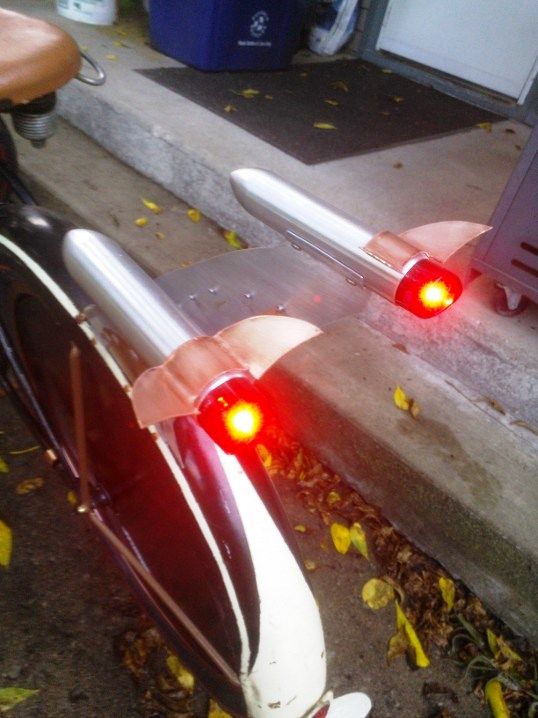
OK, fins up! Sorry for the delay in reporting, but a busy day at work and frequent conference calls prevented posting. The fin modules were finished last night, with the copper accents riveted on:
WP_002529_zps13fb2dba.jpg

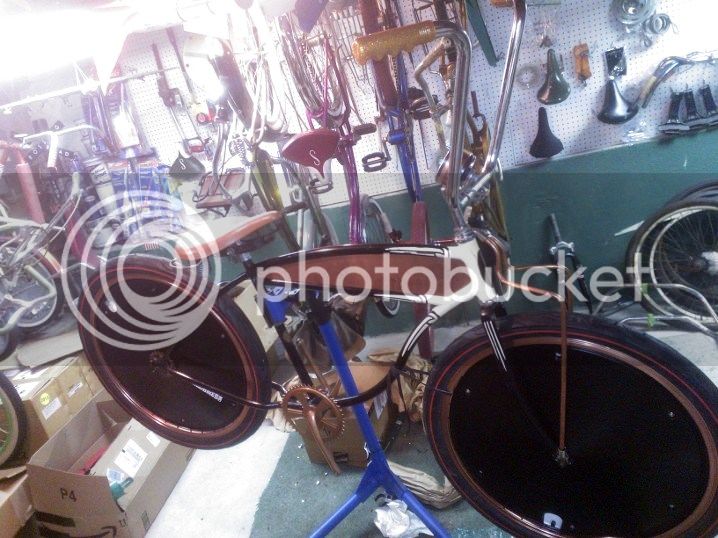
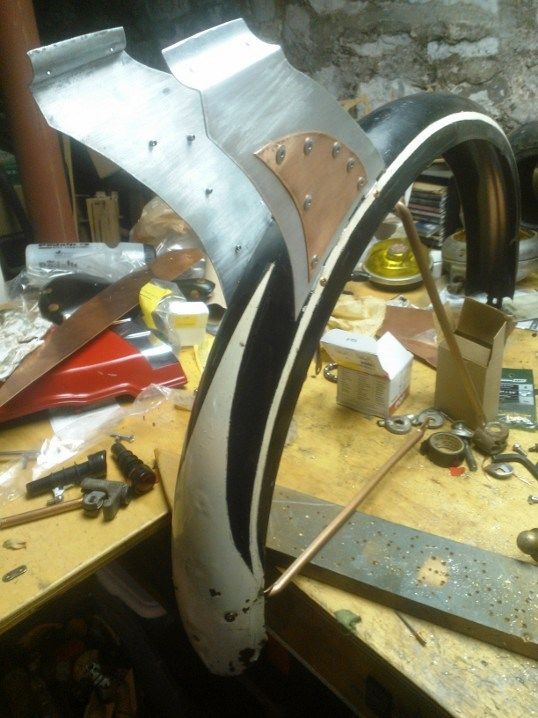
I used aluminum rivets to contrast the copper, elsewhere I am using copper rivets to contrast the aluminum. The fender stays were also riveted on with copper, though due to the larger preexisting holes in the stays, I had to make little curved washers for them to pull against. The fins were attached to the fender after the stays. Basically the front and rear tabs are bent outward against the underside of the fender, then riveted, the middle tab is bent inward and riveted so as to provide some stability and make it non-removable (at least not easily). The finished fender (sans rocket lights):
WP_002530_zps02b40728.jpg

I also dug up a cross-flagged mudflap in my shop, so I attached that too. And, you can see, I made up a chain for it.
WP_002533_zps4d0155df.jpg


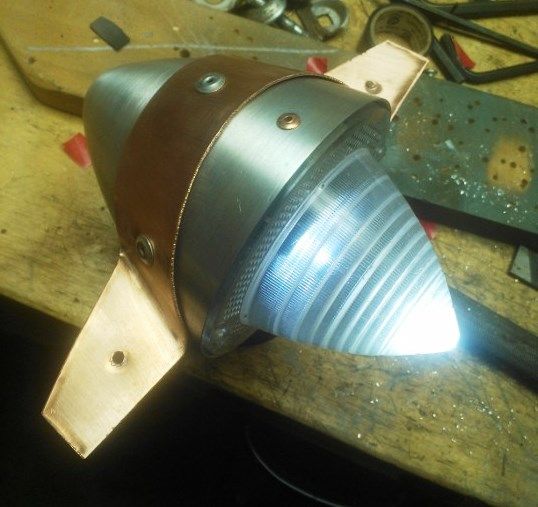
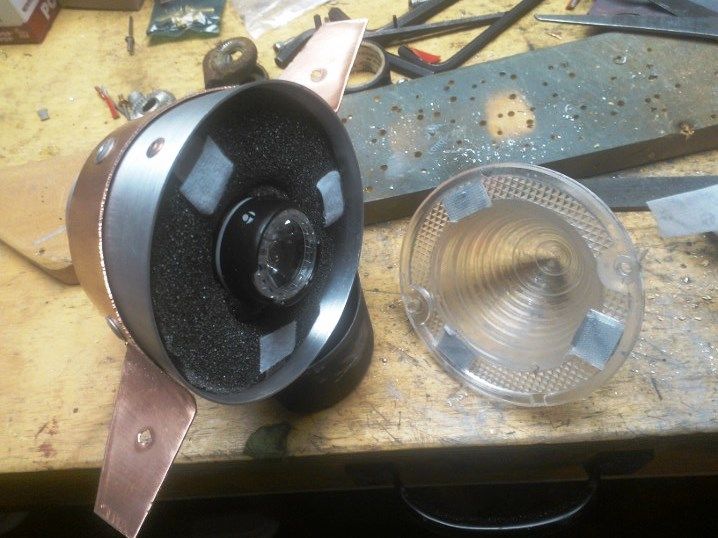
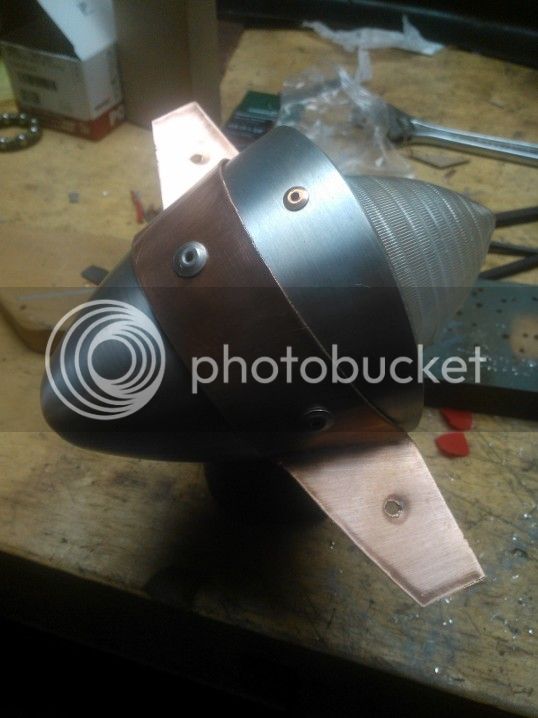
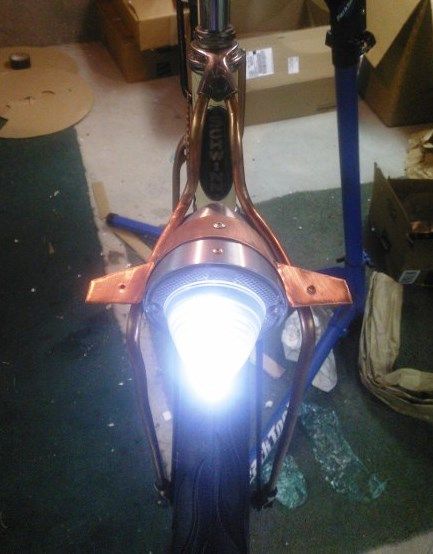
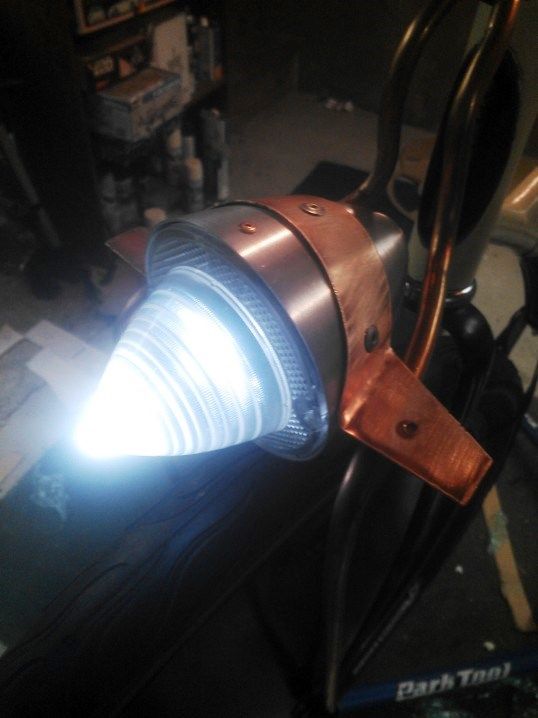
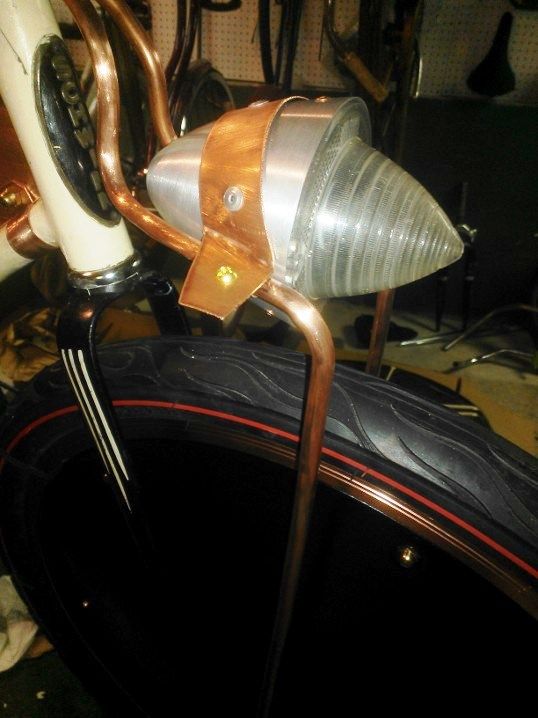
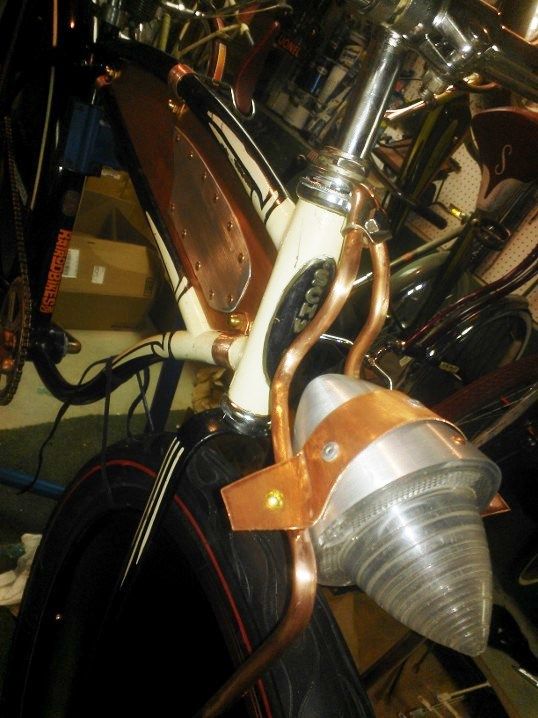
Now, about that headlight. I used a scrap of copper sheeting to make a mount bracket, which I formed over the cone, then flared out the ends. My original plan was to simply wrap under the light, then form the end extensions over the truss rods, sort of crimping it down. But since the cone was actually a parabolic shape, the sheet strip doesn't just form straight over the middle of the cone. It winds up curving forward from the centerline to the ends. A little tweaking got it to fit the compound curvature better. As I got to looking at it, though, I realized that the mount bracket looked pretty cool, especially with the "wings" on the sides. So, I decided to install it with the bracket on top, so the cone hangs from it. It'll actually be attached to the truss rods with P-clamps underneath the wings, so they can stick out the sides.
WP_002526_zps903b7b31.jpg

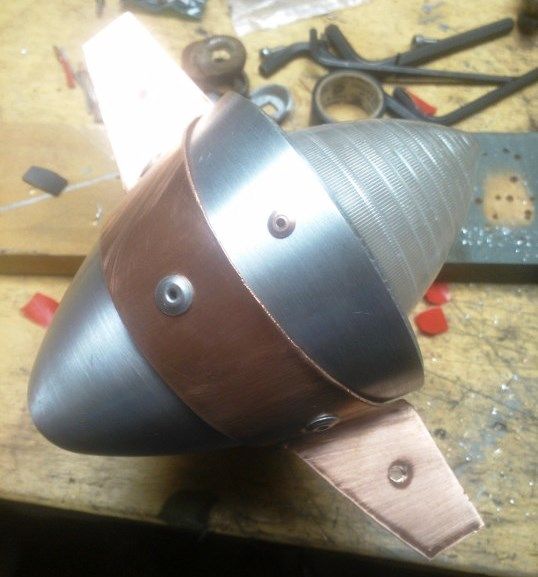
As mentioned before, aluminum rivets were used to accent the copper bracket. The lens is attached with velcro. I made 3 right angle brackets out of steel scrap and riveted them inside the cone (using copper rivets). Velcro strips are adhered to the tabs, and to the back of the lens. The original plan was to use magnets (that would stick the steel tabs), but that didn't provide enough holding force.
WP_002525_zpsc9eebc20.jpg

The steel tabs do double duty, in that they also restrain the foam insert that keeps the light unit in place. The velcro allows me to remove the lens easily to turn it on or off; we'll see if it holds it well enough to prevent it from being bounced off. Assembled light:
WP_002527_zpsaad15baa.jpg

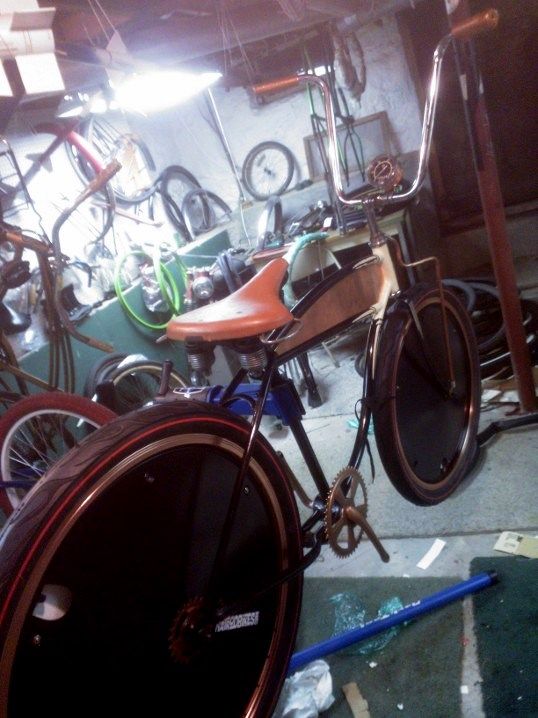
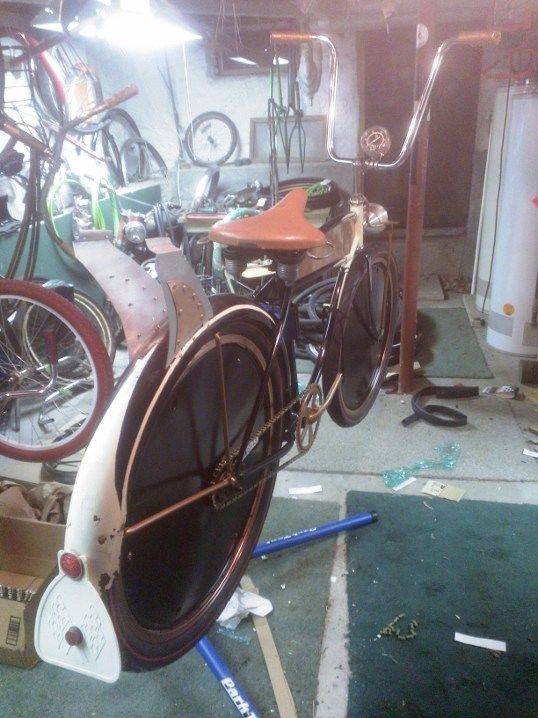
It reminds me of some sort of pudgy cartoon airplane.
WP_002524_zps26b0136a.jpg

WP_002523_zpsf799093c.jpg

WP_002522_zpse467fee9.jpg

WP_002531_zps47fbc6b9.jpg


More to come!
 
I've finished off the headlight and mounted it. I wound up using P-clamps on the truss tubing to through bolt the wings, using brass 10-32 hardware.
WP_002538_zps83cfeaa4.jpg

WP_002539_zps132cbd60.jpg

The tubing was shined up and grained to match the rest of the brushed finish on the copper and aluminum. Regarding brass hardware, I used brass pan head screws and acorn nuts to attach the wheel cover discs, replacing the chrome plated hardware they came with.
WP_002537_zps5b22c456.jpg

All of this was yesterday. Today, I had less time to work on it than I'd hoped, since I had to go into work for a while. Today, I finished up the last details of the rockets for the fins.
WP_002545_zpse41090ca.jpg

I had to fabricate the cross brace shown, to keep the fins from bouncing too much with the weight of the rockets on to. From the rear with the lights on:
WP_002546_zpsafe2fcbc.jpg


With that, this bike is essentially finished. I rode it around the block today. Final pictures coming tomorrow.
 

Latest posts

Back
Top