Workman frame build possibilty... Now "Workman RS"! All but Fini!

Rat Rod Bikes Bicycle Forum

Help Support Rat Rod Bikes Bicycle Forum:

This site may earn a commission from merchant affiliate links, including eBay, Amazon, and others.
So after getting my Amazon cart all filled up I notice that due to the number of sellers it's split into 9 shipments which is translating into big dollar shipping costs - crazy high.

I've been following a few leads and found that bikewagon.com has the majority of the parts I want, and their international shipping appears to be a much more economical.
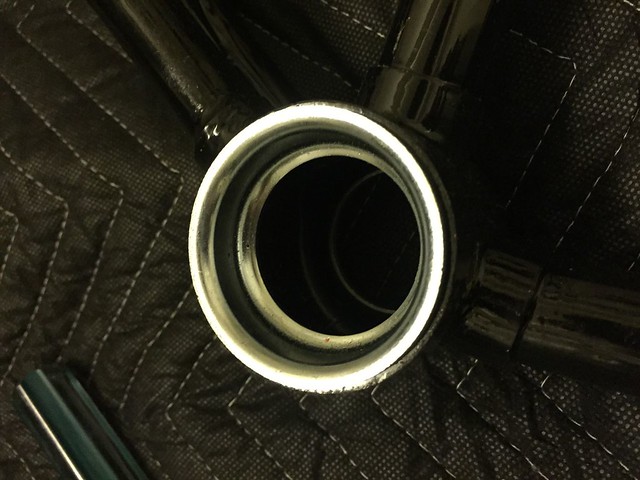
  1. Can anyone tell me if this is an appropriate BB for the INB? I can't tell if this has the american cups that I'd require.
  2. Their options for 19mm cranks are limited, especially because I want chrome/silver - the closest I could find was this one - will it work? unfortatenly it's rather expensive and I'd likely need to source the cranks (and possibility the BB depending on answer to question 1) elsewhere.
  3. I believe that a 22.2mm (7/8") seat post is what I need? I'm looking at this one which is 406mm (16") in length. Any idea if this is ok for a ~188cm (6ft 2in) rider?
  4. For the stock INB with stock 1" threaded fork, do I need a 21.1mm stem? I'm considering this bmx stem, or alternatively this 21.1mm threaded to thread-less adapter so I can run modern BMX thread-less stems. Thoughts or recommendations on this as it seems that options around for 21.1mm BMX stems are rather limited.
Mike G - Niagara only appears to ship to Canada, United Kingdom, Australia and New Zealand according to their shipping/returns page.
 
Why not buy everything you want, ship to a friend in USA, who can box it all up in one flat rate box and then ship to you?

Know anyone like that? Most the stuff I bought for my INB build was free shipping in USA, so it would only cost you one international shipping charge.

Pm me if you don't have anyone that can do that for you.
 
Villageidiot thanks for the offer - will let you know.

Here is how far I've come so far:
1. Worksman frame, ballon fork and headset. Arrived in my country but yet to be delivered.
2. Sunday Saker 175mm crankset (19mm spindle). Set came with American BB. Got from eBay.
3. Fbm "rise above" bmx stem. This was a mistake as the Wald 803 cruiser bars I'll be getting have a 25.4mm clamp area, where as this stem is for bmx sized bars. Will have to buy something else and sell this. http://fbmbmx.com/products/components/rise-above-stem.php
4. 21.1mm threaded to thread less adapter. Got from eBay. Will use until I do the threadless conversion that bicycle808 shared.http://www.ebay.com/itm/NEW-BICYCLE...-THREADLESS-ALLOY-CYCLING-BIKES-/390949028437
5. Brooks B-17 saddle.

I have some questions please:

Any help to determine my Spoke requirements for this?:

Front: sturmey-archer x-fd + sunringle eq31
Rear: sturmey-archer x-rd + sunringle eq31

http://www.sturmey-archer.com/files/catalog/files/327/SPECIFICATIONS - DRUM BRAKE HUBS.pdf

http://www.bikewagon.com/sun-ringle-equalizer-eq31-welded-26-mtb-rim

Also, I believe that a 22.2mm (7/8") seat post is what I need? I'm looking at this one which is 406mm (16") in length. Any idea if this is ok for a ~188cm (6ft 2in) rider?
 
Last edited:
If you weigh a lot, you'll likely bend that seatpost. It is the right size, however.

I just got some hot 6061 seatposts from villageidiot. Not sure if he'll ship international, but they're solid 6061 stock, polished up with strategically placed knurling....

I have a Worksman with x-fd/x-rd laced to some eq31 rims, 3x. I forget what length spokes I used, but i calculated it here: https://leonard.io/edd/ They're showing an ERD of 540, but sun-ringle's site ( http://sun-ringle.com/wp-content/uploads/2012/10/SUN_website_rim_chart_2012.pdf ) claims a 541 ERD. So, yeah, I'd go with 252mm spokes for a 3x, or 238mm spokes for 2x.... Looking at my spare spoke inventory, I can confirm that i used 252mm spokes on my black Worksman with the same rims/hubs as you're using....
 
Thanks Bicycle 808 - great detail as usual.

Finally my frame has arrived. And of course I have a question there are some silver 'cups' in the bottom bracket tube. Do these stay? Or do I try and knock them out? A quick attempt at knocking them out with a screwdriver and mallet was not successful.

Seems it would be near impossible to get my bottom bracket bearings in with those 'cups' in place.

http://postimg.org/image/wi4wrwlol/
 
Not sure how you post pics from "Postimg" it might be worth you trying "Flickr" or "Photobucket" instead. I opened the pic and borrowed it across to my Flickr to post it here for you...

16454905454_74c528ac81_z.jpg


More on posting photo's here: http://www.ratrodbikes.com/forum/index.php?threads/how-to-post-photos.80241/

Luke.
 
Thanks Luke for the image repost.

Bicycle808 and Mike G - got any advise on my previous post regarding the BB install and the 'cups' removal?
 
I didn't go back very far, but if you're using a bmx American BB, yeah they gotta go...
??? Man I don't know, I just knocked mine out with a couple of smacks with a hammer on a screwdriver, might try heating them with a torch if you're planning on doing anything else to the frame... of course if the frame is where you want it I'd avoid the torch! That's a bit of a drag, cause once they're out the bmx American BB should go in with hardly any effort at all.
 
Thanks Mike G - after reading your post I tried again, this time with no regards to the noise I was generating for my neighbours! Job done after some persistence. I assume the same 'knock-out' approach is valid for the Worksman headset cups? as I need to remove them before I get a respray job.

The frame I have still has the chain guard tabs on the frame which I want to remove - any one got some advise on the tools required (e.g. grinding disc on a power drill?) and also techniques to smooth and round it off nicely after?

Finally - for the respray is a sandblast and powder coat enough - or are there any additional layers recommended for a quality gloss look like on the Core77 dutch master?
 
When I do my next (3) worksman projects, I will de braze the tabs for the chain guards with a torch and hand file to suit. On my first I used an angle grinder with flap wheel as I was unaware they were brazed on....... Made some irreparable "dents"....... Won't be doing that again.
 
Bicycle 808 - I bought DT Swiss Competition 2.0/1.8 x 252mm silver spokes - http://www.bikewagon.com/dt-swiss-competition-2-0-1-8-x-252mm-silver-spokes#90516

I had a go at lacing the rear (Sturmey Archer x-rd) to the rim (Sun EQ31). I followed this video on YouTube - Things went ok until introducing the final set of spokes on the one side - two issues came up:

1) there did not appear to be sufficient spoke length to install those.

2) the spokes did not allow sufficient space for the hub to rotate without the black 'brake' levers, which attach to the frame, from scraping the last set of spokes.

Are these spokes (length, gauge) correct for a 3 cross installation on both Sturmey X-FD + Sun EQ31 and X-RD + Sun EQ31?

Any advise would be great. Thanks.
 
I have the same rims (EQ31) laced 3x with Wheelsmith 14g(2.0) 252mm spokes, no issues. I know that DT uses nipples that are a different length and have a different thread-depth than most other makes, but from my experience, that doesn't matter much. Is it possible that you made a mistake somewhere in the lacing pattern?

As for interference with the brake's reaction arm, it's my understanding that any spoke bigger than 13g will bump, but as you're running 14/15g butted spokes, that can't be the issue. Have you got any pics of your wheels, as they stand now?

Here's the spoke calculator i used to get the 252 length. (EDD has the EQ31 listed as 540mm ERD; Sun-ringle lists it at 541. One will call for 251mm spokes, the other 251.5; in either case, I'd select 252 spokes.)
232323232%7Ffp83232%3Euqcshlukaxroqdfv3%3C%3B%3C7%3Enu%3D8%3A%3A%3B%3E733%3E259%3EWSNRCG%3D37%3C86%3A%3A55934%3Anu0mrj


I'd suggest re-checking the pattern. It seems possible that you've got the spokes laced a little bit off?
 
Thanks! here are a few photos. In these photos one side is fully laced and the other has the offending spokes removed as they couldn't reach their respective spoke holes - perhaps you could see an error in my lacing approach?


Thanks Mike G - after reading your post I tried again, this time with no regards to the noise I was generating for my neighbours! Job done after some persistence. I assume the same 'knock-out' approach is valid for the Worksman headset cups? as I need to remove them before I get a respray job.

The frame I have still has the chain guard tabs on the frame which I want to remove - any one got some advise on the tools required (e.g. grinding disc on a power drill?) and also techniques to smooth and round it off nicely after?

Finally - for the respray is a sandblast and powder coat enough - or are there any additional layers recommended for a quality gloss look like on the Core77 dutch master?

According to the old school Glenn's Bicycle Repair Manual the proper way to remove bearing cups is to use a long drift punch, it's made to be hammered on. The one I have is like a narrow cold chisel and tapers down to a point about the size of a pea. You place the punch cross ways; on an angle so you are hammering on one side of the cups and the punch point is on the opposite side. Rotate around as it begins to come out and be prepared to pick it up on the other side of your shop. Same procedure for head set cups. I use a piece of rerod at camp for this.
 
Thanks us56456712

Bicycle808 - got any advise based on the lacing based on the photos I posted?
 
17192735509_b23de44b36_z.jpg


Just what it looks like to me:

The thin red line is where the current spoke is on the other side, but it looks like it needs to go around 2 more spoke holes to where the fatter red line is, the hole that it was in is the hole for the blue spoke tensioning the other way on the same side.

Does that make sense?

I am fairly new to wheel building too, hopefully @Bicycle808 or someone will chime in.

Luke.
 
As far as your problem, I think Luke nailed it. I've built plenty of wheels, but i still start each set by rereading the Sheldon article on wheelbuilding. It helps me get my head straight. And, yeah, i still make mistakes sometimes. In fact, I muffed up one of the wheels on the last set i built, but i caught the lacing error early and fixed it without problems. There are plenty of other good tutorials out there, but that's the one that did it for me. Excellent, detailed, step-by-step directions....

http://sheldonbrown.com/wheelbuild.html

It looks to me like you crossed'm three times, but not at the proper angle. Once you get the first set of "trailing" spokes, you'll want to twist the hub to get the angles right. If you look at your pics, some of the spokes are a straight-line 90degrees from the flange to the rim, and these also show a lot of excess spoke sticking out. A twist before lacing the second set of spokes would have rectified this.

If I were you, I'd de-lace and start over, using Sheldon or Jobst Brandt's tutorial as a guide. Take it s-l-o-w. No one ever saved any time at all by rushing a wheelbuild, and this is especially true of novice builders. Take your time, expect to make mistakes, and be ready to fix them.... Also, be ready to take a sanity break here and there on the first few sets. It can be very frustrating.
 

Latest posts

Back
Top