Varsity winter bike "V-Rat"

Rat Rod Bikes Bicycle Forum

Help Support Rat Rod Bikes Bicycle Forum:

This site may earn a commission from merchant affiliate links, including eBay, Amazon, and others.
Joined
Mar 25, 2011
Messages
1,226
Reaction score
143
Location
Rochester, NY
Rating - 100%
1   0   0
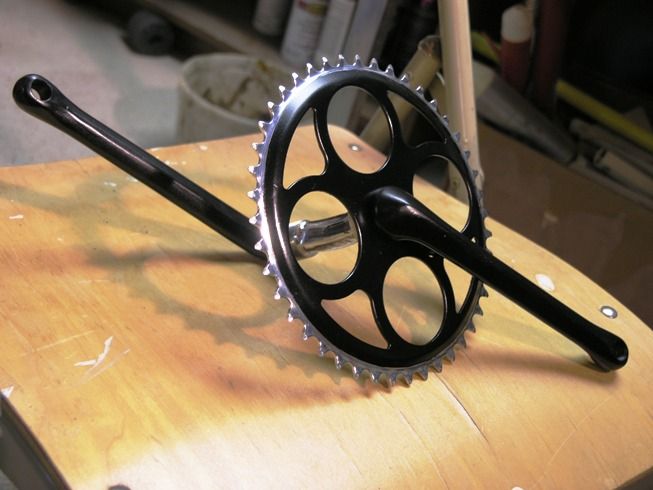
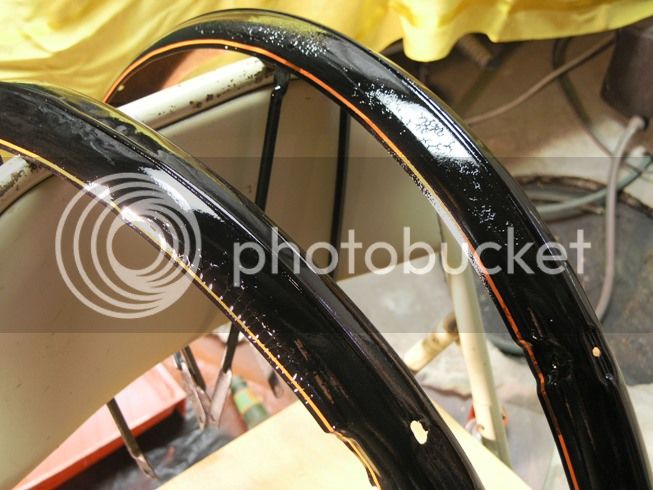
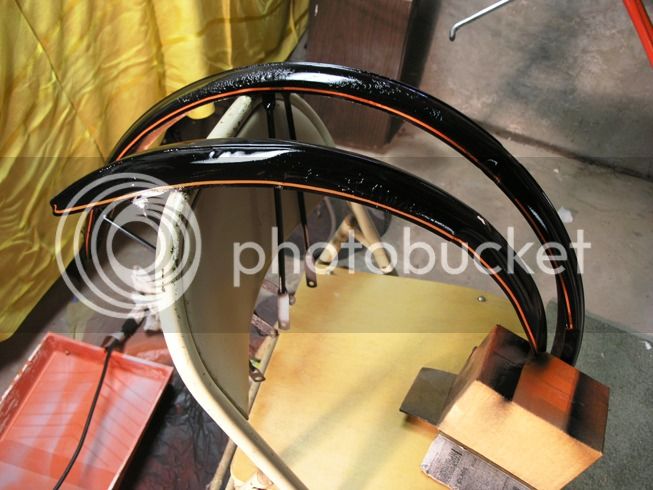
Most of the posts in this thread are written after the fact, since I have this project almost finished now. I wasn't going to post about it originally, but the end product really does meet the definition of a rat rod, and it also ties into the recent discussion of the SprayMax clearcoat...

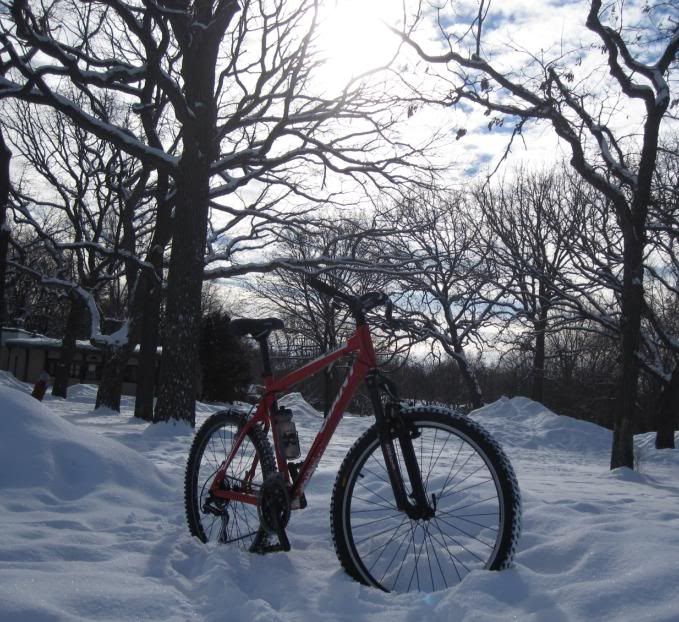
I had decided to build up a bike for winter use, since after only a few uses of my mountain bike last winter, I started seeing signs of corrosion on the cables, derailers, etc. So, I'd been keeping my eye open for an older mountain bike without a telescoping fork, something like a 10 year old Specialized Hardrock or the like.

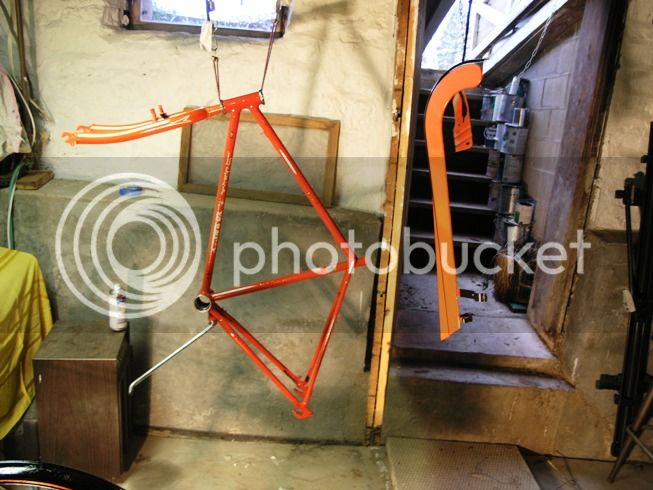
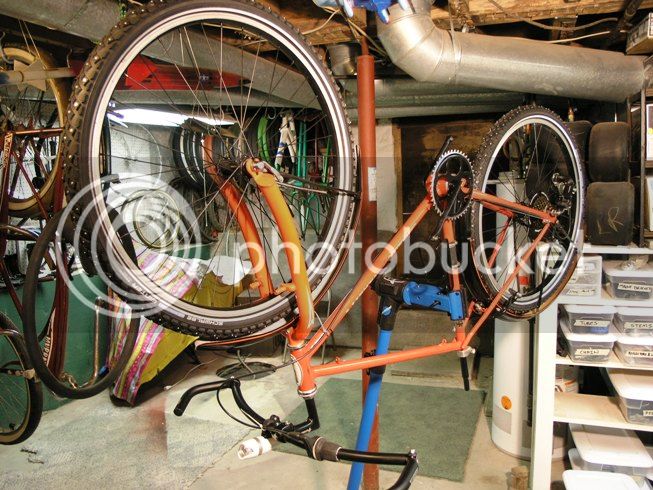
Unfortunately, once I started looking actively, everything I found was too expensive for what I wanted to do. Then, at some point, I realized that I had this hanging in my shop:
P1013978.jpg

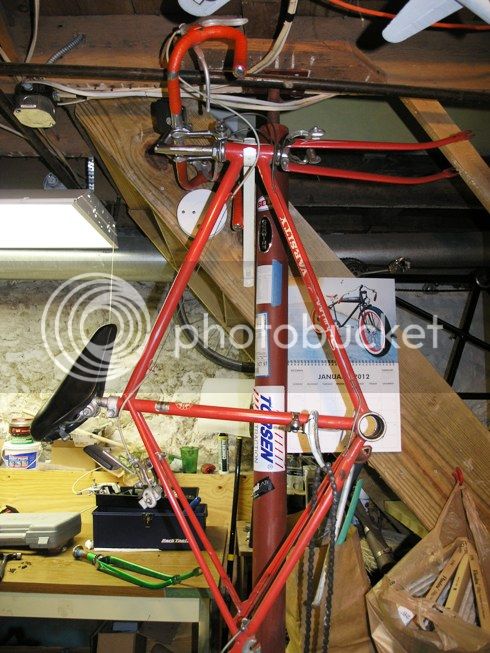
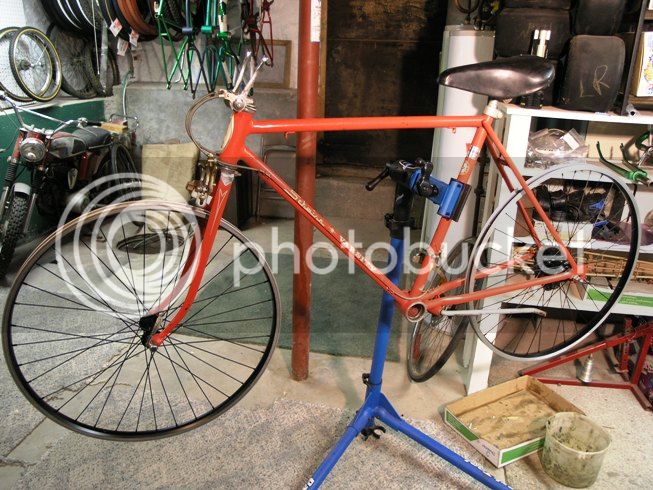
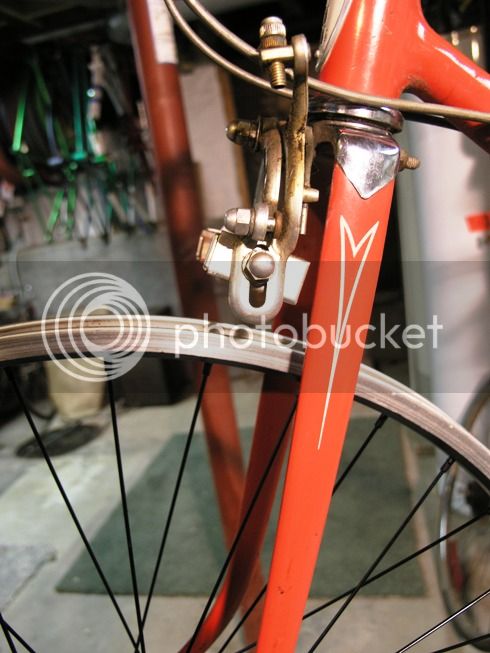
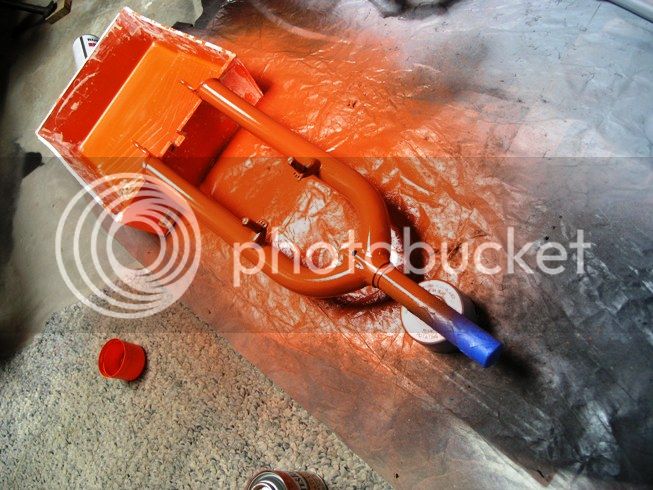
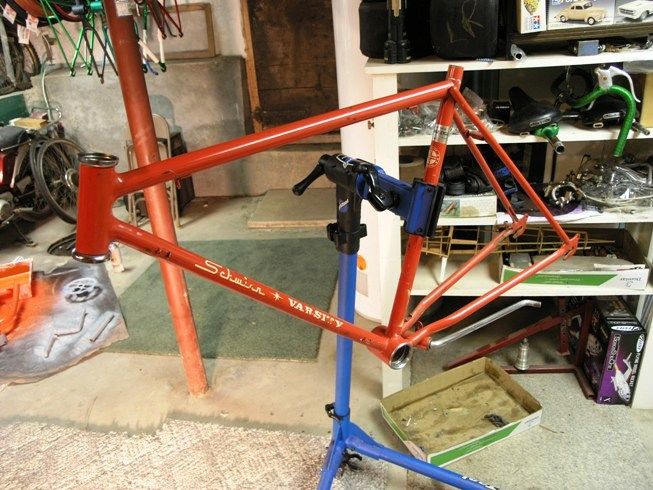
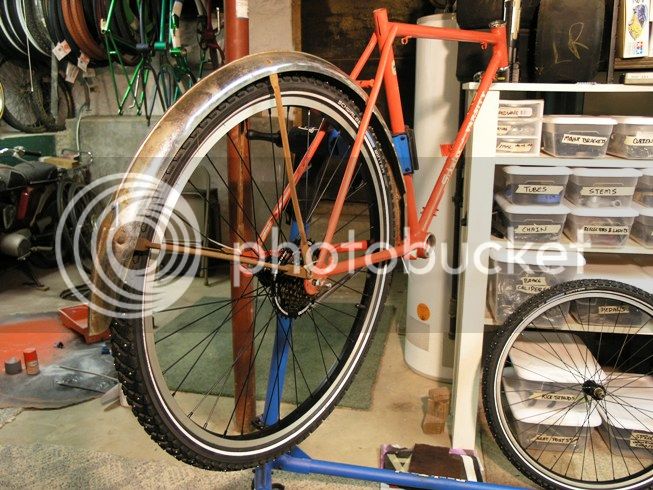
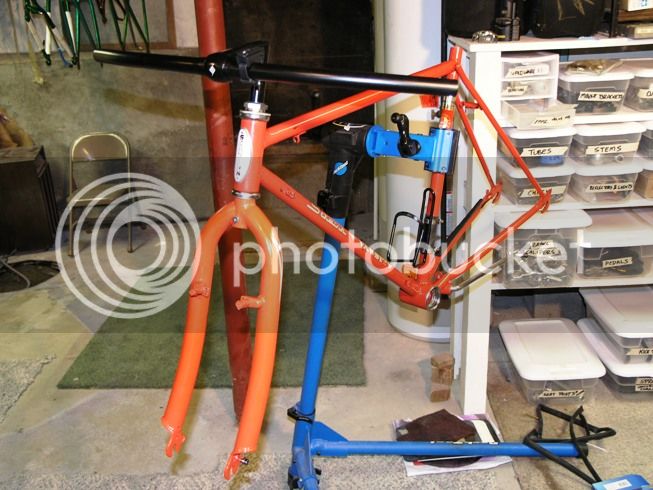
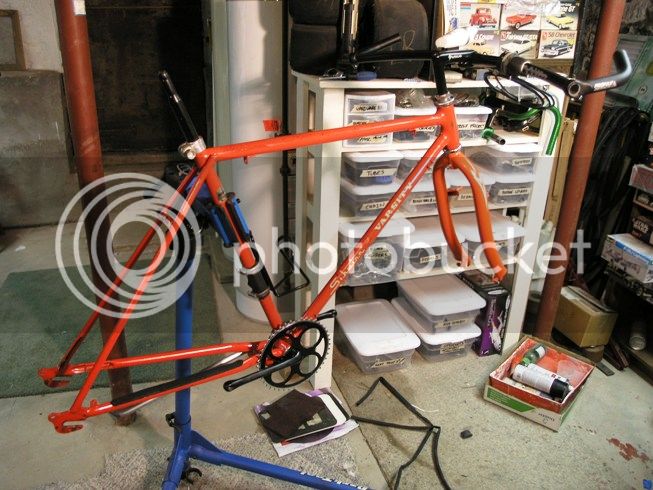
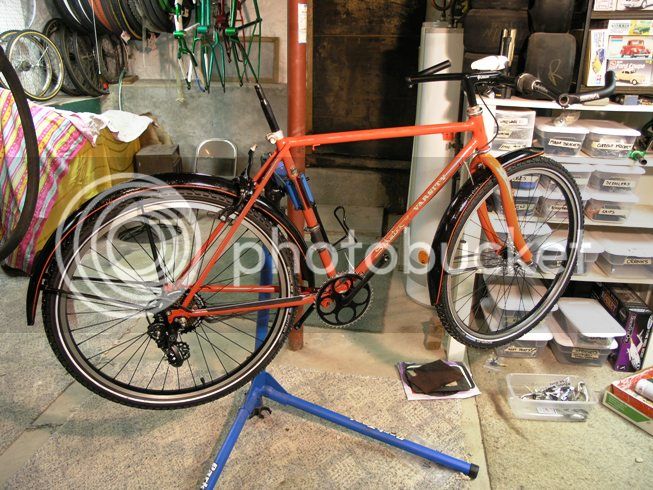
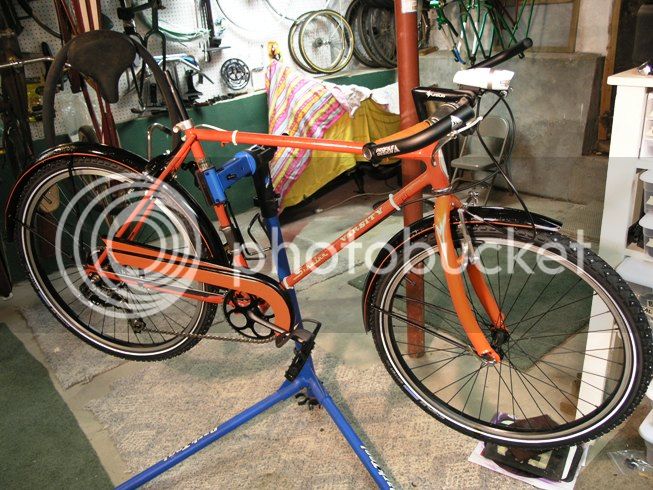
It's a '73 Varsity, Sunset Orange, that I bought last spring for parts. The '75 Flamboyent Lime Varsity I was restoring had nice paint, good decals, the original handlebar wrap intact, but had nasty chrome. I tried cleaning it up, but it was never going to look nice. The orange bike, OTOH, had a nackered up paint job and decals, but the chromed bits were in pretty good shape. Plus, it had a Huret/Schwinn speedo (now on my American) that made it definately worth the $35 the seller was asking. So, I'd previously stripped all the good bits off of the bike and left rest hanging on a hook as a reassembly reference for the green one.

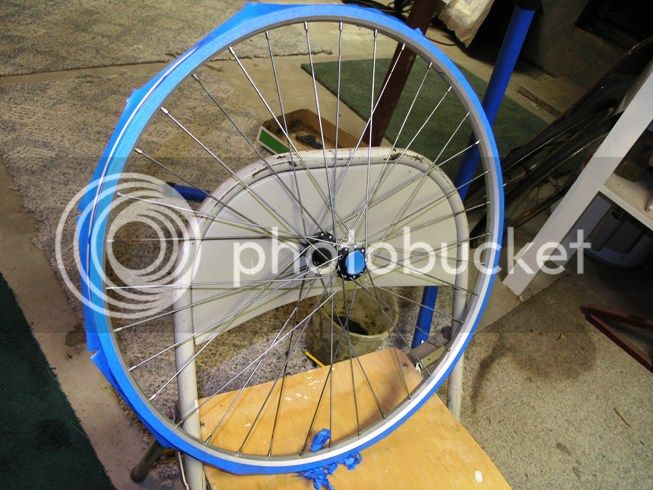
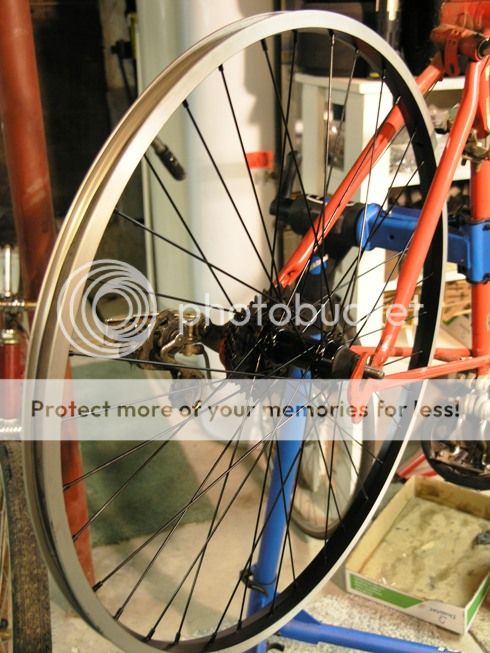
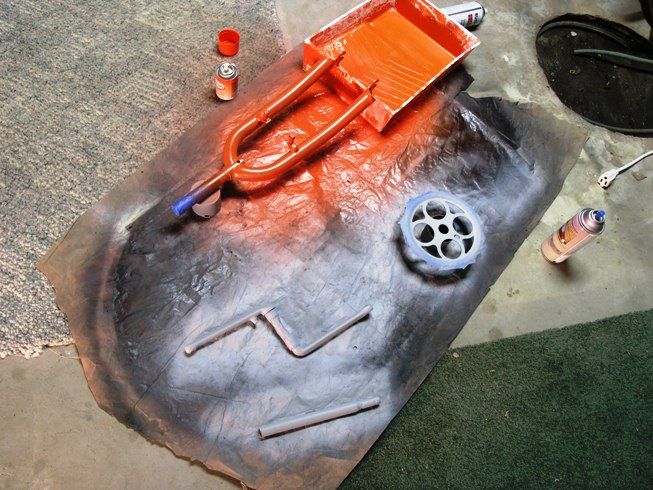
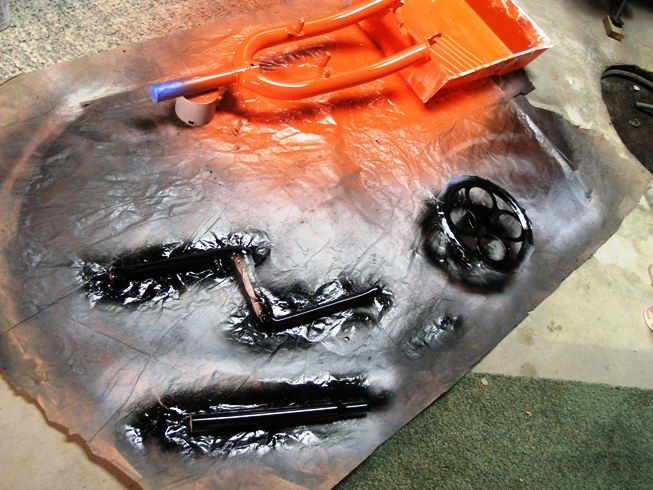
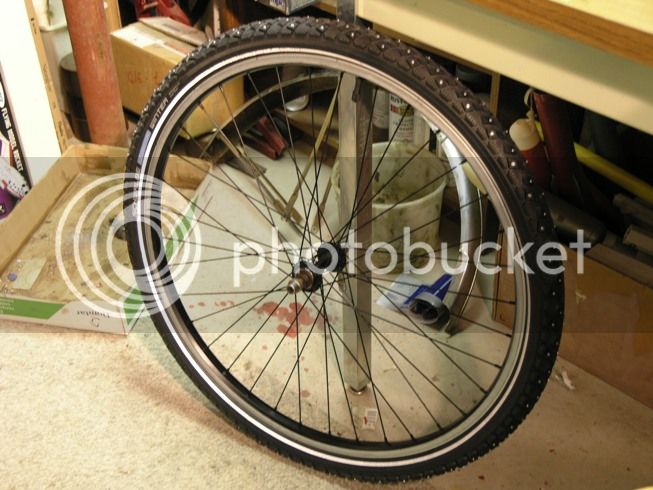
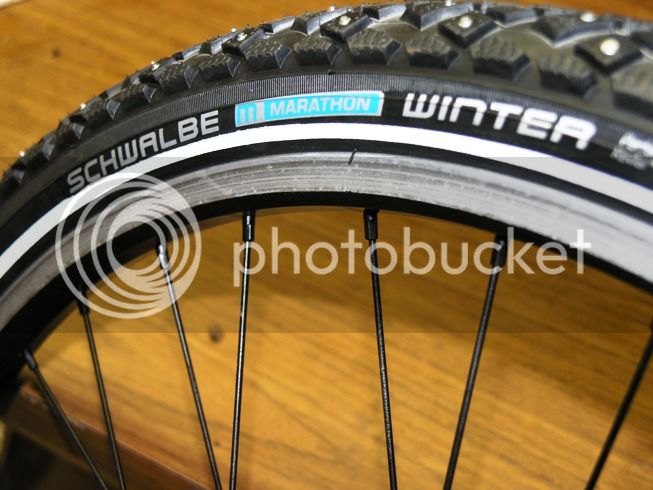
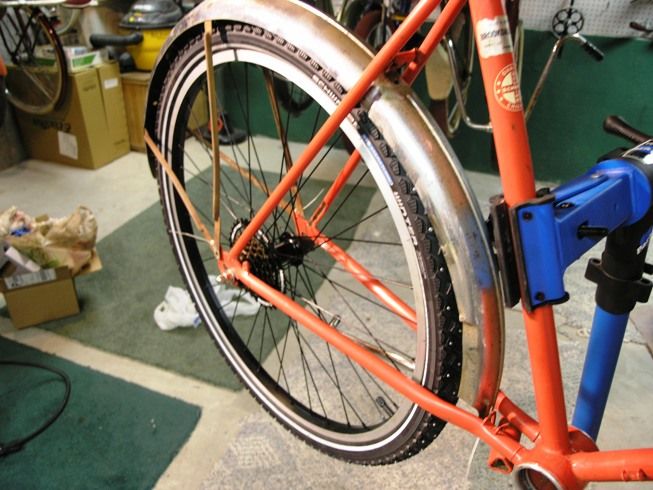
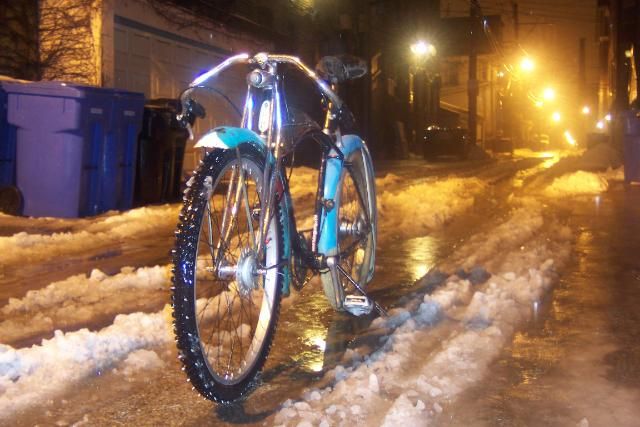
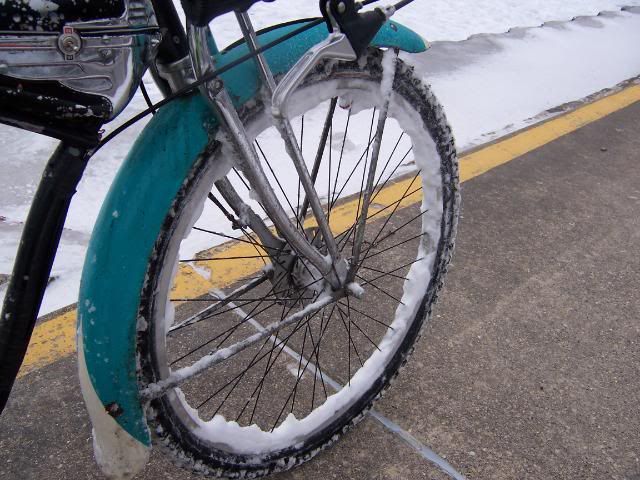
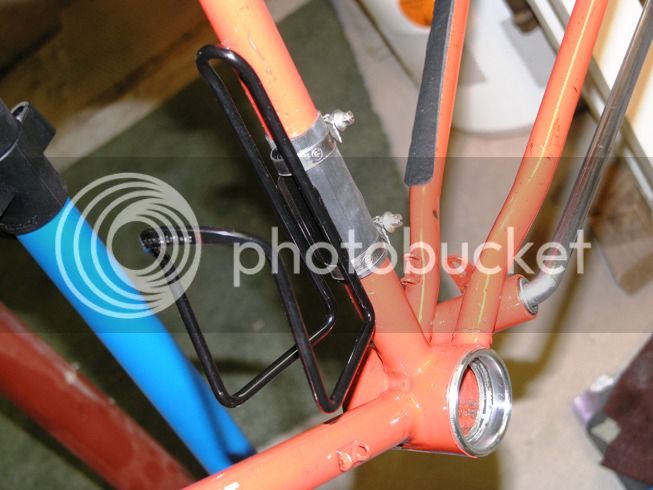
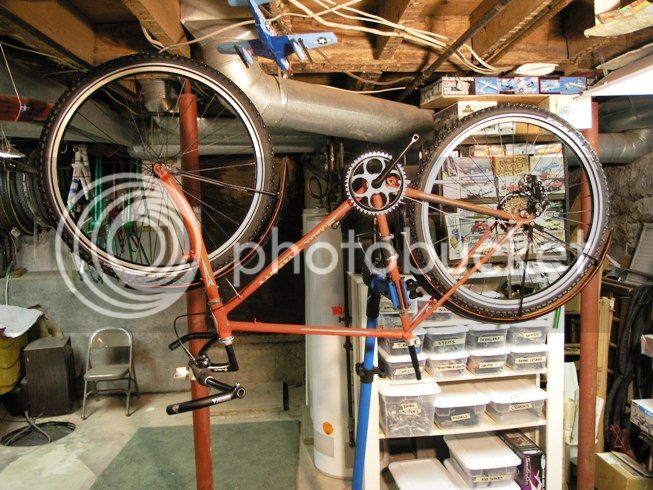
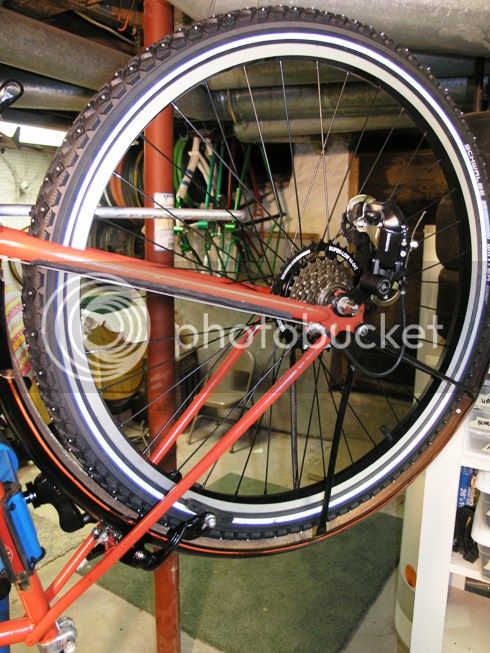
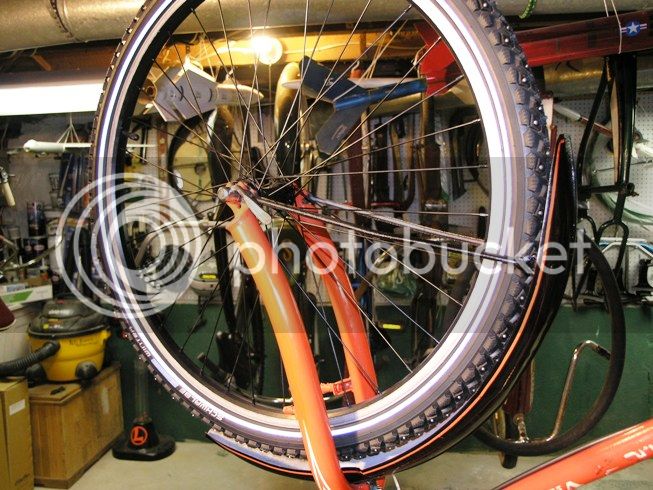
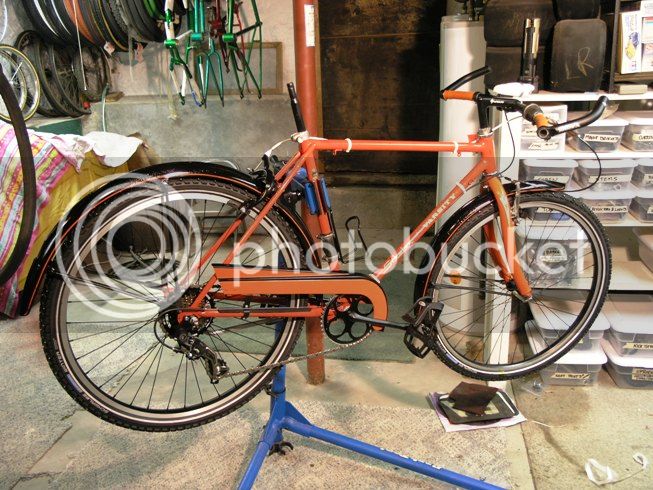
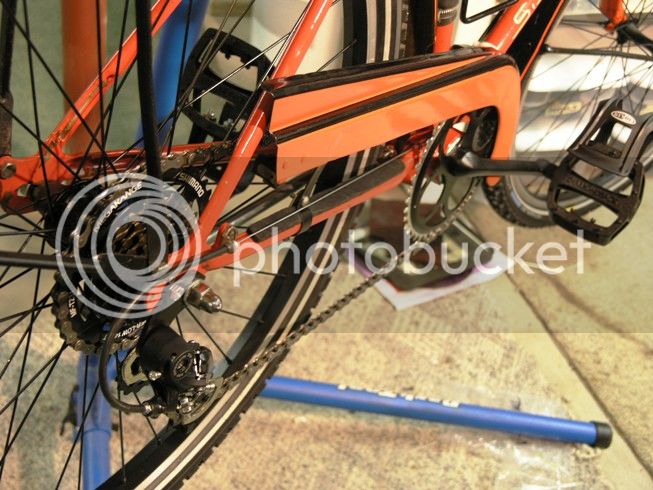
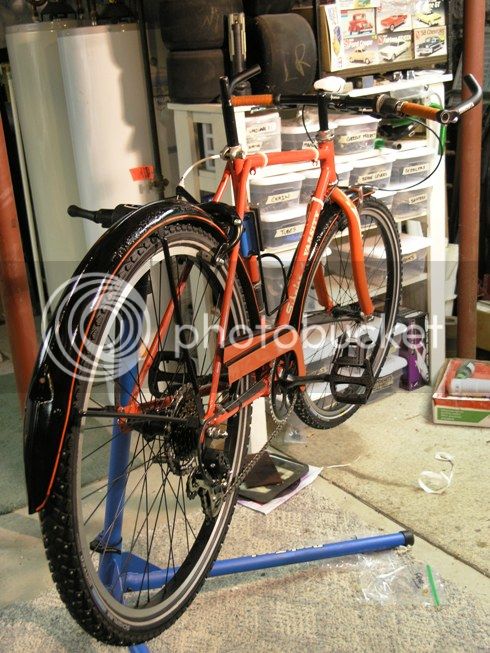
So, I wondered what I could do with this thing. One requirement I had was that I needed to be able to run winter tires on the bike. But bike snows only come in 700c or 26" sizes, there is nothing made for 27" wheels. I'd have to fit it with another set of wheels. I'd have to buy 700's, but I had several decent 26" wheels in the shop, so 26" it is. A few measurements and I found that the Varsity fork and rear stays would accomodate upwards of a 45-50mm wide tire, depending on how it actaully inflated, so I decided that I should be able to run a 26x1.75 snow tire without trouble. So this is what I set out to do...
 
So, my goal here is to build up a winter bike using as many on-hand components as possible. My starting point is a '73 Schwinn Varsity frame, in Sunset Orange, and a set of 26" wheels I had in the shop.

After deciding to go ahead with this, I started fitting parts together to see how feasible it would be. I had a new rear wheel with a 7-speed freewheel on it and an older MTB front wheel with a quick release skewer. I respaced the rear triangle and got the new rear wheel in. The fork's keyhole dropouts made getting the front on tougher, but as it turns out, the small diameter of the quick release skewer works in my favor here. I just have to thread it way out and spread the fork a little.

Now that I knew the wheels will work, I wanted to dress them up a little. I think that satin black wheels would look good on the orange frame, plus I kinda want this bike to project a little bit of rough-around-the-edges attitude. "I'm a winter bike - what are you going to do about it?" sort of thing. So I masked off the brake surface of the rims and sprayed away.

Masked:
P1013984.jpg


Finished wheel on frame:
P1013999.jpg


Both wheels on the frame:
P1014007.jpg
 
Now that I've gotten this far, I came across two significant issues. Sharp eyes might spot it in the previous post - when going from a 630 ISO wheel to a 559, there's no way I'd have enough brake adjustment to get close.
P1014010.jpg

I'd need brake calipers with a nearly 100mm reach to go from the fork crown to the rim. I haven't found any yet. I've got one from a BMX bike that my dad scrapped out that was close, but it didn't have quite the reach needed.

The second issue is that I don't have a crankset to use on this. I don't want to use the rusty original crank from the green bike. Plus, the 39-52t double that's stock on the Varsity doesn't go as low as I want. What's more is that a winter bike doesn't need to go fast, so the 52t big ring isn't well suited.
 
I've been thinking about going to a 3-piece crankset with a triple chainring. I'd use a BMX 3-piece bottom bracket adapter. That would allow me a wide range of gearing and give me sealed bearings. It looks like some of the lower-end Shimano bits are cheap enough.

Regarding the brakes, I found a solution, at least regarding the front. I happened to have a tubular-style fork from a late model Schwinn cruiser. This came on the purple bike that I built for my mother last spring. I used a vintage flatblade fork on that bike, so this thing is new. Even better, it has canti bosses on it. Plus I have all of the brake hardware that came with it. So, the V-brakes that came with the purple bike can be used, and its all bolt up.

The fork's steer tube was too long, so I shortened it and extended the threading to the right length. I picked up a can of Testor's Competition Orange spray enamel. It isn't exactly the same as Sunset Orange, (not quite as red), but it was a lot cheaper than buying a can from HyperPerformance.

Here's the fork, shortened and painted:
P1014012.jpg


I think I'll also buy a set of the fork-dart decals that you see on eBay, like the original fork had. It'll tie it in a little bit.
 
I've stripped down the rest of the frame.

P1014014.jpg


I decided that even though the paint is scraped and scratched, I want to put a clearcoat over it to protect the bare areas from rusting. I'm going to try that Spraymax clearcoat that everyone is talking about. It's expensive compared to what my needs are, but the Rustoleum clear I used on my AMF didn't prove to be all that durable. Plus, this seems like the perfect place to experiment. If it doesn't work well, there's not a big loss.
 
Revisiting the crankset issue, I've decided against spending the money on a triple and 3-piece crank. My original intent was to use as many on-hand parts as possible. Plus, I'd also have to buy a new derailer and shifter to run the triple ring, and costs start adding up quickly.

Speaking of derailers, I found that I can't use the original rear with a 7-speed freewheel. It doesn't have enough travel. I ordered a Shimano Tourney 7-speed derailer with hanger from Amazon. For less than $15, I can't go too wrong.

Back to the front, I remembered that I also have the original sprocket from the purple bike - which came with the wheel with the 7-speed freewheel. So, its for a 3/32 chain, and it has the traditional Schwinn cloverleaf design. Plus, there is a certain simplicity with a single-speed front, no shifter or derailer to monkey with.

I can't use the matching crank, though. It isn't 28TPI like vintage Schwinns were and I'd have to change the entire bottom bracket set. So, I'm back to using the rusty Varsity cranks.
 
The Varsity cranks cleaned up reasonably well on the wire wheel. Not good enough to pass for chrom plated, but good enough to paint. I decided to use the same satin black I used on the wheels. While I was at it, I decided to do the same with the chainring. In this case, I masked off the tooth area and just painted the center. It kinda matches the look of the wheels, with their silver brake surface.

Primed:
P1014011.jpg


Painted:
P1014015.jpg


Finished crankset:
P1014019.jpg
 
The chainring that I have is 44T, rather than 46T like a vintage one. But even with that, the 7-speed freewheel that is on the rear wheel has a range from 11-28T. I don't think that this combination will give me the low end that I want (I live on a steep hill). I ordered a Shimano MegaRange freewheel that has a 32T granny gear.

Also, my tires arrived. I bought a set of Schwalbe Winter Marathons.

P1014021.jpg


Not only were they less expensive then a lot of the other studded tires out there, they were the only ones I found with a directional tread that was siped, instead of just putting studs on the knobs of a MTB tire. I've been an active winter rally driver for better than a decade, I'm fussy about the particulars of snow tire design.

Tires mounted up:
P1014025.jpg


P1014028.jpg
 
More test fitting

With the tires mounted up, I put the rear wheel back on to look at how much clearance I'll have. I want to run full fenders, but clearance around the studs might be an issue. I dug out a set of early '60s middleweight Columbia fenders I had. These have a kind art-deco look; they're boat tailed and have raised center ridge. They remind me more than a little of a Dreyfuss Hudson. So I thought I'd try them.

P1014031.jpg


P1014032.jpg


To my surprise, not only to they clear around the tires well, but they fit the frame closely too. I'll have to make some hanger brackets, but they otherwise fit very nicely.

A funny aside: my niece was joking that this bike with be "punk" since it has studs. So, I call the combination of studs and art deco "Punk-Deco". This is is officially the bike's styling motif... :mrgreen:
 
Interesting buildup.
I know what you mean and agree with you about snow tire particulars.
Run Bontrager Big Kahuna front and rear specific (and directional)
Also run the Mega range and really like it. (Deep snow from last winter: 94" totals, this year so far ~15")
GiantMTB.jpg

Looking forward to seeing how this comes together.
Steve
 
Hey, cool. I hear you about this winter's snow fall. Here in western NY, we probably normally get a similar amount to what you see. But this year has had hardly any. I will say that I'm glad I didn't spring for new snow tires for my truck, it would've been a waste of money this year. And maybe these on a dedicated winter bike are too, but there's a lot less invested here...
 
Well, I sanded the frame and fork down to prep for clearcoating.

The fenders were a bit rough; both are surface rusted, but the front was painted and the rear was chromed. They needed a lot more prep work. Sand, prime, sand, prime. I sanded both with 150 grit to smooth things out. I tried to rough up the worn old chrome to encourage the paint to stick. Hopefully it will.

The front fender had a narrow pinstripe along the edge. I decided to try to reproduce that, in the colors that I was using. So, I painted the sides of the fenders orange, then striped it with 1/8th wide black pinstripe tape. Then I painted it with satin black. After the paint was dry, I peeled off the striping tape. Unfortunately, in two or three places, the orange paint didn't stick to the chrome and came up with the tape. I had an orange Sharpie on hand; not a close match to the orange paint, but close enough for the time being.
 
I sprayed the clearcoat over the weekend. Here's the frame hung up for spraying. You can see that the SprayMax clearcoat makes for a pretty glossy finish. The parts still look wet.
P1014033.jpg


I found the best way to support the fork was to stick the steer tube into the head tube. You can see the fork dart decals I put on it. Also shown is the chainguard I'm going to try to use. It's also from an early '60s Columbia middleweight; it also has a bit of an art deco feel to it, with a tail fin on the top. It fit up to the frame pretty well with a little bending. I'm not sure if it'll interfere with the shift cable routing, but I think I can make it work. So, I primed and painted it when I was doing the fenders. I painted it orange, then masked off the face of it and the vertical part of the fin, then sprayed it with the satin black.

I learned two important lessons with spraying the clearcoat. First, when you're spraying your second coat, make sure the can that you pick up is actually the clearcoat and not the satin black. That bit could've been a lot worse, but I caught it quickly and was able to wipe a lot of the black off. There's just a little overspray on the top tube to add to the patina. I put the last coat of clear over it.

The second lesson - be careful as to how much flash time you give the clear between coats AND make sure that you don't spray it too heavy. SprayMax says to spray the 2nd & 3rd coats medium-wet. I probably put the third coat on the fenders too heavy, but it wrinkled up. No issue on the frame, fork or chain guard, just the fenders. Here's how they came out:
P1014036.jpg


I'm not sure what to do with them yet. I originally intended to leave them satin black. Shouldn't have messed with them...
 
I let the clearcoat sit for about 48 hours before starting to work with the parts. The clear was dry to the touch within two hours or so, then I brought the parts into a warm part of the house to cure. Also, I'll second the advise regarding using SprayMax to do so in a well-ventilated area, with a good mask. Even doing so, the fumes were getting to me by the time I was done.

I've been thinking about the fenders, and decided to just use them as they are.
P1014034.jpg

If they bother me enough, I can work on refinishing them some time over the summer. Also, I'm installing a rack on the rear. That will help distract from the worst of the wrinkling.

I started to build up the frame last night:
P1014043.jpg

The fork crown race on the fork was 27.5 mm instead of the 26.4 that was on the Varsity fork. I found that I could use a standard American-style bearing on the bottom and a Schwinn bearing on the top. New bearings in the bottom bracket, and the crankset is installed. There isn't a lot of clearance between the sprocket and chainstay. I'm not sure if this is because I used a crank from a double chainring, but it seems like the chain line might be kinda short. Still, it seems doable, there is no actual interference.
 
Great build ! I think the fenders will look good when the bike is all together. the Schwalbe's studded tires look great. I like the paint job on the wheels.
I though about getting some for this winter.Glad I didn't no real snow to speak of here this year. After 3 tough winters in a row.


2011blackbikeSchwinn011-1.jpg


blackbike021-1.jpg


I even took my DIY studded tire off for now. Last Sunday hanging out with the TailDraggers
2012FebRide007.jpg


Keep up the great build, looking forward to seeing the finished bike.
 
Thanks for the comments. Well, I'm getting closer. As usual, the writing & photos are delayed behind the work. I added a pair of bar ends to my handle bars that I originally intended for my mountain bike. I'm not sure if I'll keep them, they make it seems real wide. Like antlers.

P1014044.jpg


The handlebars, SOMA Noah's Arch, I had left over from my Schwinn American build last spring. I originally had these on the bike before switching them for Velo Orange Belleville bars. The problem is that they have an arch to them that makes the grip area more swept back then a typical downhill bar might be, so the built-in angle on the bar ends isn't enough to make them parallel with the frame. Instead, they protrude outwards as well. Might be OK, I can always switch them for MTB bars later.

You can see in the picture the chainstay protector I added. Its from Velo Orange, its a black elkhide leather strip. Not really necessary, but it adds to the "punk-deco" theme. :mrgreen: I also added a bottle cage. The Varsity frame has no braze-ons for anything; so it has to clamp on. I used a pair of small screw-type hose clamps (from a BMW, apparently - they have the logo on them) and section of old inner tube to protect the frame.

P1014042.jpg


Seems pretty solid, and I can adjust its position if needed. The mount may be a little hokey, but maybe it adds to the theme as well. I'm not sure if a winter bike needs a water bottle (ice bottle?), but I suppose that if I fill it with something sugary, it won't freeze as readily...
 
On Monday, I started re-test fitting the fenders and wheels/tires. You can sort of see it in this picture, but there's a minor issue with the front fender.
P1014046.jpg

The stays on this fender were intended to go over the axle. Attaching them to the eyelets on the fork instead results in them pushing the nose of the fender down into the tire. There is clearance, but barely. And it looks odd, with the front down and the rear stuck out. I'd put the stays over the axle, but with the quick release skewer, it isn't real feasible.

Anyway, I got the derailer installed the shifter in place and cable strung.
P1014051.jpg

This was the first time I've actually trimmed cables to fit, so I learned about cutting them and grinding the end smooth. Thanks to Sheldon Brown, the how-to was easy to find.

So, here's how I left it for the evening:
P1014049.jpg

It's looking more like a bike now, but I still have a few issues to resolve. You can see here that I've got the twist-grip shift pretty far inboard, but I want to wrap the grip area with cloth tape rather than use molded grips. I don't need the twist grip in the grip area, in fact, my intend was to put it right next to the stem. However, the curvature of the bars prevented me from easily sliding any farther in. As it was, they were scraping the paint off as they went. So I only moved it in as far as I wanted to wrap with the tape.
 
Closer and closer. I'm nearly writing in real time here. Last night, I made a lot of progress forward. I was thinking about the front fender fit issue, and decided that I can still attach the stays to the axle, even with the quick-release skewer. I do have to take the skewer out entirely to remove the wheel, so it sort of defeats the quick-release functionality, but it can still be done without tools. And the fender sits much better around the tire:
P1014053.jpg


OK, so now I have the fenders fitted, the wheels on, and shifter and derailer in place. One issue I haven't gotten back to is the rear brake. For the front, I got around the long reach issue by changing forks. Not so easy on the rear. I did, however, find that Tectro makes extreme reach dual-pivot calipers. These stretch out to 100 mm, which was just barely enough. I had buy them as a pair to get the rear I needed, so the front from the set goes into the caliper bin. Here's the bike with the brake fitted:
P1014055.jpg

The brake cable was a NOS 10-speed rear brake cable set my father had, still its blister pack. I also needed to come up with a brake lever, but I had a few old Raleigh levers on hand from old 3-speed roadsters. He also had a package of NOS frame clips to hold the cables, so those when on to replace the zip ties.

Next up was installing the V-brakes on the fork and front brake lever, then I spent a while getting all the cables adjusted in. The front brake cable is a bit long, I might have to shorten it a bit. I had trouble at first getting the derailer to reach over far enough to engage all 7 gears. I realized that my freewheel was Shimano and shifter was SRAM, so maybe the indexing wouldn't match. In fact, the MegaRange freewheel had 1 mm wider spacing than the original one did, so I switched it, thinking I'd have to give up my low range (for now). However, the indexing travel of the shifter seemed to match the Shimano freewheel better, so I put it back on. More adjusting, and I got it work well.
 
...continued...
I wrapped the grip area of the handlebars with orange cotton tape. It was a lighter, brighter shade than the paint is, so I used amber shellac to seal the tape. I might put another coat on, but I don't want it to turn brown. Then, the chainguard went on, requiring a bit of careful bending to allow crank arm clearance on one side and chain clearance on the other. But I think it looks good. I might have to come up with some sort of decal to put on it.

P1014057.jpg


P1014058.jpg


P1014059.jpg


P1014060.jpg


There's only a few more details to finish up at this point. Saddle, lights/reflectors, rear carrier. And making sure everything is tightened down and adjusted. I should be able to wrap that up tonight...
 
Great build, awesome descriptions and vision! I really like the Noahs Arc bars. Personally I think the overall look of the bike would be better without the MTB bar ends, but you may need function over form in this case. Again, great build using spare parts - a true rat rod!
 

Latest posts

Back
Top