Tribute to our friends

Rat Rod Bikes Bicycle Forum

Help Support Rat Rod Bikes Bicycle Forum:

This site may earn a commission from merchant affiliate links, including eBay, Amazon, and others.
Hi! I've been following your build with great interest, usually with my mouth hanging open in awe. With your combined skills, proper equipment and very innovative ideas you bring customizing to another level.

I'm an electrician by trade and have spent many years doing residential service work. The biggest enemy of mechanical electrical connections is corrosion. Even if the materials are identical the connections are a resting place for condensation from humidity. I adapted this little trick from copper/aluminum connections in which you use an anti-oxidant to prevent the natural oxidation of the two different materials. It usually comes in small tubes or squeeze bottles and can be purchased anywhere a full range of electrical supplies are sold - i.e. Lowes.

Back in the old days it was a lot more common for vehicle owners to remove and replace their own batteries. Inevitably the battery clamps would have corrosion on them and would need to be cleaned. Many a car owner lost power to their starter because of the corrosion that could form on the interior of the clamp and exterior of the battery pole. I found if after cleaning all electrical contacts you coat the cleaned surfaces as well as the outside of the clamp with the anti-oxidant no corrosion will ever form. It does not dry up even after years of exposure to the elements and it conducts electricity so as to aid contact when using jumper cables.

My only recommendation is when you install the light unit with set screws that you coat all the surfaces where contact is needed such as where the set screws tighten against the mounting material as well as the actual threads of the set screws themselves. This simple step will maintain your electrical connections for years to come. A small tube costs practically nothing and you two don't seem the type to skip over something lightly. You won't regret it and keep up the fantastic work. Thanks. Robert
 
cant work out what your going to do with all that stuff but i'm exited to see! :shock:
 
Thanks to everyone for all the compliments! And also, Road Master, thanks for the helpful tip about the anti corrosion grease! We hadn’t thought of that and it would not be a good thing to overlook on my bike. :?

So here is what my dad did with all those seemingly random materials. :D

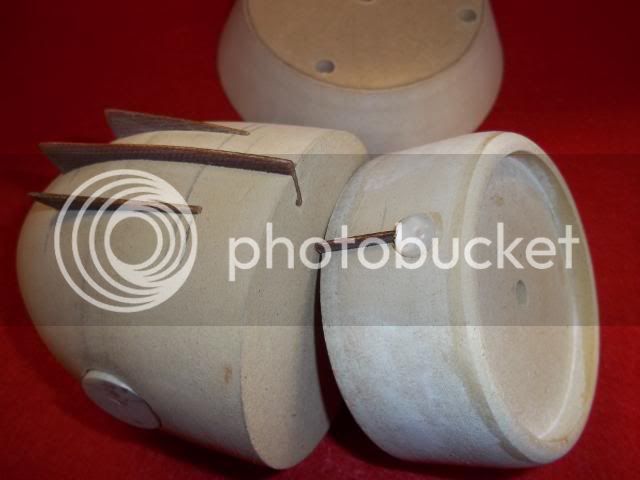
After the glue dried on the MDF disks (those sawdust things), my dad put them into the lathe and shaped them. After the lathe, he drilled a 3/4" diameter hole through the side and inserted a couple of short pieces of the fiberglass rod. Than he cut some 1/16" inch wide slits and inserted the tabs of phenolic. Here it is sanded smooth and ready for the next step . . . thermoforming. :shock:
BlinkytheHeadlight072.jpg


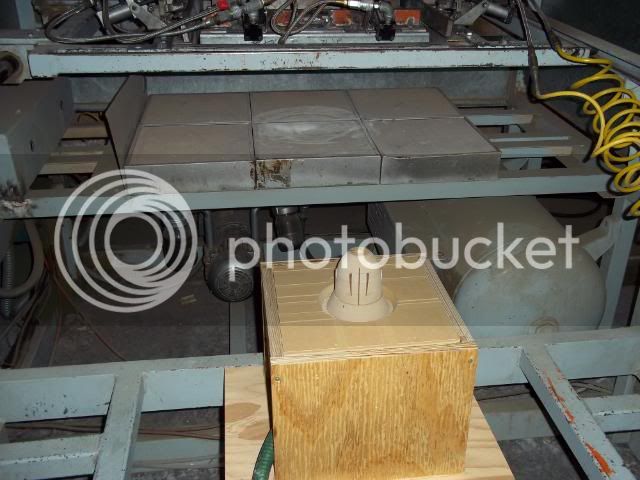
Here is your classic Heartland manufacturing thermoforming machine from the mid 1970's. :wink: The MDF parts are mounted on top of this plywood vacuum box. Behind the box to the left is a vacuum pump. It’s connected to that big vacuum reservoir tank on the right. On the outlet of the tank (or is it actually the inlet? :? ) is the solenoid valve. The solenoid valve is connected to the vacuum box with that green hose you see at the bottom of the picture. At the top of the picture, you can see a clamping frame holding a sheet of plastic in the process of being heated. Those yellow hoses are controlling the clamps on the frame. The plastic sheet is heated with twelve heating elements. You can see six of them in the picture, the rest are above the plastic sheet so it gets heated evenly.It takes about 45 seconds for the plastic to heat up. Then the frame slides out like a door, the plastic goes over the mold, and the solenoid valve allows the vacuum to the plywood box which draws the plastic around the details of the mold. The entire process takes about two minutes. :shock:
BlinkytheHeadlight066.jpg


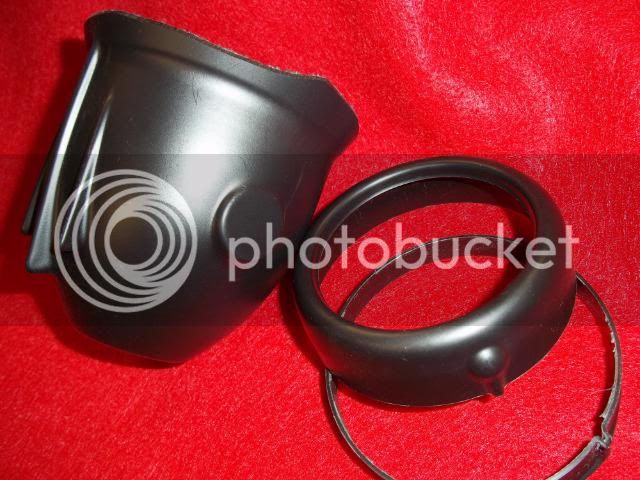
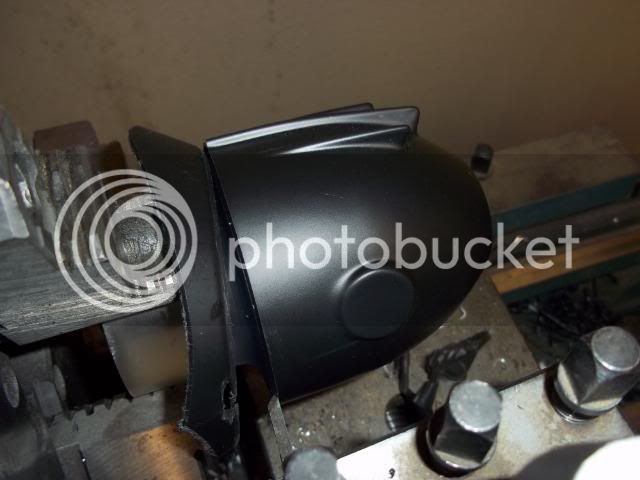
Here are the parts that were made on the thermoforming machine. The first step after taking them out of the machine is a rough trim on the bandsaw. You can see the part on the right :arrow: has been put in the lathe for a final trimming. The front ring is sitting on top of the piece that was turned in the lathe.The part on the left is ready to go into the lathe next.
BlinkytheHeadlight042.jpg


This is the other piece being trimmed in the lathe.
BlinkytheHeadlight090.jpg


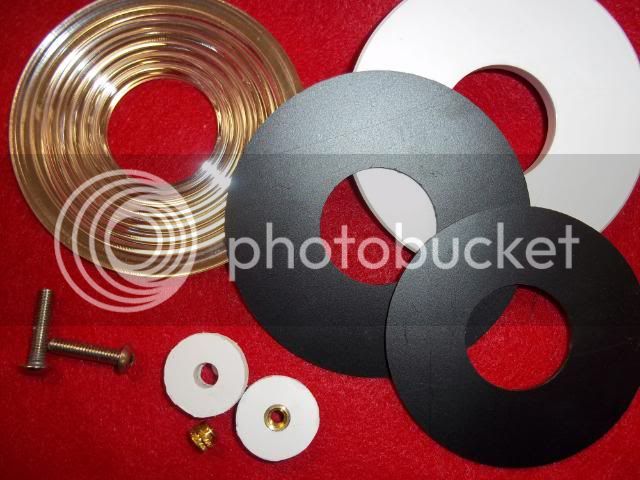
Here are some of the parts my dad made to finish the basic headlight. The black and white discs are 0.62" styrene. The smaller white discs are 0.25" styrene. Notice that my dad has pressed one of the brass inserts into one of them already. The reflector (top left) is made from 1/4" acrylic mirror.
BlinkytheHeadlight046.jpg


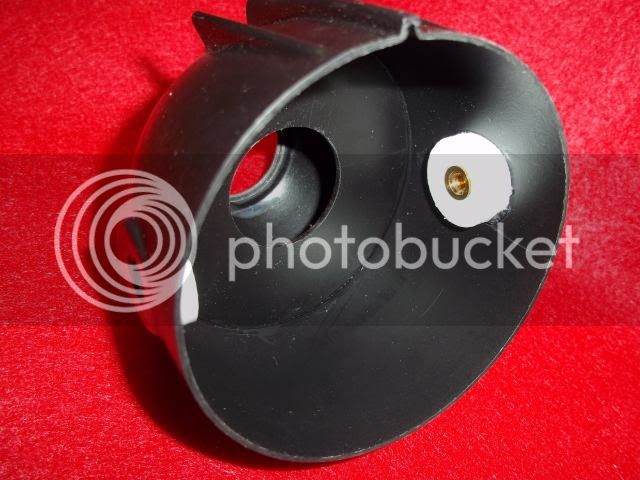
This is a view inside with the disks glued in place. They reinforce the headlight bucket. The white things with brass inserts are how we will mount it onto the frame plus a bracket.
BlinkytheHeadlight047.jpg
 
:shock: :shock: :shock:
i bet if we gave you two a box of eggs you could build the Effiel tower :lol:
nice job on the light cant wait so see it mounted and working! :mrgreen:
 
WOW, do you two have EVERY tool available for manufacturing, right there in your shop? I mean, now you're vacu-forming head lights! Incredible talent! This build is OVER-THE-TOP!
 
havent had much time to check up on this one but i do now and all i can say is..............
AMAZING WORK! one of the best builds ive seen to date!
looking forward to seeing what other stuff you 2 come up with :mrgreen:
 
Hi Fireproof and Daughter!

You now have a new fan from the other side of the world, in New Zealand! I have read this thread from page 1 in one evening and am waiting, as many others are too, with baited breath at your developments in this project. I only joined this forum to follow your project, as I had found (and now like greatly) the RatRodBikes site by accident.

This project is very inspiring! Not only for custom bike projects, but the dedication and patience required for any long term custom project. I am tinkering with a custom rebuild of a GIANT Butte MTB that was rusting along the side of our house. Nothing like your project, but as for many of us, your generosity in your progress updates gives us all further inspiration for our own projects.

I have now put a bookmark for this at the very top of my bookmark list so I can keep up with future developments from time-to-time when I am online.

Keep up the great work. It is touching to see a father and daughter having a shared passion.

With that, a gudday and see ya later mate, from NZ! Baaaa!
(Get away round there dog... get that sheep in will ya!) :lol:

Cheers

--mike "slydog" norman
 
Thanks again everyone for all the encouraging words! :D mike_at_slydog, welcome to RRB! We are so glad you joined us! You should look around on the website in the bike builds section . . . There are dozens of bikes that would knock your socks off! All the best to you on your build, and keep us posted; We would love to see pictures!

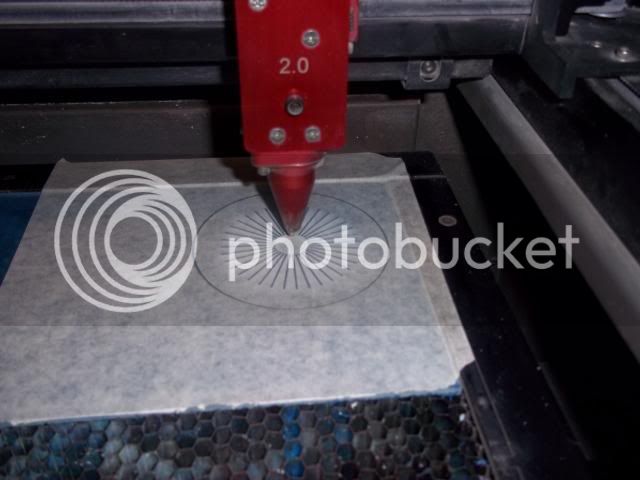
This is how my dad made a lens for my bff (best flashlight friend) Blinky! He got the idea from reading the January 2011 issue of Rod and Custom. He scaled down the process described in the article, “Bubblicious”, but added one little twist . . . he drew up a simple design using “Signlab” software and sent it to the laser! Here is the laser finishing cutting a piece of clear 0.090 acrylic.
BlinkytheHeadlight030.jpg


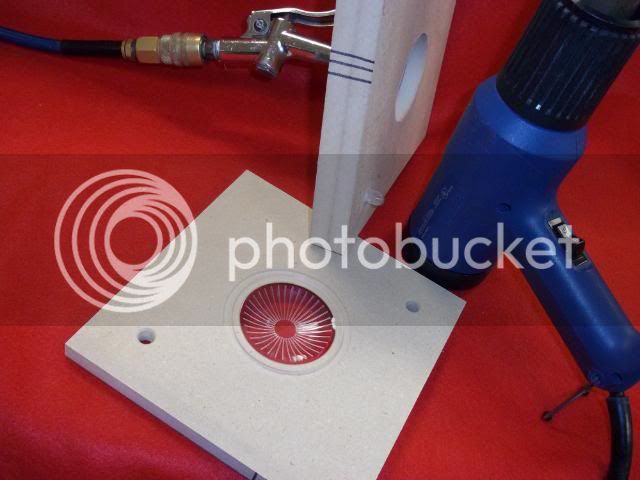
This is a simple frame for holding the acrylic lens piece. It is made from 3 pieces of MDF. One piece has a small hole for the tip of the blow-gun to press into. It is glued to the middle layer with a hole slightly smaller than the size of the lens. Note the dowels to keep things lined up. If you look closely, the third piece of MDF has a slight recess for the lens piece to fit into. He used the heat gun on its low setting to slowly heat the plastic and after the plastic was soft, he gave it a little blast of pressurized air to create a bubble shape.
BlinkytheHeadlight034.jpg


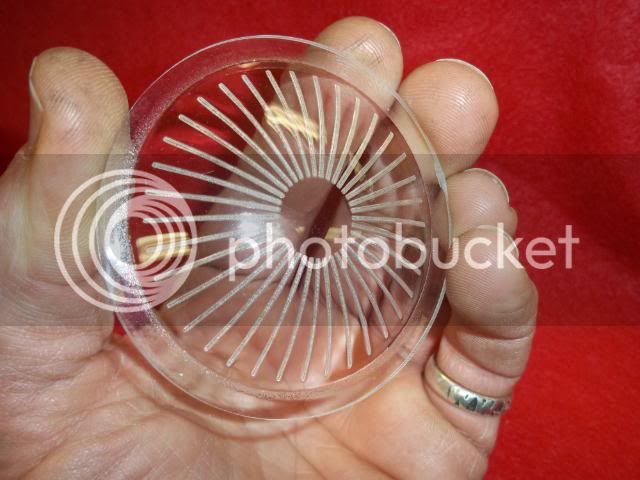
Here is Blinky’s pretty new lens, ready for installation! :mrgreen: The engraved design catches and reflects some of the light and is easier to see from a side angle.
BlinkytheHeadlight036.jpg
 

Latest posts

Back
Top