You are using an out of date browser. It may not display this or other websites correctly.
You should upgrade or use an alternative browser.
You should upgrade or use an alternative browser.
Tribute to our friends
- Thread starter Fireproof
- Start date


Help Support Rat Rod Bikes Bicycle Forum:
This site may earn a commission from merchant affiliate
links, including eBay, Amazon, and others.
Too cool. I've only just looked at this thread properly so have read over the whole lot and with how comprehensive your photos/descriptions of the build are, it's brilliant watching the transformation of this bike. Brilliant! 
deezenuts, thanks for the bump. I have one of these in the shed, so it was of interest to me. Little did I know what I was in for when I started reading it. Couldn't stop till I read the whole thing. Awesome build!! Looking forward to seeing the finished ride.
- Joined
- Apr 11, 2012
- Messages
- 27
- Reaction score
- 1
What a build, we want more. :mrgreen:
Fireproof said:My dad (Fireproof) and I are building a new OCC chopper to replace my bike that was stolen after this year's Rat Bike Rodeo. Look here for some background info . . . http://ratrodbikes.com/forum/viewtopic.php?f=1&t=31862
We had some frames and parts kicked down to us by RRB forum members Kuttnhack and davethecreep to get us started . . . THANKS GUYS!
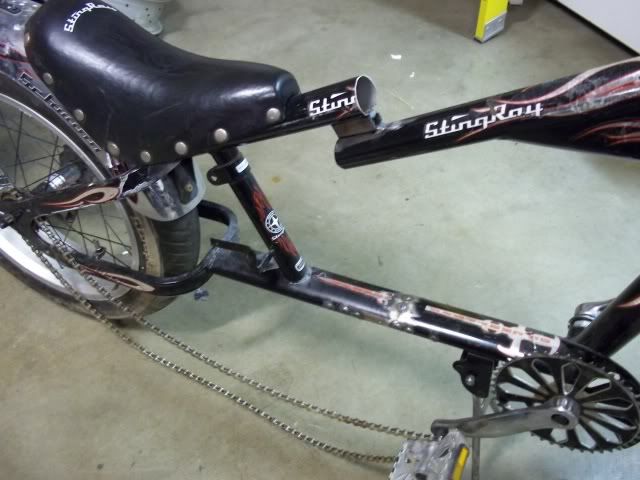
I decided that since I’m getting taller, I better make this bike a bigger one . . . and thus, my new, stretched OCC chopper was born. The first step was to take measurements from my dad’s Schwinn Spoiler and from a stock OCC bike and then compare them. I then decided that while the difference was about nine inches, I would stretch it two thirds of the way towards the Spoiler . . . six inches.
Here it is after its been stretched . . .
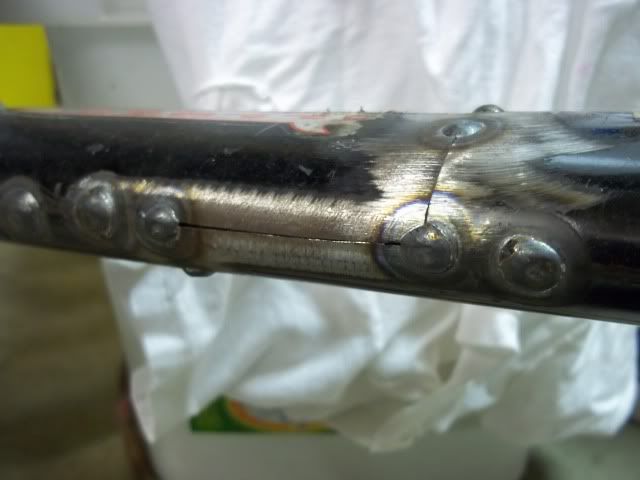
That's where the cut was made and tack welded . . .
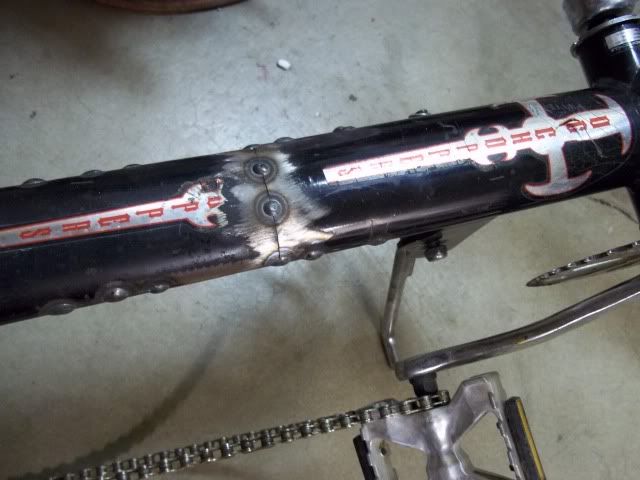
Here's a close-up. Those spots on either side of the seam are plug welds where we inserted tubing to reinforce the joint.
Note in the first photo how the top tubes don't line up, but that won't be a problem much longer . . . we plan to fix that! We tacked that short piece of square tubing in betwen the top tubes so that I could take it for a test ride to see if I liked how much I stretched it. But before this could take place, I learned how to use a chain breaker tool to extend the chain to fit the bike's new length.
First of all, great work!
Not sure if you had done so already as i could not see it in the pics but, for a stronger way to weld 2 ends together you should find a pipe that has the diameter of the inside of the pipe. (A size just big enough to slide inside, preferably a tight fit.) So you would slide this pipe into the frame and slide the other part of the frame over the inner pipe leaving an 8th inch gap and then butt weld the frames together while also penetrating the inner pipe. This will add more strength and it will give you peace of mind as well so you have no worries of the welds cracking due to tension stress of the frame. Also instead of having 2 points welded together it will now be 3..
1=frame point A
2=inner pipe welded to both frame A & B
3=frame point B
I hope this makes sense. Lol you may have already done this as i think you said you had done so but i thought i would ask and or suggest this tip as it is the safer, stronger way to go when welding bike frames.
thanks,
Douglas Johnson
"Skrach"
http://www.VividlyVintage.com
yoothgeye
I build stuff.
Thanks for the tip, but also kep in mind that the tubing on these choppers is oval, harder to find sleeve material, you can take something smaller and hammer it into an oval, but his welds look super.
yoothgeye said:Thanks for the tip, but also kep in mind that the tubing on these choppers is oval, harder to find sleeve material, you can take something smaller and hammer it into an oval, but his welds look super.
I totally didn't see that they were oval... that definitely makes it hard to shove a round pipe inside. Lol
thanks,
Douglas Johnson
"Skrach"
http://www.VividlyVintage.com
It also says, on one of the pictures, "Here's a close-up. Those spots on either side of the seam are plug welds where we inserted tubing to reinforce the joint." so perhaps they did just that.
Bumping this one up for newer members to see, there is some amazing fabrication work involved and awesome finishing skills.
Not sure if it ever got done and finished but maybe someone knows @Fireproof or @anticonformity and can find out?
Luke.
Not sure if it ever got done and finished but maybe someone knows @Fireproof or @anticonformity and can find out?
Luke.
That is awesome!!! I love the seat & hollow tank Very cool, keep it up!
Very cool, keep it up!