


The Renaissance Man
__CERTIFIED DIVER__ (Open Water & Open Dumpster)
Staff member
Moderator
Pro Member
This is one of many possible ways to alter the length of a steer tube. I'm not an expert, so use your own judgement before making any modifications yourself.
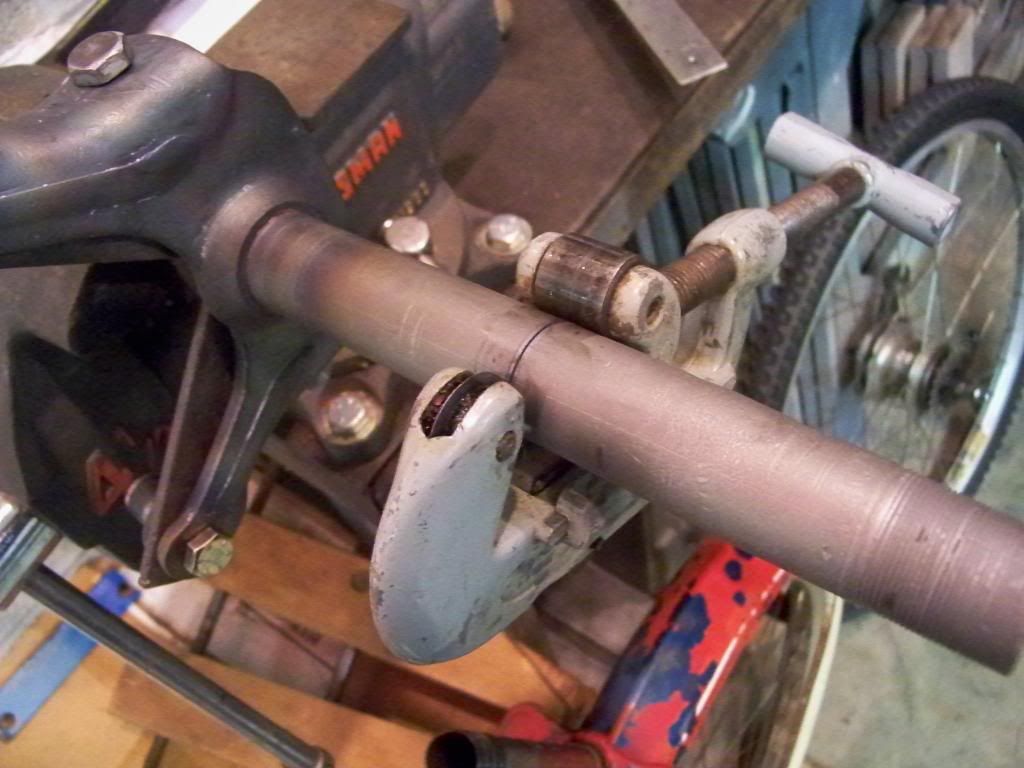
The Shockmaster fork that I'm using is from a girl's bike and therefore is too long for a boy's bike. Typically you could section the tube and weld it back, but because this one is in such poor condition, I'm going to use a donor fork. If you need to make your fork longer, you would also need a donor.
The first cut needs to be below the depth of your stem when it's installed at its lowest point. This will prevent the weld from interfering with the stem adjustments. Make this measurement from the top of your desired length, not the current length. I would make this an even measurement from the bottom so that the math is easier in the next step! A pipe cutter works well for this.
After the first cut, measure from the bottom again and then subtract that from your desired length. The result will be the measurement for the next cut from the top half of the donor.
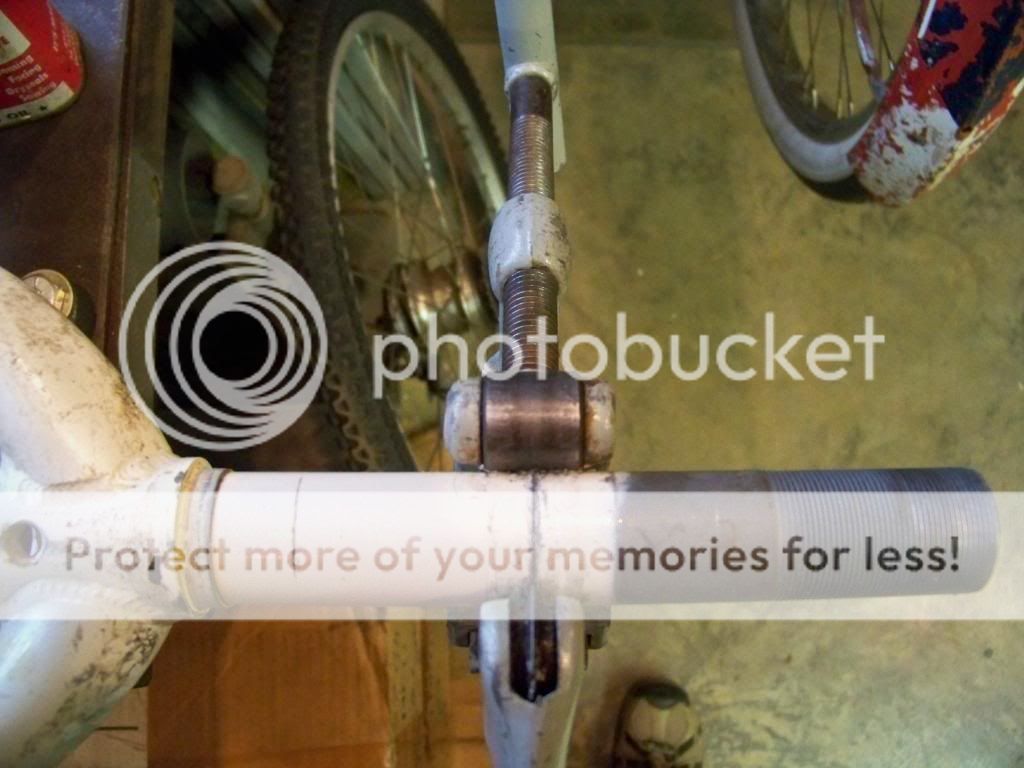
After cleaning everything up, chamfer (bevel) the edges of both cuts. Here's a link to help explain why this is important:
http://www.weldguru.com/SMAWNomenclatureandJoints.html
You need to keep everything straight for welding these parts back together. A simple jig for this can be made from a section of angle iron. To keep from crushing the tube with vise clamps, I used a couple of hose clamps. I also marked a center line on both pieces so that the groove would be in the correct position.
For more security, a sleeve can be inserted to bridge the inside of the two parts. In this case, the I.D. was smaller on the bottom half and would've required a step machined into it so I chose not to add it. If it is welded correctly, it should be very strong even without it.
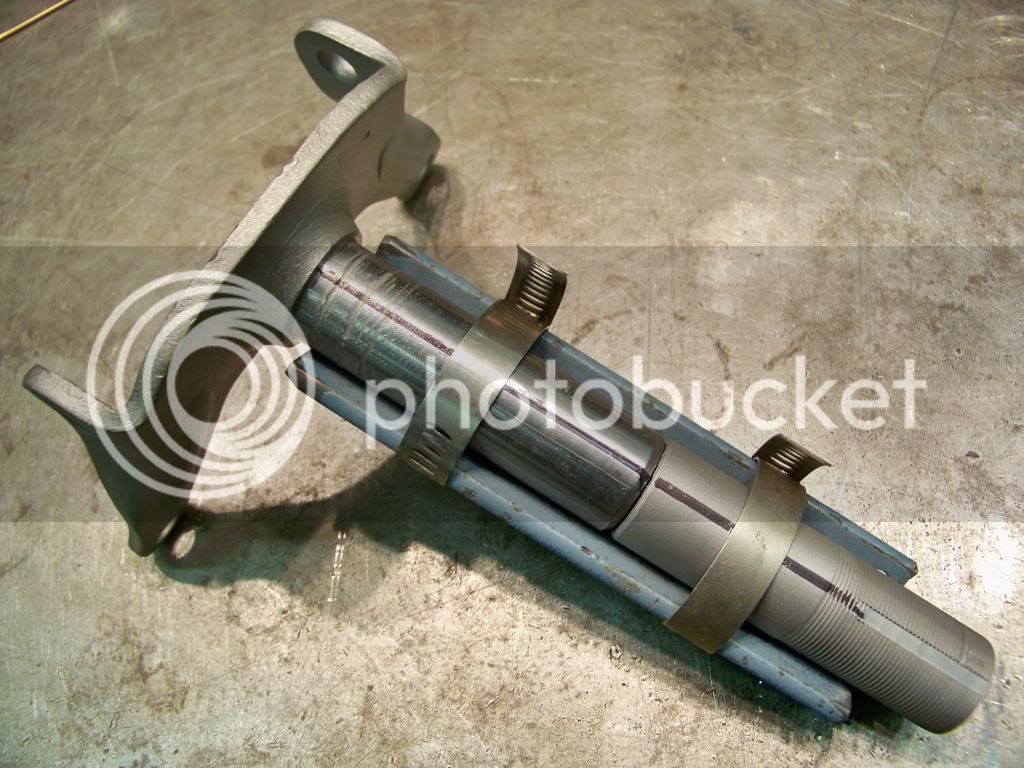
The two pieces are spot welded on each side and then removed from the jig and spot welded in two other quarter locations the rest of the way around. This keeps the metal from pulling as you add more heat. Check and make sure that nothing has moved before finishing the weld.
I should note that this is done with a TIG welder.
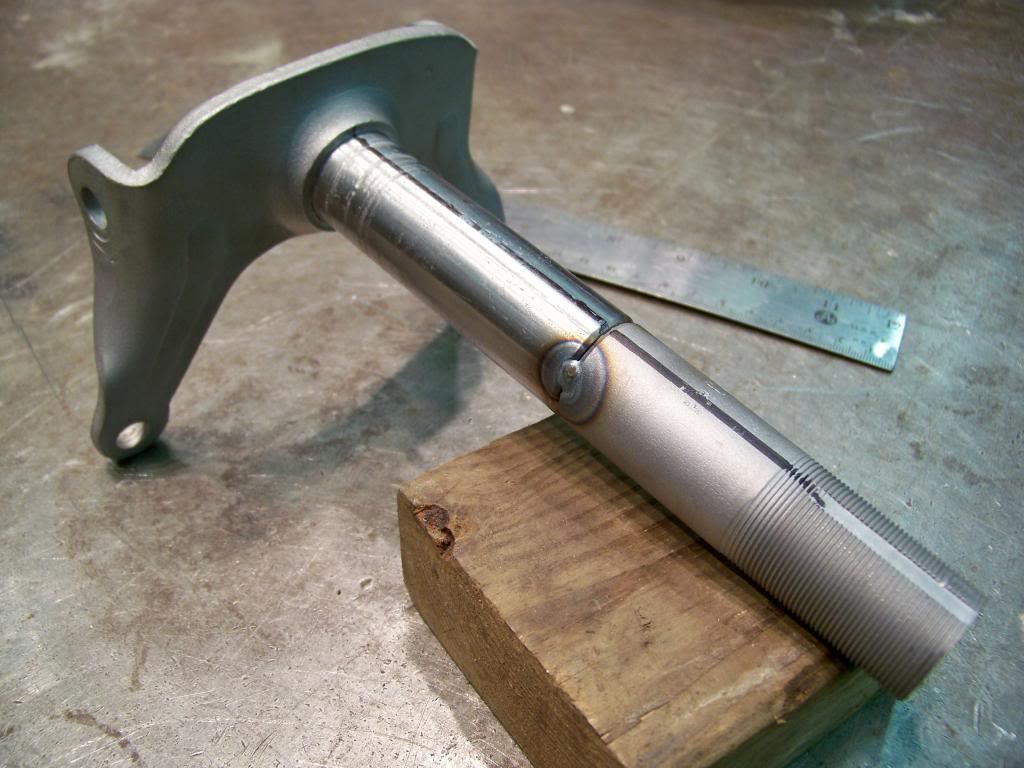
After the welding is complete and the metal has cooled (sorry, I forgot to take a picture here), I used a flat file to level the weld with the tube so that the bottom race will slide back into place. I prefer to do this by hand so that I can control it better and not remove any more metal than I have to. With a fillet weld, there's not a lot to remove anyway.
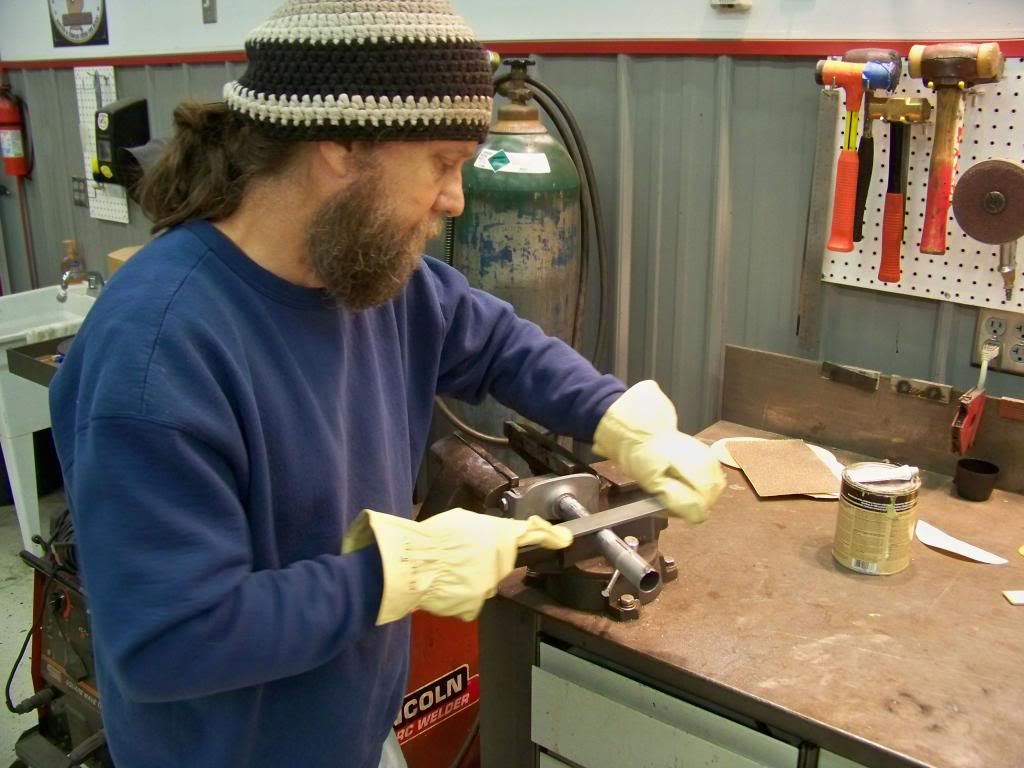
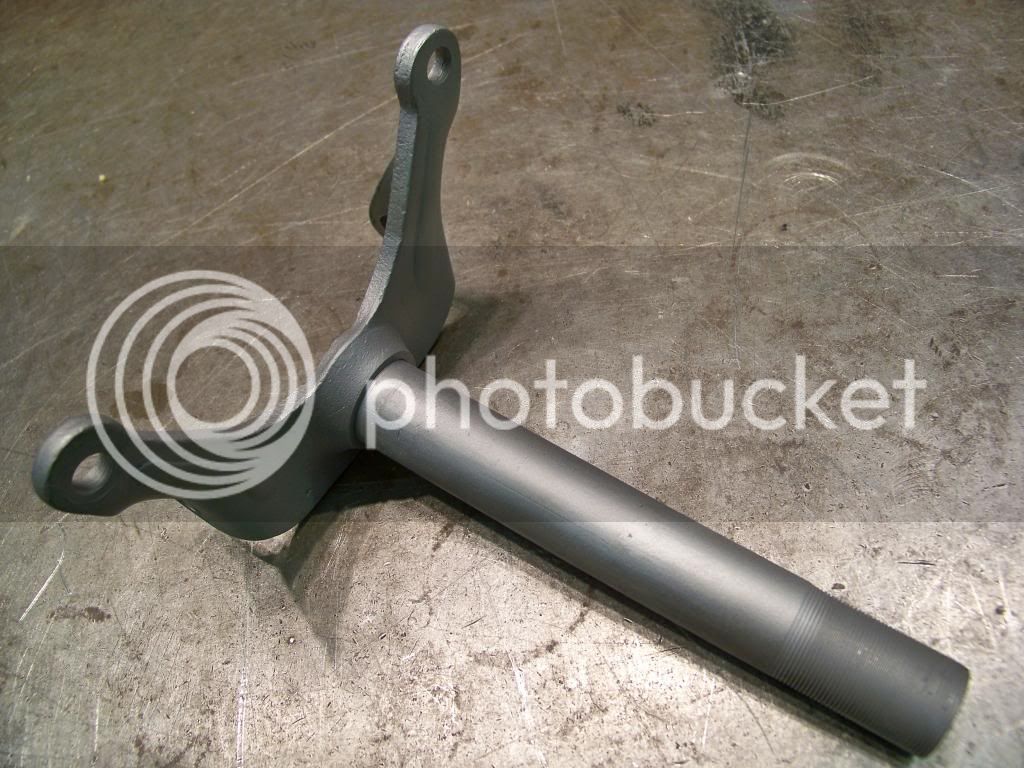
It's now ready for some primer after a quick visit to the bead blaster!
Thanks to my cousin Charlie for the welding. He's been welding on street rods for as long as I can remember!
The Shockmaster fork that I'm using is from a girl's bike and therefore is too long for a boy's bike. Typically you could section the tube and weld it back, but because this one is in such poor condition, I'm going to use a donor fork. If you need to make your fork longer, you would also need a donor.
The first cut needs to be below the depth of your stem when it's installed at its lowest point. This will prevent the weld from interfering with the stem adjustments. Make this measurement from the top of your desired length, not the current length. I would make this an even measurement from the bottom so that the math is easier in the next step! A pipe cutter works well for this.
After the first cut, measure from the bottom again and then subtract that from your desired length. The result will be the measurement for the next cut from the top half of the donor.
After cleaning everything up, chamfer (bevel) the edges of both cuts. Here's a link to help explain why this is important:
http://www.weldguru.com/SMAWNomenclatureandJoints.html
You need to keep everything straight for welding these parts back together. A simple jig for this can be made from a section of angle iron. To keep from crushing the tube with vise clamps, I used a couple of hose clamps. I also marked a center line on both pieces so that the groove would be in the correct position.
For more security, a sleeve can be inserted to bridge the inside of the two parts. In this case, the I.D. was smaller on the bottom half and would've required a step machined into it so I chose not to add it. If it is welded correctly, it should be very strong even without it.
The two pieces are spot welded on each side and then removed from the jig and spot welded in two other quarter locations the rest of the way around. This keeps the metal from pulling as you add more heat. Check and make sure that nothing has moved before finishing the weld.
I should note that this is done with a TIG welder.
After the welding is complete and the metal has cooled (sorry, I forgot to take a picture here), I used a flat file to level the weld with the tube so that the bottom race will slide back into place. I prefer to do this by hand so that I can control it better and not remove any more metal than I have to. With a fillet weld, there's not a lot to remove anyway.
It's now ready for some primer after a quick visit to the bead blaster!
Thanks to my cousin Charlie for the welding. He's been welding on street rods for as long as I can remember!