SPACELINER CONVERTIBLE (A Non-Invasive Sex Reassignment)

Rat Rod Bikes Bicycle Forum

Help Support Rat Rod Bikes Bicycle Forum:

This site may earn a commission from merchant affiliate links, including eBay, Amazon, and others.
Your next project should be spacelander conversion.

Yea, Spacelanders are cool!
Maybe the Bowden 600 1961 concept :thumbsup:! I wonder if anyone has ever built one?
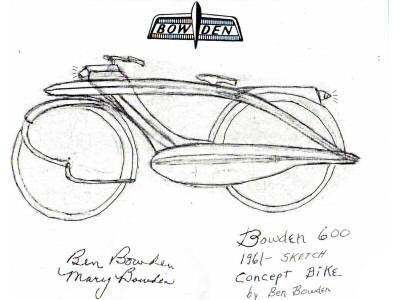
sketch-bowden1.jpg
 
I love the new shape of the tank.
Would love to see the front of the tank and the bezels.
I've been waiting to see the front also. It took a good bit of checking and re-checking to get the torpedoes mounted correctly so that they mirror each other from side to side, but I'm happy with the results.
100_6459_zpsb22d0978.jpg
 
Yes, the molds will be made to release the nose section separate from the rest of the tank. It's a more involved process to create the molds, but it's the only way to have any under cuts in the parts.
 
The first coat of polyester primer went on today thanks to my friends at Johnson's hot rod shop.

I remembered that I had intended to put divots in the buck for mounting screws, so I will have to take care of that tomorrow before anything else can happen.

After some block sanding, the lights will get permanently attached and then final prime and finish sanding.

100_6472_zpsc5f304bd.jpg
 
Last edited:
I've been waiting to see the front also. It took a good bit of checking and re-checking to get the torpedoes mounted correctly so that they mirror each other from side to side, but I'm happy with the results.
100_6459_zpsb22d0978.jpg

Jim, I love the look with the light housings attached. Its side mounted tanklight housing so resemble the Columbia's FireArrow and FireBolt concept.

attachment.php


Your method of attaching the battery trays to each half will be interesting. What are your plans to power the lights?
Here is the inside of the FireArrow tanklight shown above. These are a pan in the ... to take apart and ensure wire connections stay in place when fumbling the reassembly.
I'm sure you have come up with a easier setup than this.

attachment.php
 
Thanks John, that Columbia tank is very similar!

I have some ideas for mounting the batteries, but won't really know until I actually get to that point. What I do know is that I'm planning on using 12v LED lights and A23 12v batteries like this...
SnJn.jpg
 
Not much has been done for the past few weeks, but that's about to change. The guys at Johnson's should be finishing up on the prime and sanding tomorrow and then I can move forward with the prep work for the molds.

I'm hoping to have it done before the Get-A-Grip show coming up at the end of this month.

Here's a progress shot ...
100_6503_zpsced18aa0.jpg
 
CeeBee, I've been trading out work with them for years.
I hadn't planned on their involvement until I did some lettering on one of there cars and decided to barter instead of billing them. They're obviously better equipped for finishing body work than I am, so it worked out for both of us.
 
My initial goal was to have this finished by the Get-A-Grip show, but it's not looking good.

After a couple of set backs, I picked up the finished tank halves today. They look great and are 'slicker than owl shoes' but I'm concerned about a small section that has just enough under cut to trap it in the mold. I'm hoping that I can fix it pretty easily but at the expense of not meeting next week's deadline.:( I've come too far at this point to rush it up. I'll try to get a picture tomorrow.
 
Last edited:
Or......about 3 years ago I decided to try something new as a mold separator. I think that mold is still sitting around somewhere with the pattern still in it. :headbang:
 
Here's a shot of the 'torpedo' attached to the tank on one side. The discoloration in the primer makes it look uneven but it's not (it's kinda hard to take a clear picture).

The pencil line is ruffly where the mold will separate the 'nose' section from the rest of the tank.
100_6535_zps9b76555f.jpg
Is that the area of undercut that you are concerned about right under the 'torpedo'?
 
Yep. It's actually only about an inch or so starting around the pencil line and extending toward the back. It's hard to actually see it, but it is about 1/16th" deep. The problem is that the tank intersects the torpedo below the center line (if that makes sense).

I picked up some glazing putty today and should be able to fix it pretty easily. Then another coat of polyester primer and wet sanding and it's time to start waxing.:)
 

Latest posts

Back
Top