Science #1

Rat Rod Bikes Bicycle Forum

Help Support Rat Rod Bikes Bicycle Forum:

This site may earn a commission from merchant affiliate links, including eBay, Amazon, and others.
Joined
Dec 8, 2011
Messages
3,490
Reaction score
5,381
Location
Sacramento, CA
Rating - 100%
21   0   0
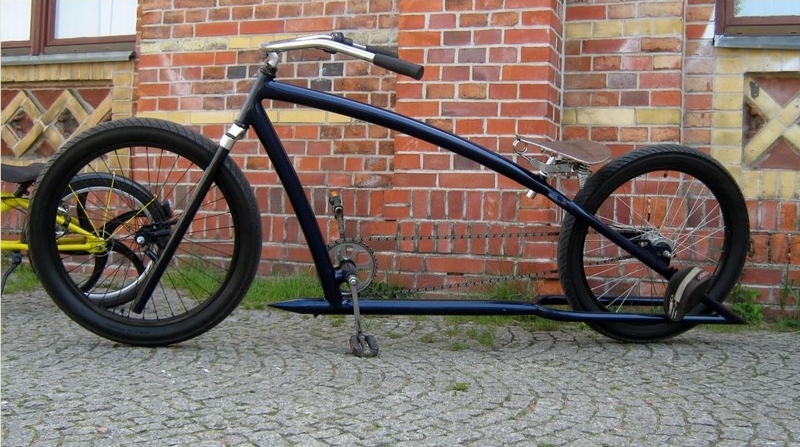
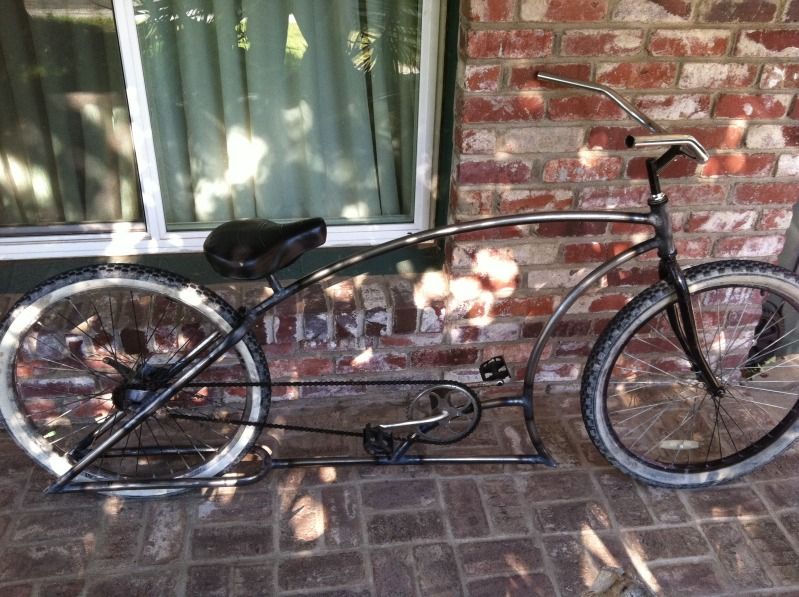
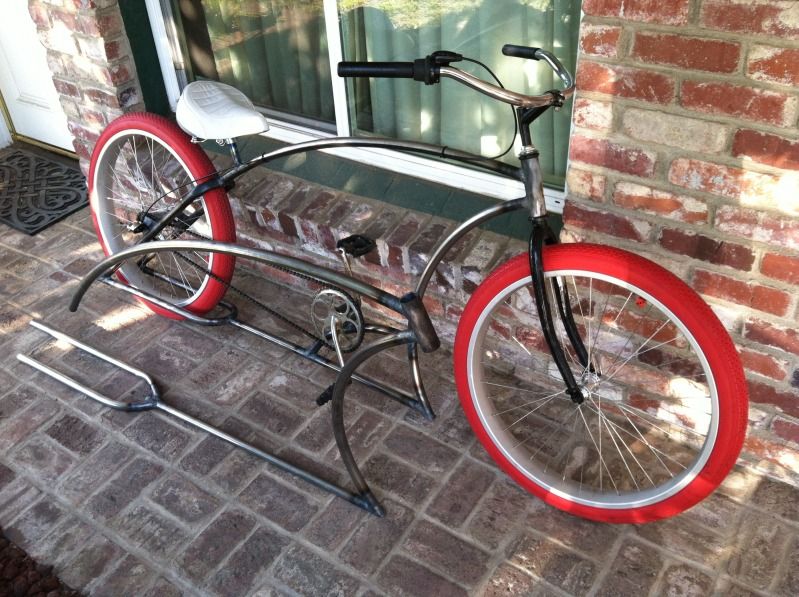
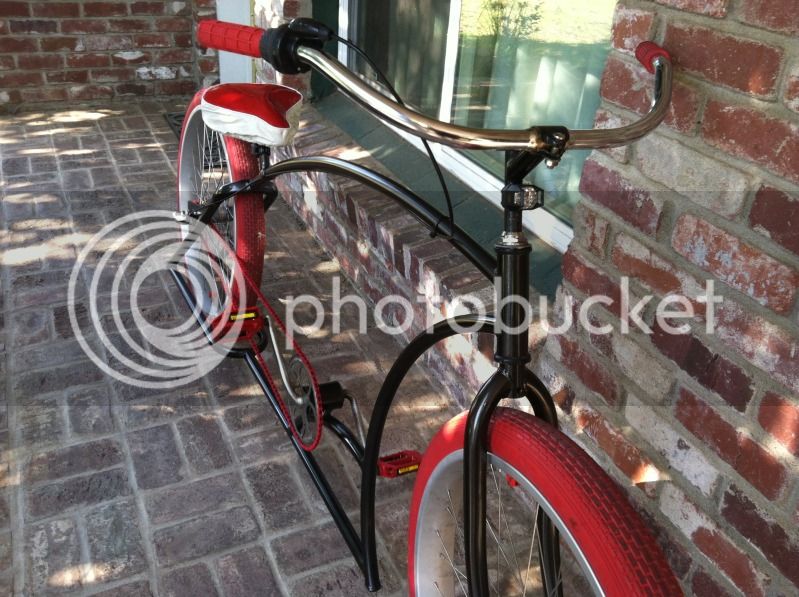
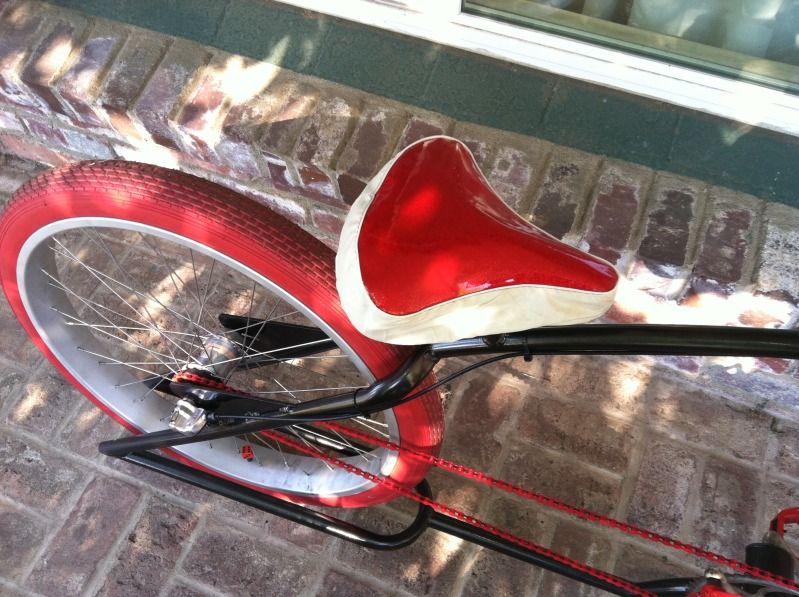
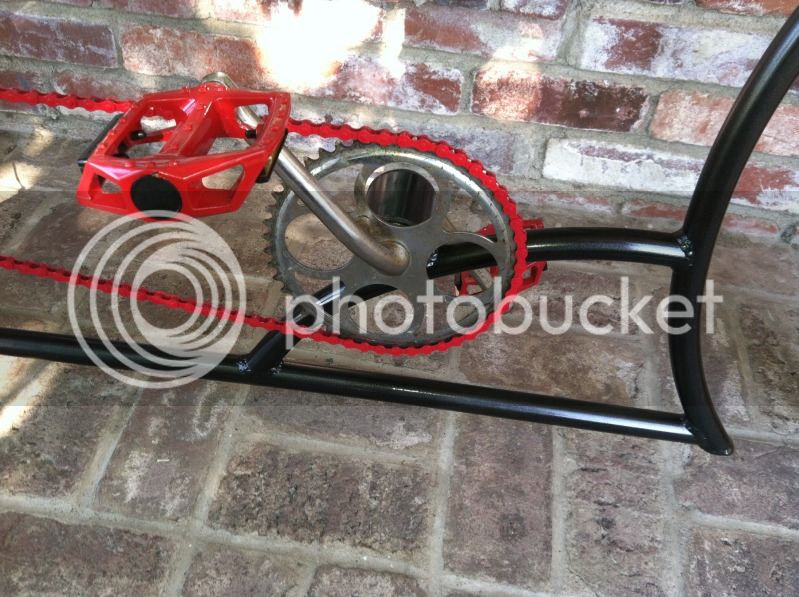
Since first discovering this scratch built section of the site, I've been wanting to give myself that challenge.

I have a sketch, though I forgot to take a picture of it, but I've done quite a bit of work on it the last two days, and so we'll get right into it.

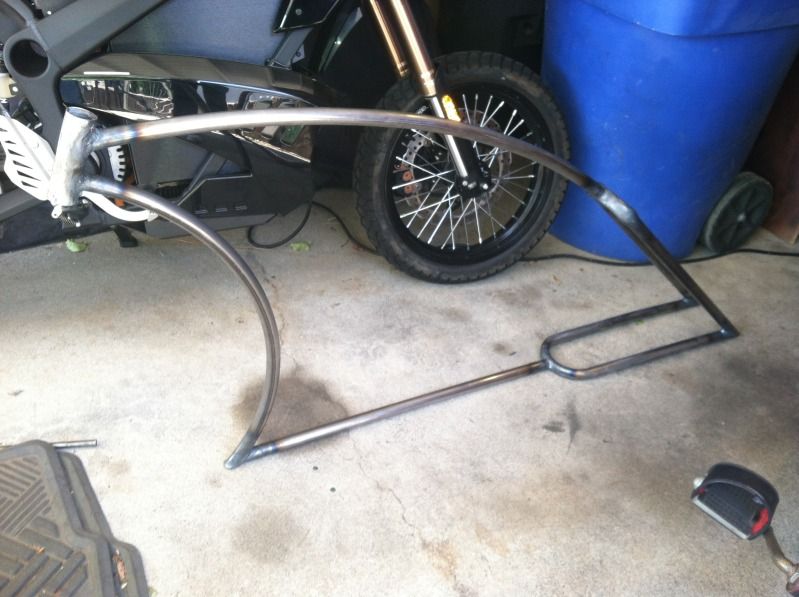
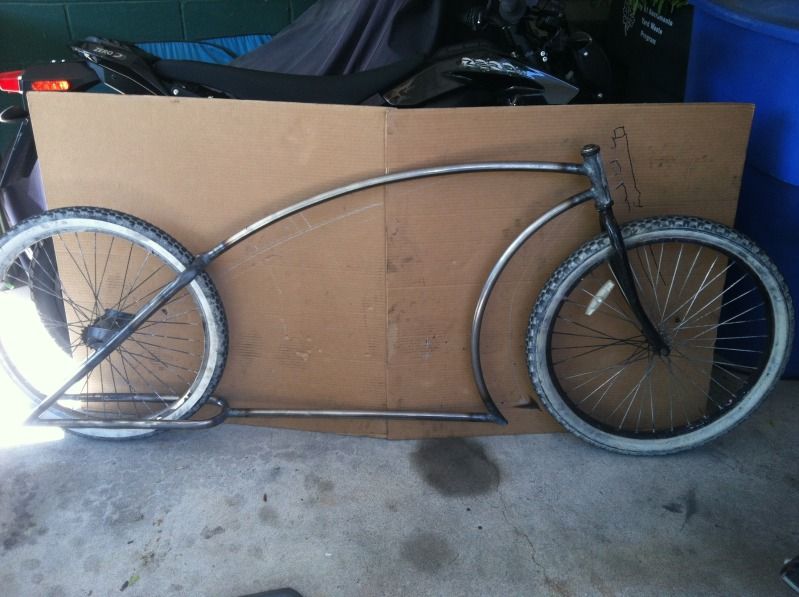
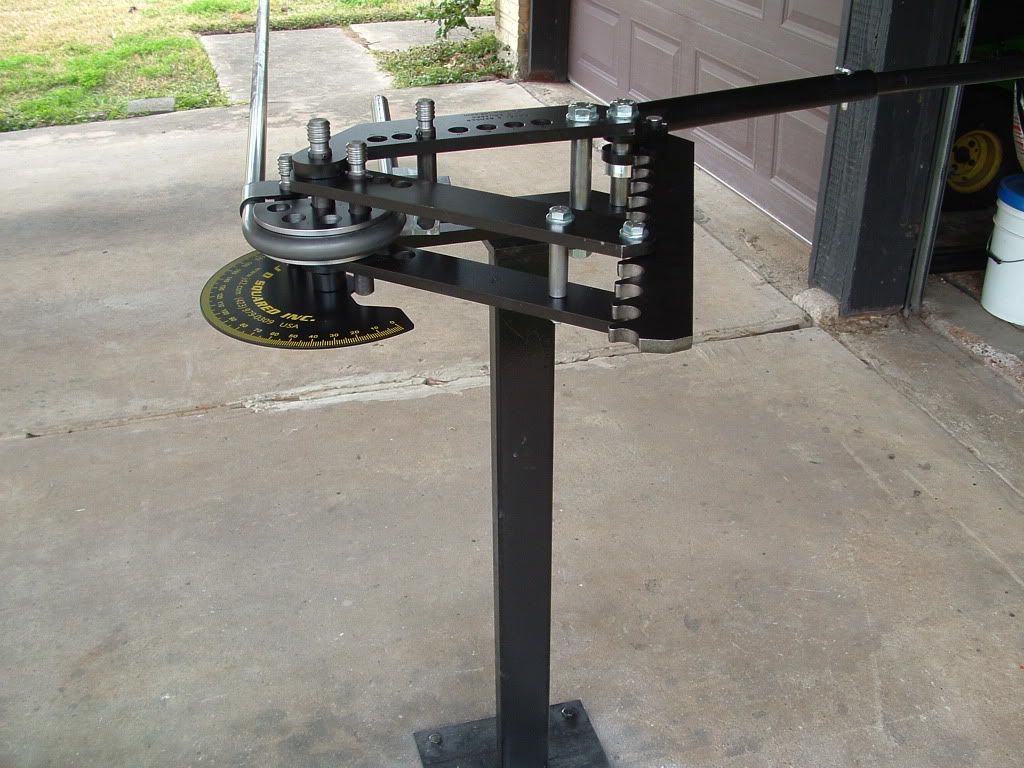
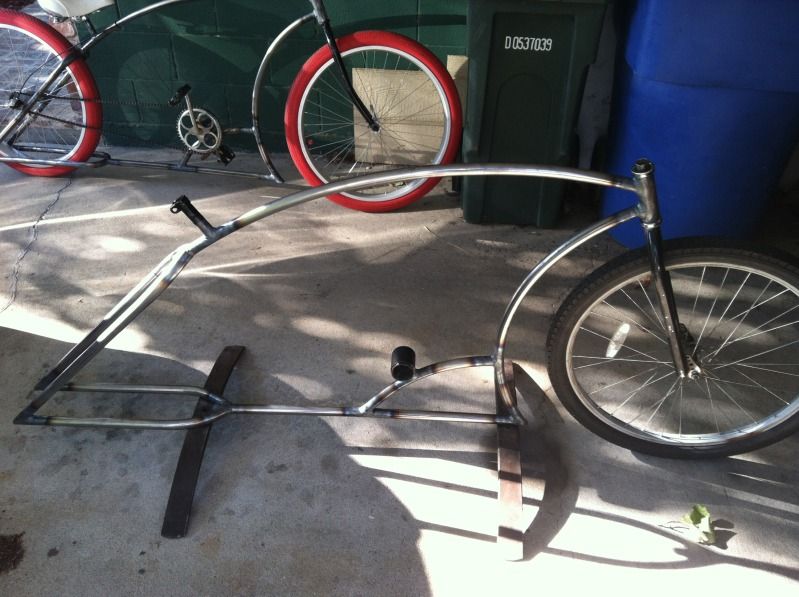
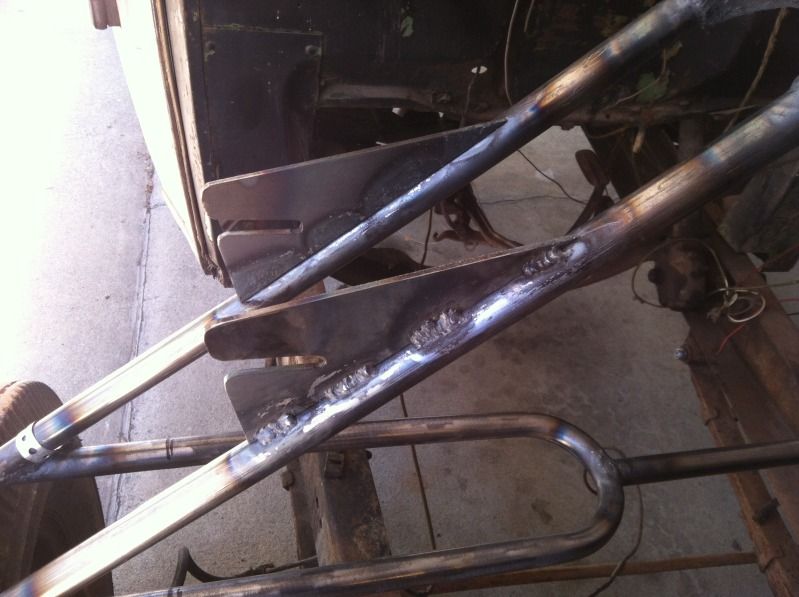
I started by making a rough life-sized drawing on some cardboard. I then grabbed some 1" thin-wall tubing that I had bought earlier, and started using my trusty Harbor Freight tubing roller to get them bent to the angles I wanted.

IMG_0875.jpg


IMG_0878.jpg


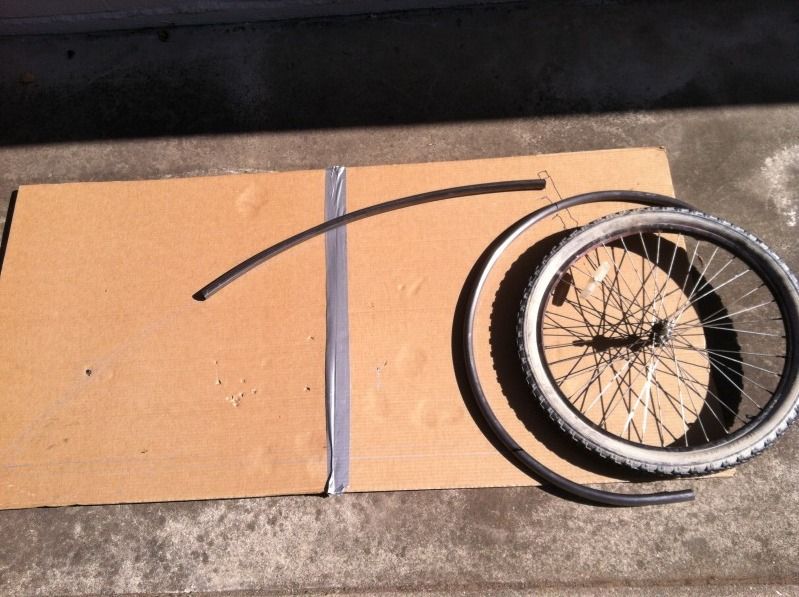
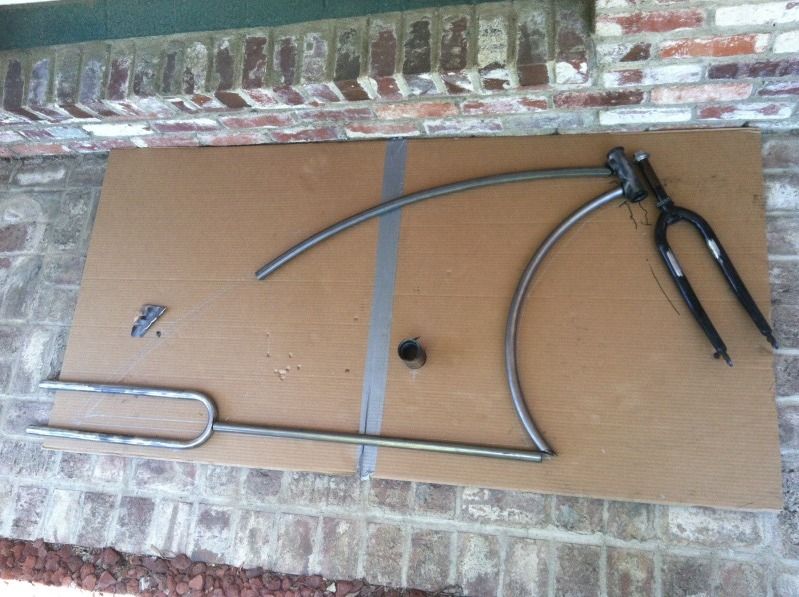
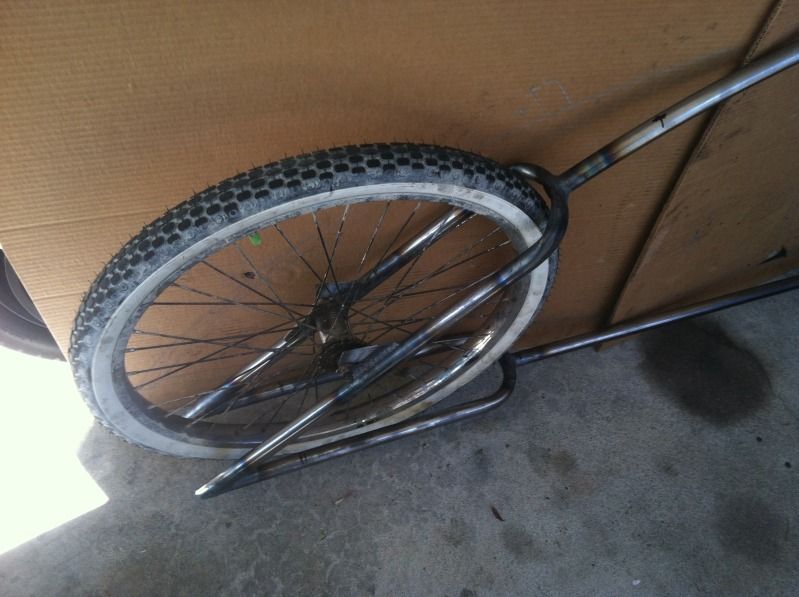
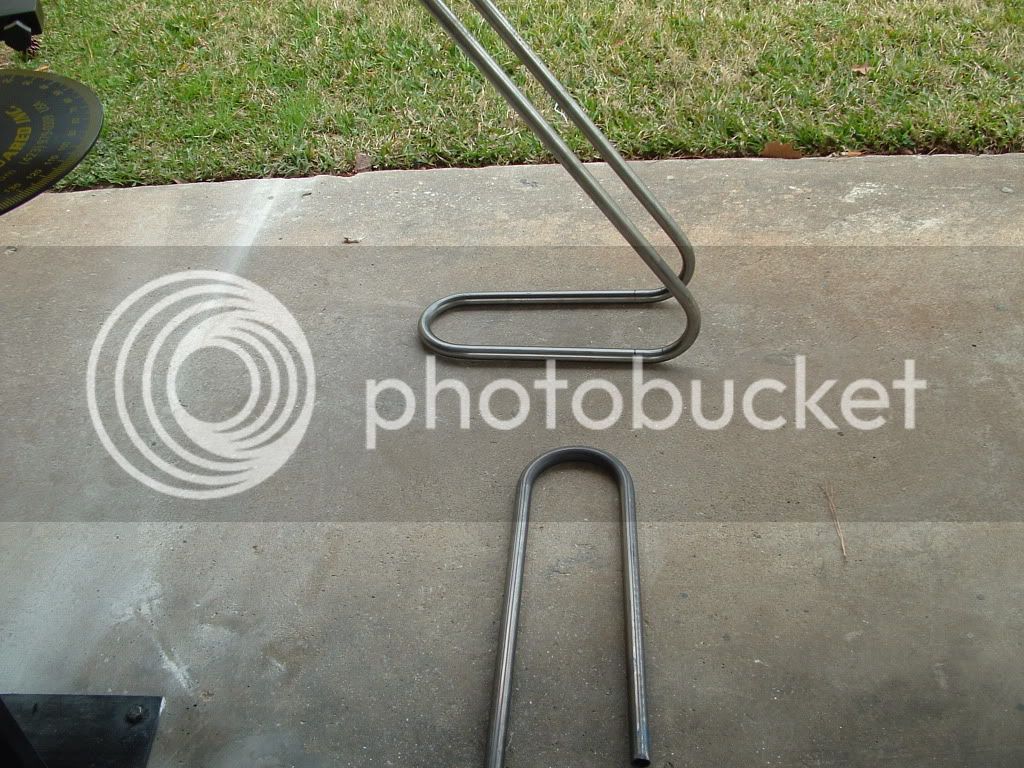
In case you're wondering, that tight bend was on a piece of scrap (not a bike part, actually) that I already had, and I decided to use it as the bottom of the rear. It happened to also be 1". Believe me, I wish I had two pieces like that, because my roller can't make bends that tight, so I'll have to come up with some other method for the seat stays.

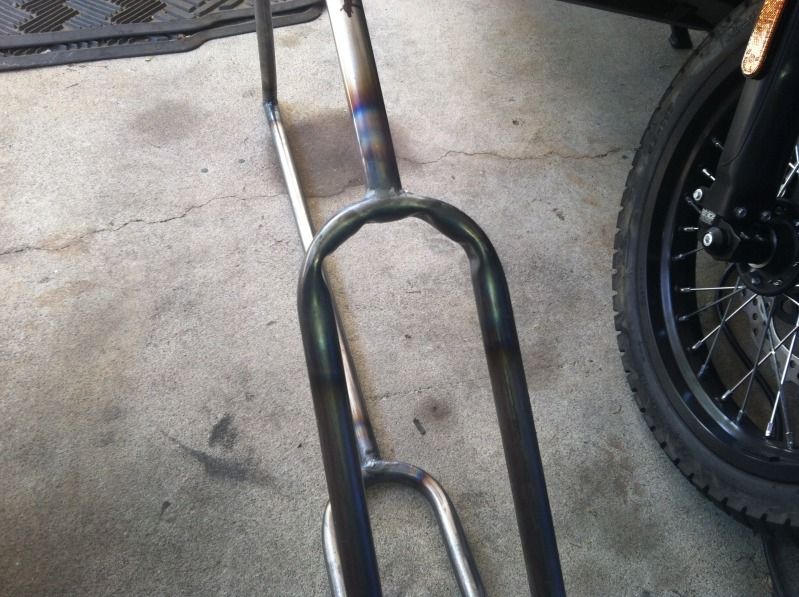
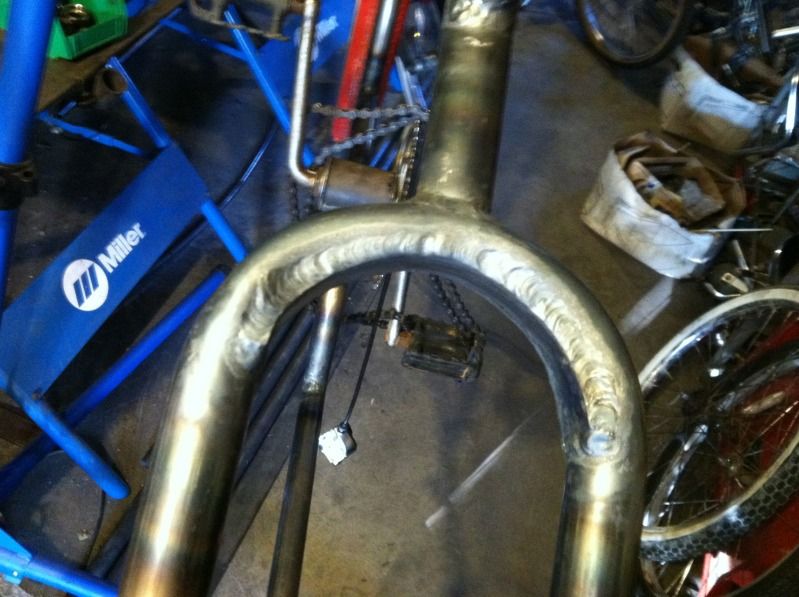
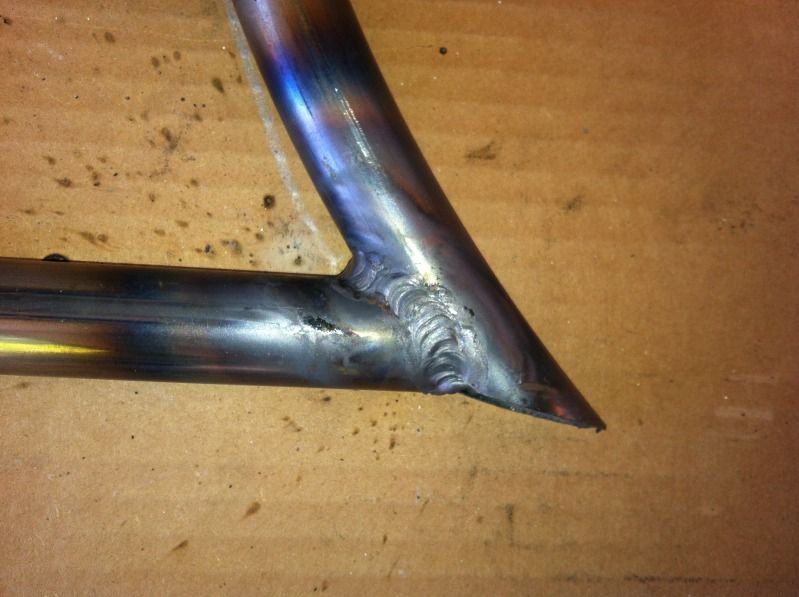
After cleaning off a headtube that I cut off of an old failed project, I began making some welds. As I've mentioned elsewhere on this site, I gas weld everything. They're decent looking welds, and I never have to grind them, or bondo over them.

IMG_0879.jpg


IMG_0880.jpg


IMG_0881.jpg


IMG_0882.jpg


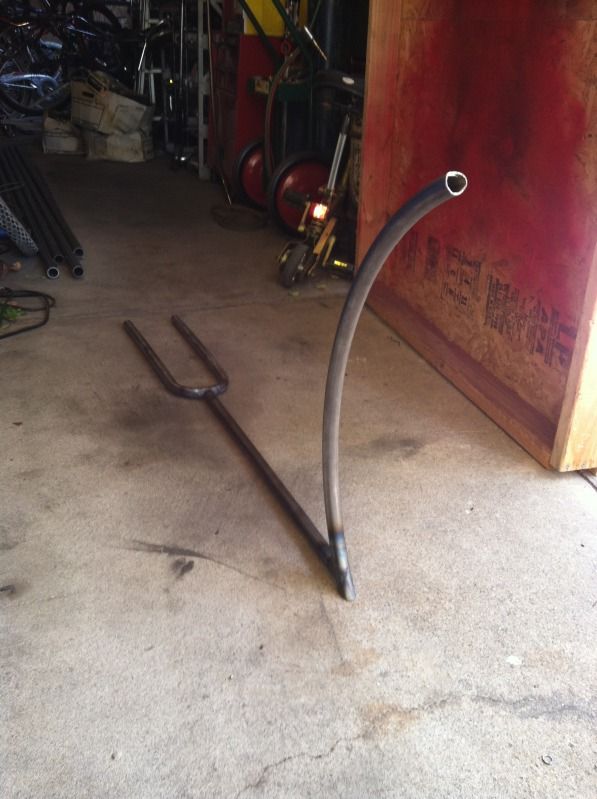
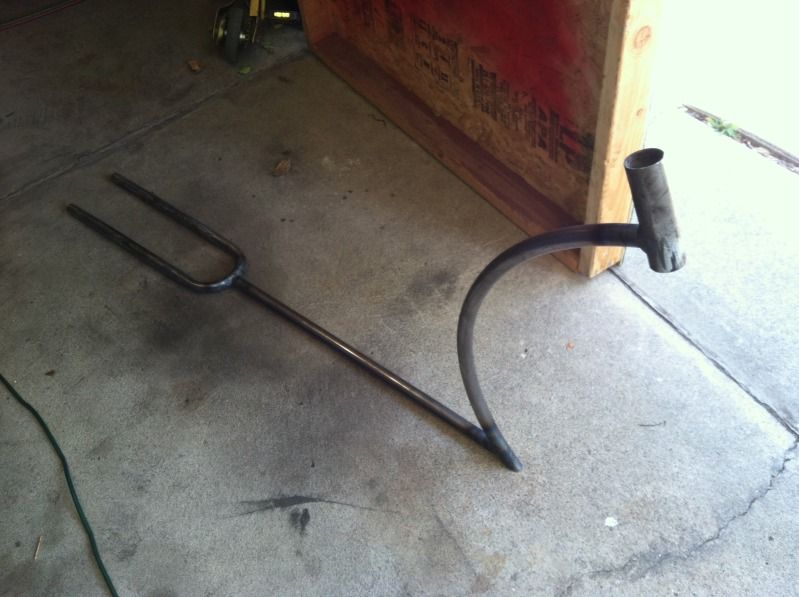
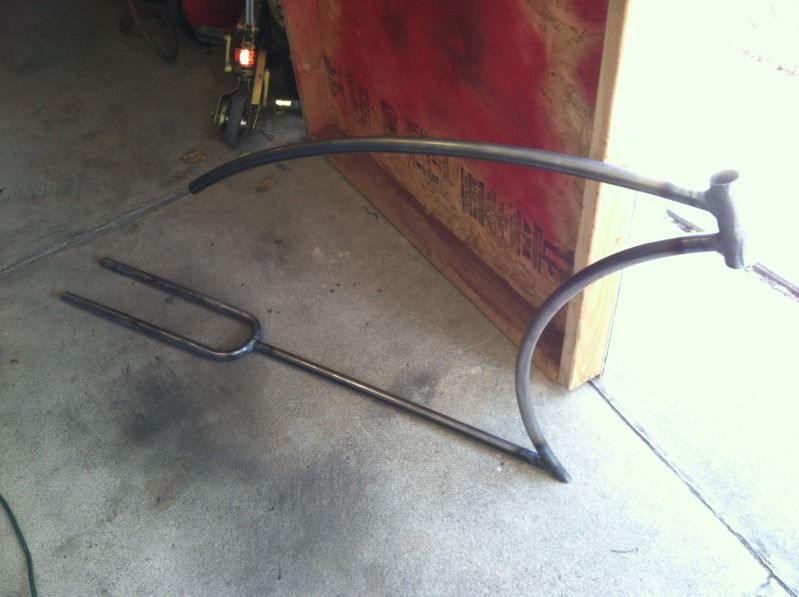
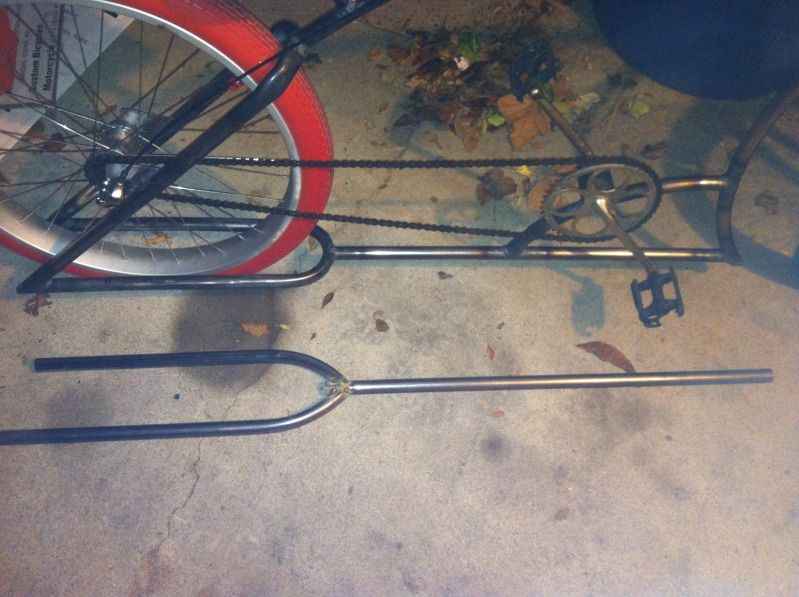
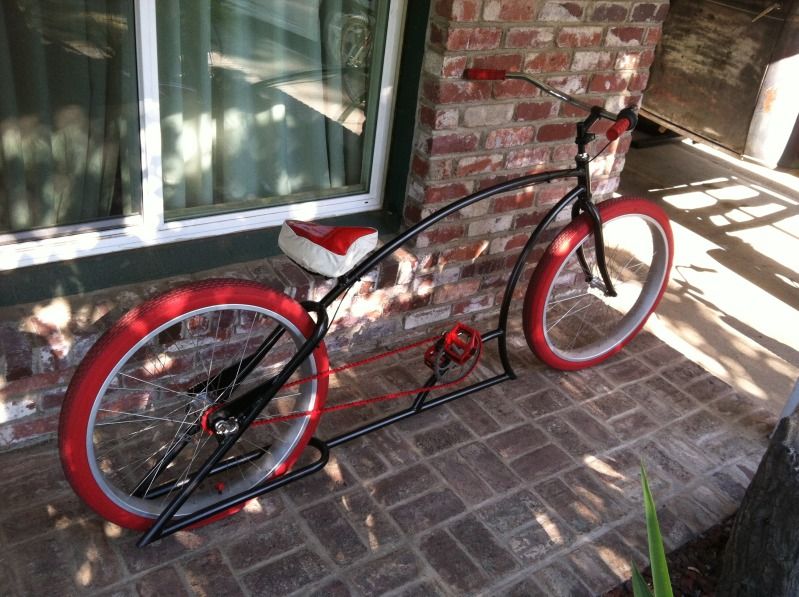
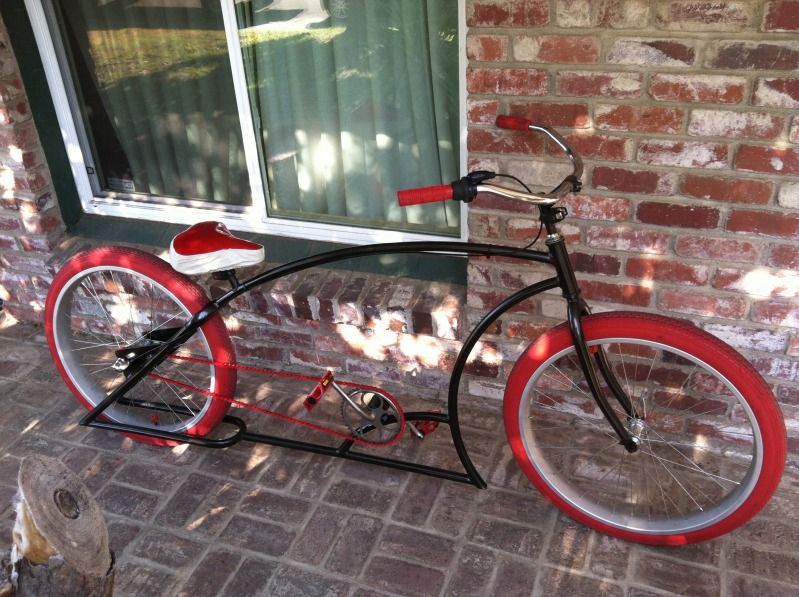
I'm not sure how to make a matching tight bend for the top, but I'm going to try. I might just heat it all up to cherry red, and see if that does it. Then the bottom bracket, seat post, and a few other details. Still a ways to go, but I'm loving the lines of the frame so far.
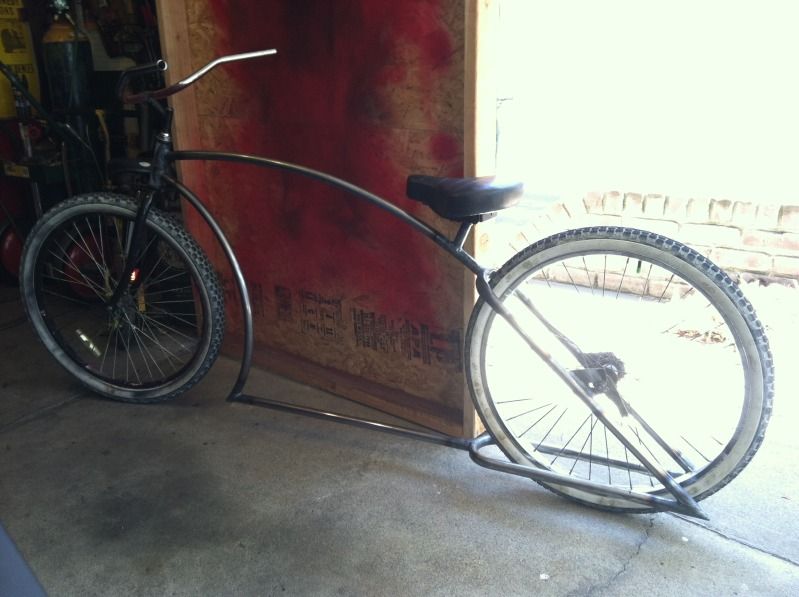
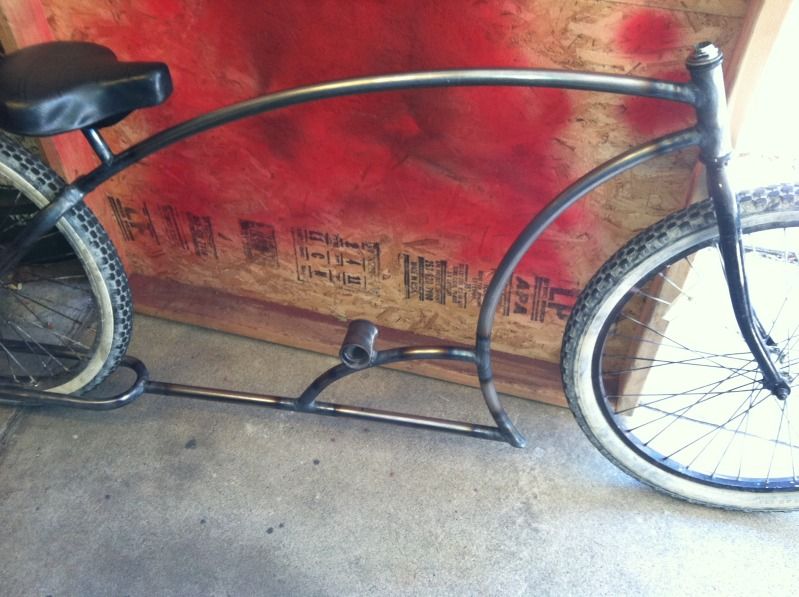
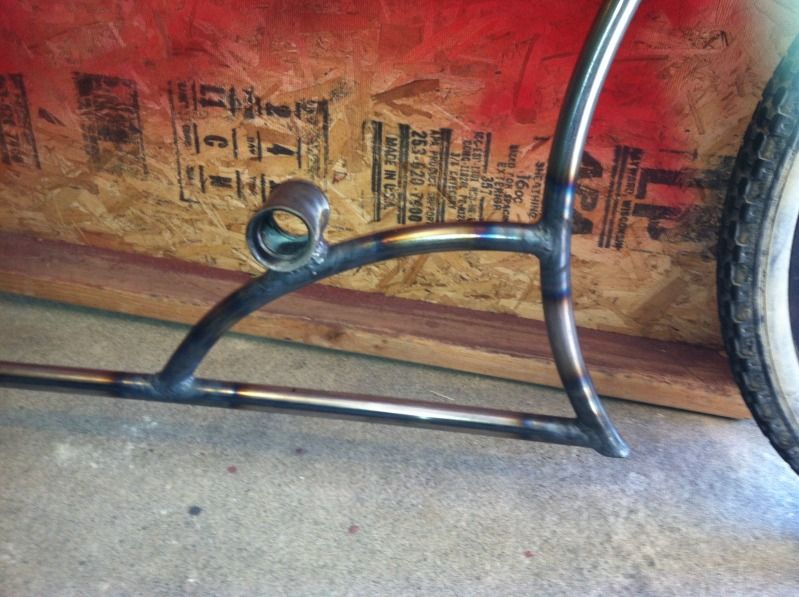
 
well.....youve got my respect!
looks good so far!
yeah i know im going off topic(kinda) but....
glad to see others still weld with gas(i still do sometimes but only on resto/custom jobs where i have to metal finish the car since itll create alot more warpage) but you can get some welds that will rival a good tig weld any day of the week!

looking forward to seeing more :mrgreen:
 
Today, I bought another stick of 1" tubing, to try and finish this rear end. I've burned through an entire 10' stick trying different things to finish this. At $10 a stick, it's not a ton wasted, but I don't have a lot of money to throw around right now, so I came to the conclusion that I would make this work, regardless.

In attempting to bend this tubing tightly, I decided to heat the steel up with a torch, and bend it around a 4" pipe that I had. It came out... rough.

IMG_0884.jpg


It was upsetting, but you know, I'm going to keep going, and I'll use some Lab Metal, or Bondo, or sheet metal to cover it up later. So, I soldier on.

IMG_0886.jpg


IMG_0887.jpg


Yeah, I'm definitely thinking I'll dress it up with some sheet metal that will hug the tire, or something. I'll try to make it a fun piece that looks intentional.

Moving on, I welded on the pieces to hold the rear tire, and put on the front end, and the rear wheel, to give myself a roller.

IMG_0890.jpg


I'm really digging the rear end of this thing.

IMG_0891.jpg


Next will be the bottom bracket, and the seat post.
 
Nice lines and now I've seen the bike on its wheels, I know why I like this design. The pic below is a similar frame-design from a German dude.
So you're on the right path, I think. :D

 
deven_science said:
Today, I bought another stick of 1" tubing, to try and finish this rear end. I've burned through an entire 10' stick trying different things to finish this. At $10 a stick, it's not a ton wasted, but I don't have a lot of money to throw around right now, so I came to the conclusion that I would make this work, regardless.

In attempting to bend this tubing tightly, I decided to heat the steel up with a torch, and bend it around a 4" pipe that I had. It came out... rough.

IMG_0884.jpg


It was upsetting, but you know, I'm going to keep going, and I'll use some Lab Metal, or Bondo, or sheet metal to cover it up later. So, I soldier on.

IMG_0886.jpg


IMG_0887.jpg


Yeah, I'm definitely thinking I'll dress it up with some sheet metal that will hug the tire, or something. I'll try to make it a fun piece that looks intentional.

Moving on, I welded on the pieces to hold the rear tire, and put on the front end, and the rear wheel, to give myself a roller.

IMG_0890.jpg


I'm really digging the rear end of this thing.

IMG_0891.jpg


Next will be the bottom bracket, and the seat post.

Deven, I'm diggin the zero in the background. I got a chance to scoot around on one a few months back..what a blast!

And the frame is SICK. When I was having the buckling problem while bending tube, an old schooler (my Pops) had me fill the tubing up with sand, heat it...and THEN bend it...problem solved.
 
I've heard the old sand in the pipe trick, I was just too impatient to try and get a hold of some sand to try it. I tend to be impatient that way.

I basically finished the frame today. Welded on a seat post, as well as the bottom bracket. Then I threw on some spare parts to take it for a test ride. It's nice. It came out great. I'm happy.

IMG_0894.jpg


IMG_0895.jpg


IMG_0896.jpg


IMG_0898.jpg


I've got some nice parts for it, so next is paint, and final assembly, once I clean up that one pinched up section.
 
When you heat metal to bend, you want to go very slow. I also make the radius I want out of wood to bend the metal around. So go slow with you bends, really slooooow. Making a frame takes time. Don't every be afraid to just walk away and call it a day.You have to have patients or you will never make a quality frame. Keep it up. I am way to embarrassed to show photos of any of my first builds. Great looking Bicycle. Blue 8)
 
One of these works pretty good , but they are about $500ish and you have
to build lots of frames to come out. The inside on this was about 5''. You
could always cut out a section and narrow it , or use a really big back tire :lol: .
Nice lines on your frame.

DSCF0004-5.jpg

DSCF0007-4.jpg
 
Bigdaddy772 said:
Deven Great looking bike!! I keep cutting up frames and stretching them out....You have inspired me to try my hand at a building one from scratch.... Keep up the great work!

BD, that's what I've done up 'til now, and I'll continue to do that, as it's a whole lot easier, but yeah, I definitely wanted to try my hand at a scratch build. I'll be starting another thread here soon, as I'm already starting another one of these for a customer, who saw mine, and was willing to pay (in trade) for one. I'm going to try and make the next one even cleaner.

Always improving, right?
 
Bike looks good man. The new chainstays look good too. There's gotta be a way though, to get that full bend. See, ya got me started, I don't have a torch to heat with but I can rig a forge, and I think I'll try the sand and heat. Make a wood form with a groove routed in it. Thanks for the inspiration, looking forward to Science #2.
 
LarzBahrs said:
Looking good man! I think some head badges have to be made, these bikes should be call weird science lol

I have most definitely thought about making some head badges for my Science bikes. I need to seriously look into that.
 
I burned up an evening tonight, trying to get Science #2 near completion for my customer. I ended the night with the frame geometry all complete, so that what's left is the seat post, bottom bracket, and rear drops. Then I can deliver this frame, and go back to painting and working on mine!

IMG_0913.jpg


IMG_0914.jpg


This one has a little more hump to it, so that the rider will be a touch higher than on the first one. I tried to make it the same, but you know how hand built stuff is, it's just about impossible to do it exactly the same way each time.
 
I finished Science #2, and the customer picked it up. Only after it was gone, did I realize that I had forgotten to take pictures of the finished product! Here's a shot of it right before I had put on the rear drops, which were the final piece:

IMG_0921.jpg


Those drop pieces were much improved from Science #1, so I cut off the old drops on #1, and made some similar to what was on #2.

IMG_0920.jpg

IMG_0926.jpg


I then also welded on a strip of sheet metal to disguise those kinks in the bend. It came out great! It looks very clean.

IMG_0925.jpg


Then I painted it, and today, put all of the parts I had set aside for it on there. It's done!

IMG_0927.jpg

IMG_0928.jpg

IMG_0929.jpg

IMG_0930.jpg

IMG_0931.jpg


I used the vintage seat cover I bought from Ozzynut to slip over a modern seat I had, and man, I love it. This will definitely become my daily rider.

Now to look more seriously into making head badges for these things!
 

Latest posts

Back
Top