I've painted a few badges in the past with mixed results. I recently painted a Speedway badge and it came out okay. I used a tip off this forum and polished it when it was dry...paint and all...with toothpaste. Wow! It still isn't a "mint factory restoration", but it looks good enough for my bikes. Here it is...

I had two of these Speedway badges, and I'll show you how I painted it on the second one. This is how it looked when I took it off the bike.

I used a weak solution of muriatic acid to clean the worst off of it, then polished it with Tarnite metal polish. You can use muriatic acid on brass badges but don't use it on aluminum. Here it is next to the first one I did.

For paint, I used Testors Paint Markers. They come in black, white, red, blue, yellow, and green. The paint is enamel and it is really thinned, which is why it works for the badges. You can get them at Hobby Lobby, or WalMart.

The tip has a spring in it and to get more paint you push the tip down on your blotter and hold it there for a second and the runny paint comes out.

I get the tip real wet with paint and put it on there. I just dabbed it on and moved over and did it again. Dabbing seems to work better than brushing. It dries too quick and brushing leaves brush marks, with the felt tip at least. It looks like you're putting way too much paint on it, but it's half thinner and shrinks down when it dries. Here's the red...

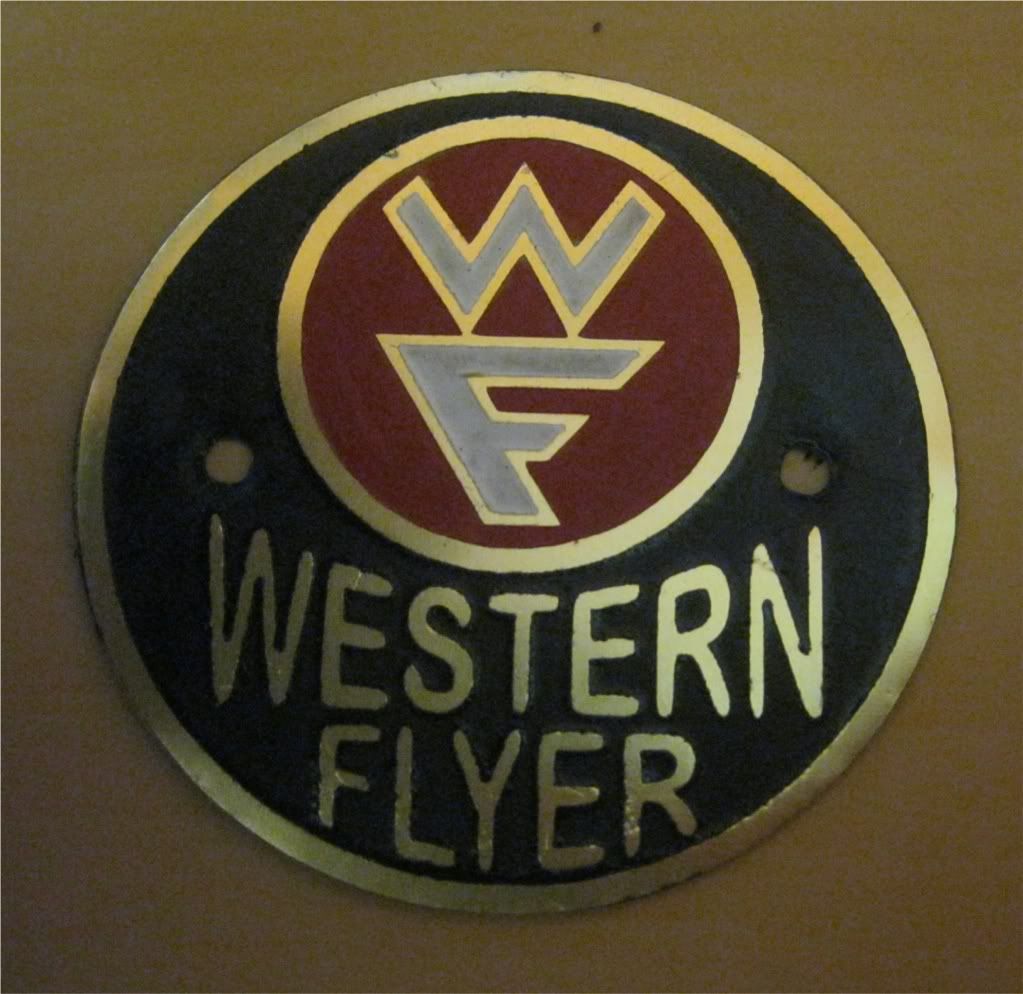
The red and the white are on. I got kinda sloppy with the white. You want to make sure it gets in every corner and if it goes over the edge that's okay. The finished badge is on the left.

After the paint is dry...enamel dries slowly, especially black...I used an Xacto knife with a #11 blade to carefully scrape the excess off. I used a fine sharpening stone to dull the blade completely. It will still scratch it faintly but is not noticable when you are finished.


I then used a small brush to remove the paint chips.


I did the black last. I hate painting with black paint. Slopped it on and covered the lettering but stayed clear of the red and white areas that are finished.

I did the fine border lines in black too, then scraped it all off when it dried. I went back and touched up a couple of small spots where I got too wild with the knife. I then let it dry for a couple of days and polished the heck out of it with a piece of flannel sheet and Colgate toothpaste. The toothpaste smoothed over and hid a lot of my screwups. Finished. My method isn't that great...yet. Hopefully some clever ratrodder will give it a try, find some better ways to do it and share them with us. B607

I had two of these Speedway badges, and I'll show you how I painted it on the second one. This is how it looked when I took it off the bike.
I used a weak solution of muriatic acid to clean the worst off of it, then polished it with Tarnite metal polish. You can use muriatic acid on brass badges but don't use it on aluminum. Here it is next to the first one I did.
For paint, I used Testors Paint Markers. They come in black, white, red, blue, yellow, and green. The paint is enamel and it is really thinned, which is why it works for the badges. You can get them at Hobby Lobby, or WalMart.
The tip has a spring in it and to get more paint you push the tip down on your blotter and hold it there for a second and the runny paint comes out.
I get the tip real wet with paint and put it on there. I just dabbed it on and moved over and did it again. Dabbing seems to work better than brushing. It dries too quick and brushing leaves brush marks, with the felt tip at least. It looks like you're putting way too much paint on it, but it's half thinner and shrinks down when it dries. Here's the red...
The red and the white are on. I got kinda sloppy with the white. You want to make sure it gets in every corner and if it goes over the edge that's okay. The finished badge is on the left.
After the paint is dry...enamel dries slowly, especially black...I used an Xacto knife with a #11 blade to carefully scrape the excess off. I used a fine sharpening stone to dull the blade completely. It will still scratch it faintly but is not noticable when you are finished.
I then used a small brush to remove the paint chips.
I did the black last. I hate painting with black paint. Slopped it on and covered the lettering but stayed clear of the red and white areas that are finished.
I did the fine border lines in black too, then scraped it all off when it dried. I went back and touched up a couple of small spots where I got too wild with the knife. I then let it dry for a couple of days and polished the heck out of it with a piece of flannel sheet and Colgate toothpaste. The toothpaste smoothed over and hid a lot of my screwups. Finished. My method isn't that great...yet. Hopefully some clever ratrodder will give it a try, find some better ways to do it and share them with us. B607