Name Chosen.."Hoosier Daddy"

Rat Rod Bikes Bicycle Forum

Help Support Rat Rod Bikes Bicycle Forum:

This site may earn a commission from merchant affiliate links, including eBay, Amazon, and others.
Joined
Aug 16, 2008
Messages
903
Reaction score
773
Location
Spanish Fork, Utah
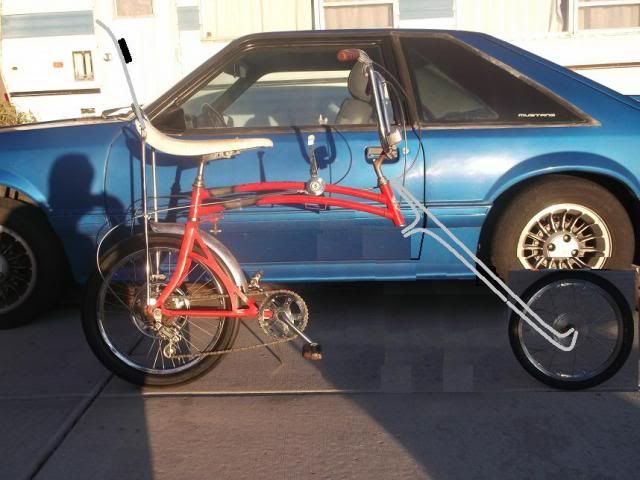
Super cheesy name. It seemed to fit the 70's era race car/musclebike theme so I'm going with it.

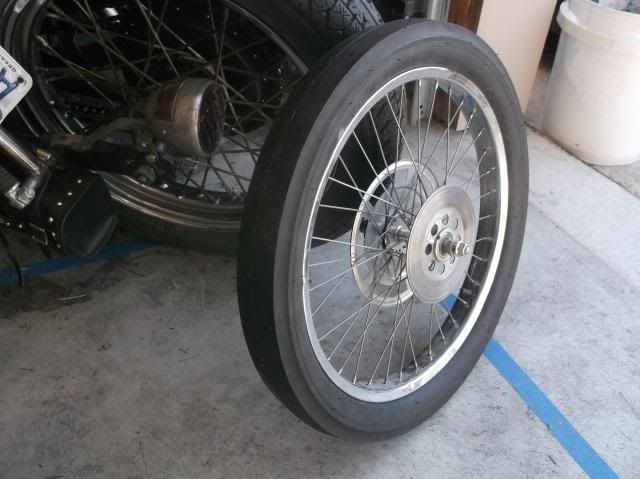
Thanks to CCR I got my first piece for this build.

I don't have time right now to get a picture uploaded, but this link shows the rear tire. I used one on a past build and loved it. They are no longer sold in the US I found out. But luckily this site and it's members are a great resource. Thanks everyone!

http://www.innovatires.com/products/Bic ... 2098_1.jpg
 
Re: I'm in. Name later... Just got my first Piece...

It says on the side 20 X 3. It isn't really 3" across, but it will fill up the frame nicely. My favorite part about the tire has got to be the depth holes. (To tell you how much rubber is left.) It is ridiculous but the kid in me loves it.

Here is a picture I had on photobucket already of an identical tire that I used on my last build.

IMG_0110.jpg
 
Re: I'm in. Name later... Just got my first Piece...

Picked up these crazy sissy bars...They measure over 30 inches from the mounting holes to the 90 degree bends at the bottom. I am unsure how these will be used at this point. I am thinking either wheelie bar or fork.

DSCF1042_zps220f54bd.jpg
 
Re: I'm in. Name later... Just got my first Piece...

I sold a frame last year and I am using some parts left over from that old build. I greased the bearings and mounted the new tire on the wheel and did a test fit on the frame. It fits just right. :D 
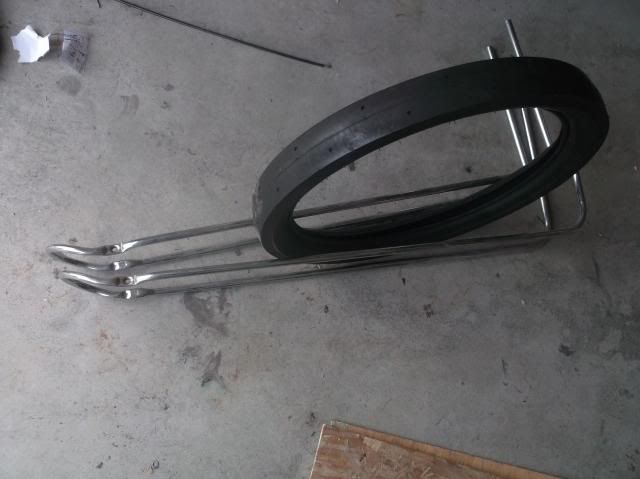
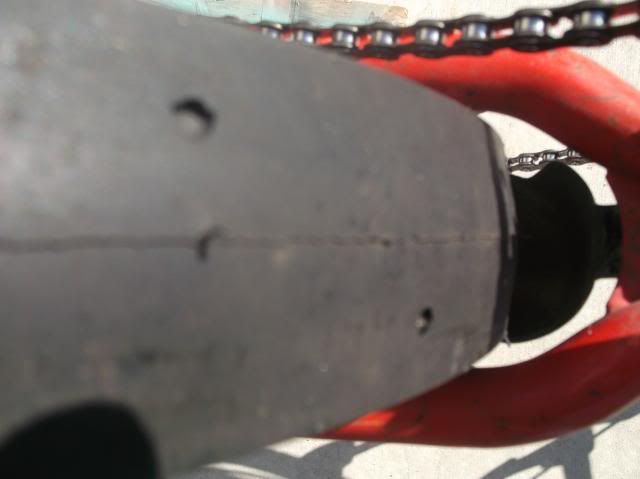
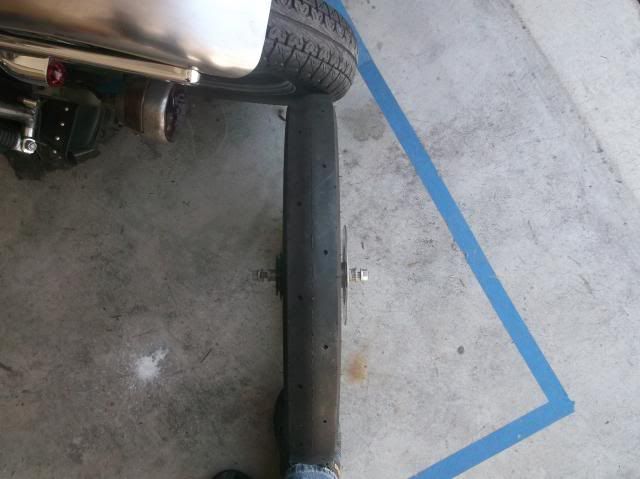
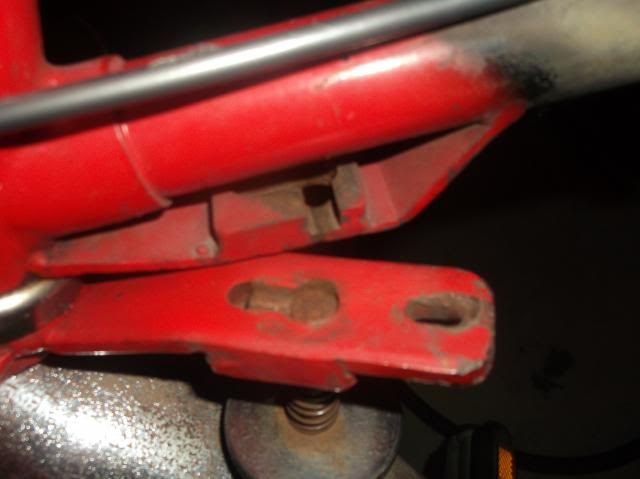
The only problem is that I cannot use the lowest gear because the tire is in the way.(Third picture) No complaints though, It wheelies fine in 2nd anyway.

DSCF1044_zps506bf89d.jpg

DSCF1046_zpsc8238b76.jpg

DSCF1045_zps6e73dd94.jpg

DSCF1047_zps4ce957ac.jpg
 
Re: I'm in. Name later... Just got my first Piece...

If the bike is as cool as the tires and wheels, you've got a winner!
 
Re: I'm in. Name later... Just got my first Piece...

I was going to hold of on the frame reveal until later, but I was working on a few concept ideas. Here is one of the fork ideas I might try with those crazy long sissy bars.... after going out to the garage and looking at it in person I am not sure the factory frame will hold up to the extended leverage from layed out forks like this. You can see it had been bent at one time with an all factory setup. Maybe if I move the seat back to counter act with weight?

Here is the mock up in paint for now anyway.
orangeconcept_zpsa825091d.jpg
 
Re: I'm in. Name later... Just got my first Piece...

Thinking of names...Agent Orange...Hoosier Daddy...(would require white "Hoosier" lettering on the slick).
 
Re: I'm in. Name later... Just got my first Piece...

An original Swing-bike? AWESOME!!! :D
I love the Hoosier Daddy idea! I don't know much about the originals and the strength of the frame, but moving the seat back would in theory put less weight on the front end, no idea how it will affect the swing-ability of the bike though...

Luke.

Edit: Any chance of getting a pic of how the locking pin works? I have read about it and know how it works, but want to see exactly how they did it... :wink:
 
Re: I'm in. Name later... Just got my first Piece...

DSCF1063_zpsfdb31514.jpg

DSCF1061_zps9031734e.jpg

IMG_2219.jpg


There are four parts you will need to cut and drill. Two for the triangle and two for the top frame. The very bottom of the four parts is what holds the pin in place all the time (keeps it on the bike) is just one hole in a square that is roughly 1"x1"x1/4". the next part is the one welded to the triangle. It has a keyhole shape for the pin and another hole in front for the springs. For the keyhole shape I drill two holes and use a dremmel with little cutoff wheels to connect them for that shape. I am sure there is a better way, but it works.

The next two parts for the upper frame have key hole shapes as well. The very top one is almost a "T". It has the key hole with the sides open so you can turn the pin 90 degrees to lock it. On my frames I like to only open one side of the top piece. It seems to hold the fame tighter when locked.

The parts need to be drilled and cut out before welding. Use a washer or two between the parts and bolt them together when welding so you know it will all line up after.

For the lock pin I use a clevis pin from any hardware store, countersink one side for the head of a spoke nipple to recess into.
 
Re: I'm in. Name later... Just got my first Piece...

That is awesome! I take it from your comments you have built some in the past? Do you have a build thread?

Been looking at you frame for the build-off, am I correct in assuming it is a very early one? Lugged construction and the beam tubes are the same size?

Luke.
 
Re: I'm in. Name later... Just got my first Piece...

It is from the 70's...It is not the first version though. It is the second. This is my first original swingbike. I have built several. I was finally able to get one in rough shape for a reasonable price and picked it up.

Here is one of my build threads.

viewtopic.php?f=21&t=14417
 
Re: I'm in. Name later... Just got my first Piece...

Thanks BikeBuilder!

Luke.

Edit: Just realised I had read through that thread a while back, and you are the man behind my favorite swingbike video on YouTube! Great stuff!!! :lol:
 

Latest posts

Back
Top