Hang in there buddy, been there too.
You are using an out of date browser. It may not display this or other websites correctly.
You should upgrade or use an alternative browser.
You should upgrade or use an alternative browser.
(MBBO4 Class 1) Super Slingshot
- Thread starter CRASH
- Start date


Help Support Rat Rod Bikes Bicycle Forum:
This site may earn a commission from merchant affiliate
links, including eBay, Amazon, and others.
Thanks for the support.
I think for some money to keep the lights on I'm going to sell some previous MBBO winners. I'll start with my 26" Monster Ray. Bidding will start at $15,000.00. Anyone?
I think for some money to keep the lights on I'm going to sell some previous MBBO winners. I'll start with my 26" Monster Ray. Bidding will start at $15,000.00. Anyone?
That looks like a spring compression tool with the jaws reversed that you are using to spread the dropouts? Great idea! Will have to remember that one. ")
Building... riding...
Building... riding...
Yup. Paid about $14 at Harbor Freight, but had to buy two of them. I also had to cut one of the bolts in half to create a thin enough starting space when I was spreading really tight stays (The Collegiate)
Well, the way I worked it out was that a 20" Slingshot used 20x1.75 / 16x1-3/8, which was a four inch difference in wheels. The 24" Super Stock version used 24x1.75 / 20x1-3/8 wheels, also a 4" difference. So, for a 26x1.75 wheel I found the appropriate difference will be 22x1-3/8
Math. It's not just for 8th graders anymore...
Merle.
Merle.
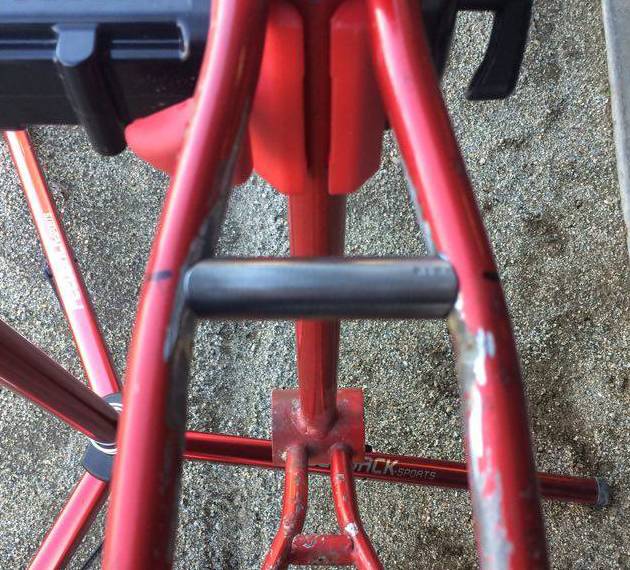
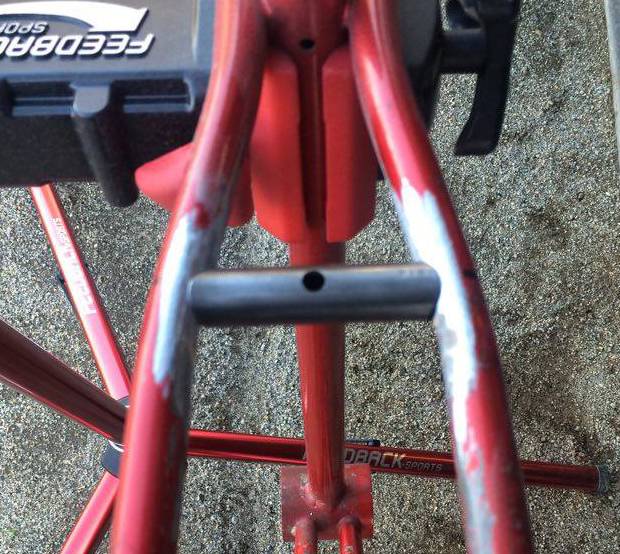
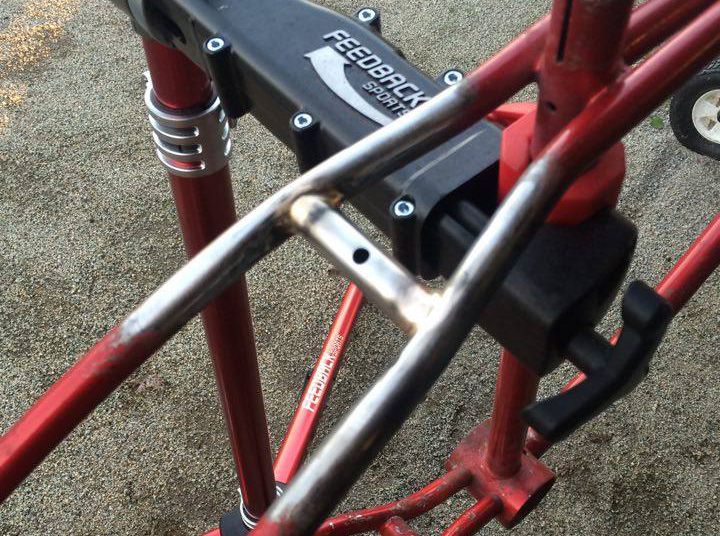
I'm working with a friend who can weld to accomplish the next steps. I wish I knew how... but such is life. Today we installed the new brake bridge. You may remember the original one wouldn't hold a brake, so we set out to install a simple one just like on a 24" Super Stock.
The stays were cleaned up a little more and smoothed out.
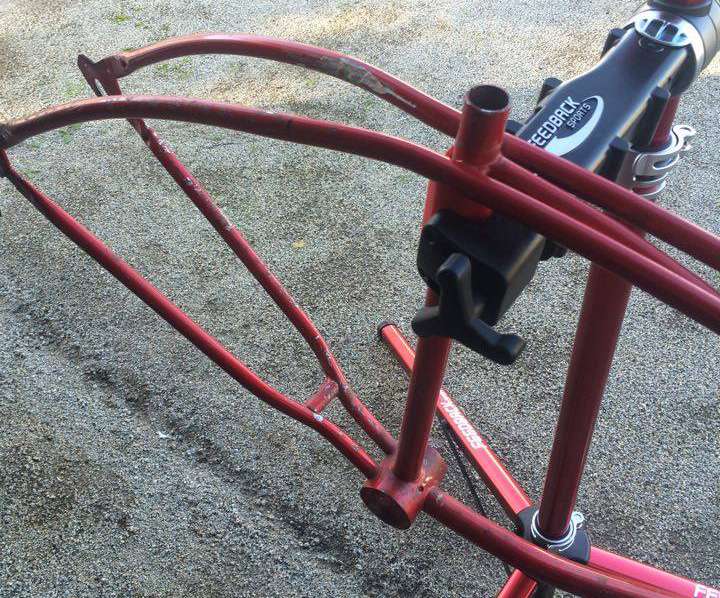
From the appropriately sized tubing the curves were cut in.
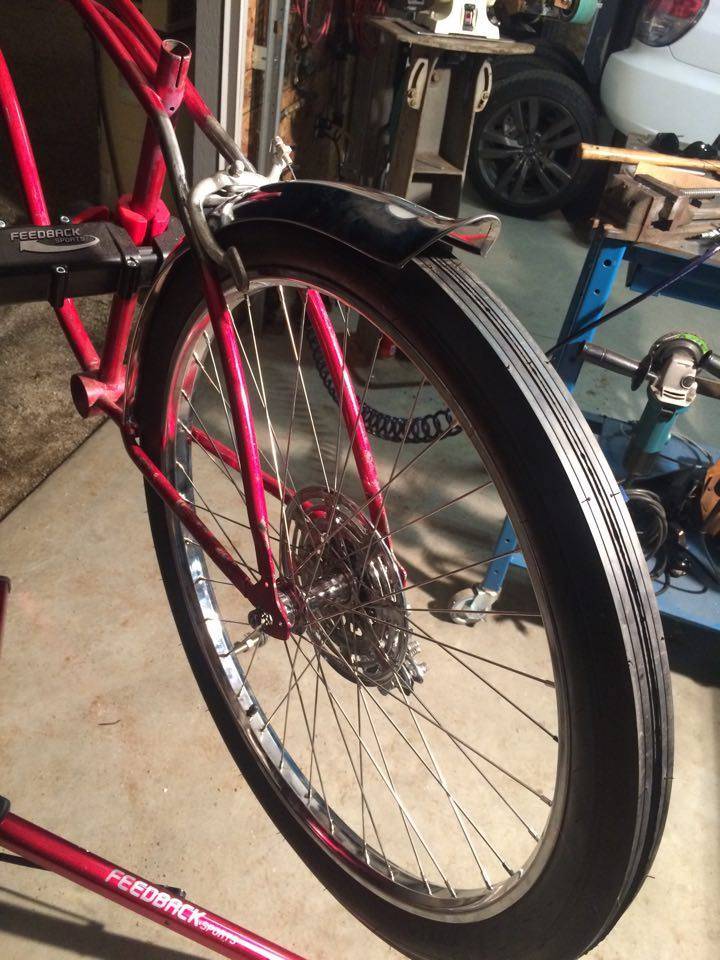
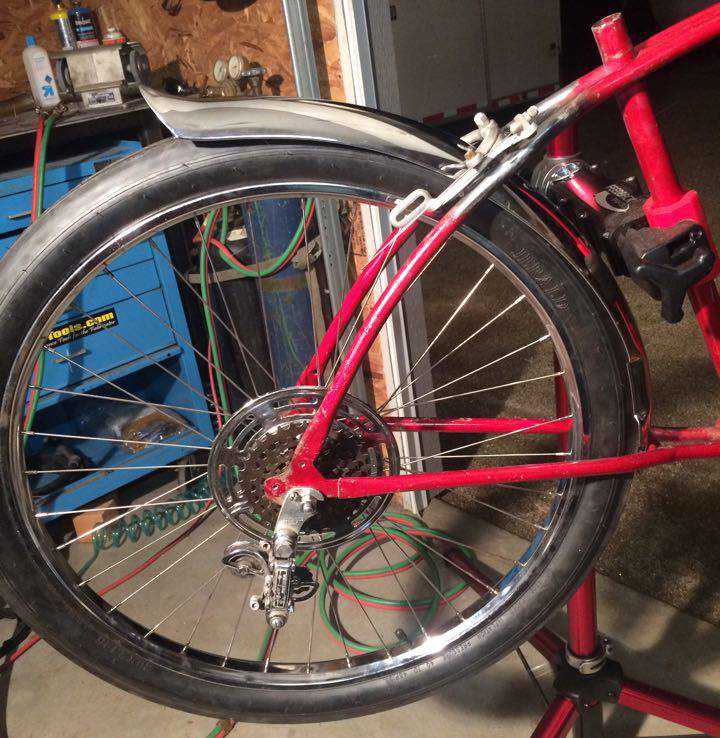
The wheel, fender and brake were used to determine the spot to set it in.
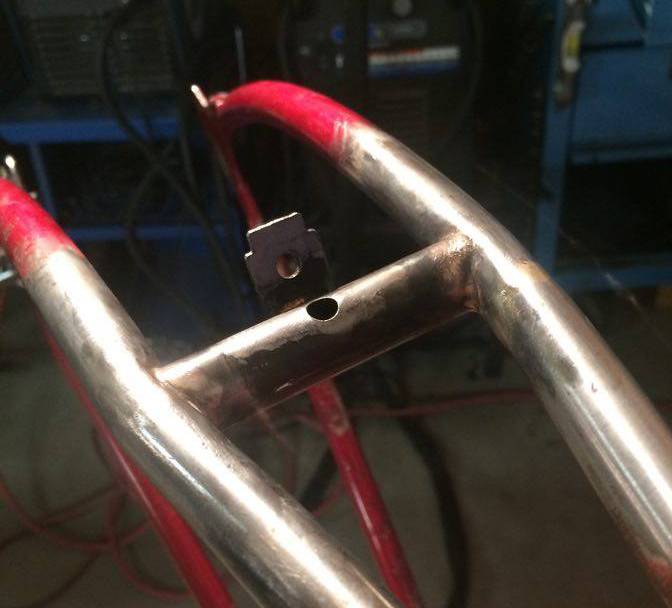
Almost forgot the hole for the brake!
Better.
Brazed it in to make it look original.
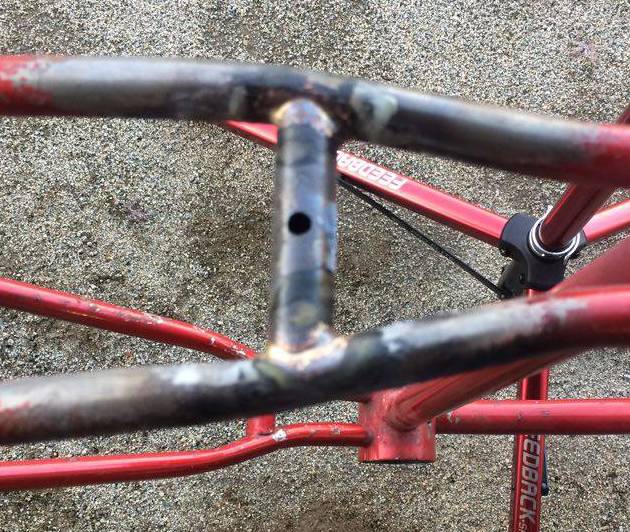
And cleaned it up.
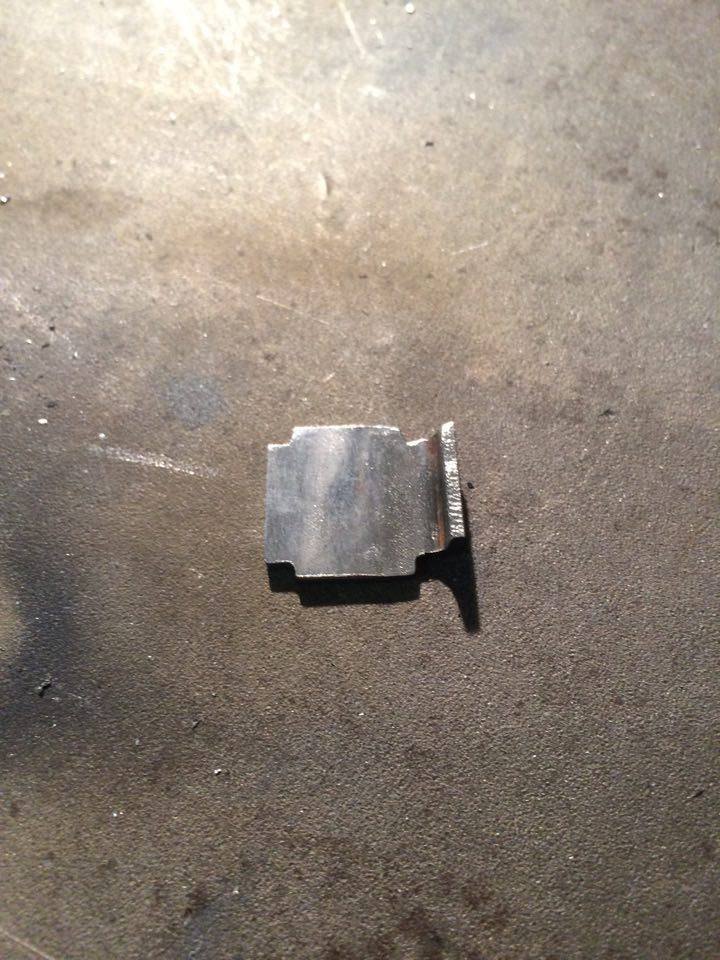
A tab was made to copy a Super Stock's tab, then attached to the bridge.
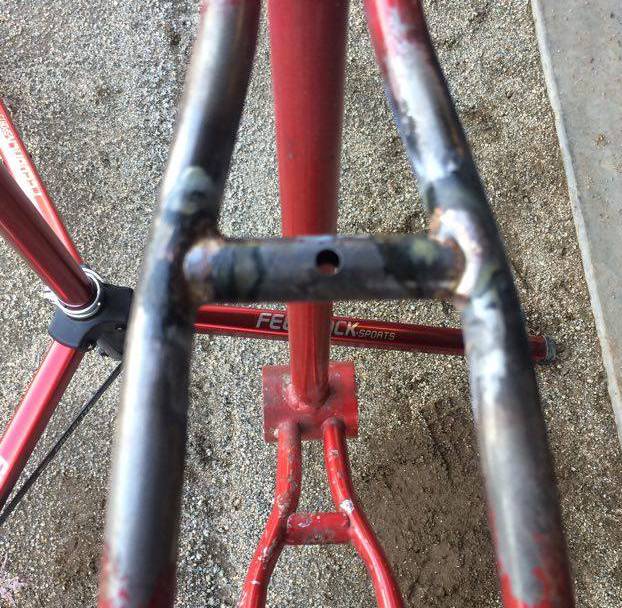
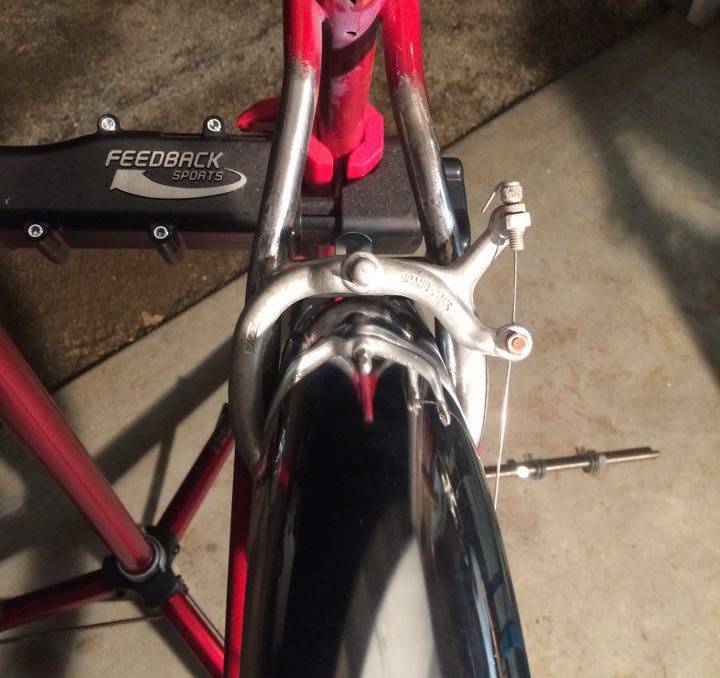
Then the final fit was tested. I think it's going to work great!

Next step when time permits... the fork.
The stays were cleaned up a little more and smoothed out.
From the appropriately sized tubing the curves were cut in.
The wheel, fender and brake were used to determine the spot to set it in.
Almost forgot the hole for the brake!
Better.
Brazed it in to make it look original.
And cleaned it up.
A tab was made to copy a Super Stock's tab, then attached to the bridge.
Then the final fit was tested. I think it's going to work great!
Next step when time permits... the fork.
Good thing I left the "All welding must be done by the builder" rule out this year! 
Whoever did the work for you did a good job, I would be inclined to get them to add a little braze to the brake bridge on your other build...
Luke.
Whoever did the work for you did a good job, I would be inclined to get them to add a little braze to the brake bridge on your other build...
Luke.
You've never had that rule. And if you were to add it, you'd have to add that all painting must be done by the builder too, which tosses out the powder coaters.
You need a lot of specialized equipment and experience to weld. I don't have either, so I need help. Sorry if that's an issue.
You need a lot of specialized equipment and experience to weld. I don't have either, so I need help. Sorry if that's an issue.
No issue and I'm not complaining...You've never had that rule. And if you were to add it, you'd have to add that all painting must be done by the builder too, which tosses out the powder coaters.
You need a lot of specialized equipment and experience to weld. I don't have either, so I need help. Sorry if that's an issue.
Luke.
Math. It's not just for 8th graders anymore...
Merle.
It was some serious math. Great thread. http://ratrodbikes.com/forum/index.php?threads/26-24-or-26-22-super-slingshot.91519/
That brace looks super top notch. CRASH I love this build so much I'm going to post this pic here so it's easier to find to stare at.


Good looking bike, but mine is only going to be a 5-speed. Finding parts to a Twin stick is hard.
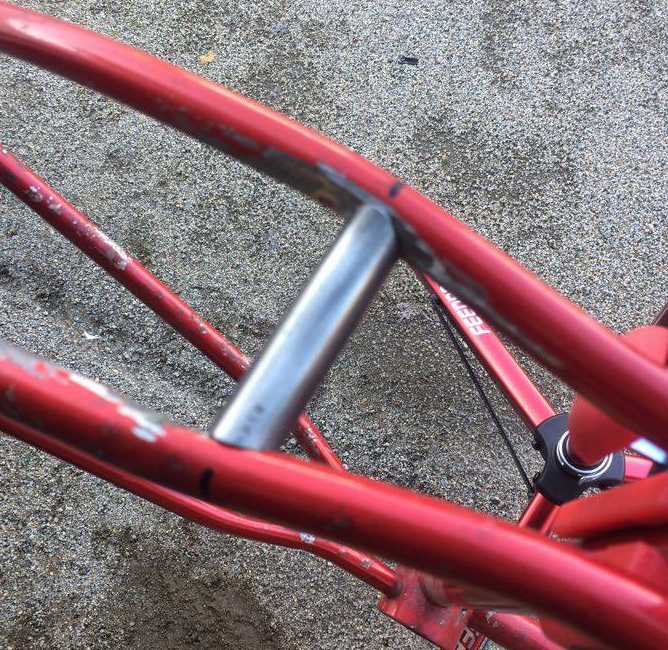
We tackled the steering tube today. But first, I forgot to add a picture of the finished tab. I like it because we made it look like an original Super Stock tab. A pointless detail, but it's those little things that make these recreations special for me. I'll notice it, so...
Here's the tab of a 24" Super Stock

And here's my tab
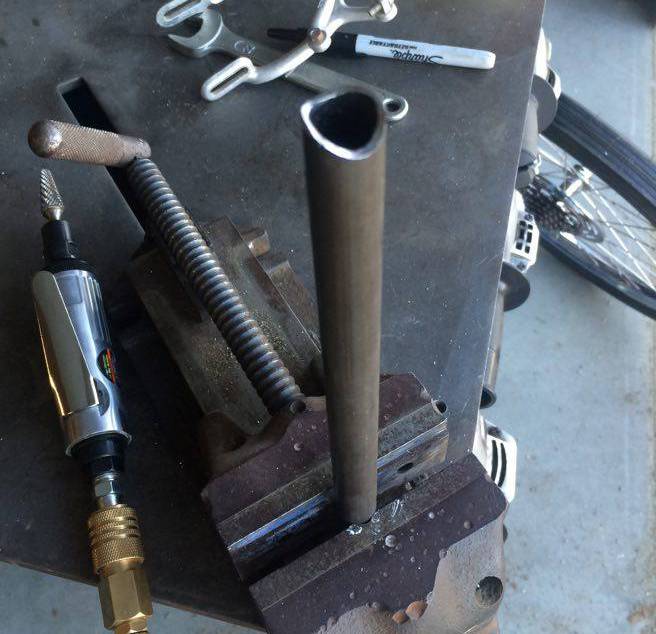
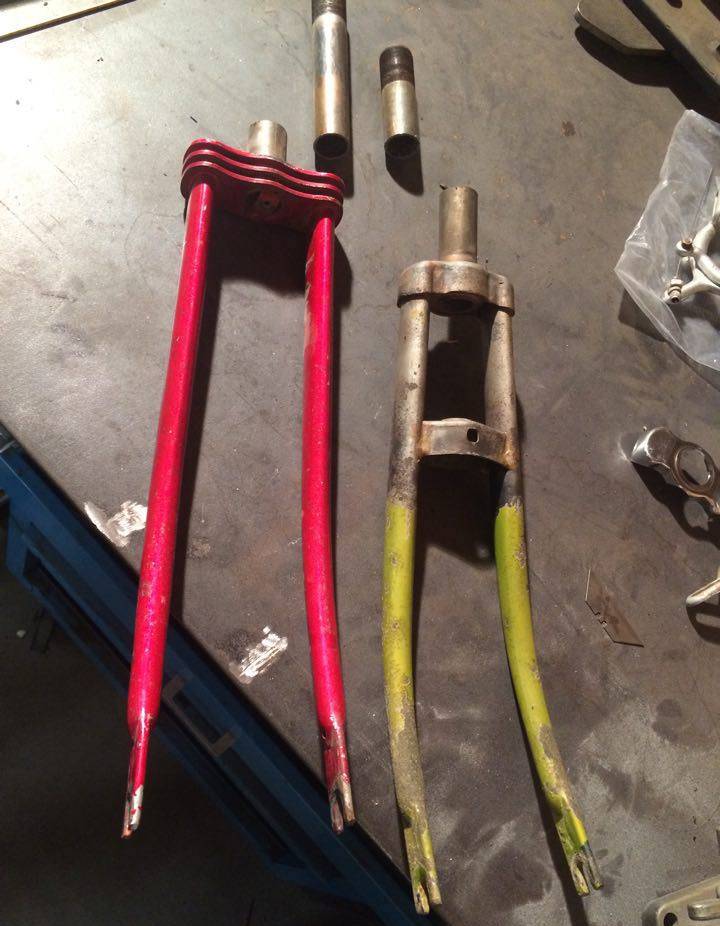
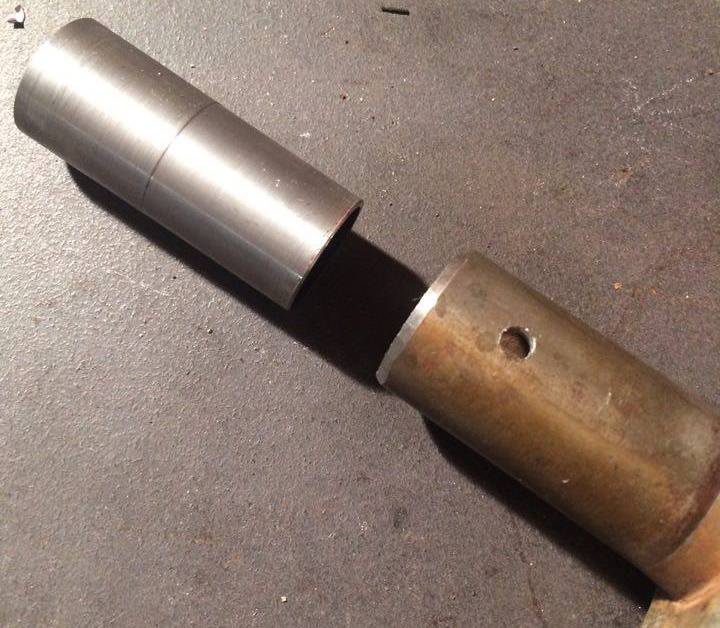
On to the steering tube. You may remember the donor fork came from a Gremlin, so the steer tube is too short. So taking some tube from the original fork, and adding it to the Gremlin fork...
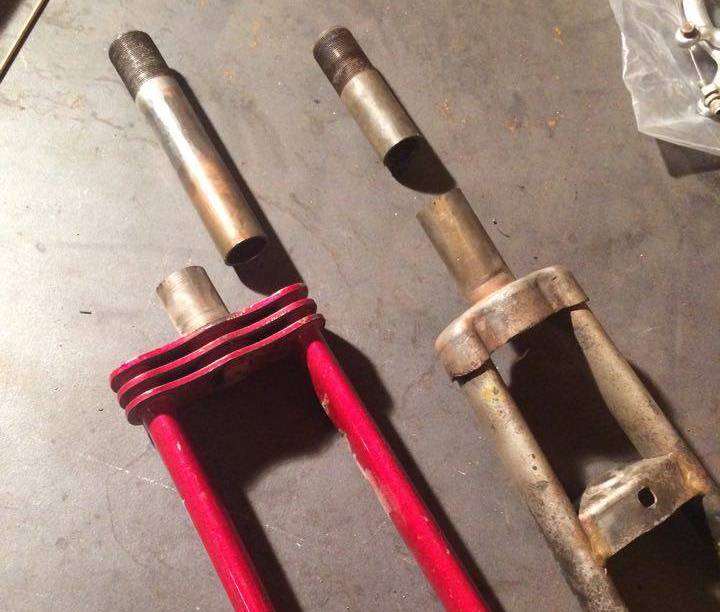
As a reminder, the original forks will be measured to fit the 22" wheel and fender, then attached to the Gremlin fork. We're going to cut the legs off right below the lower brake bridge to keep the spring unit whole.
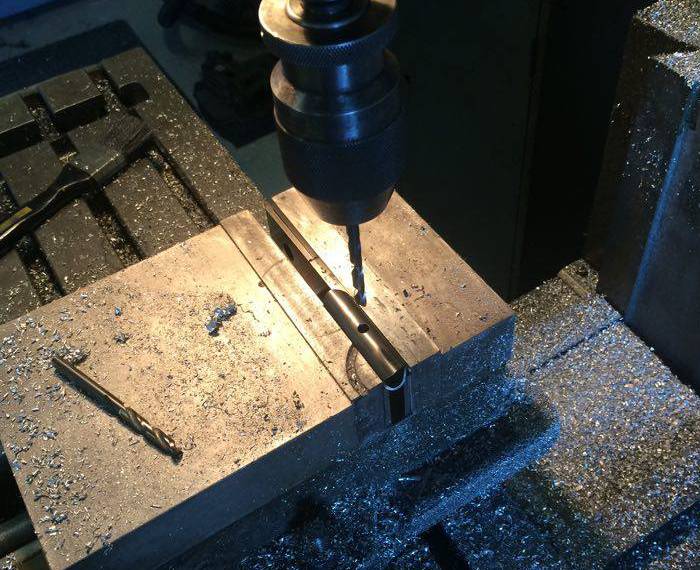
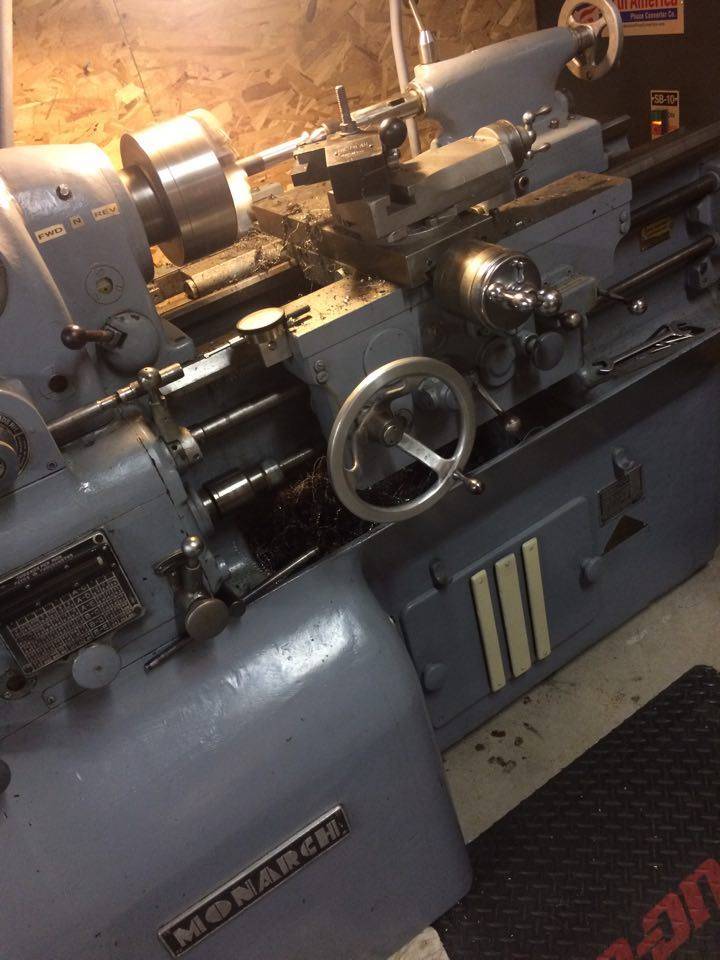
My friend recovered a monstrous lathe from the Rohr Aircraft company years ago. It's a 1947 Monarch 10EE. He says it's one of the greatest Lathes ever built. This one helped build fuel tanks for the Spruce Goose, and now it's making parts for me.
Here he's cutting an internal sleeve that will align the two tubes together.
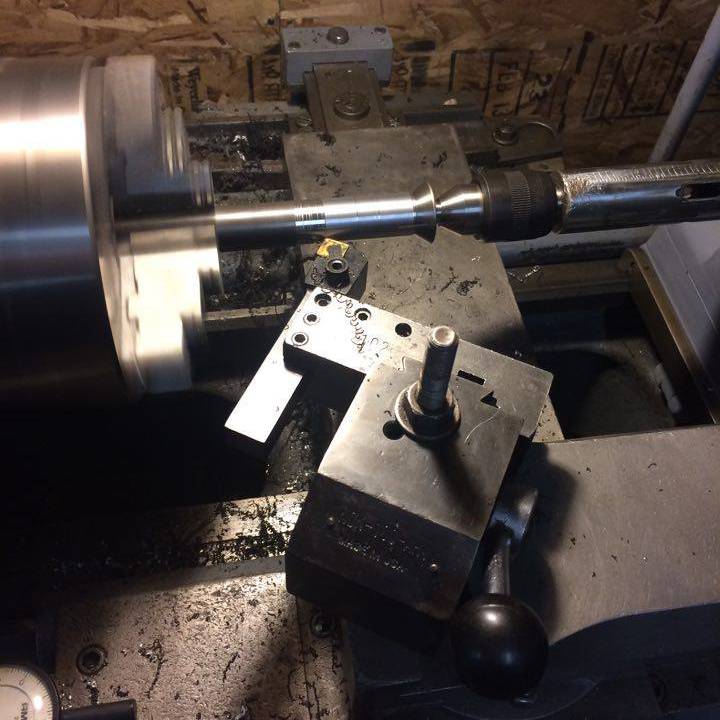
Sqeezing it in. It has very tight tolerances.
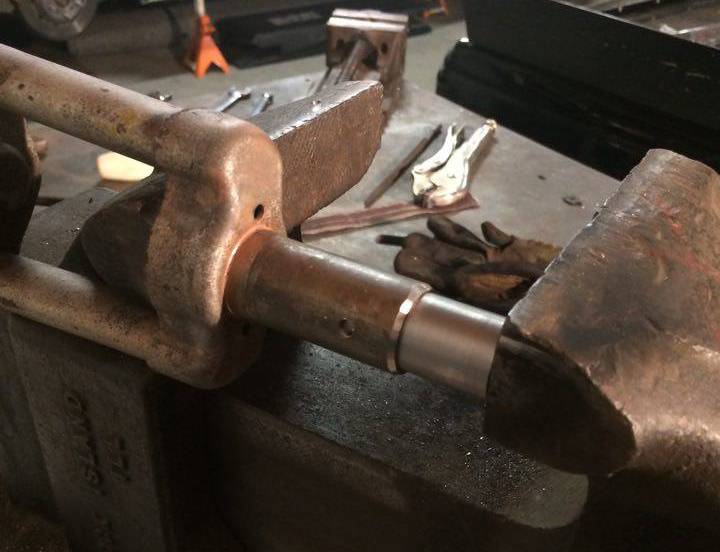

He did what is called a "Rosette Weld" (I think). Basically he just zapped the hole real quick.
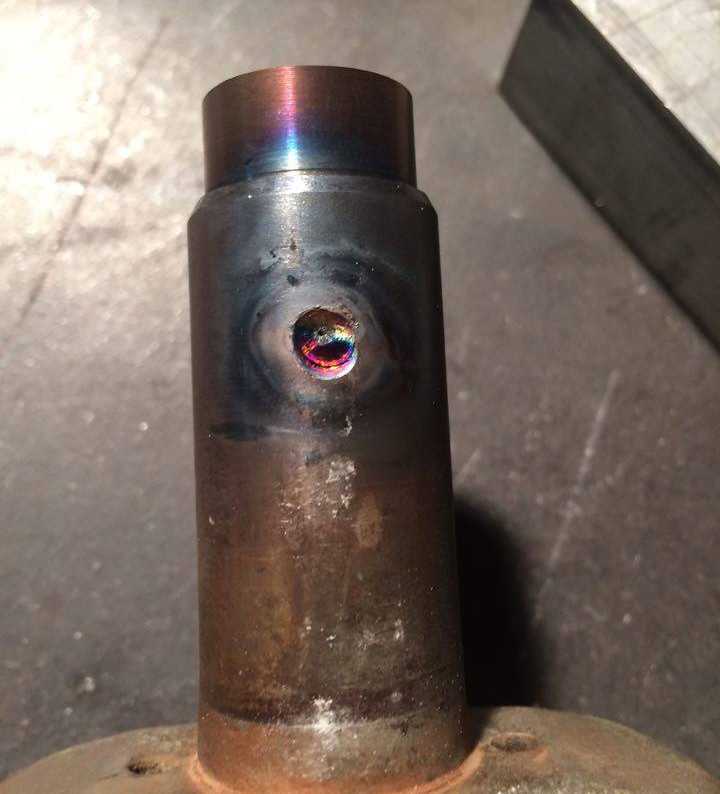
Following yesterday's bullying comments from Luke (I'm just kidding) I asked to give it a try, but I ran into the same problem I did the last time I tried to weld. When I put the helmet down I cannot see a thing! I don't know how you do it. My bud told me he just stares exactly where he wants to start, gets his hands in place, flips down the helmet with a jerk of his head, and starts... then he can see. Since I can't see, and don't know what to look at, going blind freaks me out. So... maybe I'll try again on something less important. (Like my Mother-In-Law's car)
This is the tube all finished and cleaned up. (No, the top isn't crooked, it's just a long pic and the camera made it look weird)

Here's the tab of a 24" Super Stock
And here's my tab
On to the steering tube. You may remember the donor fork came from a Gremlin, so the steer tube is too short. So taking some tube from the original fork, and adding it to the Gremlin fork...
As a reminder, the original forks will be measured to fit the 22" wheel and fender, then attached to the Gremlin fork. We're going to cut the legs off right below the lower brake bridge to keep the spring unit whole.
My friend recovered a monstrous lathe from the Rohr Aircraft company years ago. It's a 1947 Monarch 10EE. He says it's one of the greatest Lathes ever built. This one helped build fuel tanks for the Spruce Goose, and now it's making parts for me.
Here he's cutting an internal sleeve that will align the two tubes together.
Sqeezing it in. It has very tight tolerances.
He did what is called a "Rosette Weld" (I think). Basically he just zapped the hole real quick.
Following yesterday's bullying comments from Luke (I'm just kidding) I asked to give it a try, but I ran into the same problem I did the last time I tried to weld. When I put the helmet down I cannot see a thing! I don't know how you do it. My bud told me he just stares exactly where he wants to start, gets his hands in place, flips down the helmet with a jerk of his head, and starts... then he can see. Since I can't see, and don't know what to look at, going blind freaks me out. So... maybe I'll try again on something less important. (Like my Mother-In-Law's car)
This is the tube all finished and cleaned up. (No, the top isn't crooked, it's just a long pic and the camera made it look weird)
Your friend does nice work!
I would love to have a play on that lathe!
You might do better welding with an auto helmet...
I went back and checked the old MBBO's, you were absolutely correct, never posted that rule...
Pretty sure I will continue to not post it too, I can understand why it is there for the big build-off's though...
Luke.
Yeah, I've never used them, but they do have auto dimming helmets...
Clear till you strike a spark.
Carl.
Clear till you strike a spark.
Carl.