FreeWheelin' Gambles

Rat Rod Bikes Bicycle Forum

Help Support Rat Rod Bikes Bicycle Forum:

This site may earn a commission from merchant affiliate links, including eBay, Amazon, and others.
Joined
Mar 2, 2008
Messages
297
Reaction score
0
Location
Franklin,Indiana. U.S.A.
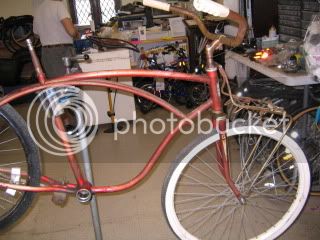
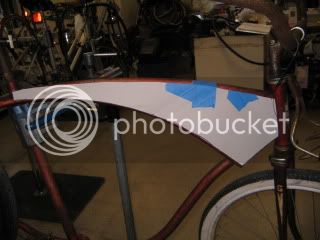
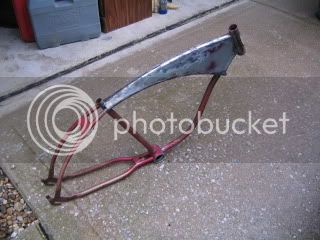
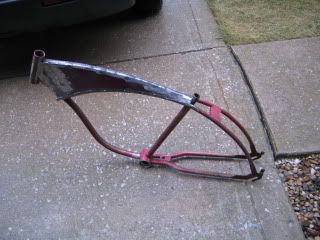
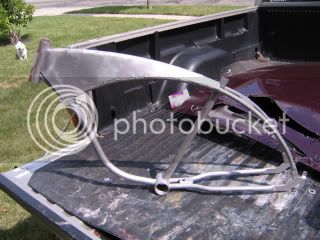
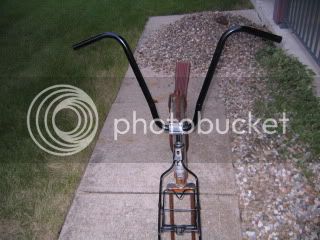
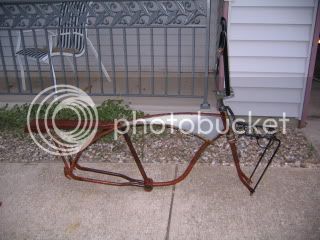
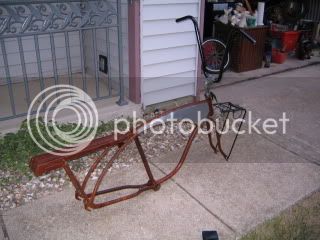
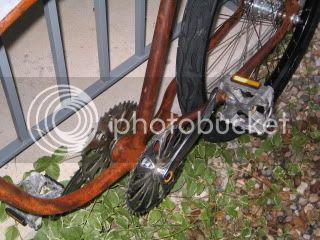
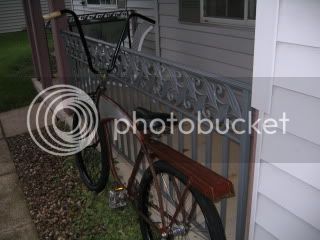
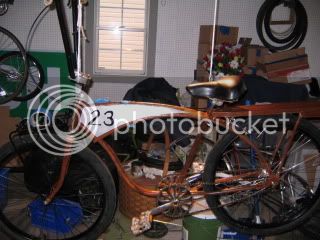
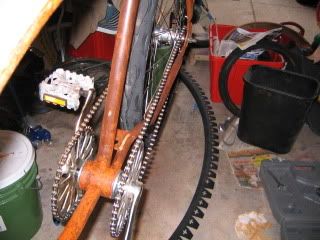
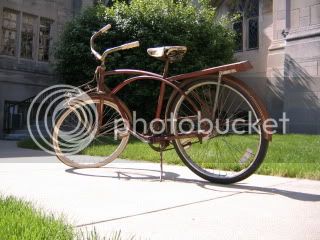
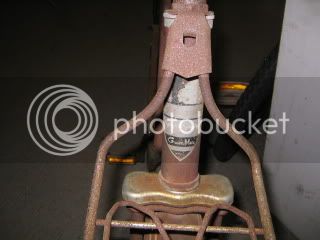
Well we are in at last. Don't know if this is the name we will stick with because I am going to let the kids help decide but this will get us started & our bike shop is called Freewheelin' and were are building an old Gambles so I figure what the hey. Anyway I got to the shop today and we dug it out and started planning the build,taking some pics of it and then taking it some what apart. We ended up taking the rear fender,rack,chainguard,and seat off.I will sand blast these parts this week and they will paint them at the shop next tues.. So far we have discussed the paint scheme and the parts that we will use and we have decided to go with rust treating the frame and tank,Black wheels,Kenda flames,no fenders,leaving the racks, and running apehangers.
Also I was introduced to one of our newer students today that the director had been talking to me about lately and when he mentioned a"Ratbike" I got to talking to him and was telling him about this site he said he was a member here already but hasn't posted here yet but should be posting his intro soon. He goes by the screen name of Franken_Farthing.
RRBBO4007.jpg

RRBBO4005.jpg
 
i finished cleanin and greasin the headset, got the bottom bracket clean, and put the crank in a bag with the bearings

nancy said do whatever with the ape hangers theres no attachment to them


wish you well see you tuesday :D
 
Is that a 24 in the front or an "illusion"?
 
Well no students today but Scott did get quite a bit stripped off of it while I was gone last week. Not much got done except getting the pattern for the tank made and the measurements for the apehangers. I'll try to pick up a car hood this week from a local bodyshop and get the panels cut out of it next tues.
erinscruiser015.jpg

erinscruiser016.jpg
 
Finally some progress. May I say that Ratrodders and Ratrodding is by far the coolest way to "Go Green" by recycling.
I stopped by Bradley Cheverolet's body shop today and they were kind enough to hook me up with a damaged hood (for free) to make our tank panels out of.
RRBBO4013.jpg

Then I went up to Moonlight Automotive in Greenwood to use there sandblasting cabinet (also free) and was able to get the front and rear racks,as well as the rear wheel,forks and a headlight sandblasted.
RRBBO4012.jpg

When I got home I layed out the pattern on the hood and got to cuttin'.

Then my friend Jeremy came to get the frame and tank panels to take to his house to weld them. He also does the welding for our bike shop.
I wanted it to look "Rat" so I had him only stitch weld it and not grind the welds at all.
RRBBO4016.jpg


RRBBO4014.jpg

I will start with the primer on some of the painted parts and rust treating the forks tomorrow.
Also I know it sounds like a bunch of shameless plugs above,I am not sponsored but I do have Great friends and we all support each other and I am more than happy to tell others about them. You Know like "PAYING IT FOWARD"
 
Cool looking bike love the look you had with the raked look to it.
 
Well I was able to work on it again this afternoon and took the frame up to Moonlight and got it completely sandblasted.
I was also able to start treating the metal and will wash it down tomorrow and clearcoat it.I was able to get the rear rack and forks done yesterday.
RRBBO4017.jpg


I have edited my previous posts on this build to say rust treating on purpose. As I was doing this I realized that even though it looks cool (in my opinion) it is really a pretty stupid and dangerous process and I don't want any of the kids trying to copy this. The last thing I would ever want is for one of them to get hurt.
 
Got the rusting done,tank panels painted,& the clear coat on it. All that is left of the paint is the pinstripe which I hope to finish this weekend. Started some assembly with the forks,front rack and handlebars. I forgot to get pics of the handlebars before but they started as a pair of walmart mongoose freestyle bars and where mated to a set of hi-rise bars from a tandem. Also attempted to lace the rear wheel,got down to the last few spokes only to find out I didn't have the right length.Oh well live and learn. What I have is the original 26" rear rim sandblasted and painted gloss black and I am lacing in a Profile bi- drive rear bmx hub. I think on one of the first build off bikes there was a sticker one the left side of his bike saying that it was the ugly side.I shouldn't have that problem one this one. :wink:
RRBBO4025.jpg

RRBBO4026.jpg

RRBBO4027.jpg

I just realized the bars look uneven in the pics but that is just in the pic.
 
Getting closer to finished. Received my second crank & sprocket from Cody- James Tues. and the bottom bracket Wed. so I was able to continue. The rear wheel is the original rim that I sandblasted and painted gloss black. This is the first wheel I have laced and I learned alot of what to and what not to do but it was fun. I used new stainless spokes and a Profile Racing dual drive bmx hub,a right hand and ACS Southpaw left hand 16t frewheels. I also salvaged a troxel seat from an old Vista bike and a pair of nasty looking white grips alsom from a trash find bike. Need to install the brakes,chains,hand grip and finish the lettering and the stripes. Should be done saturday afternoon to be able to take pics Sunday.
RRBBO4028.jpg

RRBBO4029.jpg

RRBBO4030.jpg

RRBBO4031.jpg


I would also like to thank Alan and Carl at Freewheelin' for thier patience and help as I learned the fine details of building a wheel. :) :) :)
 
http://img.photobucket.com/albums/v603/ ... G_1099.jpg
This is were the idea came from. A friend of mine was sponsored by Clemtwin inc. and ran a set on his bike. I always thought they were cool but in the late 70's the $200.00 they cost was way outta reach even with 2 paper routes.
 
Getting closer, but will most likely be down to the wire. We got the brakes on today as well as both chains which took the best part of the day and 2 trips to one lbs and one trip to another. Seems the southpaw I had bought takes a 3/16" chain and I would have had to buy 2 to get enough links and at $20 each I couldn't do that. So I ended up finding another that took the 1/8" chain to match the right side.Also had to buy shims for the left side to get the chain to line up with the front sprocket.Haven't got all the lettering and stripping done yet but should finish it tomorrow.
RRBBO4032.jpg

RRBBO4033.jpg

When this is done it's time to clean the garage then start another one. :)
 

Latest posts

Back
Top