


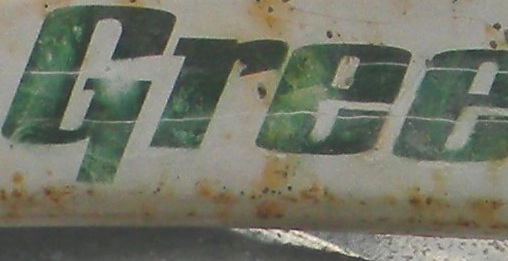
Hello everyone, if you read my intro, you saw the story of how my first Rat Rod truck lettering customer runs a bicycle store, and how he wanted me to letter a bike. This post is about the methods I used. The bicycle is one that's hard to get history on, it has a name tag that says:"Sky Ray". The store name is Greenlee's, on Broadway in Knoxville Tn. He wanted the store name on the "tank" which goes up by the top of the frame; and "Saw Works Racing" on the chain guard.
I used two methods here, one is more common for me, but I have lots of computer aided sign making tools and experience, so I won't be going into great detail about that method, although it is very similar to what I will describe in greater detail. I didn't get enough pictures of the letter cutting stage, but a quick look at the lower pictures should show what you need to see. Also, this is different than Rat Rod lettering for a truck, because on those I want brush marks to show, here I don't. Which is good for you because an x-acto knife is a lot easier to handle than a lettering brush. The reason I don't want brush marks is because I'm trying to make this look like faded silk screen lettering, a mass production method.
Remember that lettering is an ancient art form, full of hidden rules and optical illusions. If you don't incorporate at least the major ones, your work will have a home made look, no matter how precise you are. I've already given a brief description of those rules in another tutorial; you can see it here: http://www.donahuesignarts.com/?q=node/188 Most of the traditional fonts on your computer are well within the rules, using the computer to draw the words might help.
Just before cut vinyl letters changed the sign trade, there was a brief time in the 80's when a certain method was common; it's known as cut and roll, or cut and spray. This is basically what we'll be doing. The difference is that we're going to cut the mask somewhere other than the surface to be lettered. I've seen guys cut through mask and right through paint on a truck door; it rusted a short time later. When I do this stuff, I use a white vinyl paint mask made just for this; but I don't expect you to track it down. So, I found a roll of clear contact paper we had around, and tried that. A little dicey in some ways, but with care, you can pull it off. Strange phrase there, considering that's exactly where you need to be cautious, but that's later.
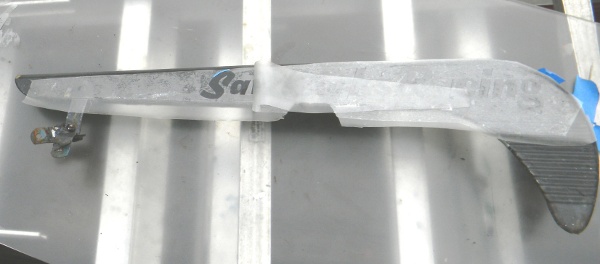
The idea is to draw the letters on the plastic side of the contact paper, then carefully cut out the letters without going through the backing paper (as much as possible), then transfer this thing over to the surface to be painted. First, I sharpened a pencil with a knife, so the the carbon is long. Then I use that to rub/draw the shape of the part to be lettered. Hold it at a consistent angle, and you'll get a pretty good idea of the part's shape, even if it has big rounded edges, as these parts did.
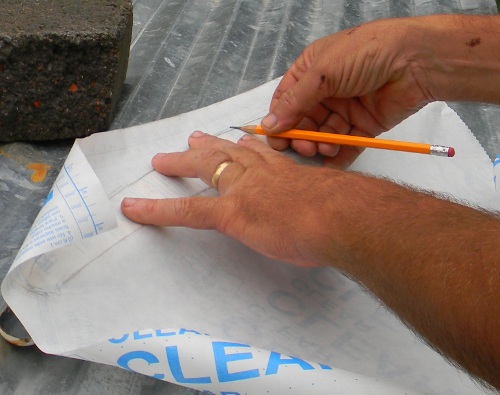
Next, draw the letters on the contact paper (plastic side). In this picture, I've drawn the letters, but I'm using a T square to be sure they all tilt at the same angle. If you're using lettering drawn by a computer on a piece of paper, I would get something like carbon paper to trace them onto the contact paper. If you rub enough soft pencil carbon on the back side of that paper, it will act like carbon paper. There is another way, whereby you spray adhesive on the back of the paper, then stick it to the contact paper; then cut through both. It has a precision advantage, but you have to cut through a lot more material, and this is already going to be difficult enough, without having to push-fight-hack your way through two layers, while smoothly going around curves. Hard enough for someone with 30 years experience; but it's up to you.
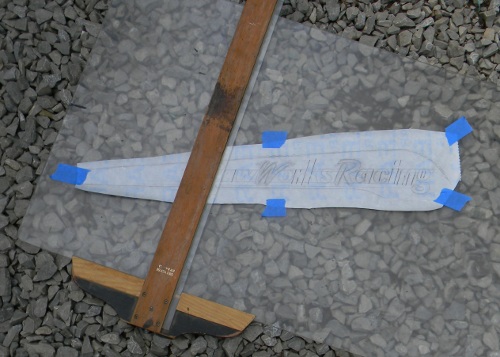
Once you have the letters drawn, peel them out,saving the background. We're making a very precise stencil that has no bridges, no overspray, and is used one time. You have to make one for each side of the bike, if you're doing two sides. Next, you need to transfer this thing to the surface to be painted. Leave the backing paper on for now. Take another piece of contact paper the same size as the one with the letters cut out of it. Peel the backing paper off of it, and lightly rub the sticky side across your clothing. Not a bizarre ritual folks; the reason is to lesson the tack, to lower the adhesion. If you have some lower adhesion masking tape, it could be used for this step. Apply this second layer of contact paper or tape to your cut out piece. Position the whole thing exactly where you want it on the bike part.
You can use two little pieces of tape to hold it in position, while we make the “hinge” in the middle. If
you're doing something short like a monogram, you can hinge off one side, but longer pieces work well with a middle hinge. The hinge is simply tape that goes across the middle, out onto the part, to hold your stencil piece in place. Now, with the hinge in place, lift one edge of the stencil off its backing paper. You are lifting two layers: the top layer of contact parer or tape is your transfer layer, this is what holds everything together on the cut out layer at this stage.
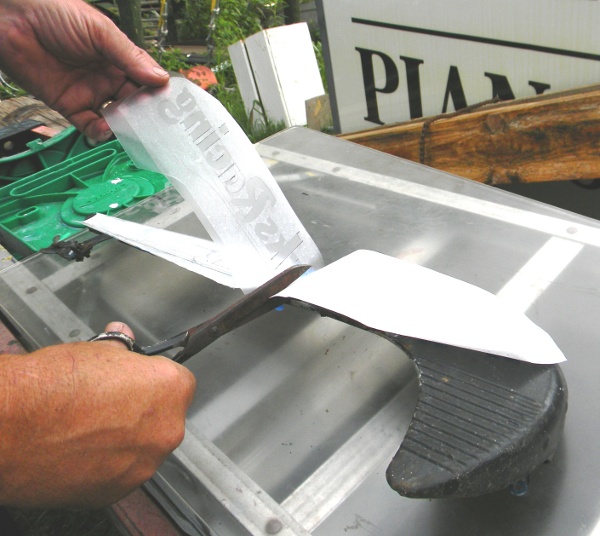
In this picture, I have the cut layer and transfer layer lifted up, I'm getting ready to cut away half the backing paper with a pair of scissors. Do not tear it here, use scissors. A tear will leave a fuzzy edge, and make trouble.
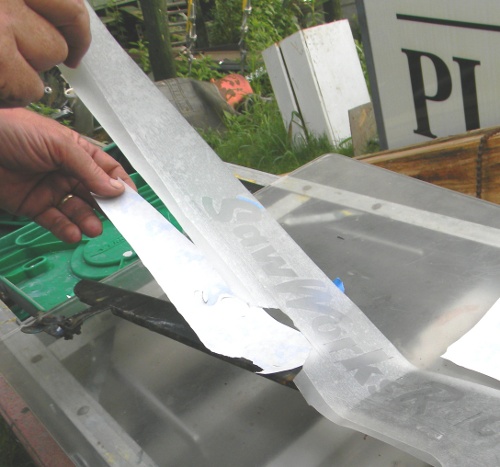
Next, I remove the backing paper, in this picture you can see that it has been moved away from the hinge; you want to remove it all the way, and lay the two remaining layers down. I use one hand to let it down while the other hand gently presses it to the surface of the part. Don't press it on too hard; it only needs to adhere well enough to keep overspray (underspray?) from getting by the edge of the letters. This is important, you don't want a mask that is stuck on too much.

Now, remove the tape hinge, pull up the two plastic layers from the backing paper, remove the remaining piece of backing paper, and lay the other side down like the first.
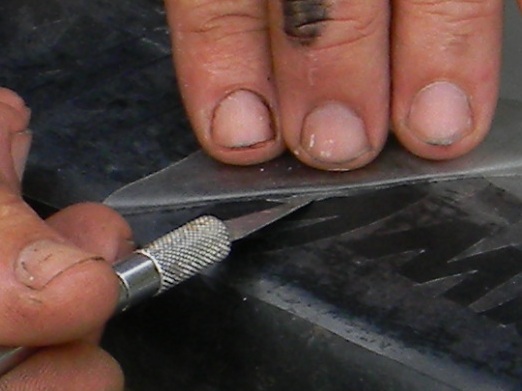
Next, carefully remove the transfer layer, leaving only the cut layer. Look at this close up; with one hand I'm doing what we call “backpeeling”, with the other hand I'm using the knife to hold down the middle of a letter. When you're backpeeling, you have the material being removed sliding right on top of itself.
Next comes painting. If you have access to an airbrush, great, but on these pieces, I used only spray paint. Make sure that your paint is atomizing very fine. If you notice, the lettering in the masking stages of this post is different from the letter style in the final picture. That's because I had to wipe the first try off with mineral spirits, and redo the whole thing. I had to redo it because the spray on my first try was too coarse. The following is VERY, VERY IMPORTANT: use a LOT LESS paint than you think. You'll think that there's so little paint inside the letters, that it will never show up. It will. More than you think, WAY MORE than you think. Spray some areas lightly, others almost not at all. Maybe make a separate test piece on something that's painted the same background color. You don't even need the test to be letters, just an area between two pieces of tape. Try it there first, spray way less than you think is enough, then lift the tape to see what I mean.
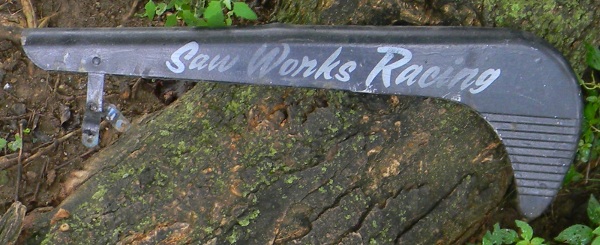
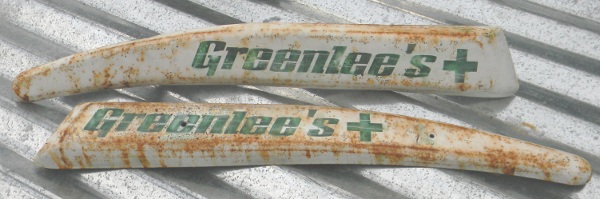
In the final pictures, you see three parts. The two lower parts were done with the aid of a computer and cutting plotter; the thing that cuts vinyl letters for signs. The black chain guard was done entirely by hand. On the green letters, I applied more paint than I should have, so I did a common trick, which is to use denatured alcohol and a rag to wipe off the over painted areas. In the process, I accidentally smeared green onto the white. So I used the xacto knife with a very light touch to scrape the green from the white. In the process, I discovered something really cool, a new ghost lettering trick. The white paint came up in a very fine powder, which when I tried to rub it off, made white areas in the letters much softer and better than any rag and solvent trick. Watch out for lead, but this is quite a few notches above other methods, and I found it here on this job. Serendipity is the coolest. To make the trick reliable and safe, I'll need to find a white powdery pigment, not talcum powder. It only looks white, but is basically clear.
If anyone wants to pursue this with a computer, that's probably very doable, depending on whether you can take a vector file to a sign shop, and get them to cut it out of paint mask. It's very accurate and fast, excluding the time driving to the sign shop. I don't want to go into detail about the difference between a vector file and a raster file; but trust me, you must make a vector file. If you don't own Corel Draw or Adobe Illustrator, a very good alternative is Inkscape. It does the same thing, but is FREE. I used it to make the lettering for the white parts. I found a font close to the style that I had in mind, then tweaked the shape of a few letters, and adjusted the space between a few others. Then I made the object to path, which is mucho important. If you don't do that, the file will open as a different font at the sign shop. In other software that step is known as convert to curves, a printer I know calls it “kill the font”. In the upper right of the top toolbar in Inkscape is document properties; set the page size a little bigger thanthe lettering (and/or graphics) that you're making. You might also save it as an eps file in addition to the svg extension.
Ask for RTA ( ready to apply) graphics in paint mask. Your local shop might call it something else, but it means they cut the low adhesion vinyl paint mask, peel out the letters, and apply the transfer paper. The vinyl is already on a backing paper, so you walk away with three layers, same as the first part of this tutorial. You take it home, and proceed with this tutorial at the point where you position it on the part and make the middle hinge. So that's it for now, I'll post pictures of the whole bike later. I'm sure this all seems a bit involved and verbose, but look at the pictures and I think you'll see it's not that tough. I just wanted to give you the finer points so you can do a nice job on you bike. Have fun!
I used two methods here, one is more common for me, but I have lots of computer aided sign making tools and experience, so I won't be going into great detail about that method, although it is very similar to what I will describe in greater detail. I didn't get enough pictures of the letter cutting stage, but a quick look at the lower pictures should show what you need to see. Also, this is different than Rat Rod lettering for a truck, because on those I want brush marks to show, here I don't. Which is good for you because an x-acto knife is a lot easier to handle than a lettering brush. The reason I don't want brush marks is because I'm trying to make this look like faded silk screen lettering, a mass production method.
Remember that lettering is an ancient art form, full of hidden rules and optical illusions. If you don't incorporate at least the major ones, your work will have a home made look, no matter how precise you are. I've already given a brief description of those rules in another tutorial; you can see it here: http://www.donahuesignarts.com/?q=node/188 Most of the traditional fonts on your computer are well within the rules, using the computer to draw the words might help.
Just before cut vinyl letters changed the sign trade, there was a brief time in the 80's when a certain method was common; it's known as cut and roll, or cut and spray. This is basically what we'll be doing. The difference is that we're going to cut the mask somewhere other than the surface to be lettered. I've seen guys cut through mask and right through paint on a truck door; it rusted a short time later. When I do this stuff, I use a white vinyl paint mask made just for this; but I don't expect you to track it down. So, I found a roll of clear contact paper we had around, and tried that. A little dicey in some ways, but with care, you can pull it off. Strange phrase there, considering that's exactly where you need to be cautious, but that's later.
The idea is to draw the letters on the plastic side of the contact paper, then carefully cut out the letters without going through the backing paper (as much as possible), then transfer this thing over to the surface to be painted. First, I sharpened a pencil with a knife, so the the carbon is long. Then I use that to rub/draw the shape of the part to be lettered. Hold it at a consistent angle, and you'll get a pretty good idea of the part's shape, even if it has big rounded edges, as these parts did.
Next, draw the letters on the contact paper (plastic side). In this picture, I've drawn the letters, but I'm using a T square to be sure they all tilt at the same angle. If you're using lettering drawn by a computer on a piece of paper, I would get something like carbon paper to trace them onto the contact paper. If you rub enough soft pencil carbon on the back side of that paper, it will act like carbon paper. There is another way, whereby you spray adhesive on the back of the paper, then stick it to the contact paper; then cut through both. It has a precision advantage, but you have to cut through a lot more material, and this is already going to be difficult enough, without having to push-fight-hack your way through two layers, while smoothly going around curves. Hard enough for someone with 30 years experience; but it's up to you.
Once you have the letters drawn, peel them out,saving the background. We're making a very precise stencil that has no bridges, no overspray, and is used one time. You have to make one for each side of the bike, if you're doing two sides. Next, you need to transfer this thing to the surface to be painted. Leave the backing paper on for now. Take another piece of contact paper the same size as the one with the letters cut out of it. Peel the backing paper off of it, and lightly rub the sticky side across your clothing. Not a bizarre ritual folks; the reason is to lesson the tack, to lower the adhesion. If you have some lower adhesion masking tape, it could be used for this step. Apply this second layer of contact paper or tape to your cut out piece. Position the whole thing exactly where you want it on the bike part.
You can use two little pieces of tape to hold it in position, while we make the “hinge” in the middle. If
you're doing something short like a monogram, you can hinge off one side, but longer pieces work well with a middle hinge. The hinge is simply tape that goes across the middle, out onto the part, to hold your stencil piece in place. Now, with the hinge in place, lift one edge of the stencil off its backing paper. You are lifting two layers: the top layer of contact parer or tape is your transfer layer, this is what holds everything together on the cut out layer at this stage.
In this picture, I have the cut layer and transfer layer lifted up, I'm getting ready to cut away half the backing paper with a pair of scissors. Do not tear it here, use scissors. A tear will leave a fuzzy edge, and make trouble.
Next, I remove the backing paper, in this picture you can see that it has been moved away from the hinge; you want to remove it all the way, and lay the two remaining layers down. I use one hand to let it down while the other hand gently presses it to the surface of the part. Don't press it on too hard; it only needs to adhere well enough to keep overspray (underspray?) from getting by the edge of the letters. This is important, you don't want a mask that is stuck on too much.
Now, remove the tape hinge, pull up the two plastic layers from the backing paper, remove the remaining piece of backing paper, and lay the other side down like the first.
Next, carefully remove the transfer layer, leaving only the cut layer. Look at this close up; with one hand I'm doing what we call “backpeeling”, with the other hand I'm using the knife to hold down the middle of a letter. When you're backpeeling, you have the material being removed sliding right on top of itself.
Next comes painting. If you have access to an airbrush, great, but on these pieces, I used only spray paint. Make sure that your paint is atomizing very fine. If you notice, the lettering in the masking stages of this post is different from the letter style in the final picture. That's because I had to wipe the first try off with mineral spirits, and redo the whole thing. I had to redo it because the spray on my first try was too coarse. The following is VERY, VERY IMPORTANT: use a LOT LESS paint than you think. You'll think that there's so little paint inside the letters, that it will never show up. It will. More than you think, WAY MORE than you think. Spray some areas lightly, others almost not at all. Maybe make a separate test piece on something that's painted the same background color. You don't even need the test to be letters, just an area between two pieces of tape. Try it there first, spray way less than you think is enough, then lift the tape to see what I mean.
In the final pictures, you see three parts. The two lower parts were done with the aid of a computer and cutting plotter; the thing that cuts vinyl letters for signs. The black chain guard was done entirely by hand. On the green letters, I applied more paint than I should have, so I did a common trick, which is to use denatured alcohol and a rag to wipe off the over painted areas. In the process, I accidentally smeared green onto the white. So I used the xacto knife with a very light touch to scrape the green from the white. In the process, I discovered something really cool, a new ghost lettering trick. The white paint came up in a very fine powder, which when I tried to rub it off, made white areas in the letters much softer and better than any rag and solvent trick. Watch out for lead, but this is quite a few notches above other methods, and I found it here on this job. Serendipity is the coolest. To make the trick reliable and safe, I'll need to find a white powdery pigment, not talcum powder. It only looks white, but is basically clear.
If anyone wants to pursue this with a computer, that's probably very doable, depending on whether you can take a vector file to a sign shop, and get them to cut it out of paint mask. It's very accurate and fast, excluding the time driving to the sign shop. I don't want to go into detail about the difference between a vector file and a raster file; but trust me, you must make a vector file. If you don't own Corel Draw or Adobe Illustrator, a very good alternative is Inkscape. It does the same thing, but is FREE. I used it to make the lettering for the white parts. I found a font close to the style that I had in mind, then tweaked the shape of a few letters, and adjusted the space between a few others. Then I made the object to path, which is mucho important. If you don't do that, the file will open as a different font at the sign shop. In other software that step is known as convert to curves, a printer I know calls it “kill the font”. In the upper right of the top toolbar in Inkscape is document properties; set the page size a little bigger thanthe lettering (and/or graphics) that you're making. You might also save it as an eps file in addition to the svg extension.
Ask for RTA ( ready to apply) graphics in paint mask. Your local shop might call it something else, but it means they cut the low adhesion vinyl paint mask, peel out the letters, and apply the transfer paper. The vinyl is already on a backing paper, so you walk away with three layers, same as the first part of this tutorial. You take it home, and proceed with this tutorial at the point where you position it on the part and make the middle hinge. So that's it for now, I'll post pictures of the whole bike later. I'm sure this all seems a bit involved and verbose, but look at the pictures and I think you'll see it's not that tough. I just wanted to give you the finer points so you can do a nice job on you bike. Have fun!