You are using an out of date browser. It may not display this or other websites correctly.
You should upgrade or use an alternative browser.
You should upgrade or use an alternative browser.
Custom Diamondback "JOKER" ~~DONE, FINISHED, CONCLUDED!~~
- Thread starter LukeTheJoker
- Start date


Help Support Rat Rod Bikes Bicycle Forum:
This site may earn a commission from merchant affiliate
links, including eBay, Amazon, and others.
Thanks everyone! Very cool that "Joker" is stamped on the bottom bracket, I noticed it is also stamped on the fork stem, will get a pic of that at some point too.
Luke.
Thanks Moisstink!I like the direction you are going with this . Different for sure. Looking forward to seeing how this one comes out!
Luke.
Nice work Luke!!! once again your build is incredibly cool!!!!
Troy
Troy
Coming back up from the depths of page three! 
Sorry for the lack of updates...
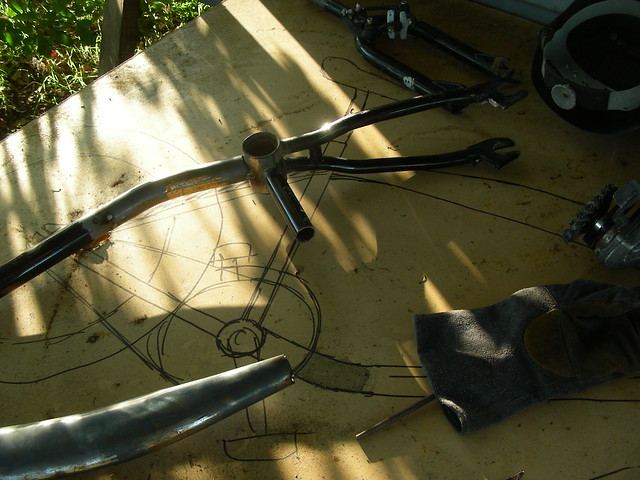
Big day today, got the tank/top tube and rear stays tacked in place! Here it is mocked up with a seat post and bars in roughly the right places:
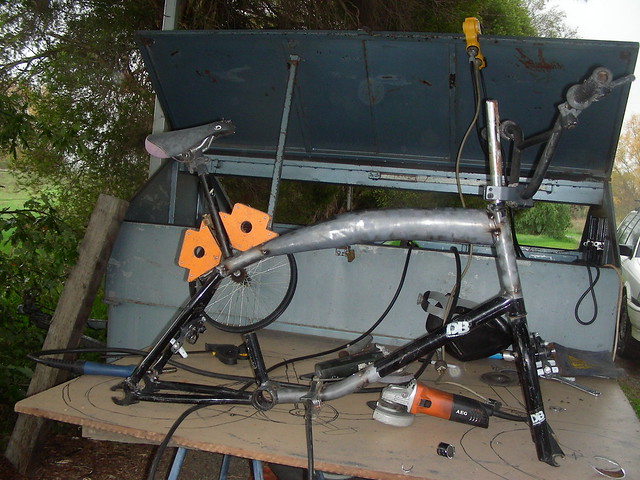
I spent quite a long time looking at it and feeling that I had made a mistake lengthening the wheelbase the full amount and maybe it would have looked better with less, but then I realised the rear problem, the original BMX has a very slack seat tube angle because it is so short. So I moved the set forward to what seemed a better place and took another photo:
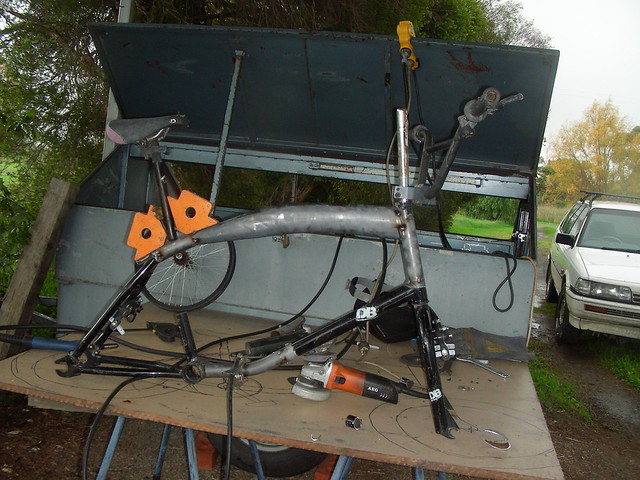
Much better! I will remove the stub of seat tube from the BB and weld a whole new one in on the more upright angle.
Managed to get a decent fit on the headtube with the tank, as you can see I have still left the Gyro mounts on the headtube, not sure if I will run the Gyro or not, but it is something I saved up to buy for my old Diamondback BMX back in school, so I might...
I had to extend the tank using a piece of curved tubing from an old Huffy and tied it all back together with the original top tube end.
Still have to fill the old seat tube hole and cut the new one, but it is starting to look like a bike again.
Luke.
Sorry for the lack of updates...
Big day today, got the tank/top tube and rear stays tacked in place! Here it is mocked up with a seat post and bars in roughly the right places:
I spent quite a long time looking at it and feeling that I had made a mistake lengthening the wheelbase the full amount and maybe it would have looked better with less, but then I realised the rear problem, the original BMX has a very slack seat tube angle because it is so short. So I moved the set forward to what seemed a better place and took another photo:
Much better! I will remove the stub of seat tube from the BB and weld a whole new one in on the more upright angle.
Managed to get a decent fit on the headtube with the tank, as you can see I have still left the Gyro mounts on the headtube, not sure if I will run the Gyro or not, but it is something I saved up to buy for my old Diamondback BMX back in school, so I might...
I had to extend the tank using a piece of curved tubing from an old Huffy and tied it all back together with the original top tube end.
Still have to fill the old seat tube hole and cut the new one, but it is starting to look like a bike again.
Luke.
It's taking shape and looking good...
Thanks Drac!
Luke.
Luke.
dang this thing is cool Luke!! the proportions are great, and the new seat tube location looks right!!!
Troy
Troy
That geometry is looking great Luke!
Rather than plug the old seatpost hole, I would try to figure out something cool to do with that hole. It's kinda cool.
Rather than plug the old seatpost hole, I would try to figure out something cool to do with that hole. It's kinda cool.
maybe one of those test tube flower vases the use in volkswagensThat geometry is looking great Luke!
Rather than plug the old seatpost hole, I would try to figure out something cool to do with that hole. It's kinda cool.
")

or make a cut#split at the rear and make this the seat post clamp directly?maybe one of those test tube flower vases the use in volkswagens
Looking good luke !
Glad everyone is liking it! It is growing on me, everytime I do something it just seems to raise more issues, but I guess seeing as I am messing with the proportions so much, that is to be expected...
Best I have come up with so far is some kind of trailer hitch...
Luke.
Been thinking the same thing King, have yet to come up with an idea I like, and no, sorry, a flower vase will not work for me Jats!That geometry is looking great Luke!
Rather than plug the old seatpost hole, I would try to figure out something cool to do with that hole. It's kinda cool.
Best I have come up with so far is some kind of trailer hitch...
Luke.
What about building in a light there? If you could find some bulbous lenses like these. You could even have lenses top and bottom of the hole.

I like the way you are thinking King!
Luke.
Luke.
Or laminate some Joker image from a card and recess it in the hole.
EDIT: AND BACK LIGHT IT!
EDIT: AND BACK LIGHT IT!
Last edited:
Here is a plant holder idea. There must be some cool plants down under . A recycled rusted out light.Glad everyone is liking it! It is growing on me, everytime I do something it just seems to raise more issues, but I guess seeing as I am messing with the proportions so much, that is to be expected...
Been thinking the same thing King, have yet to come up with an idea I like, and no, sorry, a flower vase will not work for me Jats!
Best I have come up with so far is some kind of trailer hitch...
Luke.

Nice work, Luke!
That thing is still useableHere is a plant holder idea. There must be some cool plants down under . A recycled rusted out light. View attachment 2921
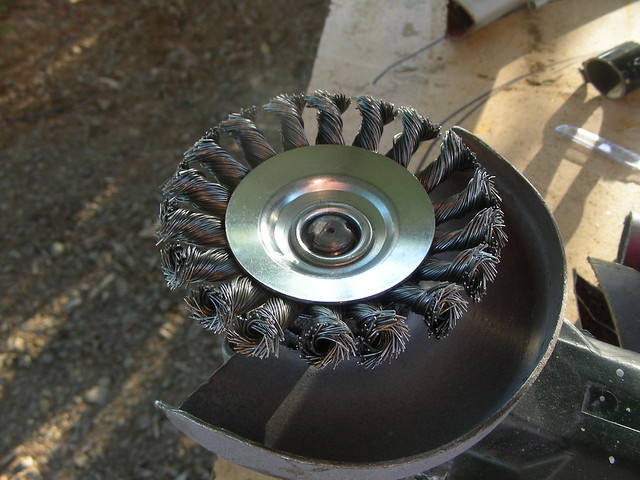
A two steps forward, one step back kind of day today, woke up coughing and spluttering with the flu again, so guess I didn't really get over it, so went back to bed. Woke up about 2pm in the afternoon and felt better, went for a drive to get some groceries and pick up a new wire brush wheel while I was out:
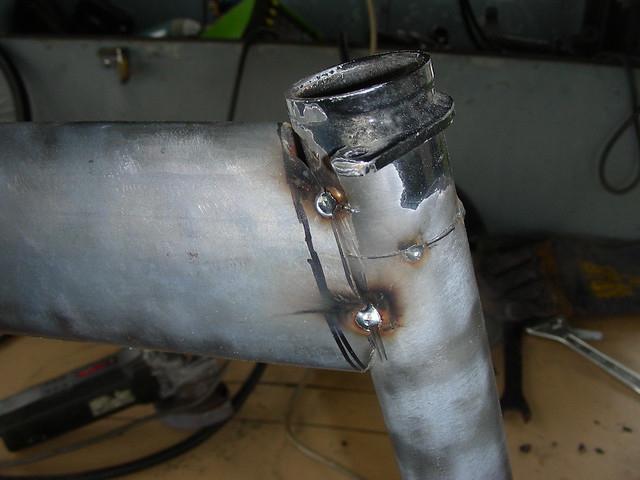
I decided last night that even though it would be difficult, and time consuming, and no one would ever see it, and a total waste of time because my welds are good anyway, to pull apart the top tube/tank and sleeve the joins, just to back up the "Bomb Proof" style I am going for.
This is made difficult because of the curve in the tubing and also the tank join, but found some curved tubing that was a nice fit inside (coincidently from the same Huffy I took the other curved tube from) and cleaned it up and got it inside the joiner piece:
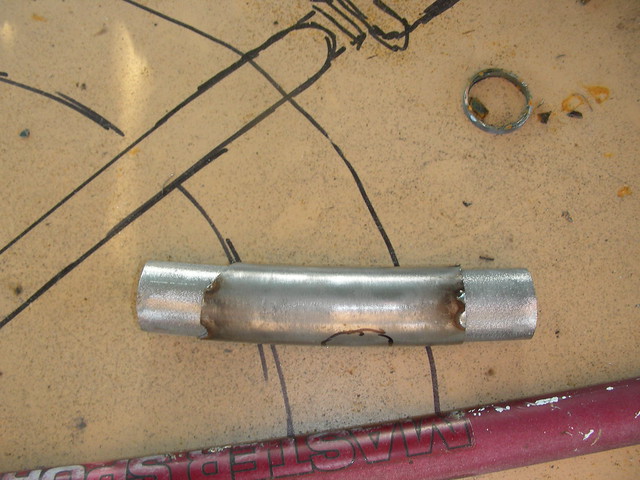
I had to do quite a bit of filing inside the tank to get it to slide in but got it there eventually:

So tacked all that back up, much easier this time because the sleeve held everything in place!
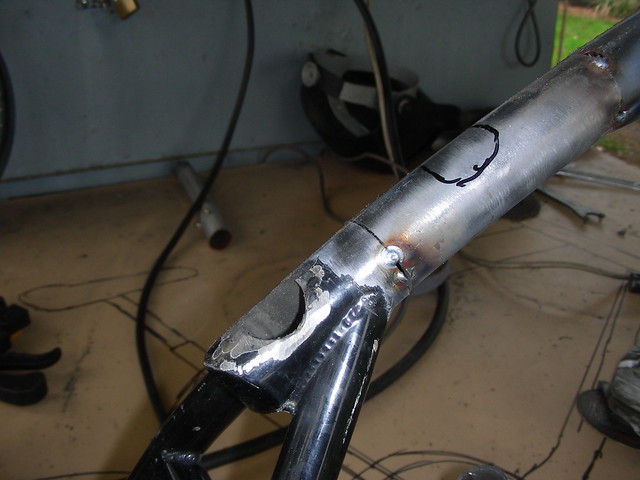
Now of course because I sleeved the tube where the seat tube is going through I made the next bit harder too!
I have figured out that one thing that makes certain bikes look better than others is matching the headtube and seat-tube angles, so I got out my angle finder and a 1 meter rule (40") and set it to the headtube angle, then moved back to the BB and marked on the top tube where the seat post would come through the top tube, surprisingly very close to my guess, just slightly further forward, I really wish I had a hole saw for the next part because it took lots of cutting and filing to get it to where the new seat tube could slide through. I cut the seat-tube out of an old 10 speed road bike as it had the same inner and outer diameters as the original.
Slid it in, double checked the angles and tacked it in place:
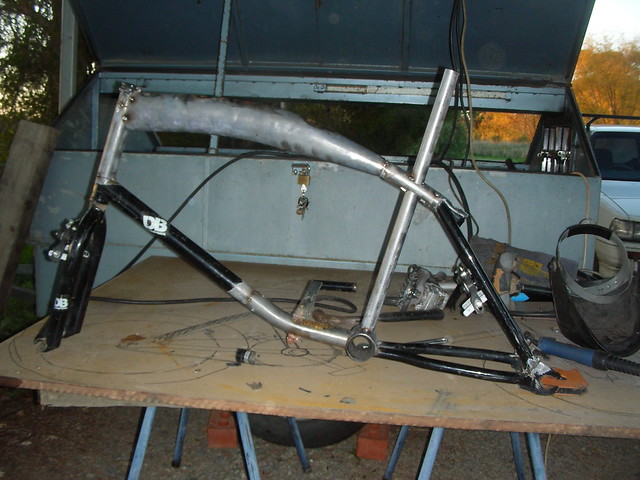
Starting to look like a complete frame again! I will cut the tube, drill and split it when I decide on a height.
I had to mock it back up with a seat and bars:
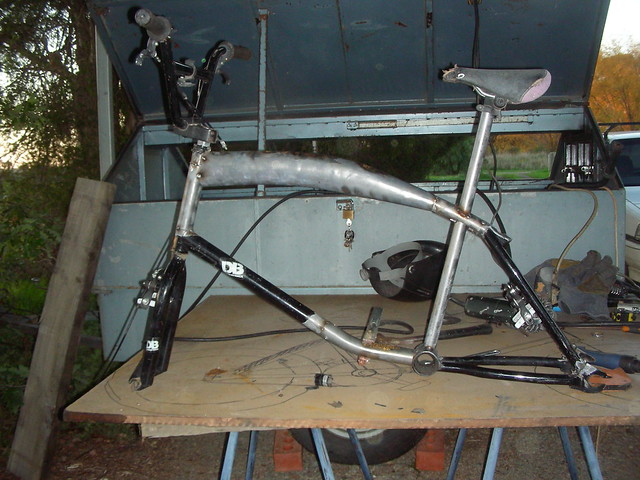
Looking good! Very happy!
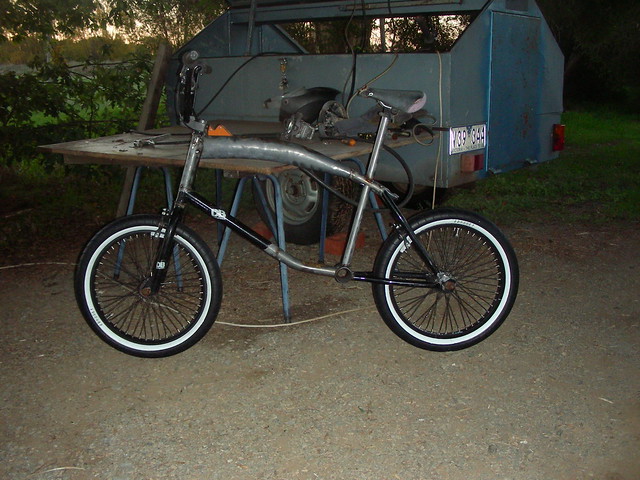
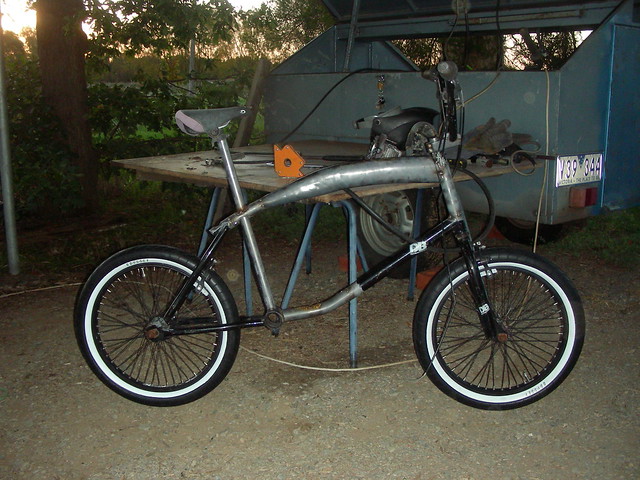
As you can see in the photos, by this time is was getting dark and time to pack up, but I really wanted to see what it would look like up on those wheels and tires that inspired the build!
Luke.
I decided last night that even though it would be difficult, and time consuming, and no one would ever see it, and a total waste of time because my welds are good anyway, to pull apart the top tube/tank and sleeve the joins, just to back up the "Bomb Proof" style I am going for.
This is made difficult because of the curve in the tubing and also the tank join, but found some curved tubing that was a nice fit inside (coincidently from the same Huffy I took the other curved tube from) and cleaned it up and got it inside the joiner piece:
I had to do quite a bit of filing inside the tank to get it to slide in but got it there eventually:
So tacked all that back up, much easier this time because the sleeve held everything in place!
Now of course because I sleeved the tube where the seat tube is going through I made the next bit harder too!
I have figured out that one thing that makes certain bikes look better than others is matching the headtube and seat-tube angles, so I got out my angle finder and a 1 meter rule (40") and set it to the headtube angle, then moved back to the BB and marked on the top tube where the seat post would come through the top tube, surprisingly very close to my guess, just slightly further forward, I really wish I had a hole saw for the next part because it took lots of cutting and filing to get it to where the new seat tube could slide through. I cut the seat-tube out of an old 10 speed road bike as it had the same inner and outer diameters as the original.
Slid it in, double checked the angles and tacked it in place:
Starting to look like a complete frame again! I will cut the tube, drill and split it when I decide on a height.
I had to mock it back up with a seat and bars:
Looking good! Very happy!
As you can see in the photos, by this time is was getting dark and time to pack up, but I really wanted to see what it would look like up on those wheels and tires that inspired the build!
Luke.
Looking good Luke