A 'New World' Order- Updated 11/20/09

Rat Rod Bikes Bicycle Forum

Help Support Rat Rod Bikes Bicycle Forum:

This site may earn a commission from merchant affiliate links, including eBay, Amazon, and others.
Re: A 'New World' Order

kram said:
Finally the I was able to get the seat today. It's one of the cheap ones from http://www.hiwheel.com. I went and picked it up today and they have some really cool bikes there, and Greg is a really nice guy. The seat is basically what should be expected from a $20 seat. I'm going to take a page out of stepper's book and sand off the paint and lace it up viewtopic.php?f=6&t=11209 . The finish on the seat looks to be paint and not dye and it really needs the laces to stiffen it up some. With a bit of work it should be a pretty nice seat, and once I coat it in shellac it will match the grips nicely. Also a few people have asked what the make is on the spotlight, it says Appleton Series s-451. I googled it and it looks like it is from the approximate time of the bike, which is cool. I still need to clear coat the chainguard but it is getting close to being done.

It was rainy today so the pictures are crappy indoor lighting.
DSC05173.jpg


DSC05174.jpg


DSC05175.jpg

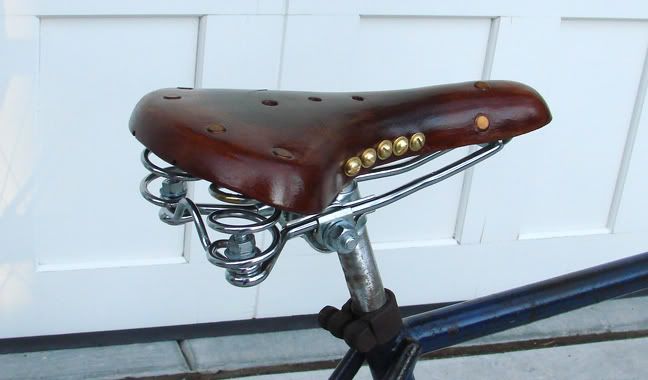
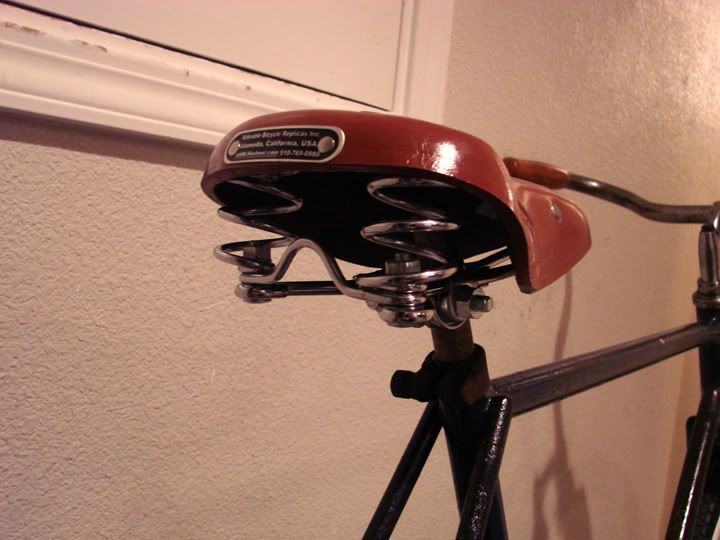
I have that seat's big brother on my low and fat cruiser. Lacing it up really gave it more support and helped make it more usable.
low913.jpg


Let me know how lacing works with the smaller one. I like how it looks.
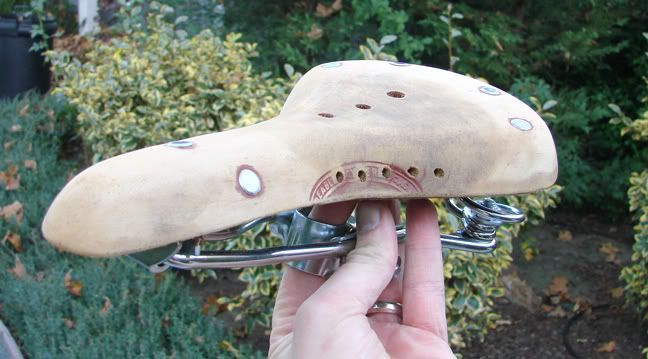
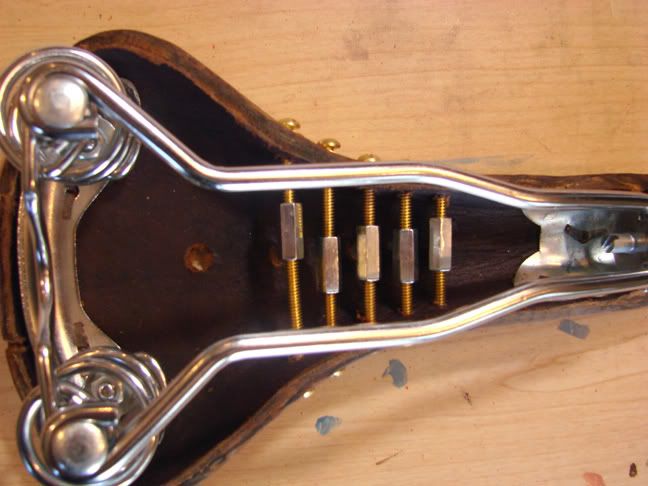
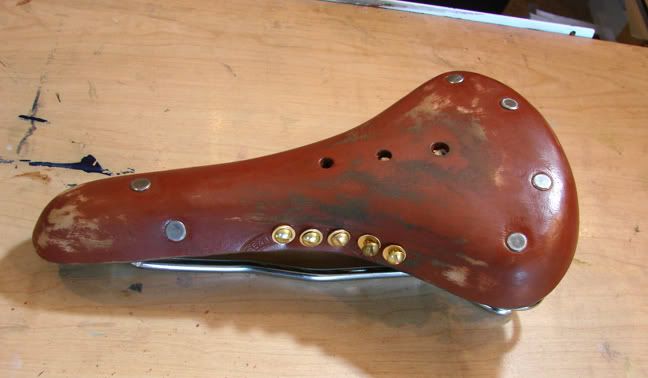
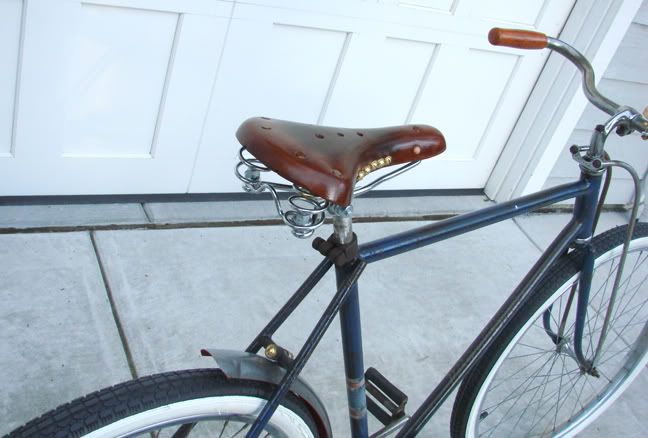
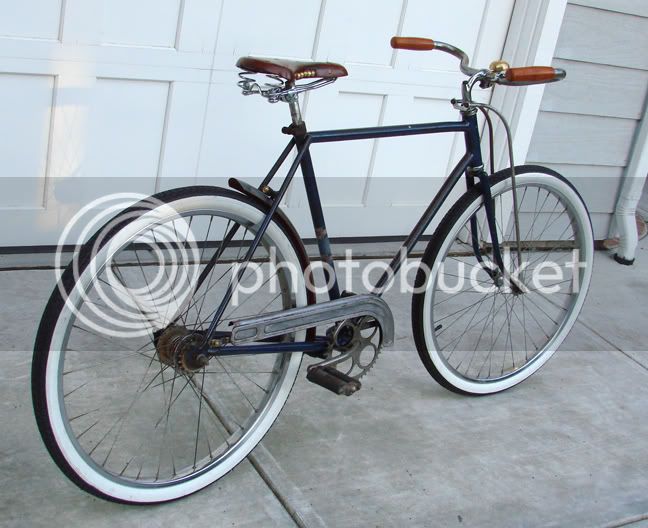
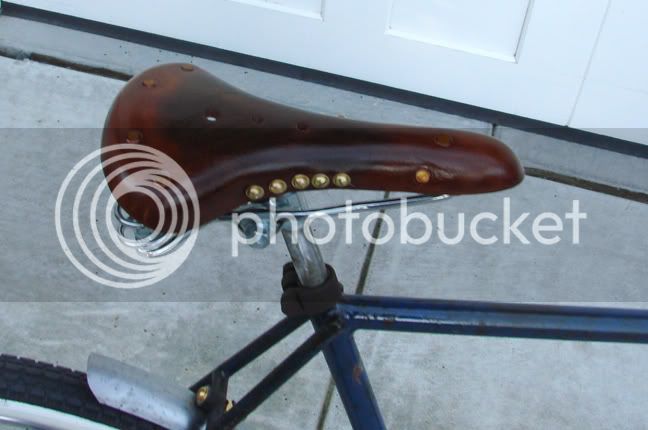
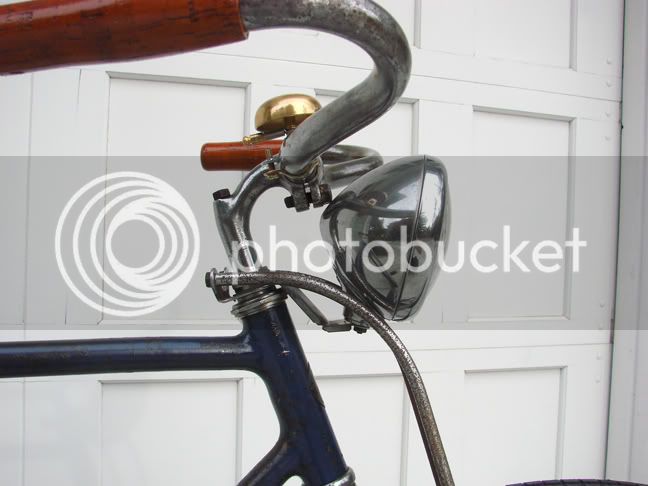
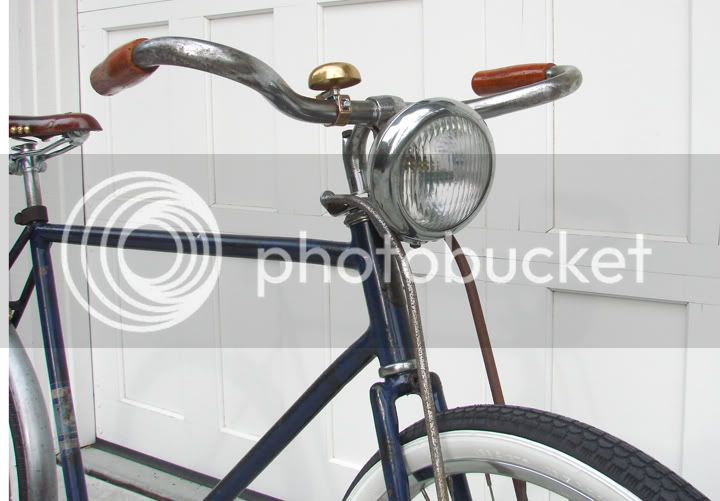
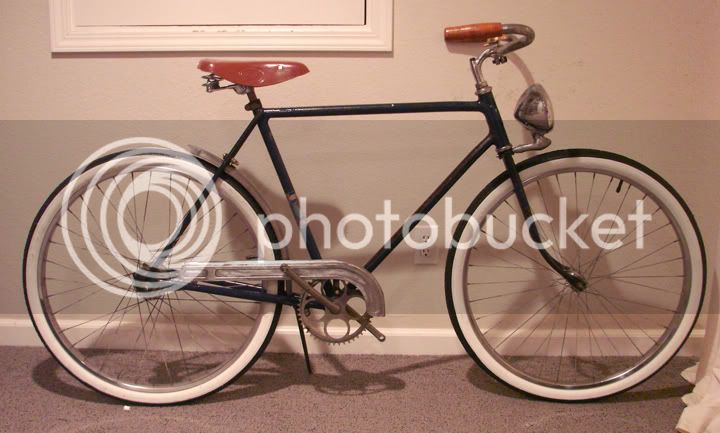
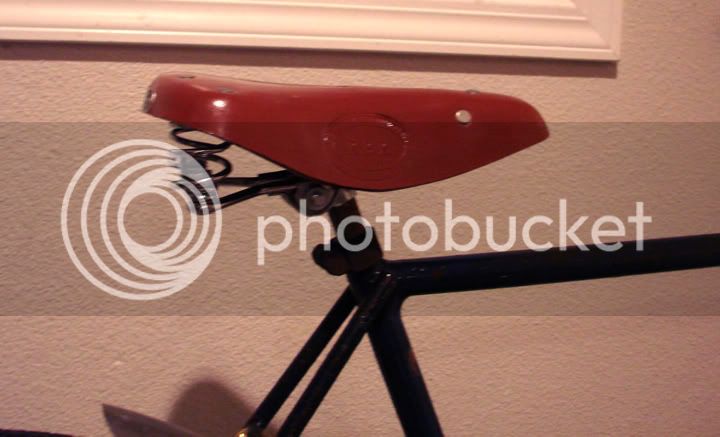
 
Re: A 'New World' Order

Gdcast said:
I have a similar saddle...
Way the laces? way? way?

I didn't read above, but...

My guess is to shrink down the width of the middle a little bit, if it's too wide. If it's too wide, it probably hurts your legs after some riding.
 
Re: A 'New World' Order Update 11/08

Ok, the reason for the laces are to stiffen this seat, it's kind of like adding a lid to a box. When I first got it I could almost push the under side of the seat to the rails without much of an effort. It was kind of like sitting on a hammock, and with the cheap seat there isn't much of an adjustment to be made. By pulling the sides in together it doesn't let the leather bow downwards. It was actually much more effective that I thought it would be.

So first off I trimmed the seat to change the look of it. I took off a lot of leather on the sides and trimmed the back and front because they were pretty lopsided. I trimmed it with a dremel tool and a cut off wheel. The leather was super dry and it was not a pleasant experience but I like the end results. I was basically burning it and it smelt horrible! After I trimmed it I used lacquer thinner to take off some of the paint, and then took the rest off with 100 grit sandpaper. I would definitely not suggest this on a nice saddle but at $20 I didn't have much to loose.

This is what it looked like sanded. There is a dark place in the middle because I oiled the under side of the seat the night before and it permeated all the way through and stained it a bit. If I did it again I would probably oil after it was either dyed or coated in shellac. You live and learn, and I like the effect it gave in the end.
DSC05183.jpg


I had drilled the holes for the laces also, but I decided to use bolts instead. I used brass bolts with some coupler nuts to add tension to the seat. The trick is to get the right sized bolts to be able to tighten to the right amount. These pics were before I sanded it and a couple of the bolts were a little too long. I was just testing to see if it would even work.
DSC05177.jpg


DSC05179.jpg


I coated the seat with three coats of amber colored shellac and let it dry overnight. I've learned to get a smooth finish with shellac you have to move fast or sand it after it has dried. Also when I first put on the shellac I thought I had ruined the seat because it went almost black, but as it dries it lightens up a lot.

The seat looks a little dark in these pictures because there wasn't much daylight left. It has a nice deep orange/red color to it. You can also see the darker spots in the middle where the oil changed the color a bit.
DSC05193.jpg


I'm also deciding if I like the truss rods or the headlight. I'm still leaning towards the headlight.
DSC05189.jpg


DSC05190.jpg


In the end I really like how it turned out. The quality is pretty low on these and the seat is actually a bit crooked (the front rivets are a little towards one side). Adding the bolts made the seat really stiff and maybe a little too stiff. If you used leather laces that have a bit of stretch it might work better, and the seat might break in some.
 
Re: A 'New World' Order- Updated 11/08/09

Cool beans. I really like the darker part. I wonder if you oiled it again from the bottom if it would make it all dark even though you put shelliac on it already.
 
Re: A 'New World' Order- Updated 11/08/09

Great result on that seat! And many thanx for the tips man, I´ll be lacing my saddle soon :wink:
Oh, and by the way, I would keep that beautiful head light.
 
Re: A 'New World' Order- Updated 11/08/09

Yeah I think I would run the strut rods (which look really good) and the spot light. Might build a bracket off of the strut rods with some sheetmetal clamp type brackets and hook the light to them. Like on a motorcycle fork .One one each side hole drilled in each side of the spotlight with nuts inside. :wink:
 
Re: A 'New World' Order- Updated 11/08/09

I am diggin the bike with the light only. Good idea on the grips.
 
Re: A 'New World' Order- Updated 11/08/09

Maybe try mocking it up first, see how it looks.
I´ve made the error of putting to many things on my main cruiser, now I think it´s over done, and I have some holes to take care of, which mean a lot of work to cover them up.
Drilling holes takes a few seconds, removing them is a pain in the... but if like how everything goes together, try the strut rods and light. :lol:
 
Re: A 'New World' Order- Updated 11/08/09

dig the saddle customization and the entire bike. trusses look great.
 
Re: A 'New World' Order- Updated 11/10/09

Thanks to everyone for the comments so far. After Uncle Stretch first suggested using both the light and truss rods I started moving the light around to see how they would both look. I realized the only place it looked right was just below the bars. If it was lower to the wheel it stuck out way too far.

I had this reflector bracket that I had taken off a garbage bike. It's actually pretty thick and was about the only piece that wasn't rusted to pieces.
bracket.jpg


After using a dremel tool to make some notches and a little work with a vice and hammer I came up with this.
DSC05235.jpg


DSC05233.jpg


DSC05234.jpg


I was a little worried like gdcast said about putting to much stuff on there, but I think it looks like it was meant to be.
 
Re: A 'New World' Order- Updated 11/10/09

It does look really good with both. If you ever have to build a bracket that fits the 1'' neck ,you can draw a circle and take a drill and drill alot of small holes around the circle and then knock out the middle. Then take your drimmel and take out the rest. Being an old frame you should build a battery box under the center tube out of a piece of pvc with caps glued on both ends ....sprayed black and put some batteries inside to run your light. :lol:
 
Re: A 'New World' Order- Updated 11/10/09

This thing is perfect. I realize you are a professional artist, but you really have a good eye for stucture and color. I like uncle stretch's idea of a battery container.
 
Re: A 'New World' Order- Updated 11/10/09

Wow, it's like you guys are reading my mind. I thought it might be cool to do a battery container out of a piece of brass tubing to match the some of the other parts. When it comes to electronics I'm at a loss, can anyone give me an idea of what I need to make the battery container? I can figure out the looks but need some direction to get it going.
 
Re: A 'New World' Order- Updated 11/10/09

Just an idea, not quite brass, but you may be able to get some copper at a hardware store that could look good and be inexpensive. Maybe you could mount one end to an on/off button style switch so you would just push on the end of your battery container to turn it on or off. It would help keep a simple look.
 

Latest posts

Back
Top