RRBBO13 The Moonlight

Rat Rod Bikes Bicycle Forum

Help Support Rat Rod Bikes Bicycle Forum:

This site may earn a commission from merchant affiliate links, including eBay, Amazon, and others.
Joined
Aug 4, 2016
Messages
1,167
Reaction score
2,864
Location
Poznan, Poland
Hello everyone.
Long time ago i have decided to build this bike, but now only i have put myself into situation when i can not cancel or avoid it any more :)
I have came up with the sketches for this bike like a year ago, but it was rough at first. But now i have connected one of the projects i am making at my school with this bike, and i have a deadline with building a frame somewhere in the middle of June. So probably this is going to be the fastest frame i have ever built :) Then i have quite limited time to finish the whole bike too, since in the beginning of july i am leaving to Netherlands for CSI.
This bike is inspired by older classic cruisers from 50's and 60's, and especially double straight bar 1962 Schwinn Typhoon. This would be the first bike frame i am building completely from scratch, by my own design, my first real precised tubing bending experience. I only am going to use ready-made BB, all the tubes including a head tube are just raw steel.
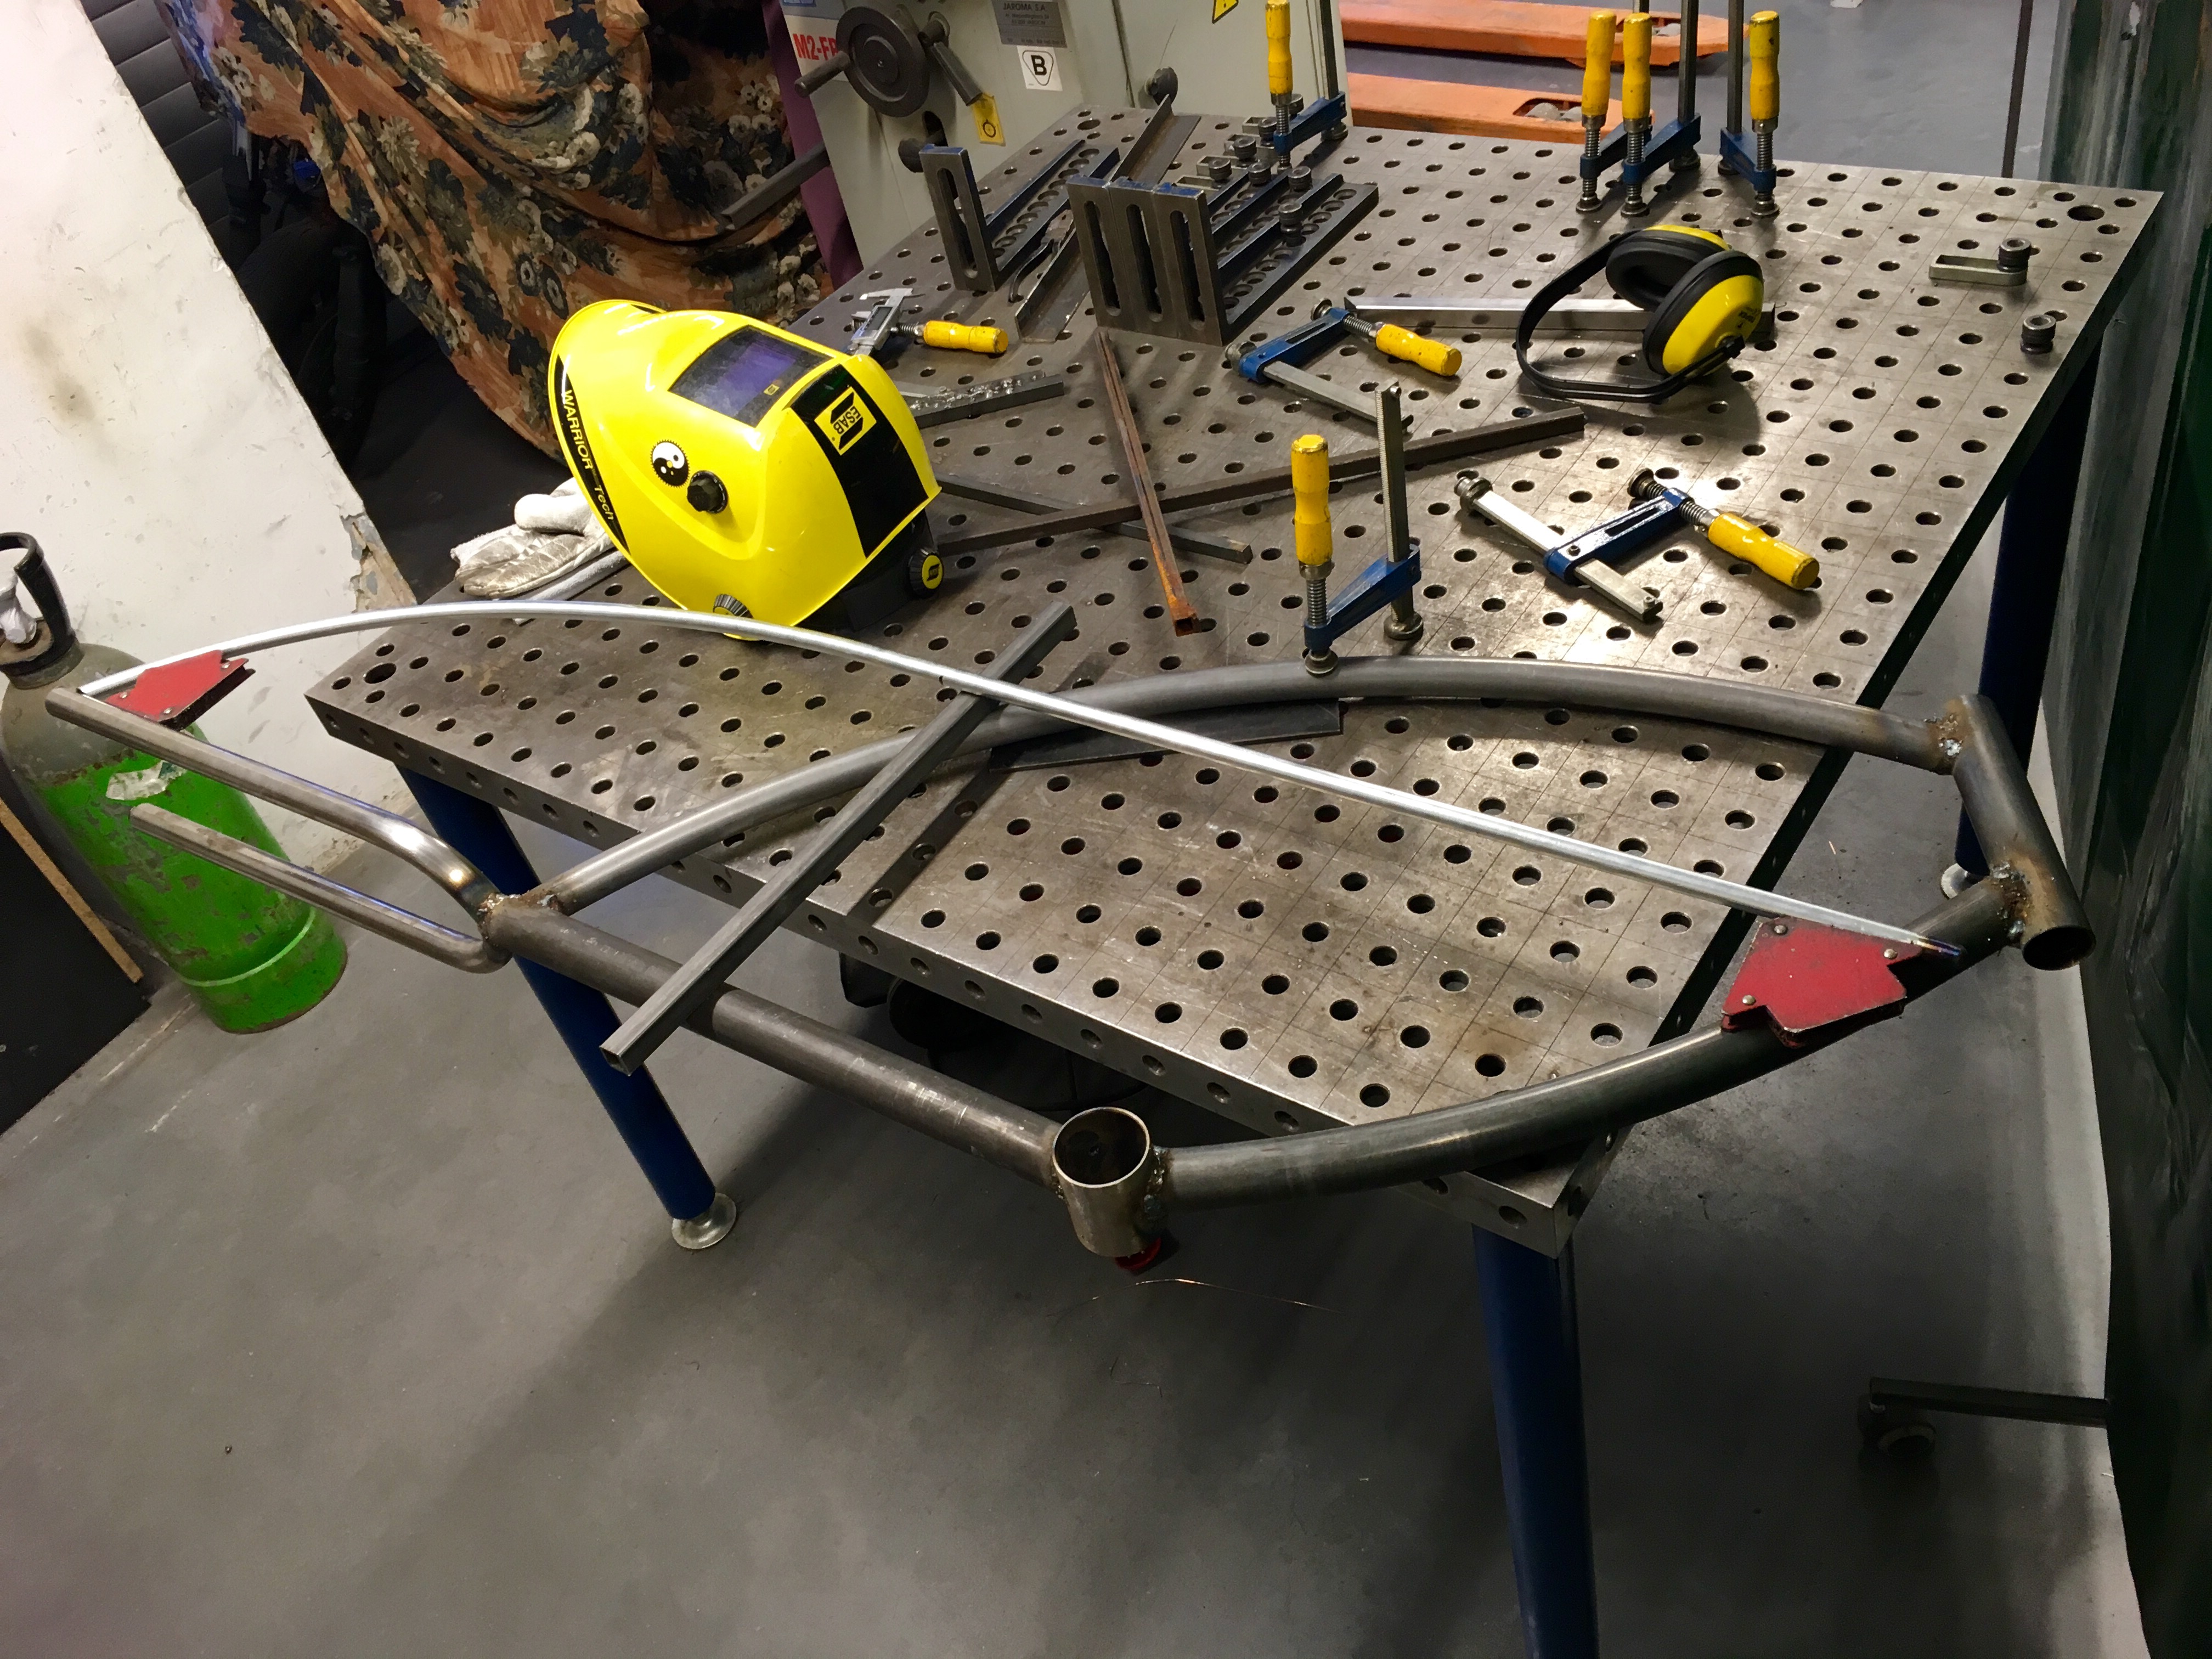
Anyway, here are the stages i went through already.
Here is a first sketch, i have made about march 2017:
faf35e92015882652d8c2356d2c9da07.png

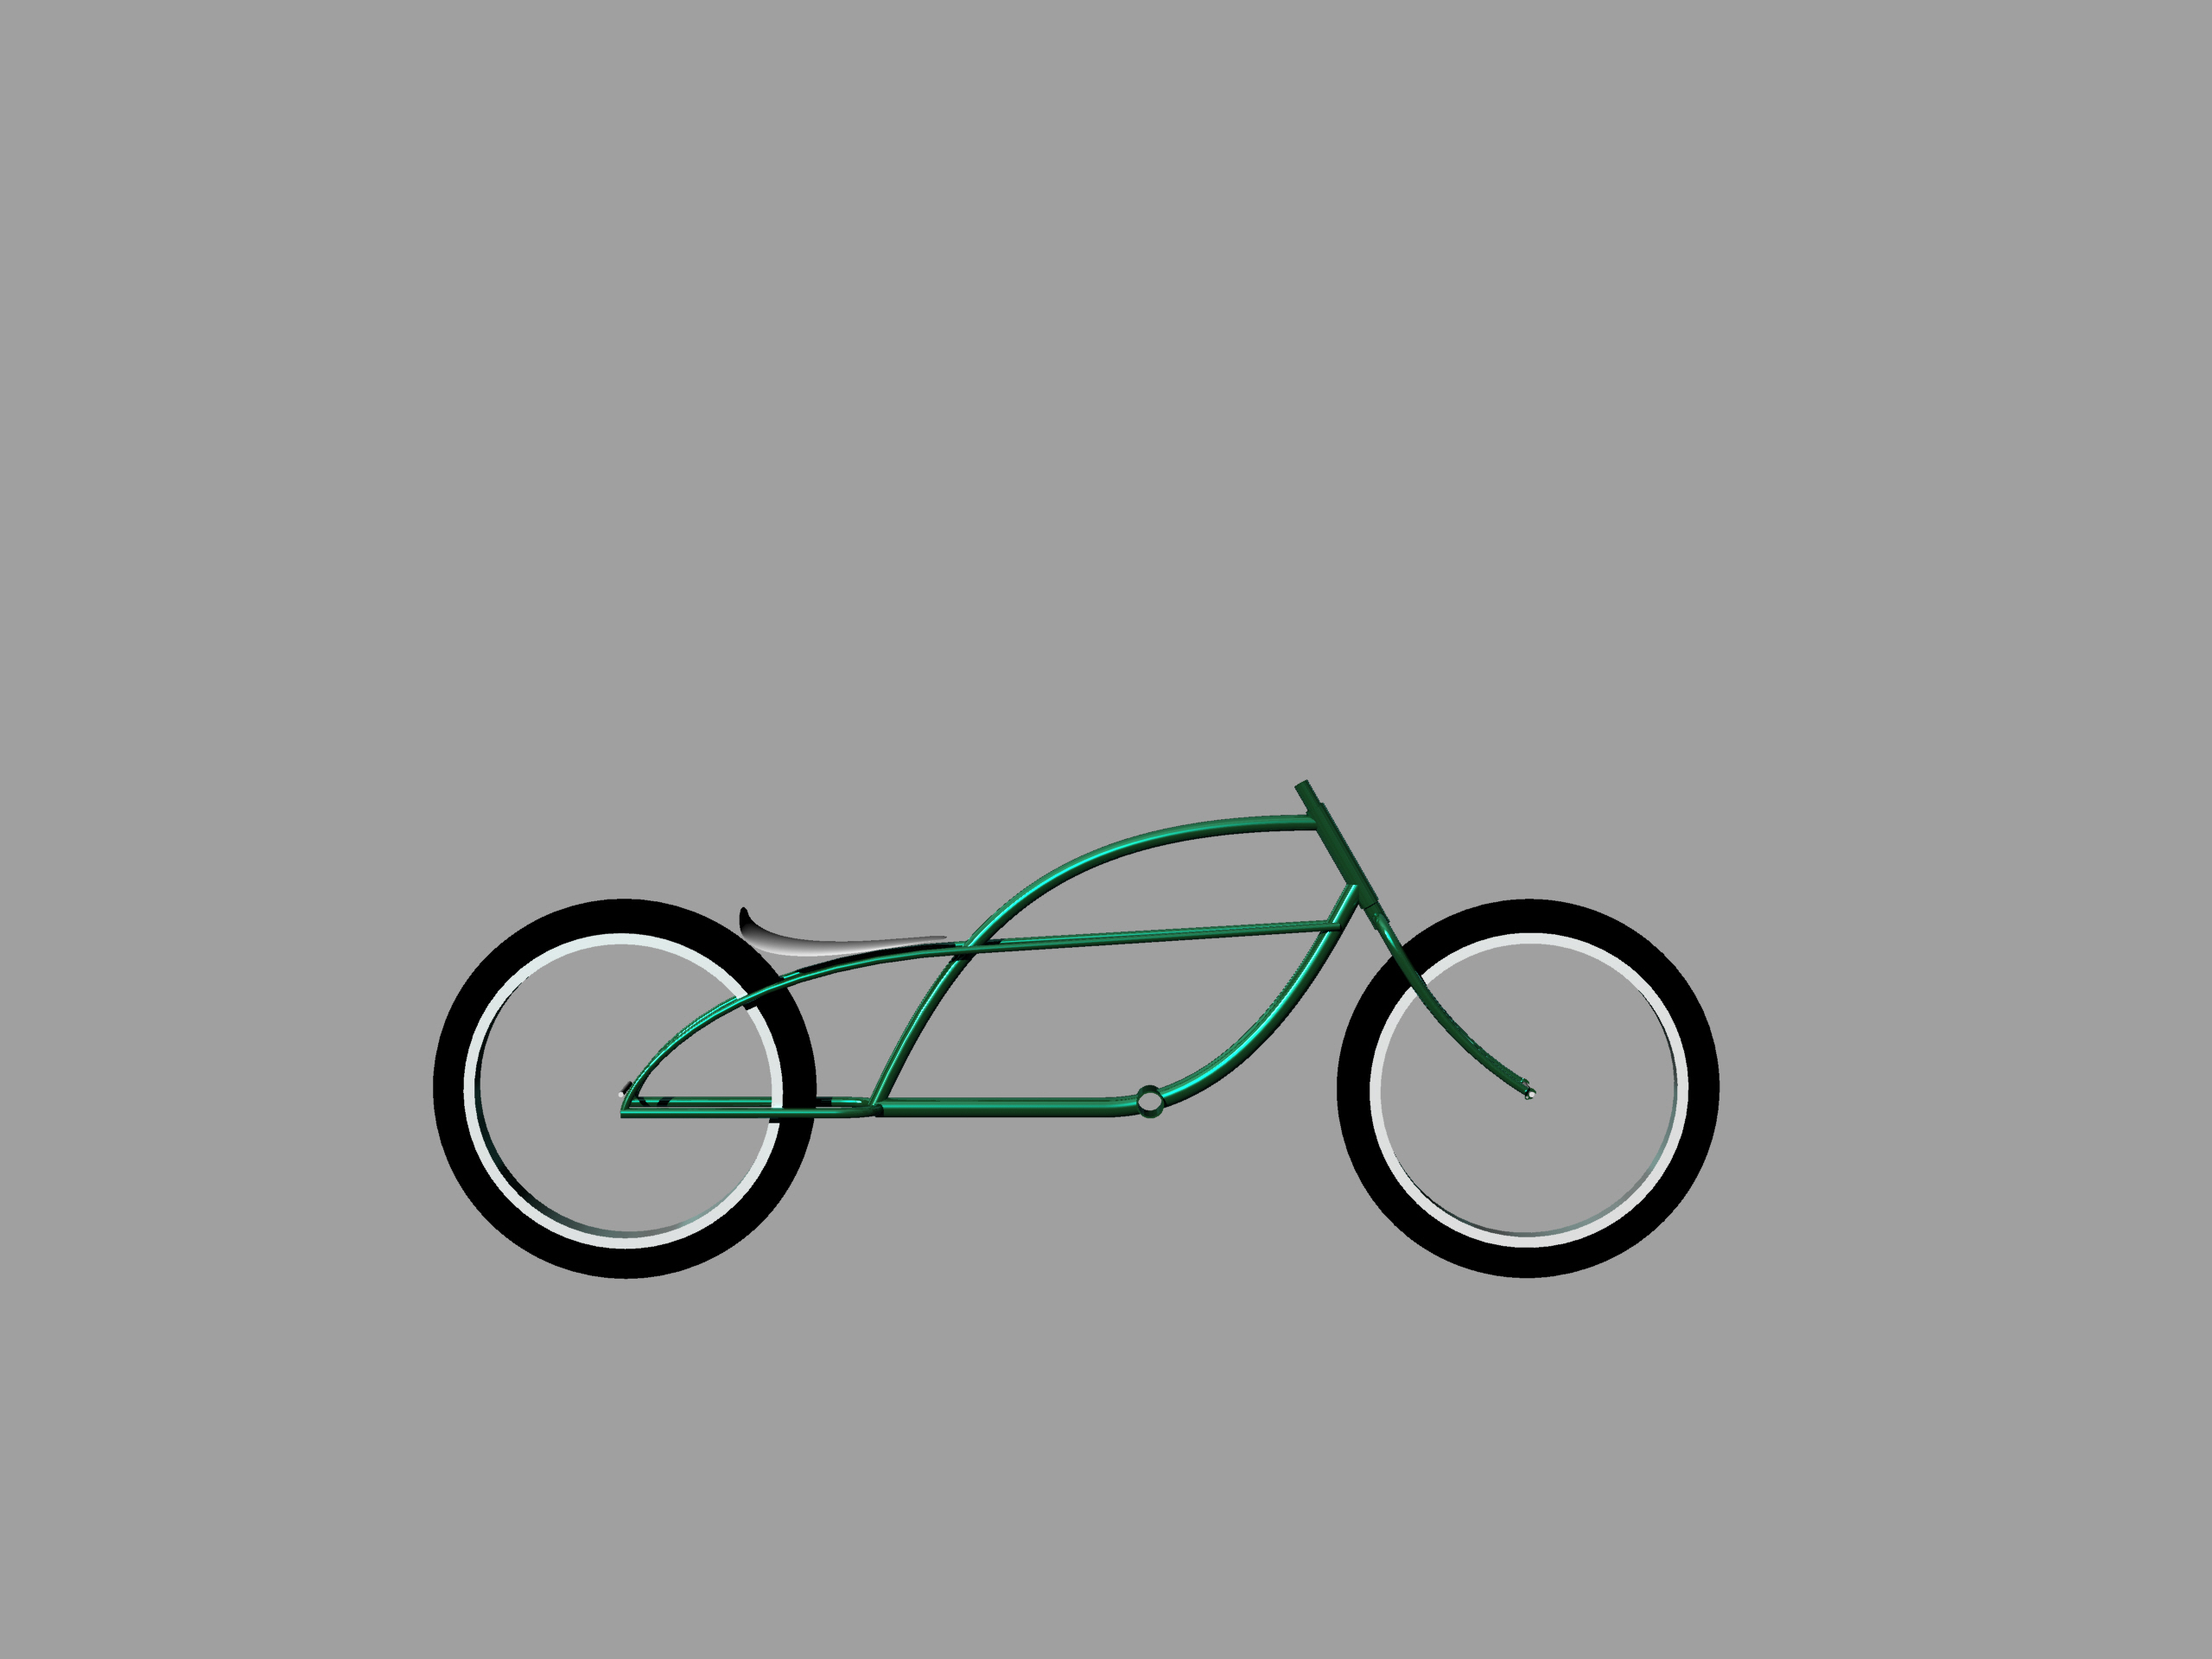
Then here is a 3d-model i have prepared, already with good dimensions and some design problems solved:
<gimme a sec, i need to reboot the computer to post the screenshots of a 3d model>
Out of that i have made a picture with all the tubes separately.
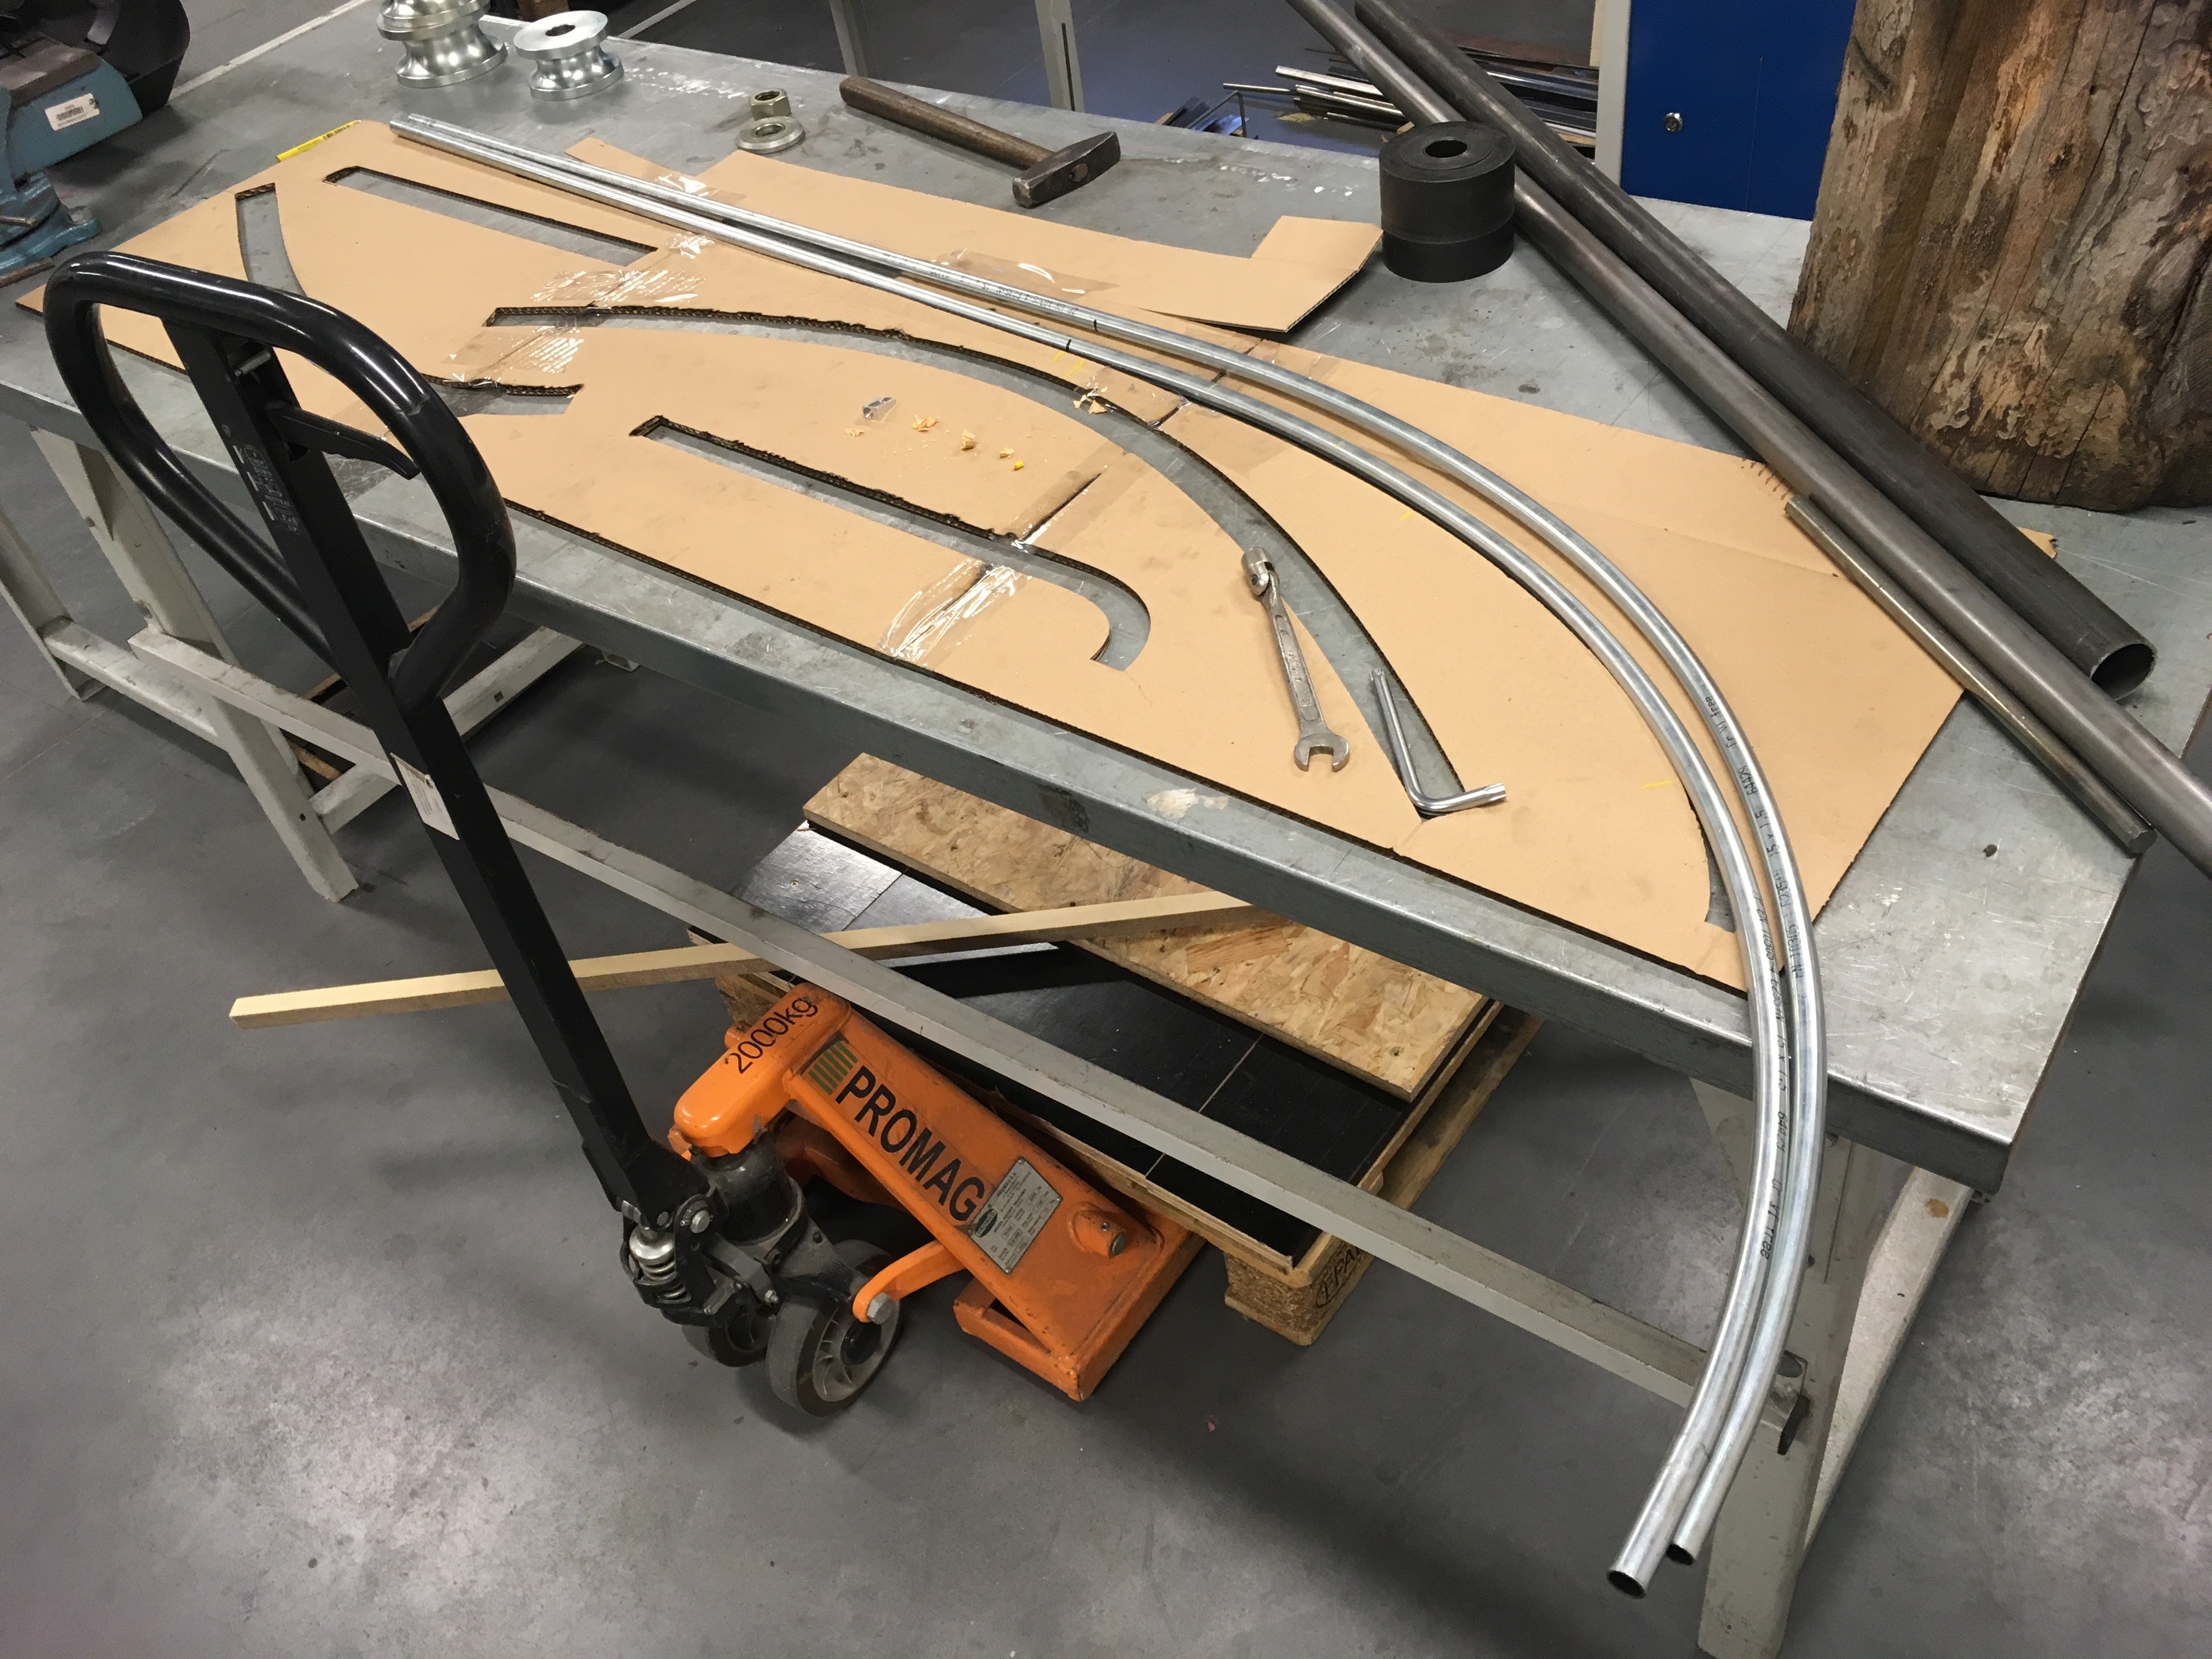
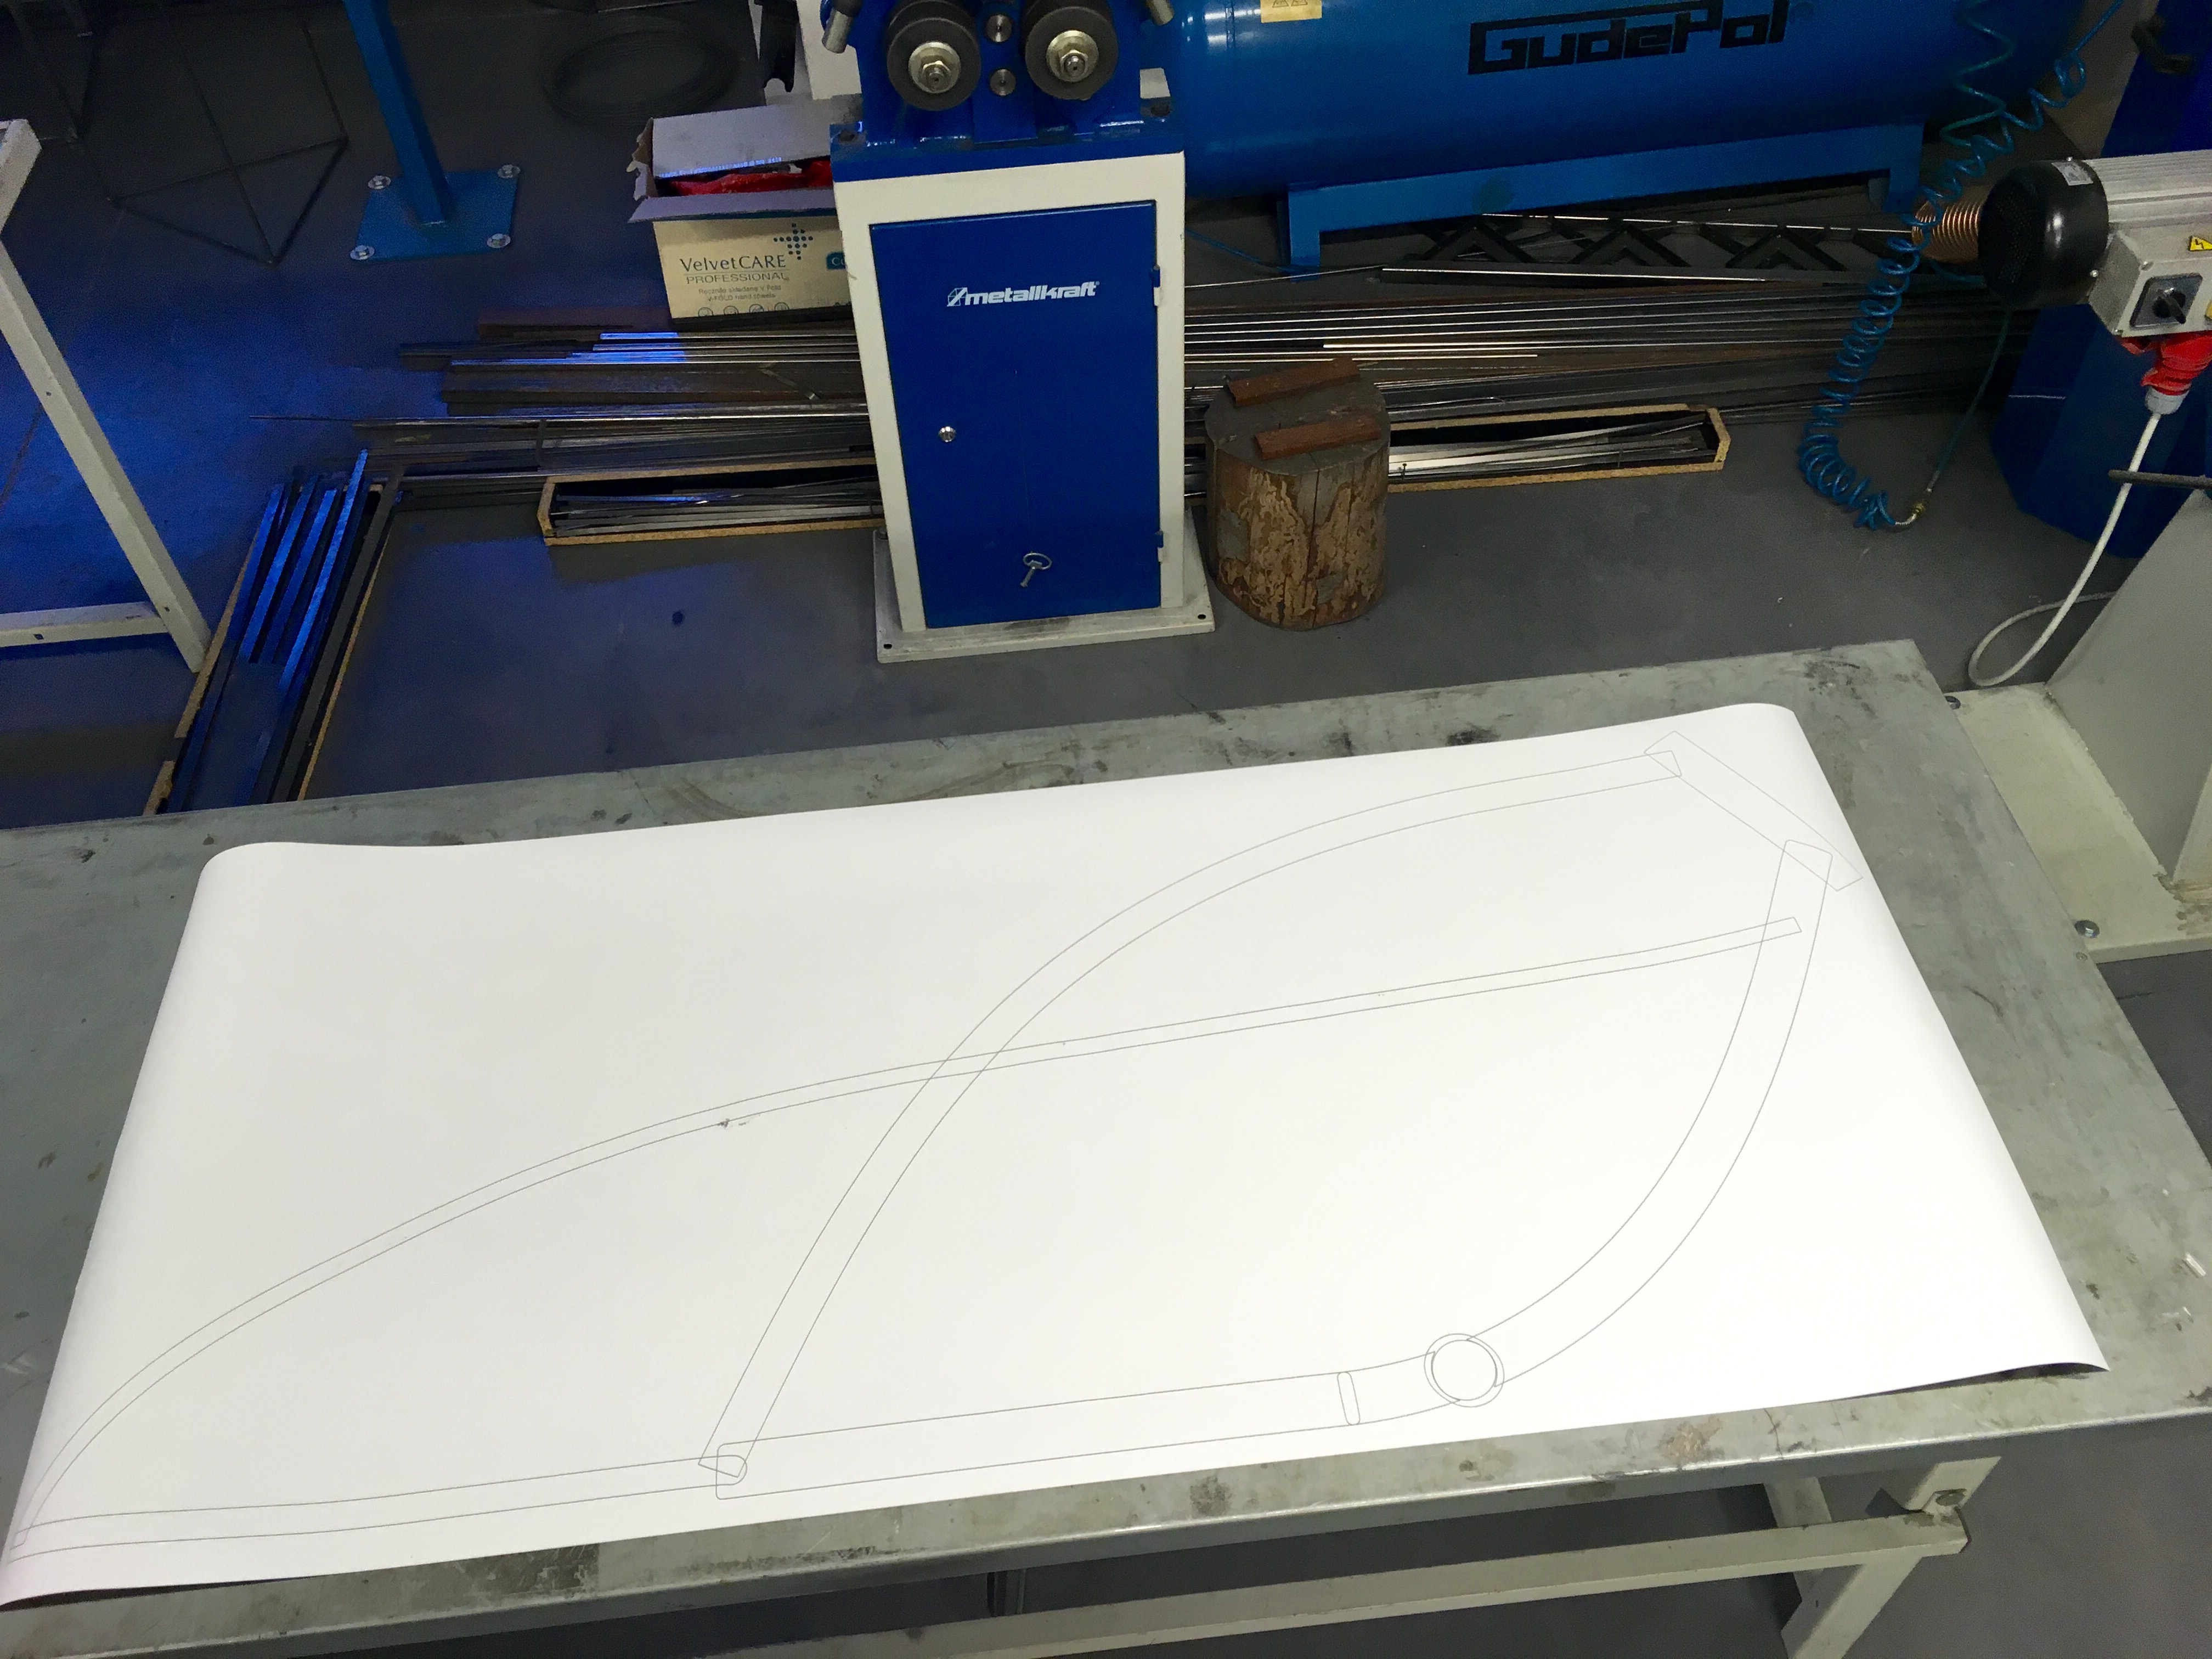
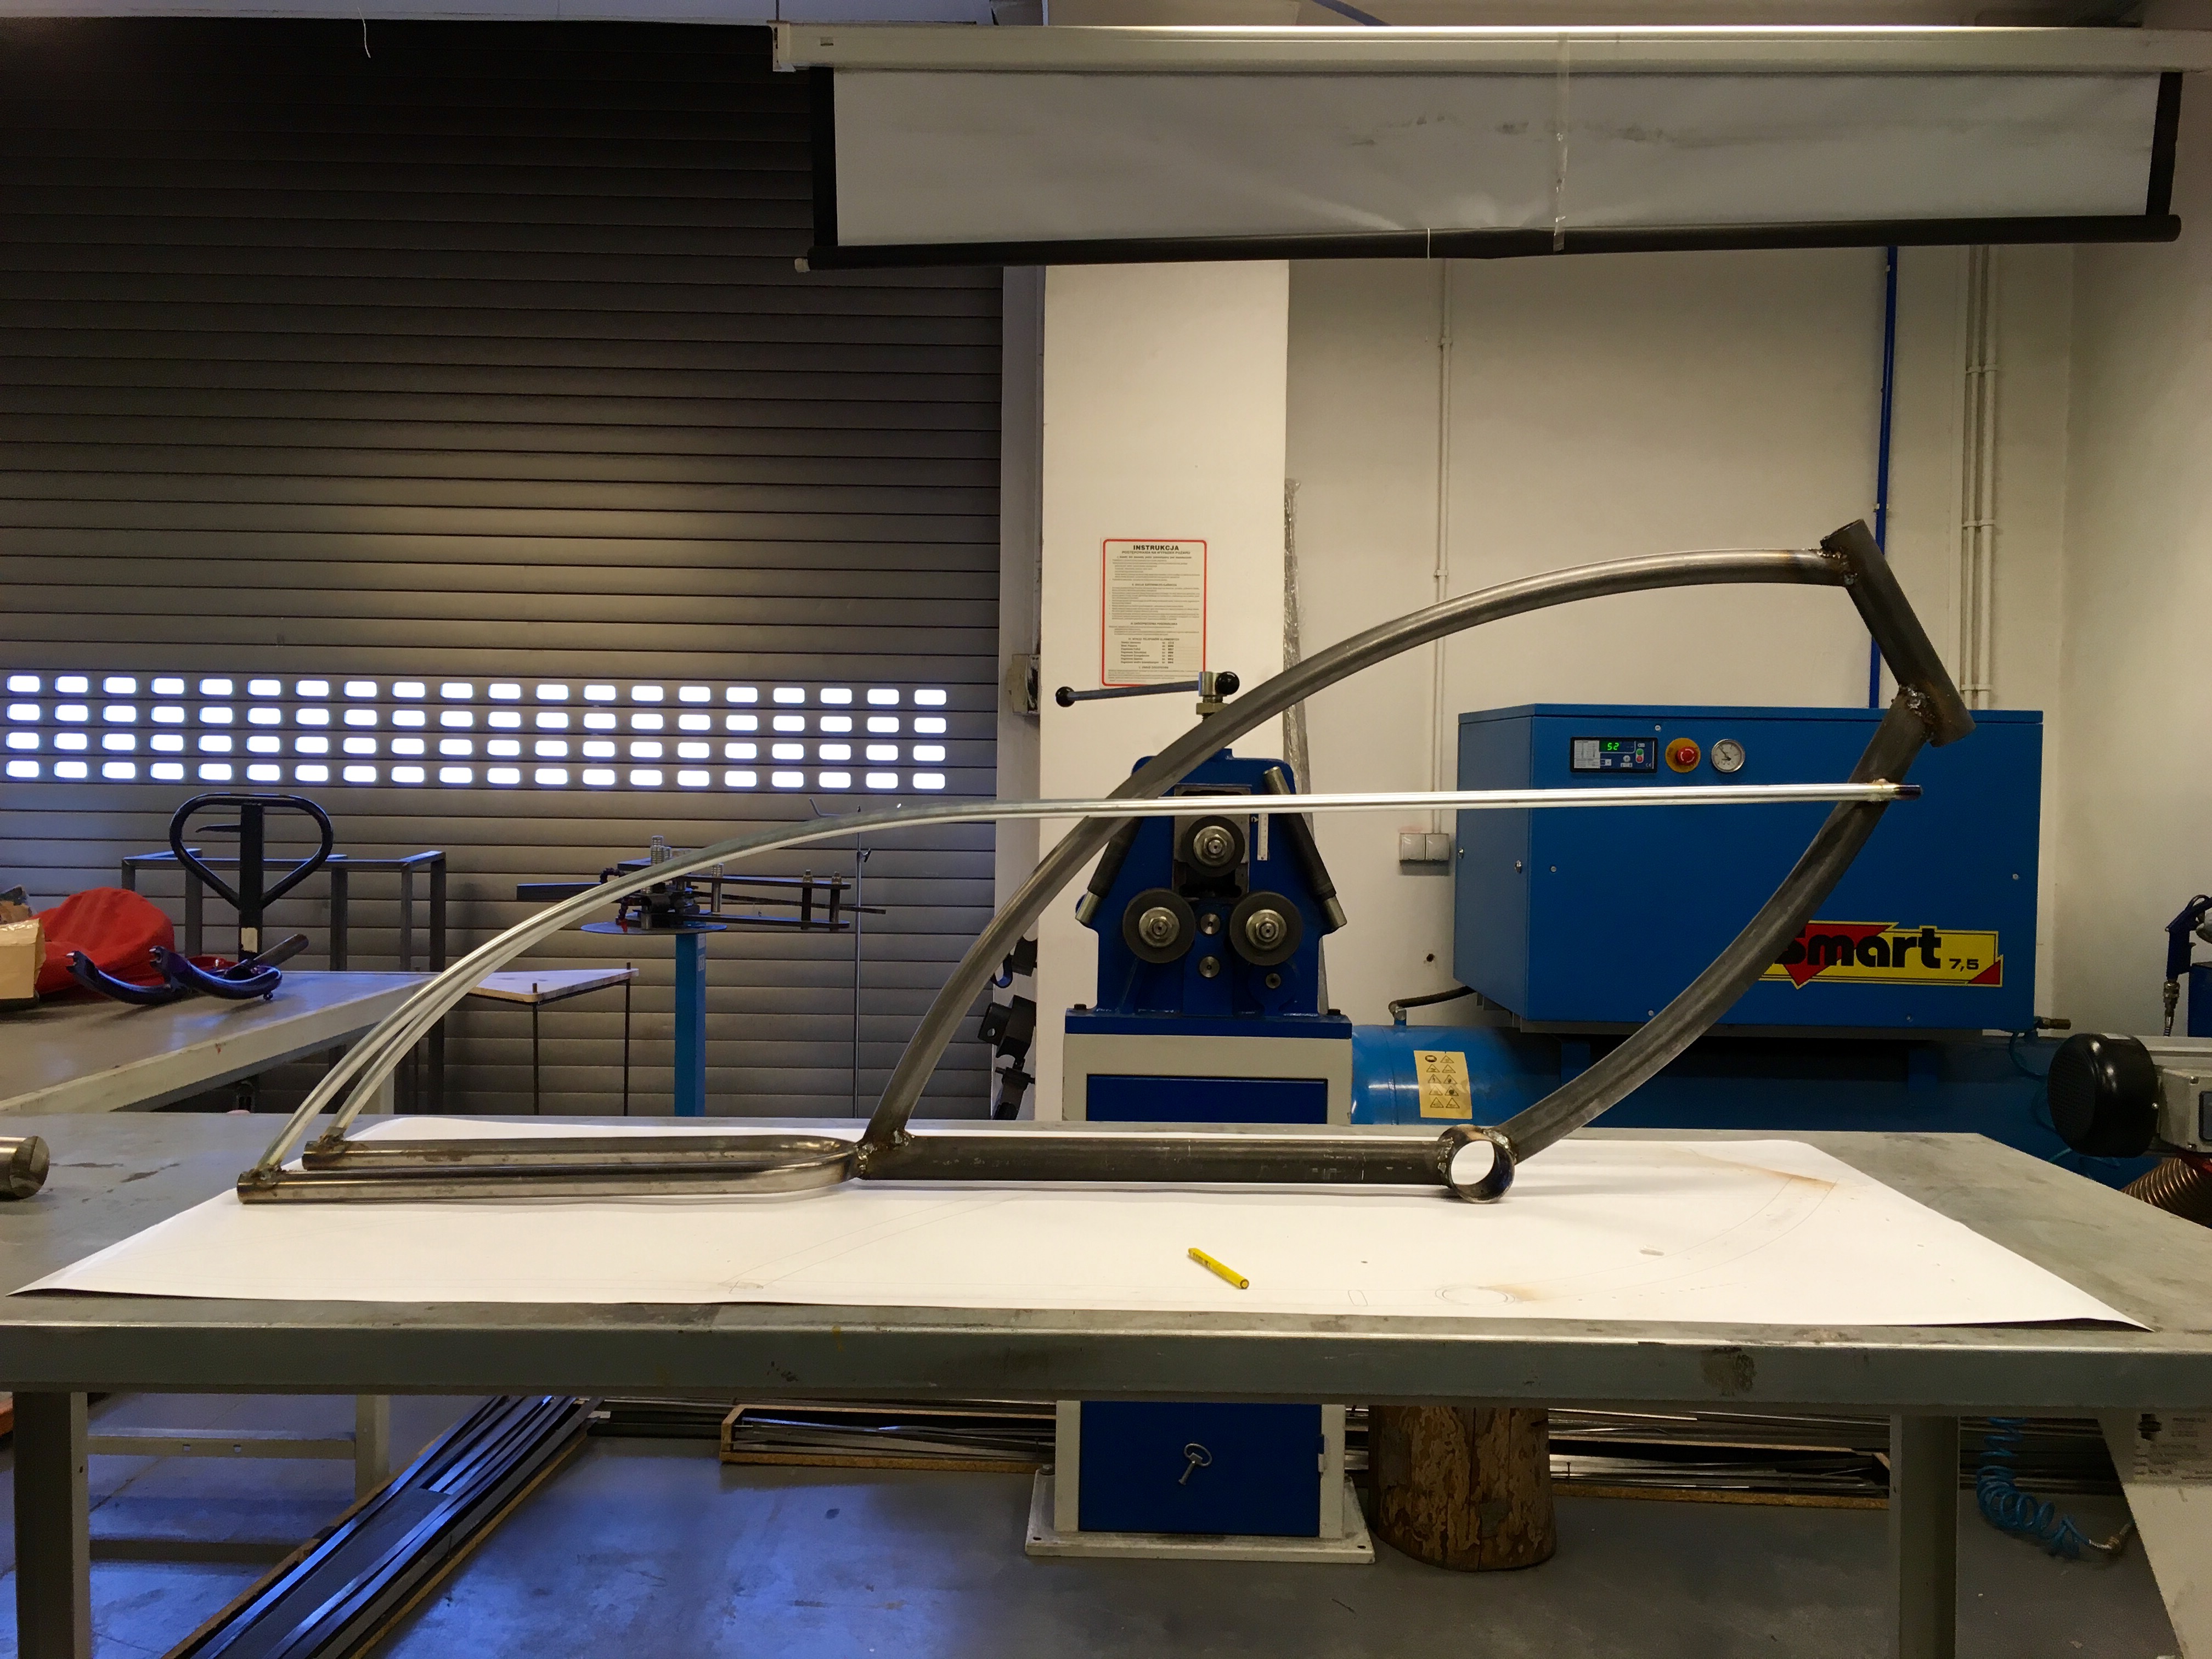
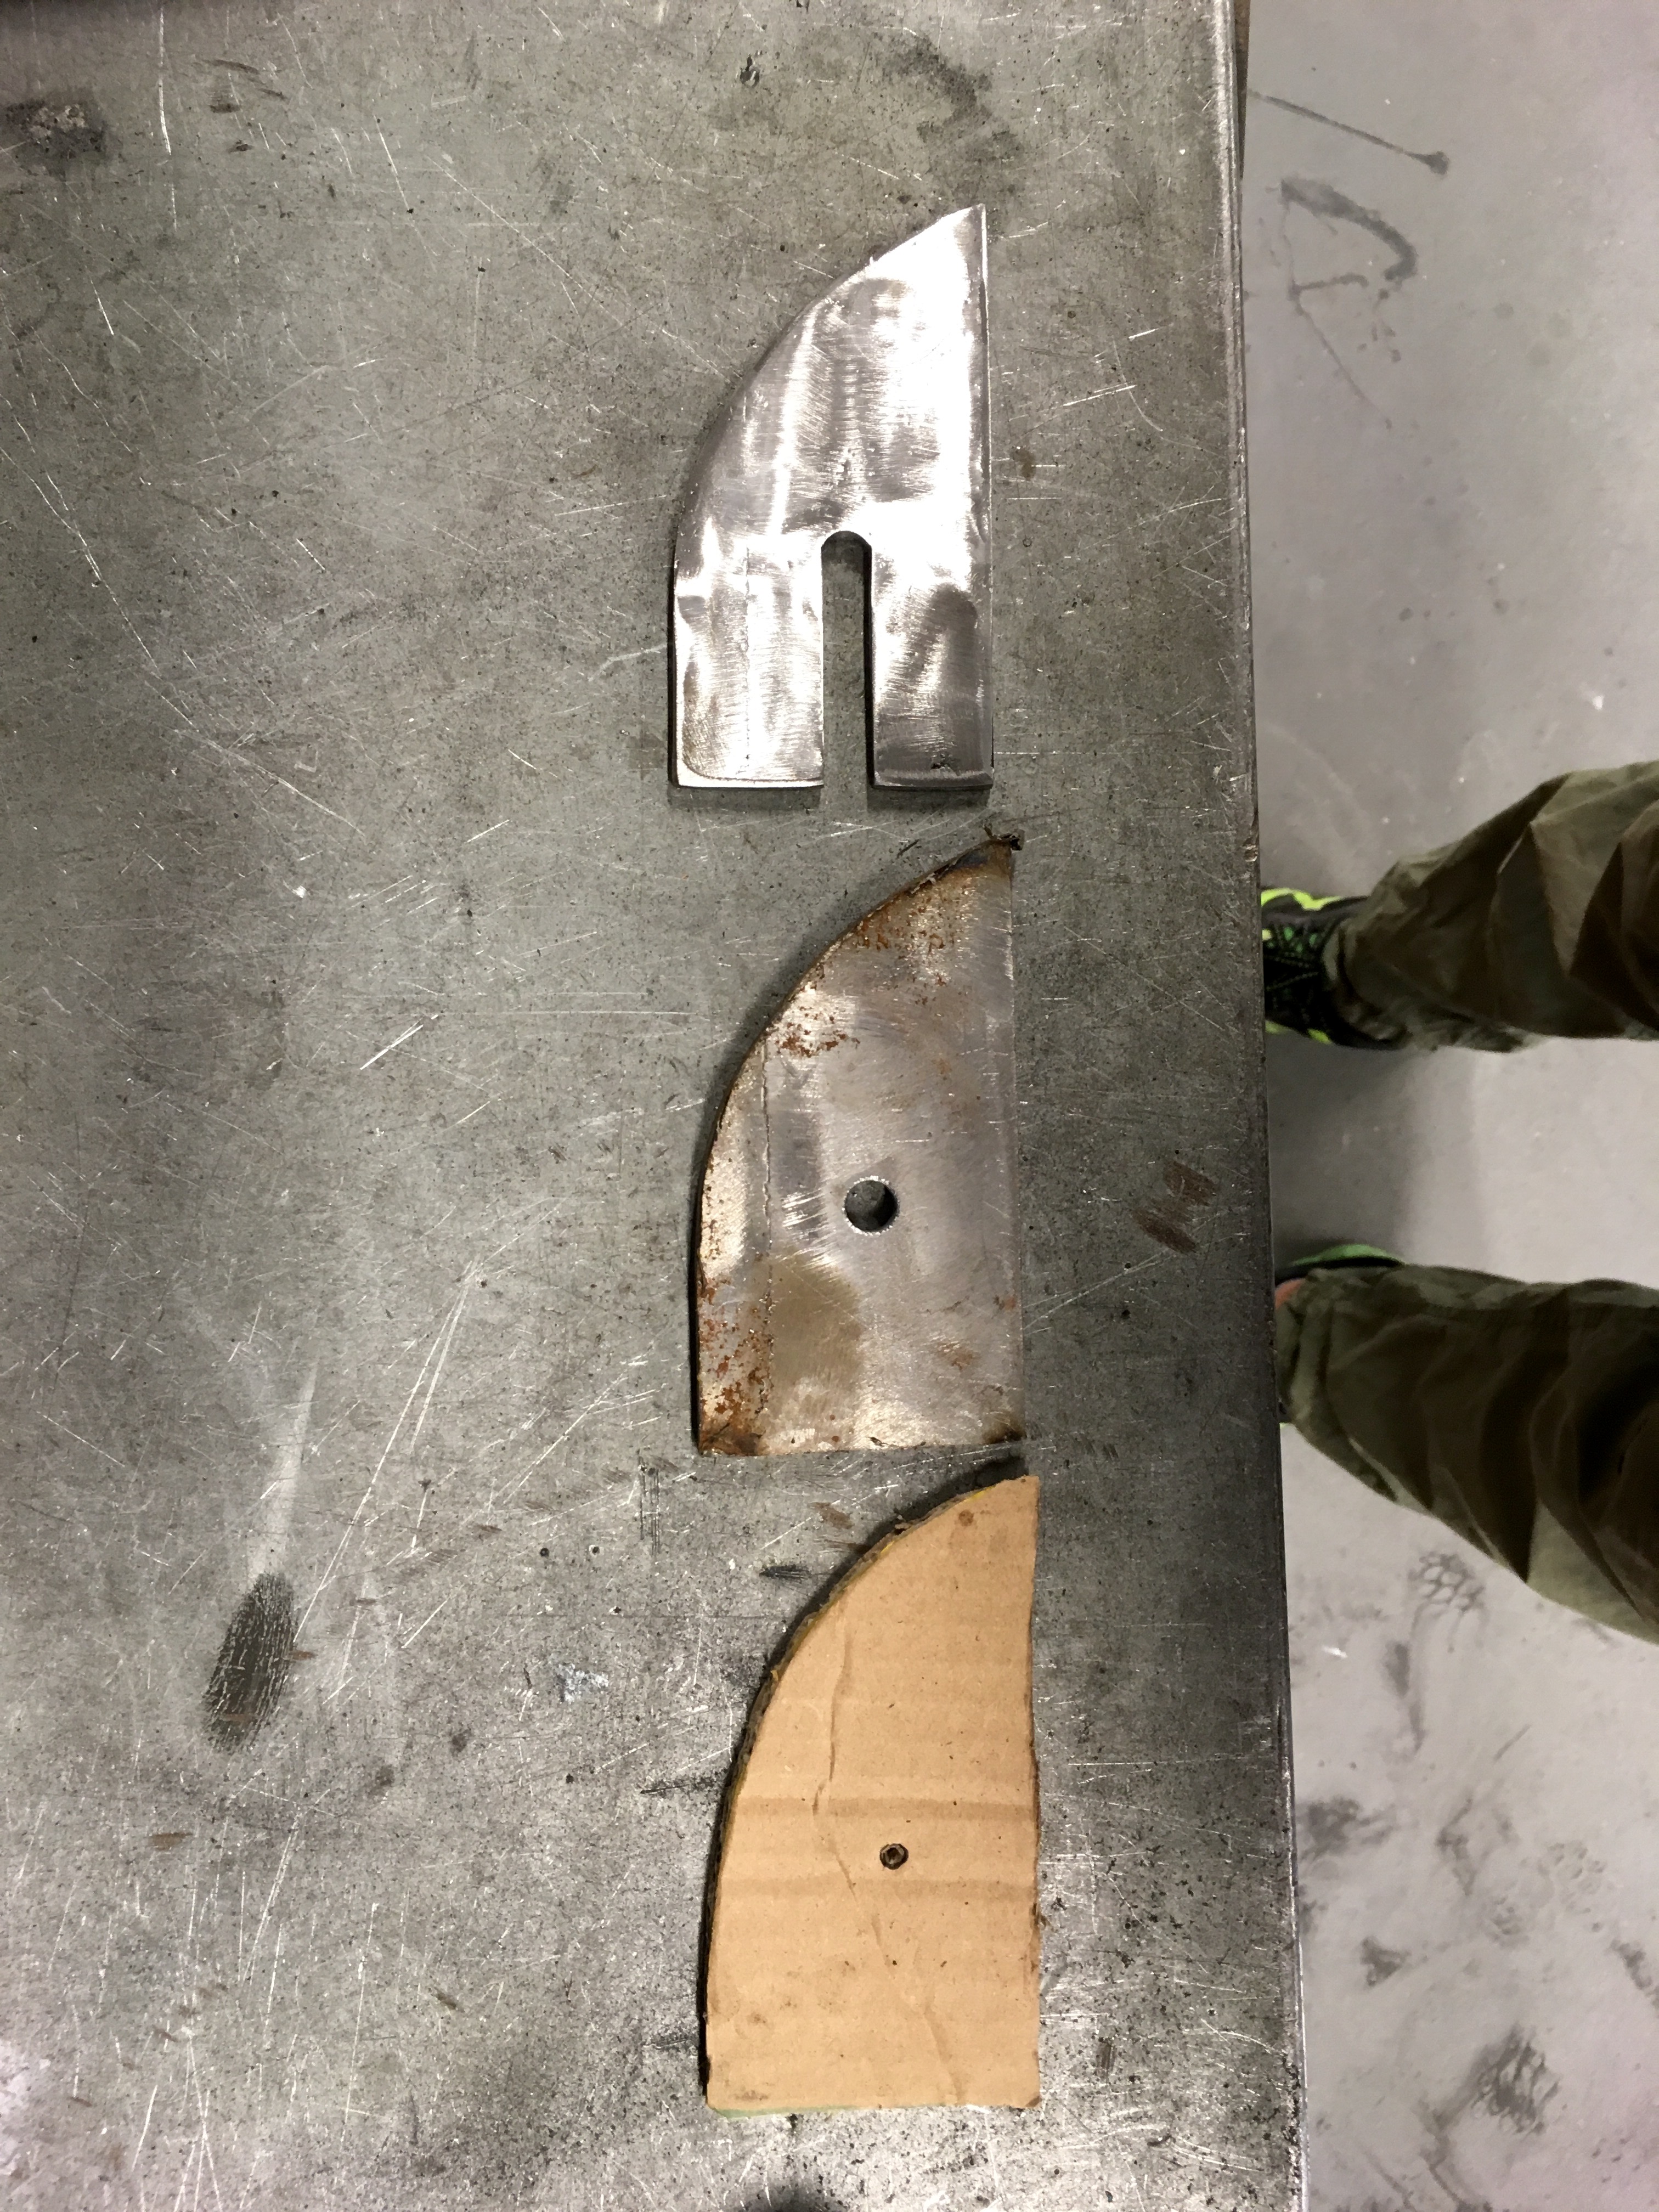
I do not have a big plotter printer to print a bike in real scale, but i have a laser cutter at school, so i have made a templates from cardboard to bend my tubing with help of it:
2c0a110cc4527a7fb933c9abadb682c0.jpg

62628029e87761033a9d01948bccac29.jpg

5674ecd5b1cbf71164f720c3fd991072.jpg


Some cardboard caught a fire in the process, but i had some water close by luckily :)
a8dae095d3a314cee896620e69363c38.jpg


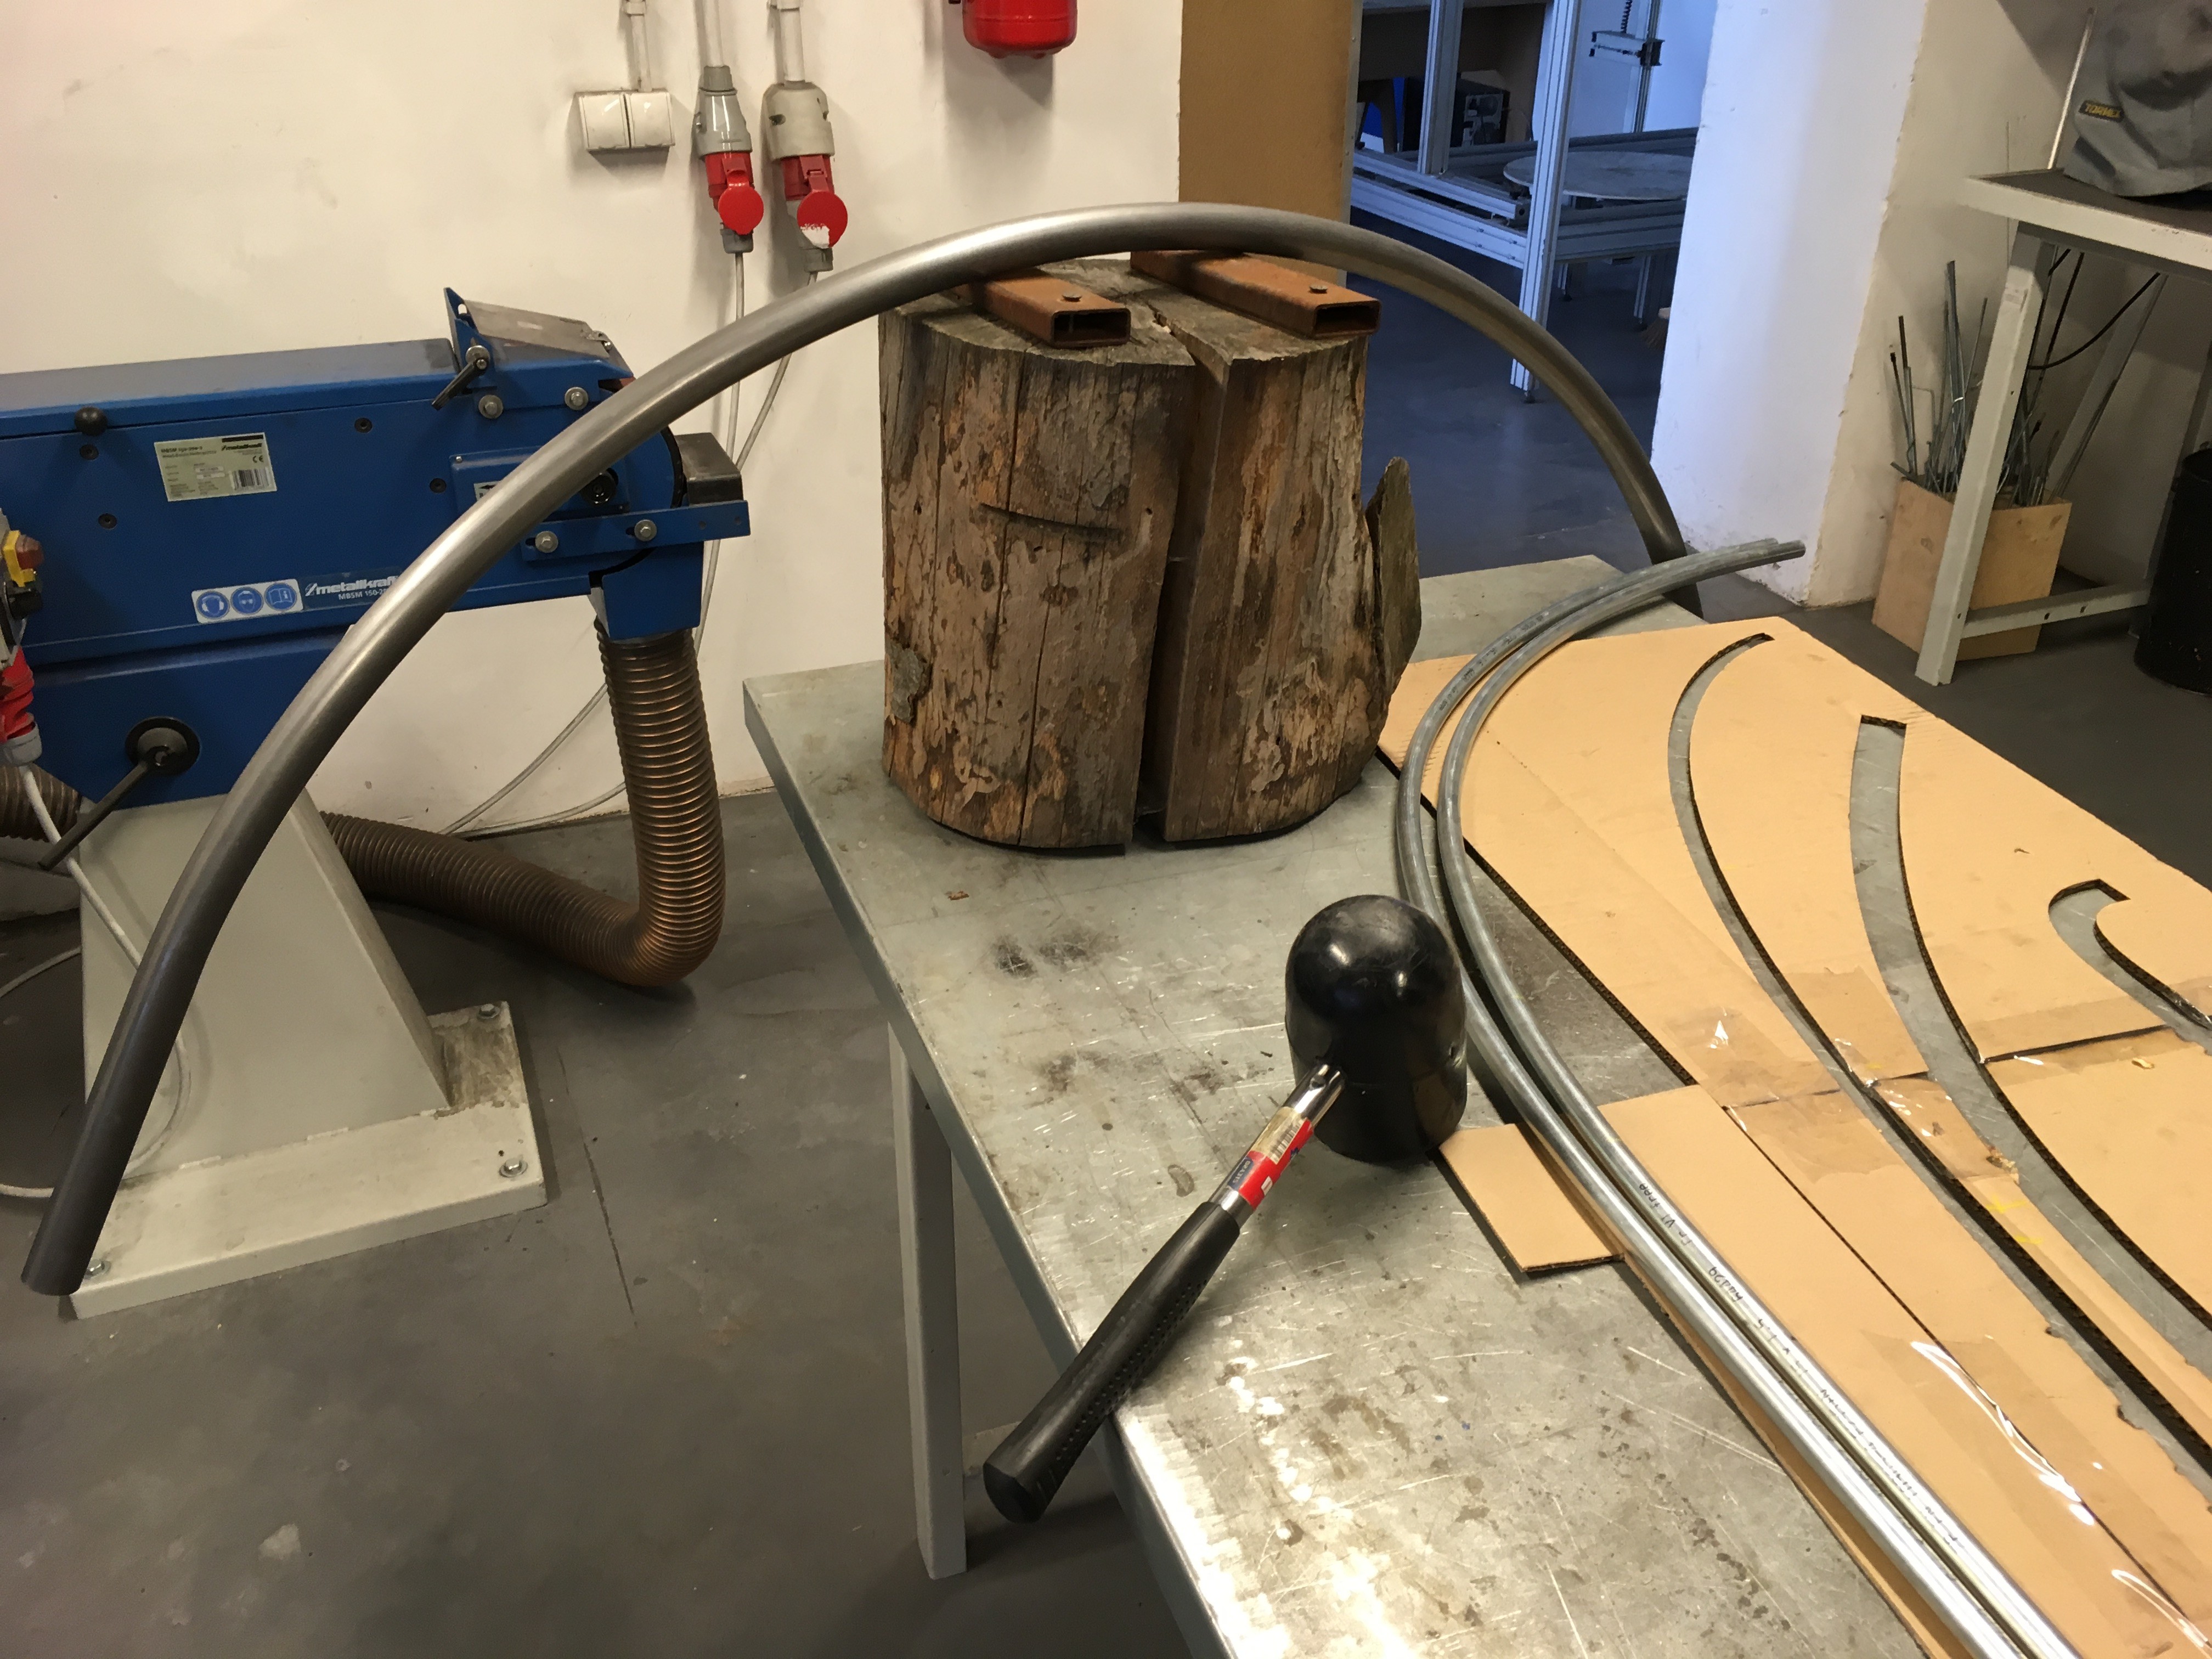
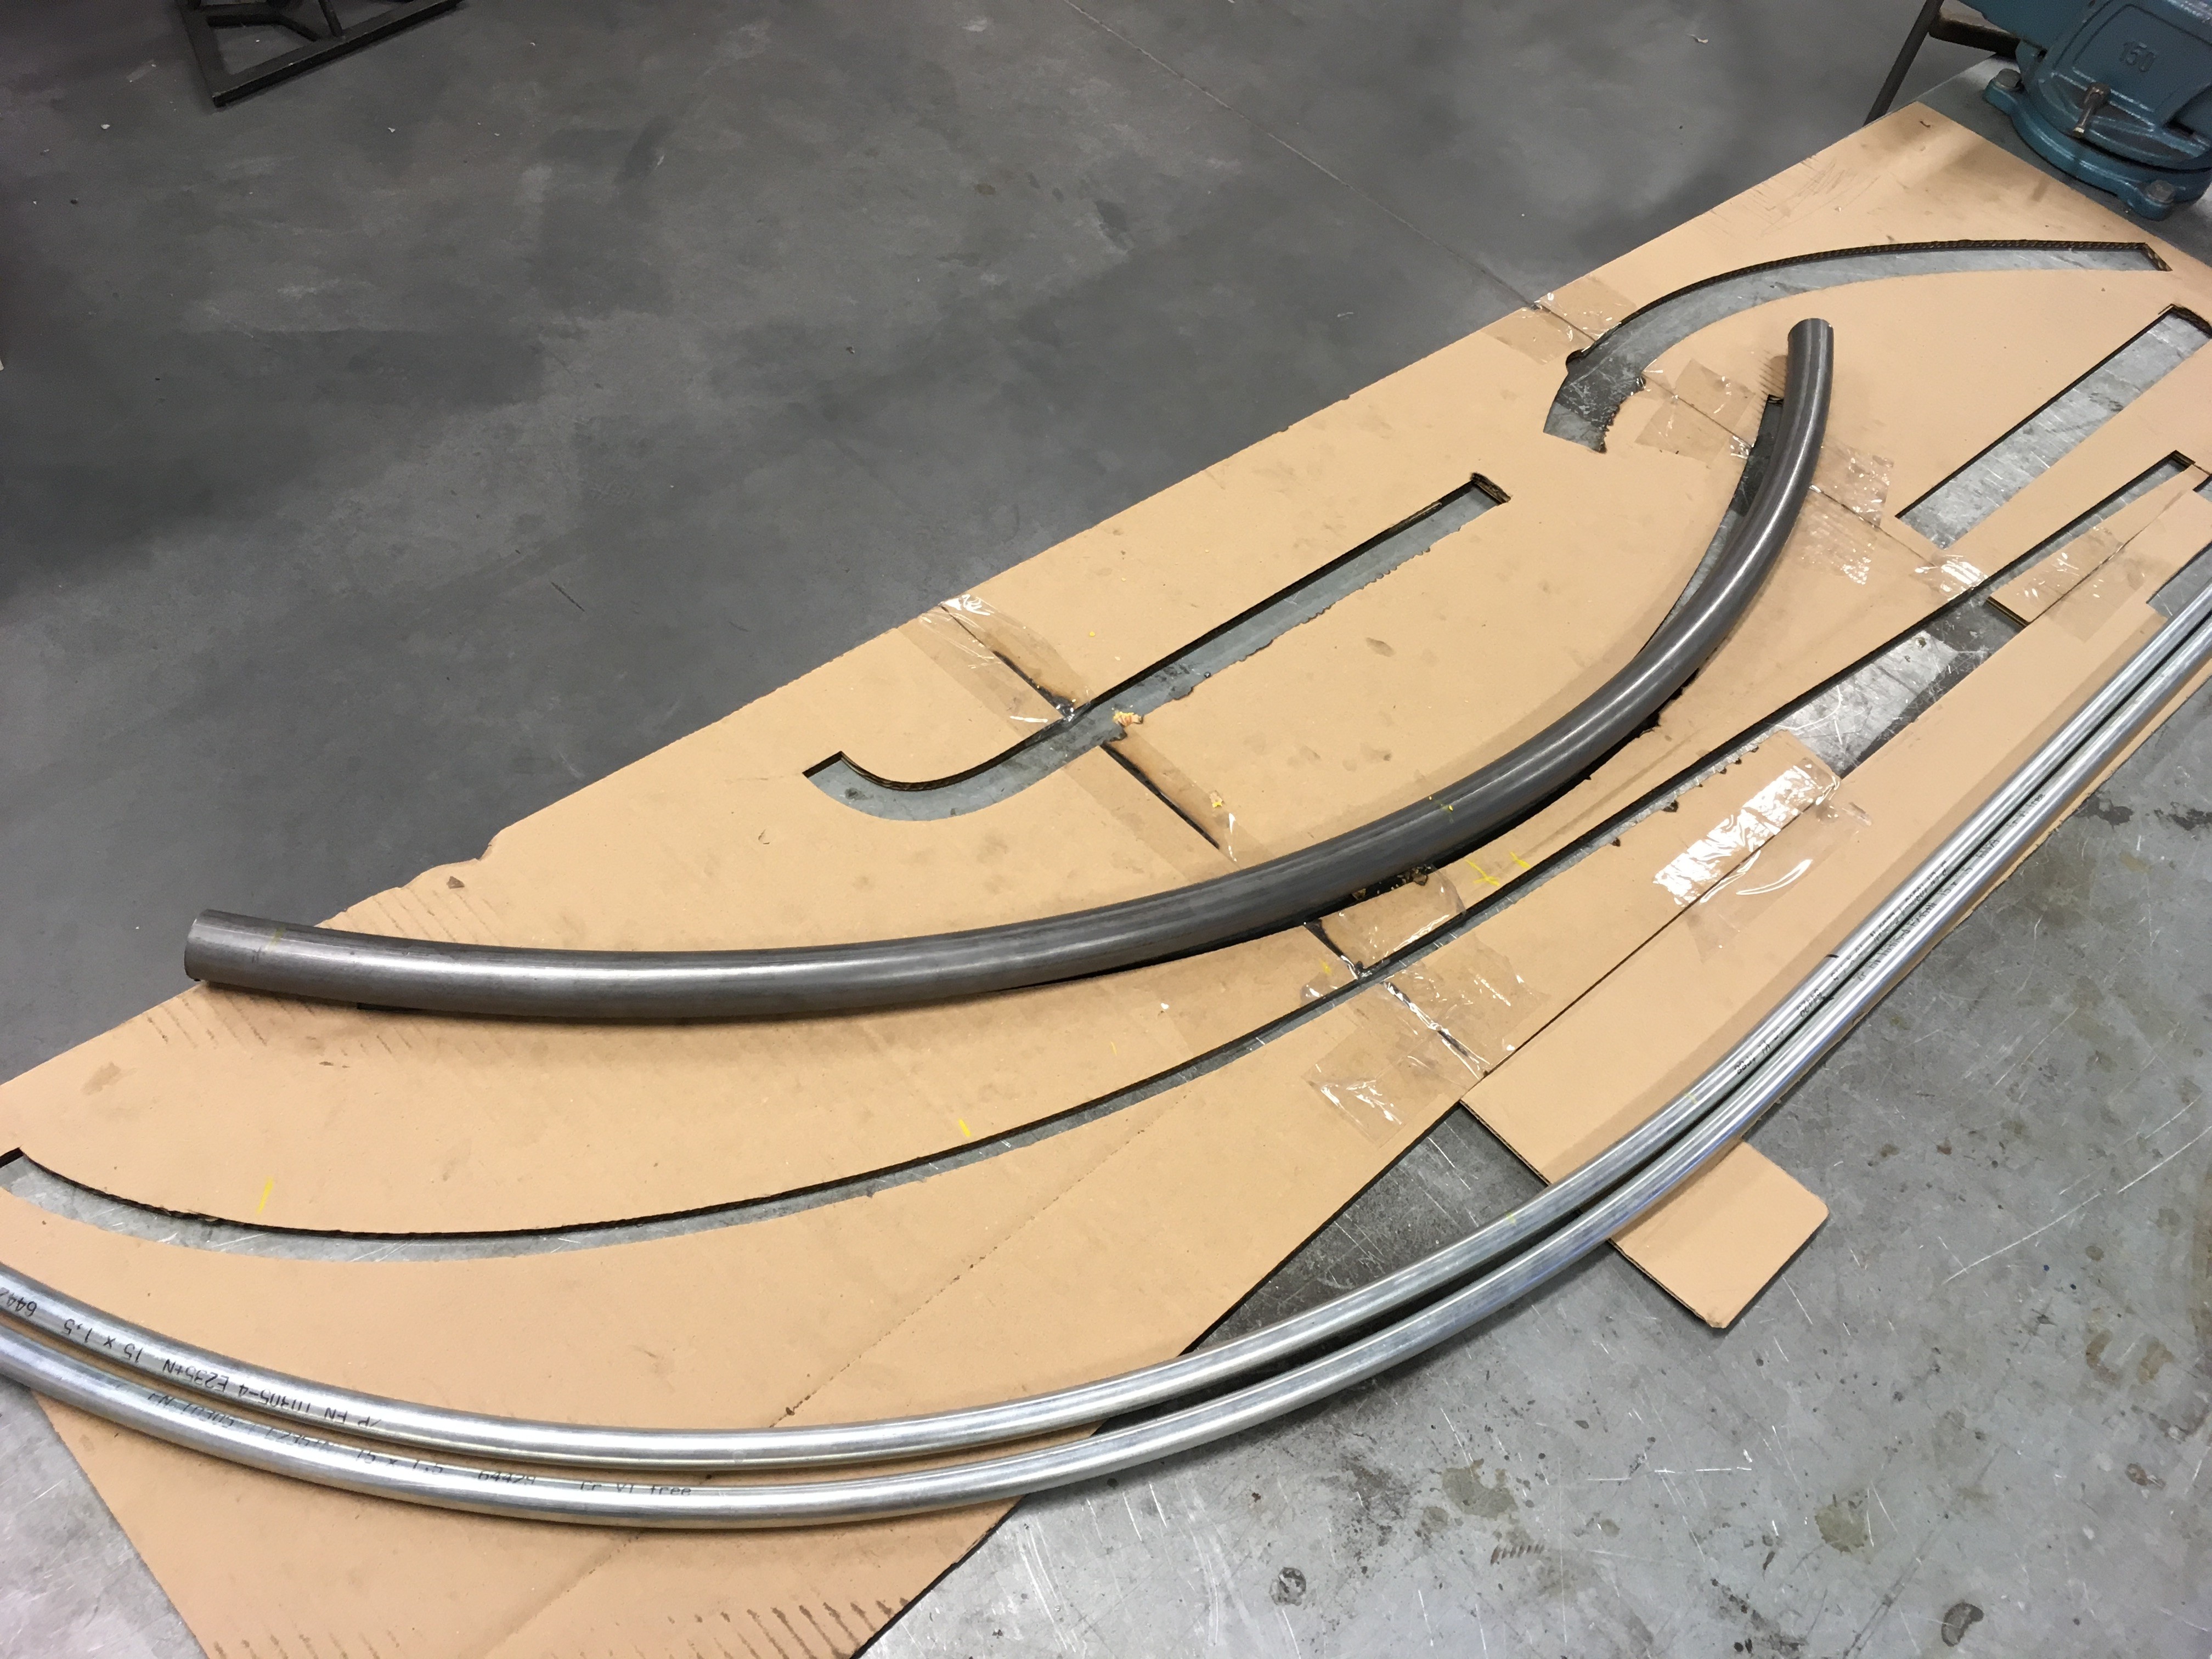
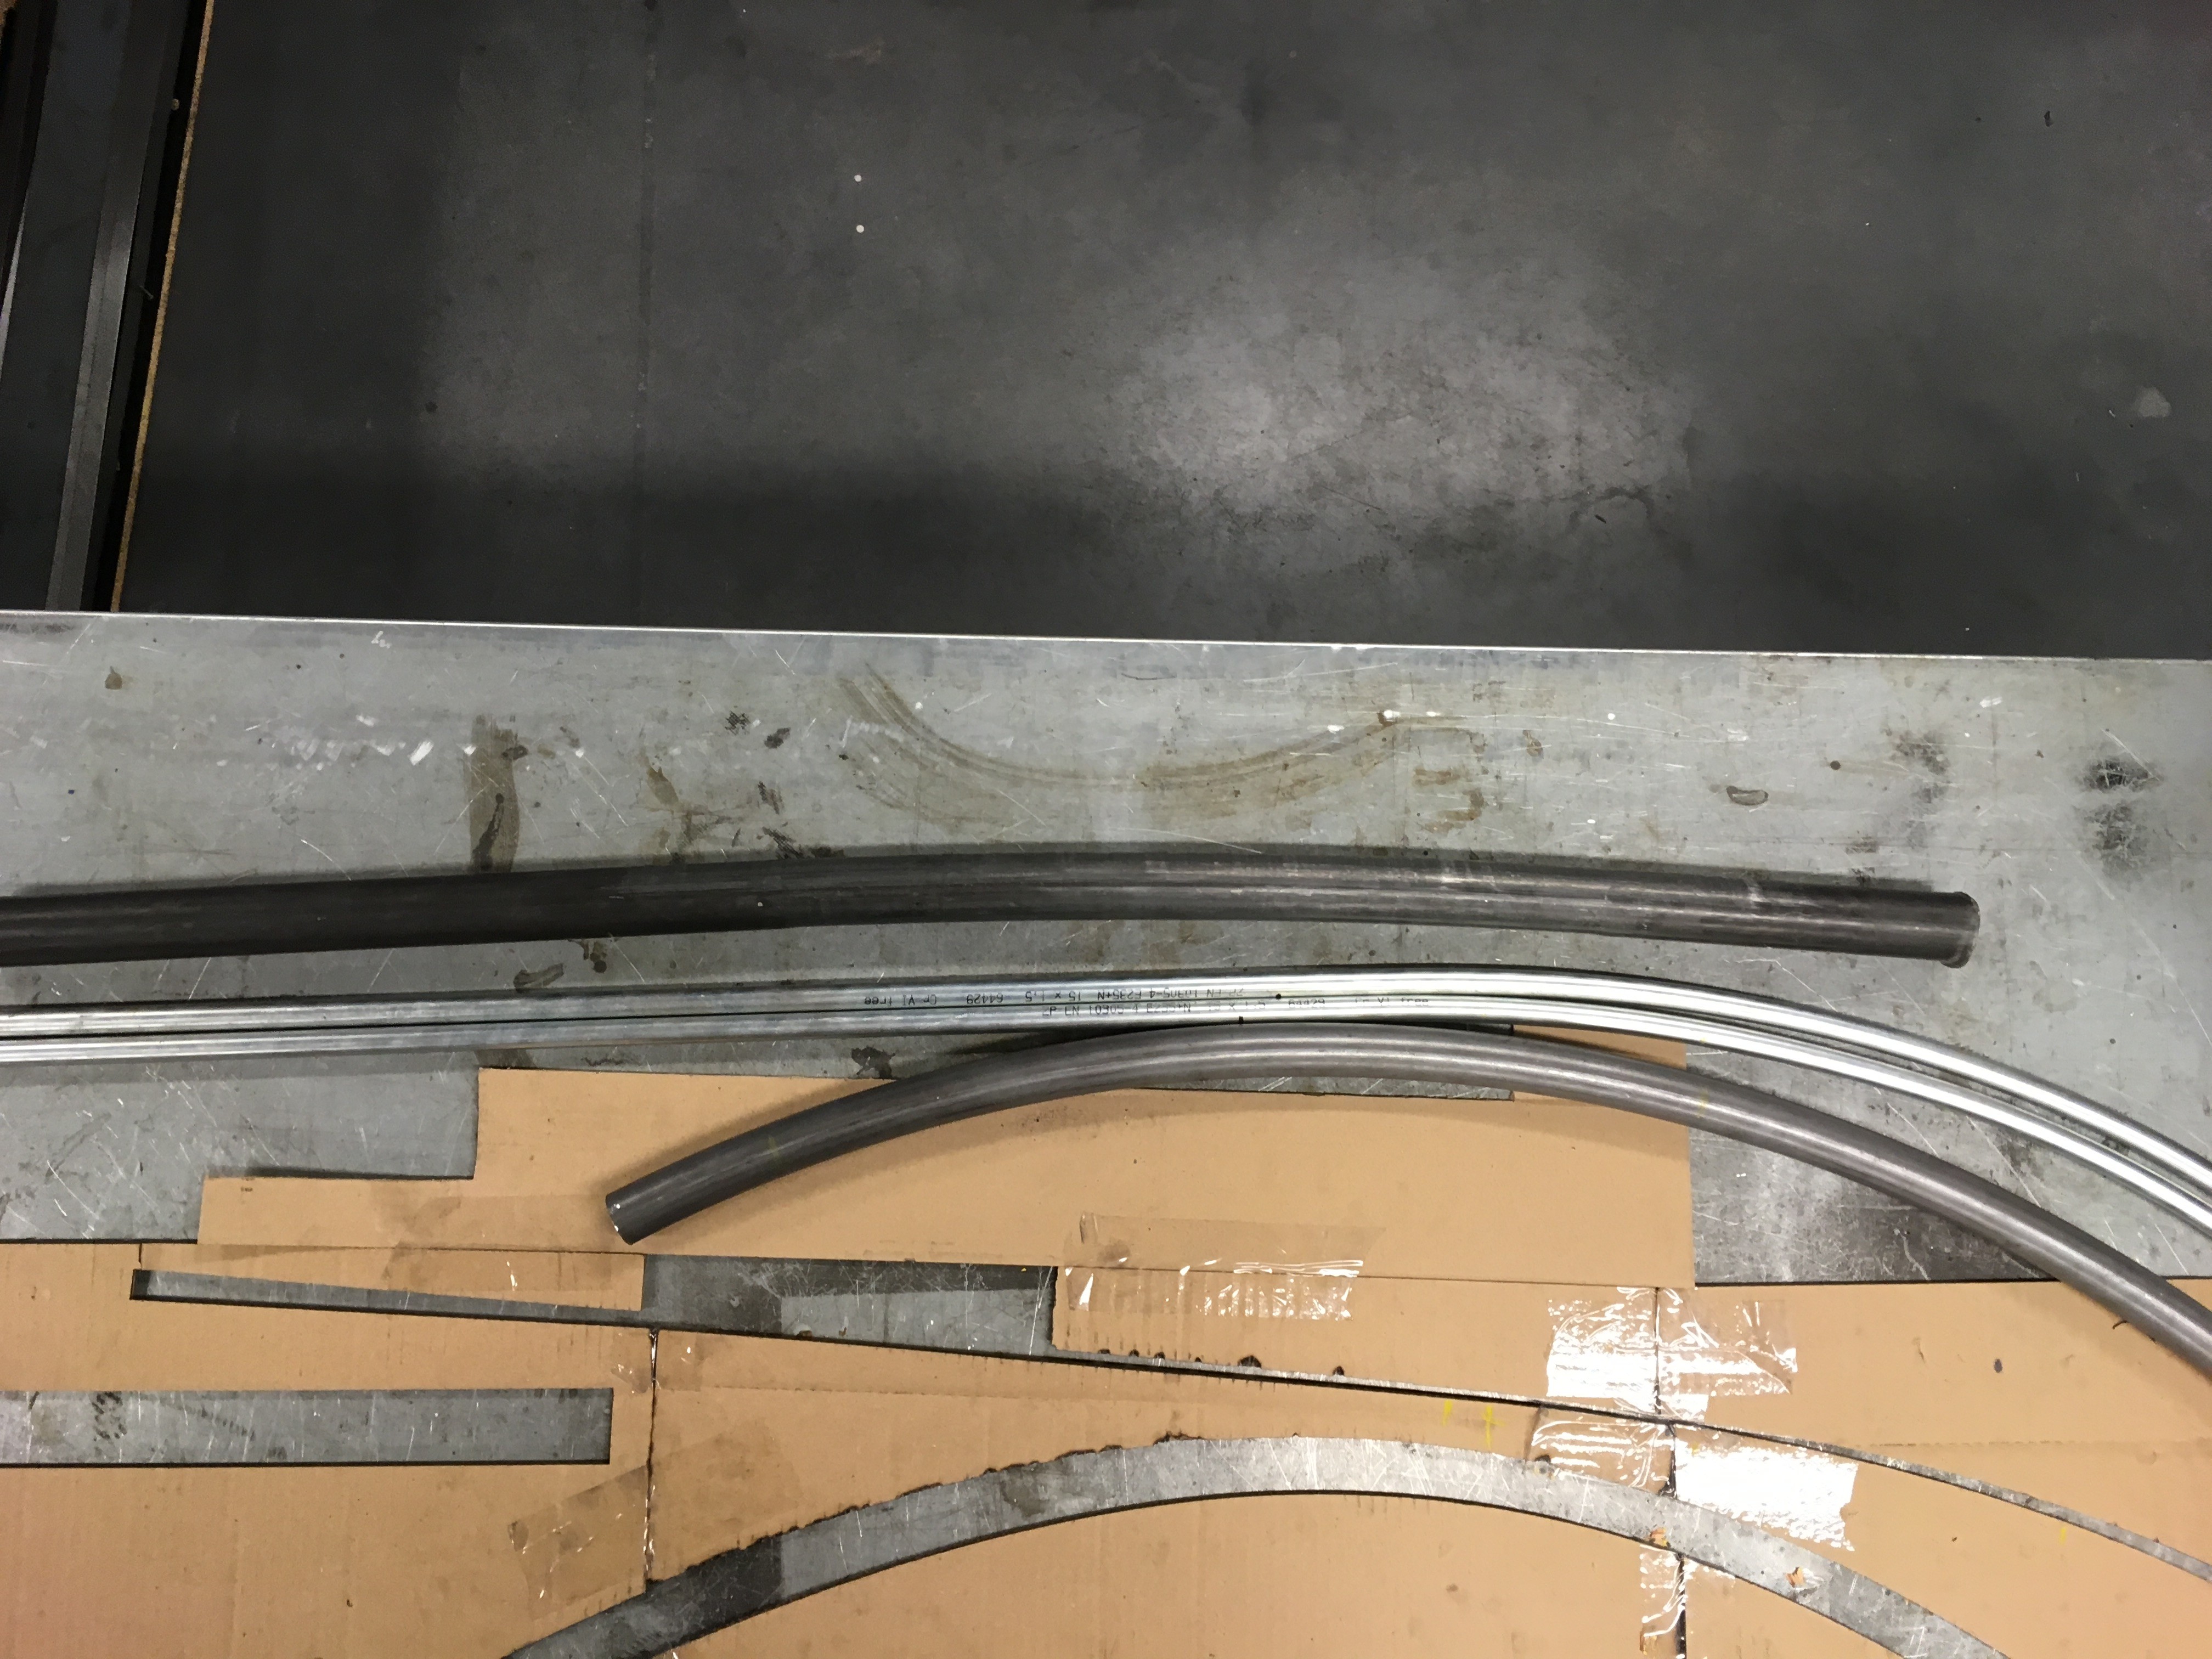
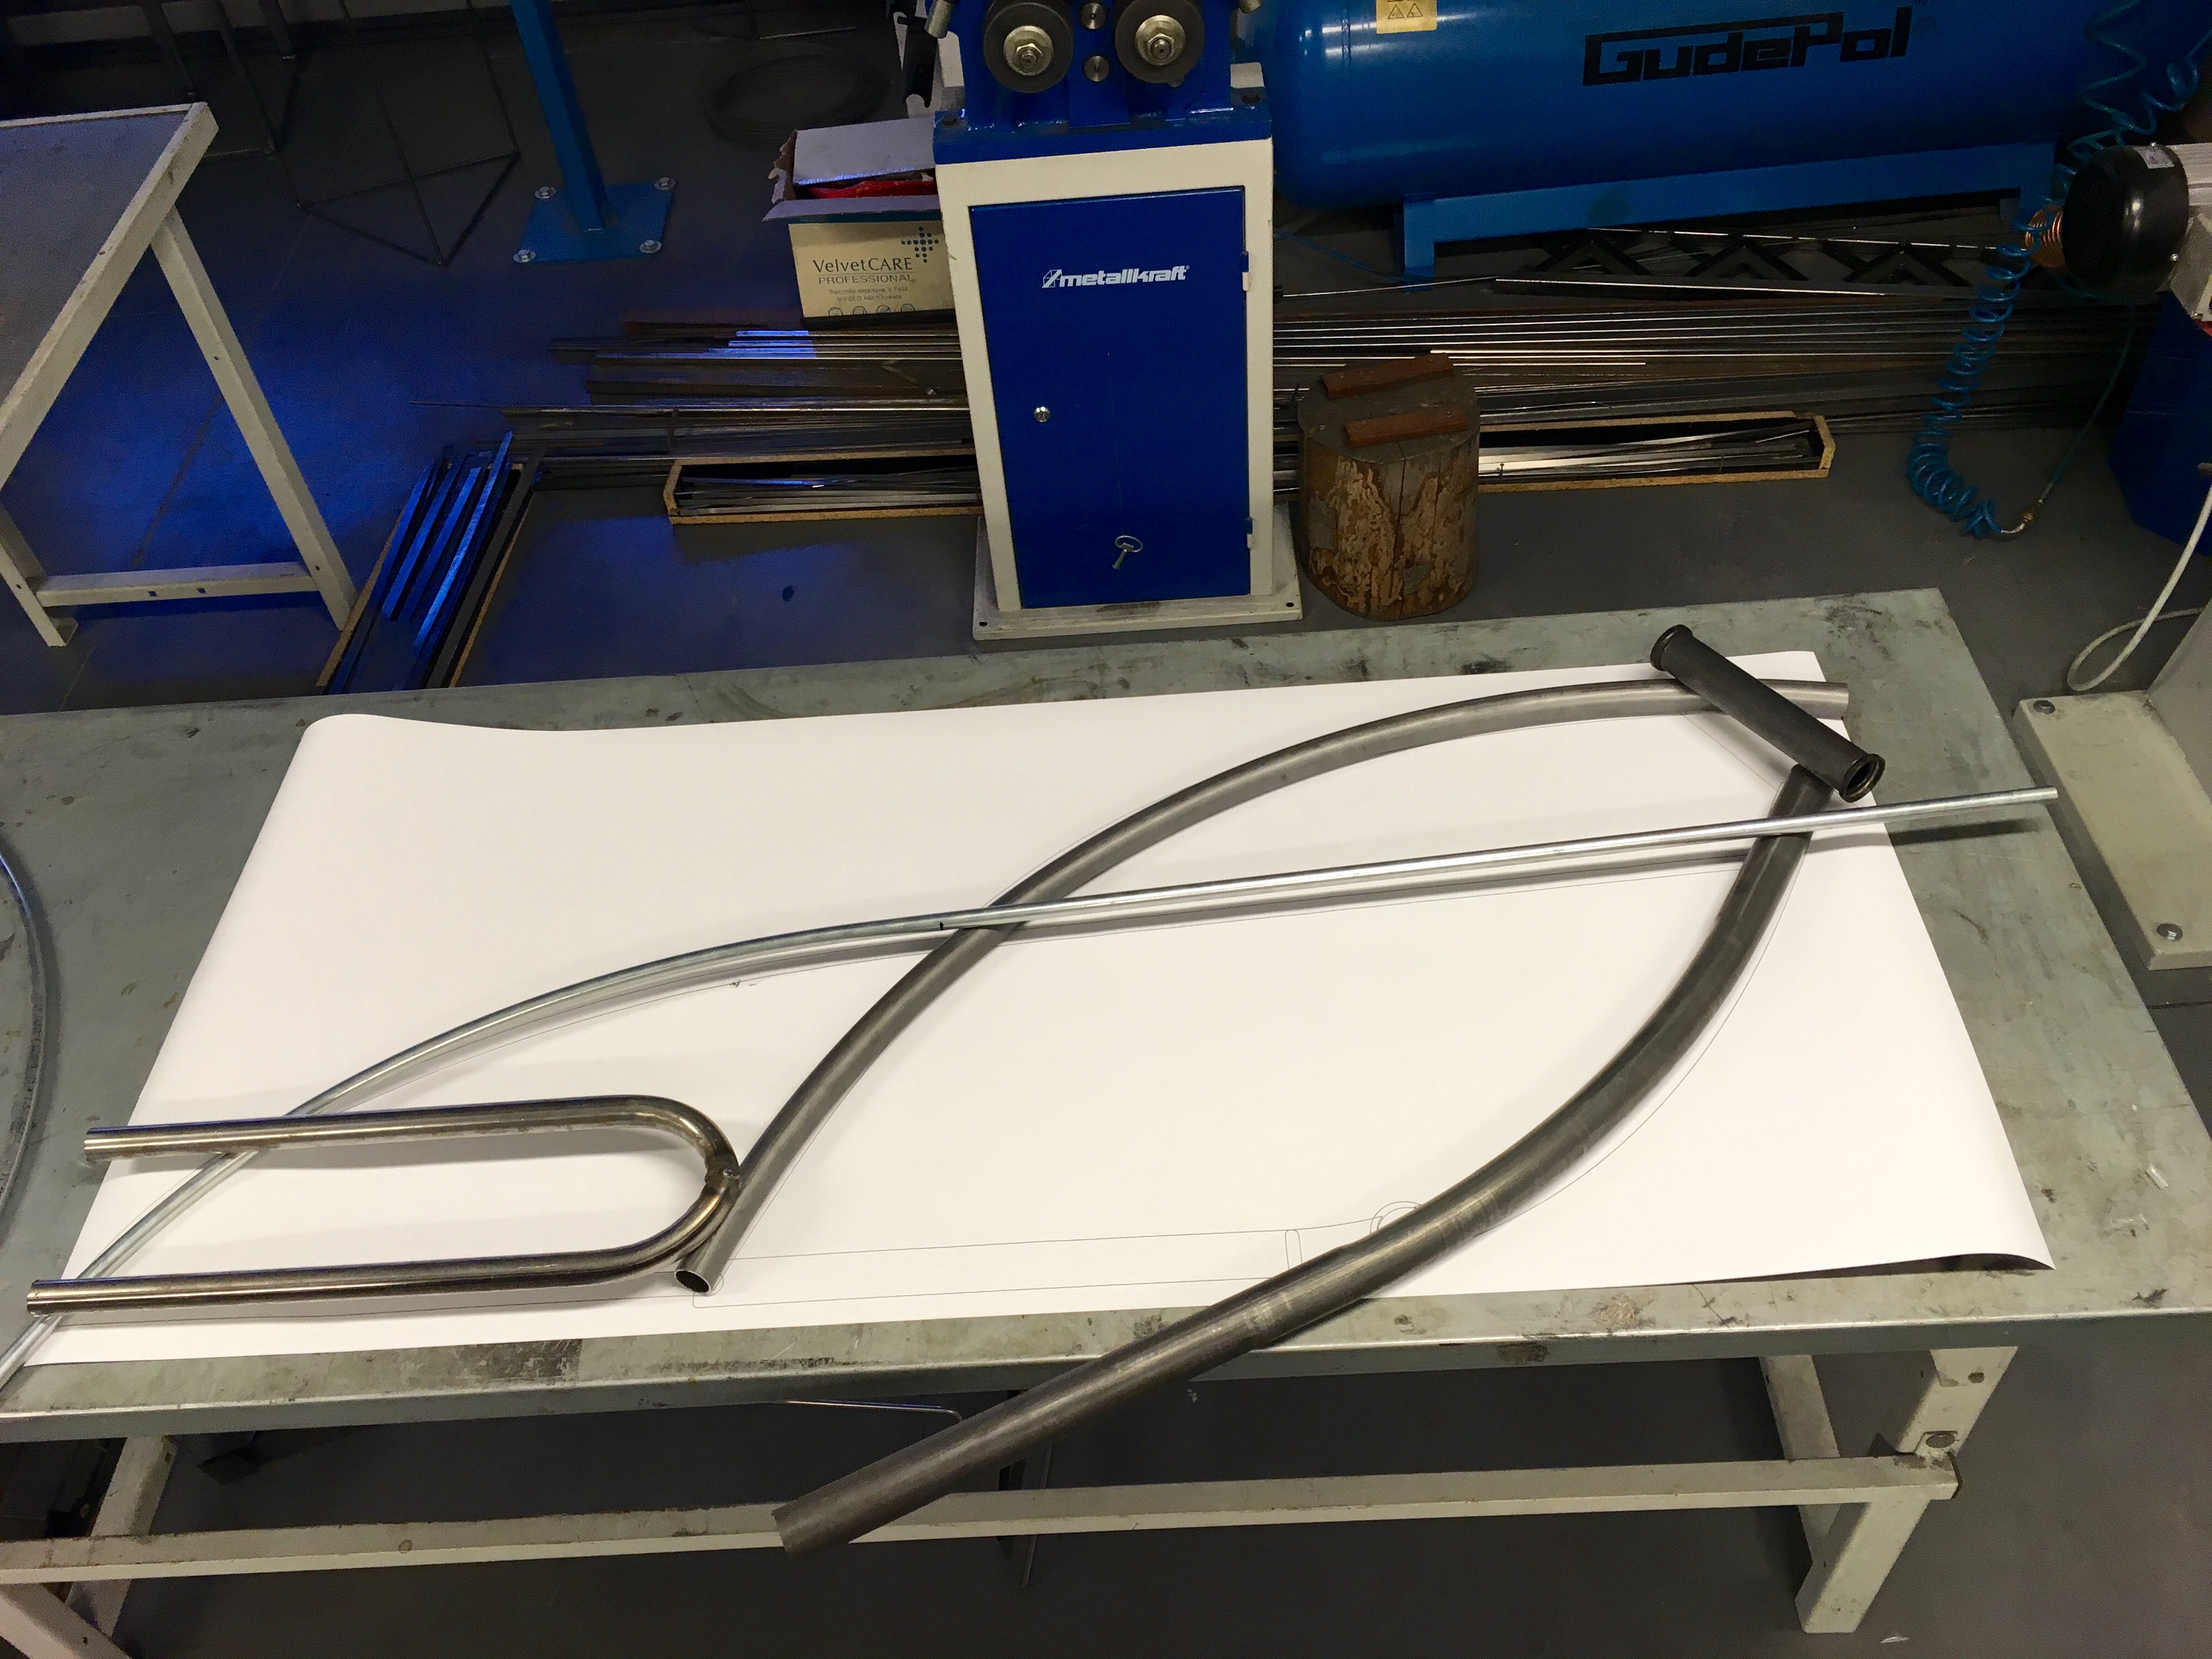
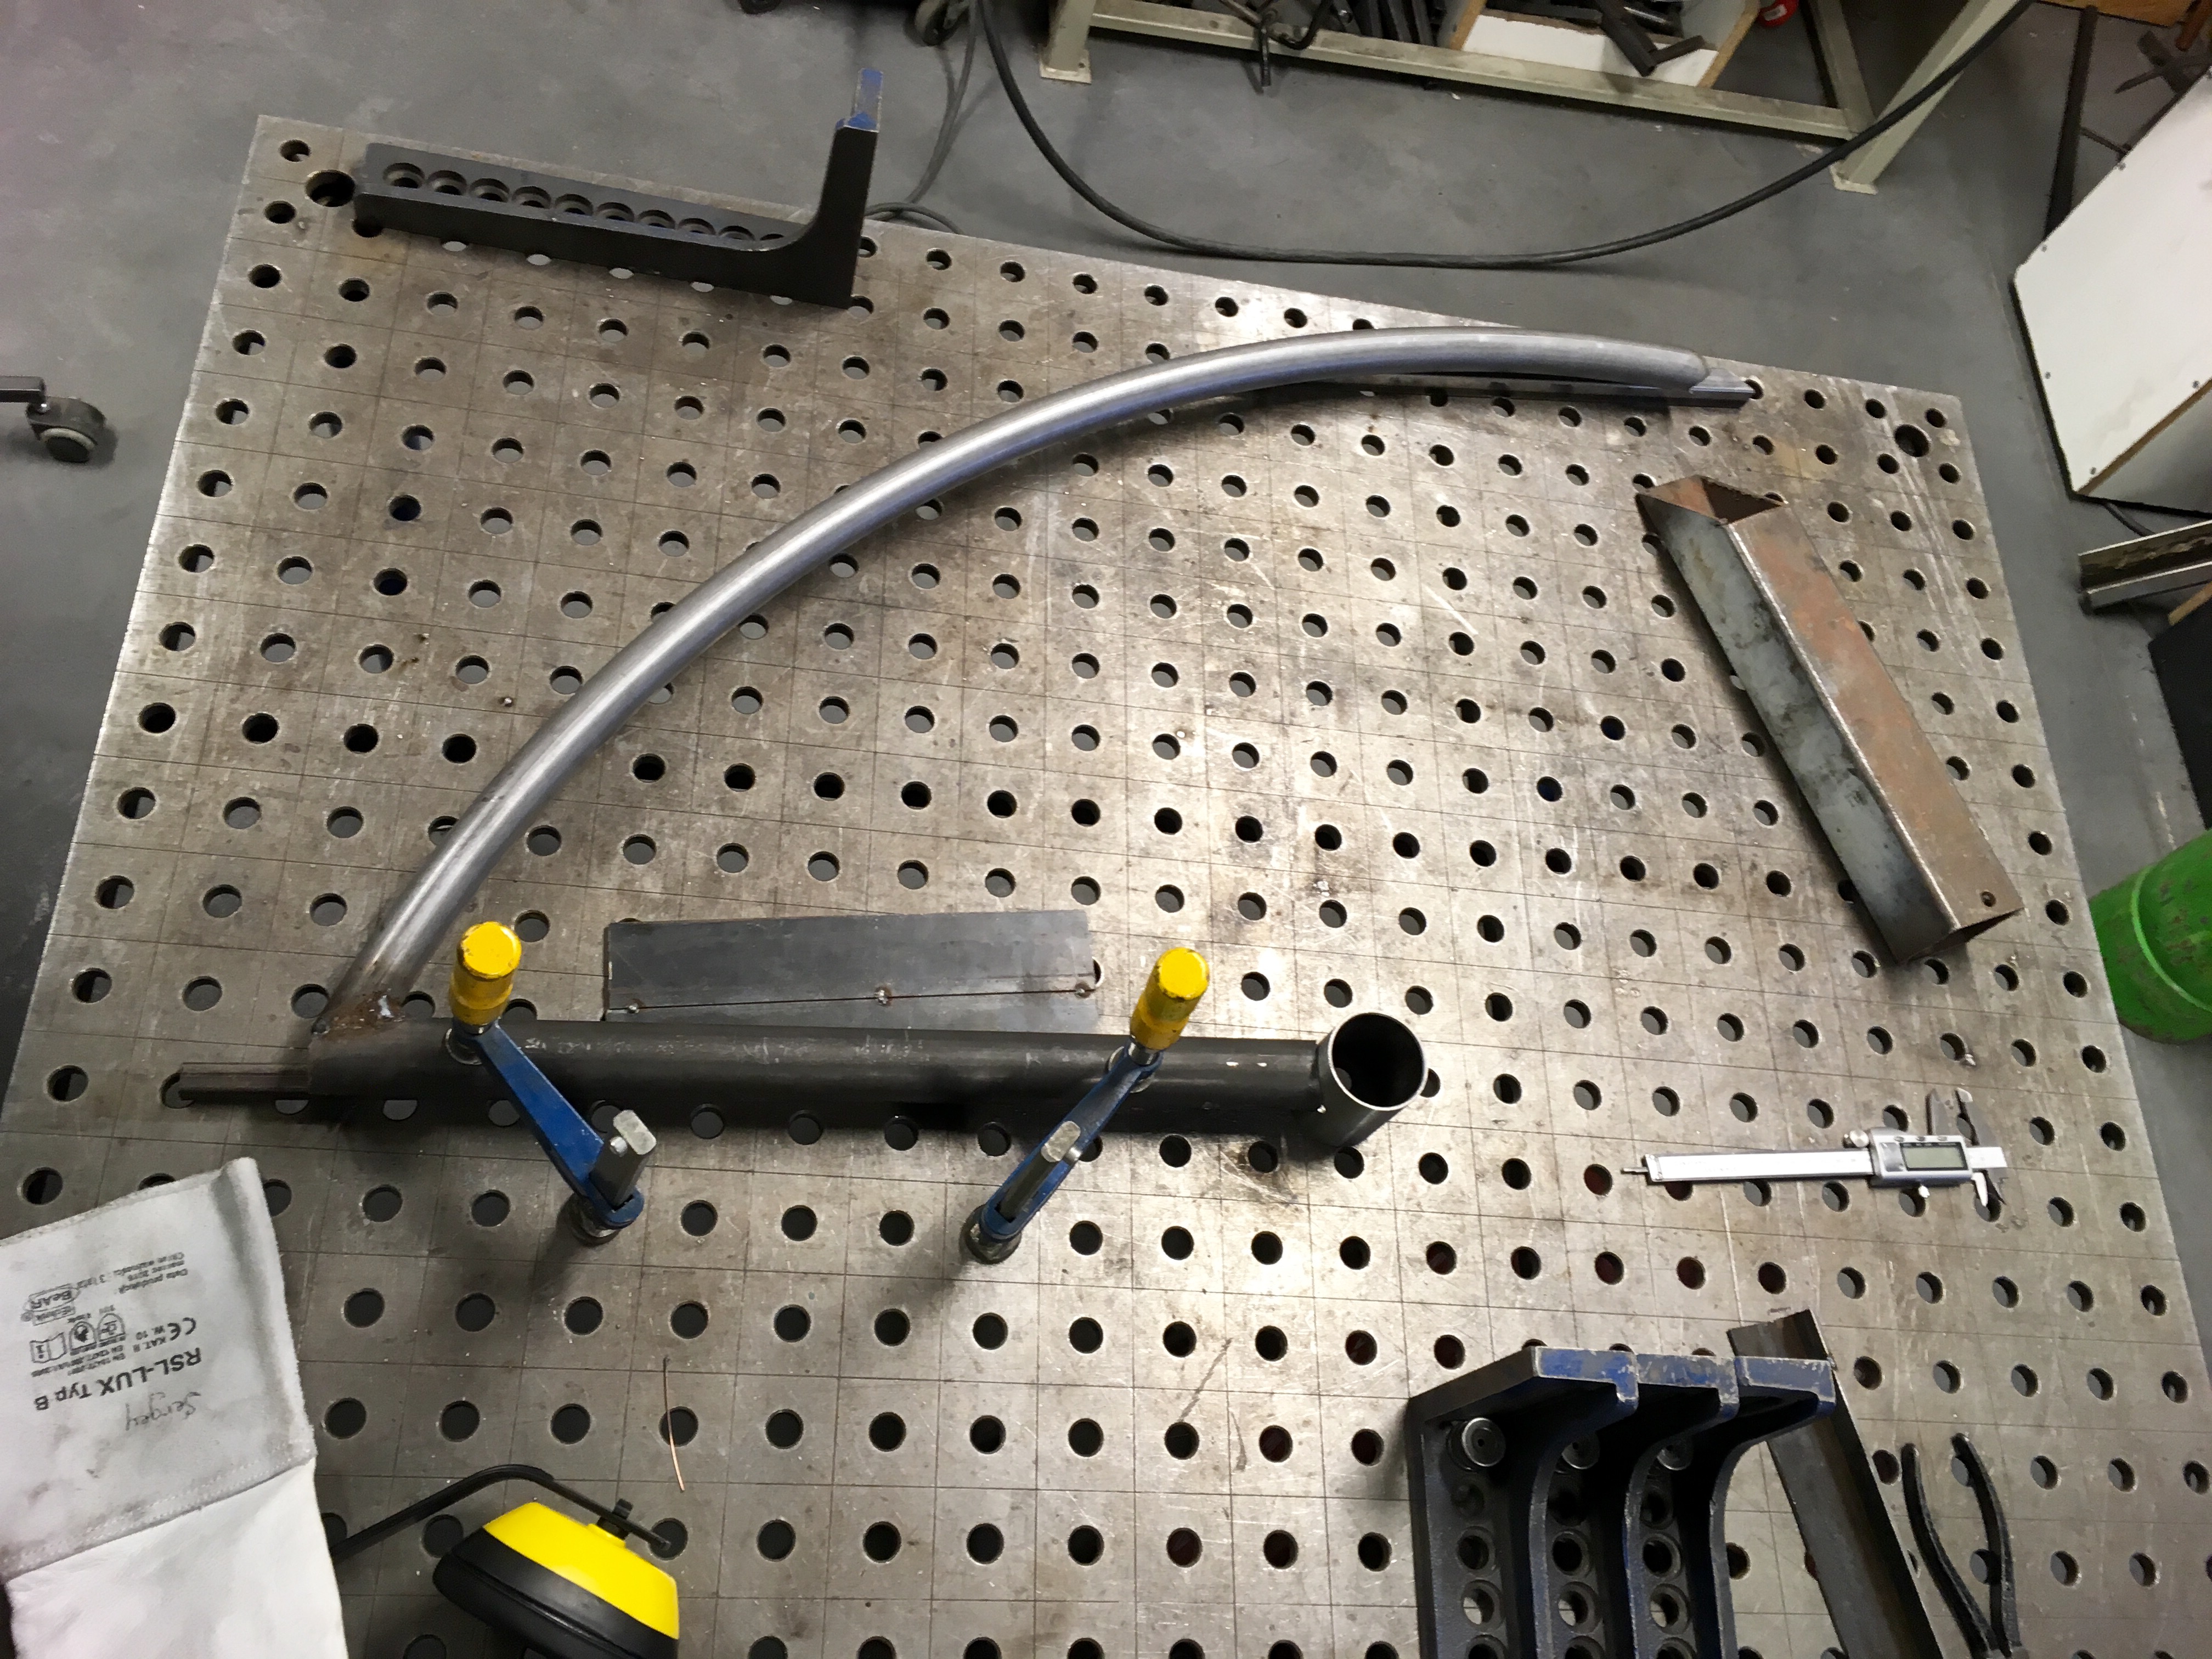
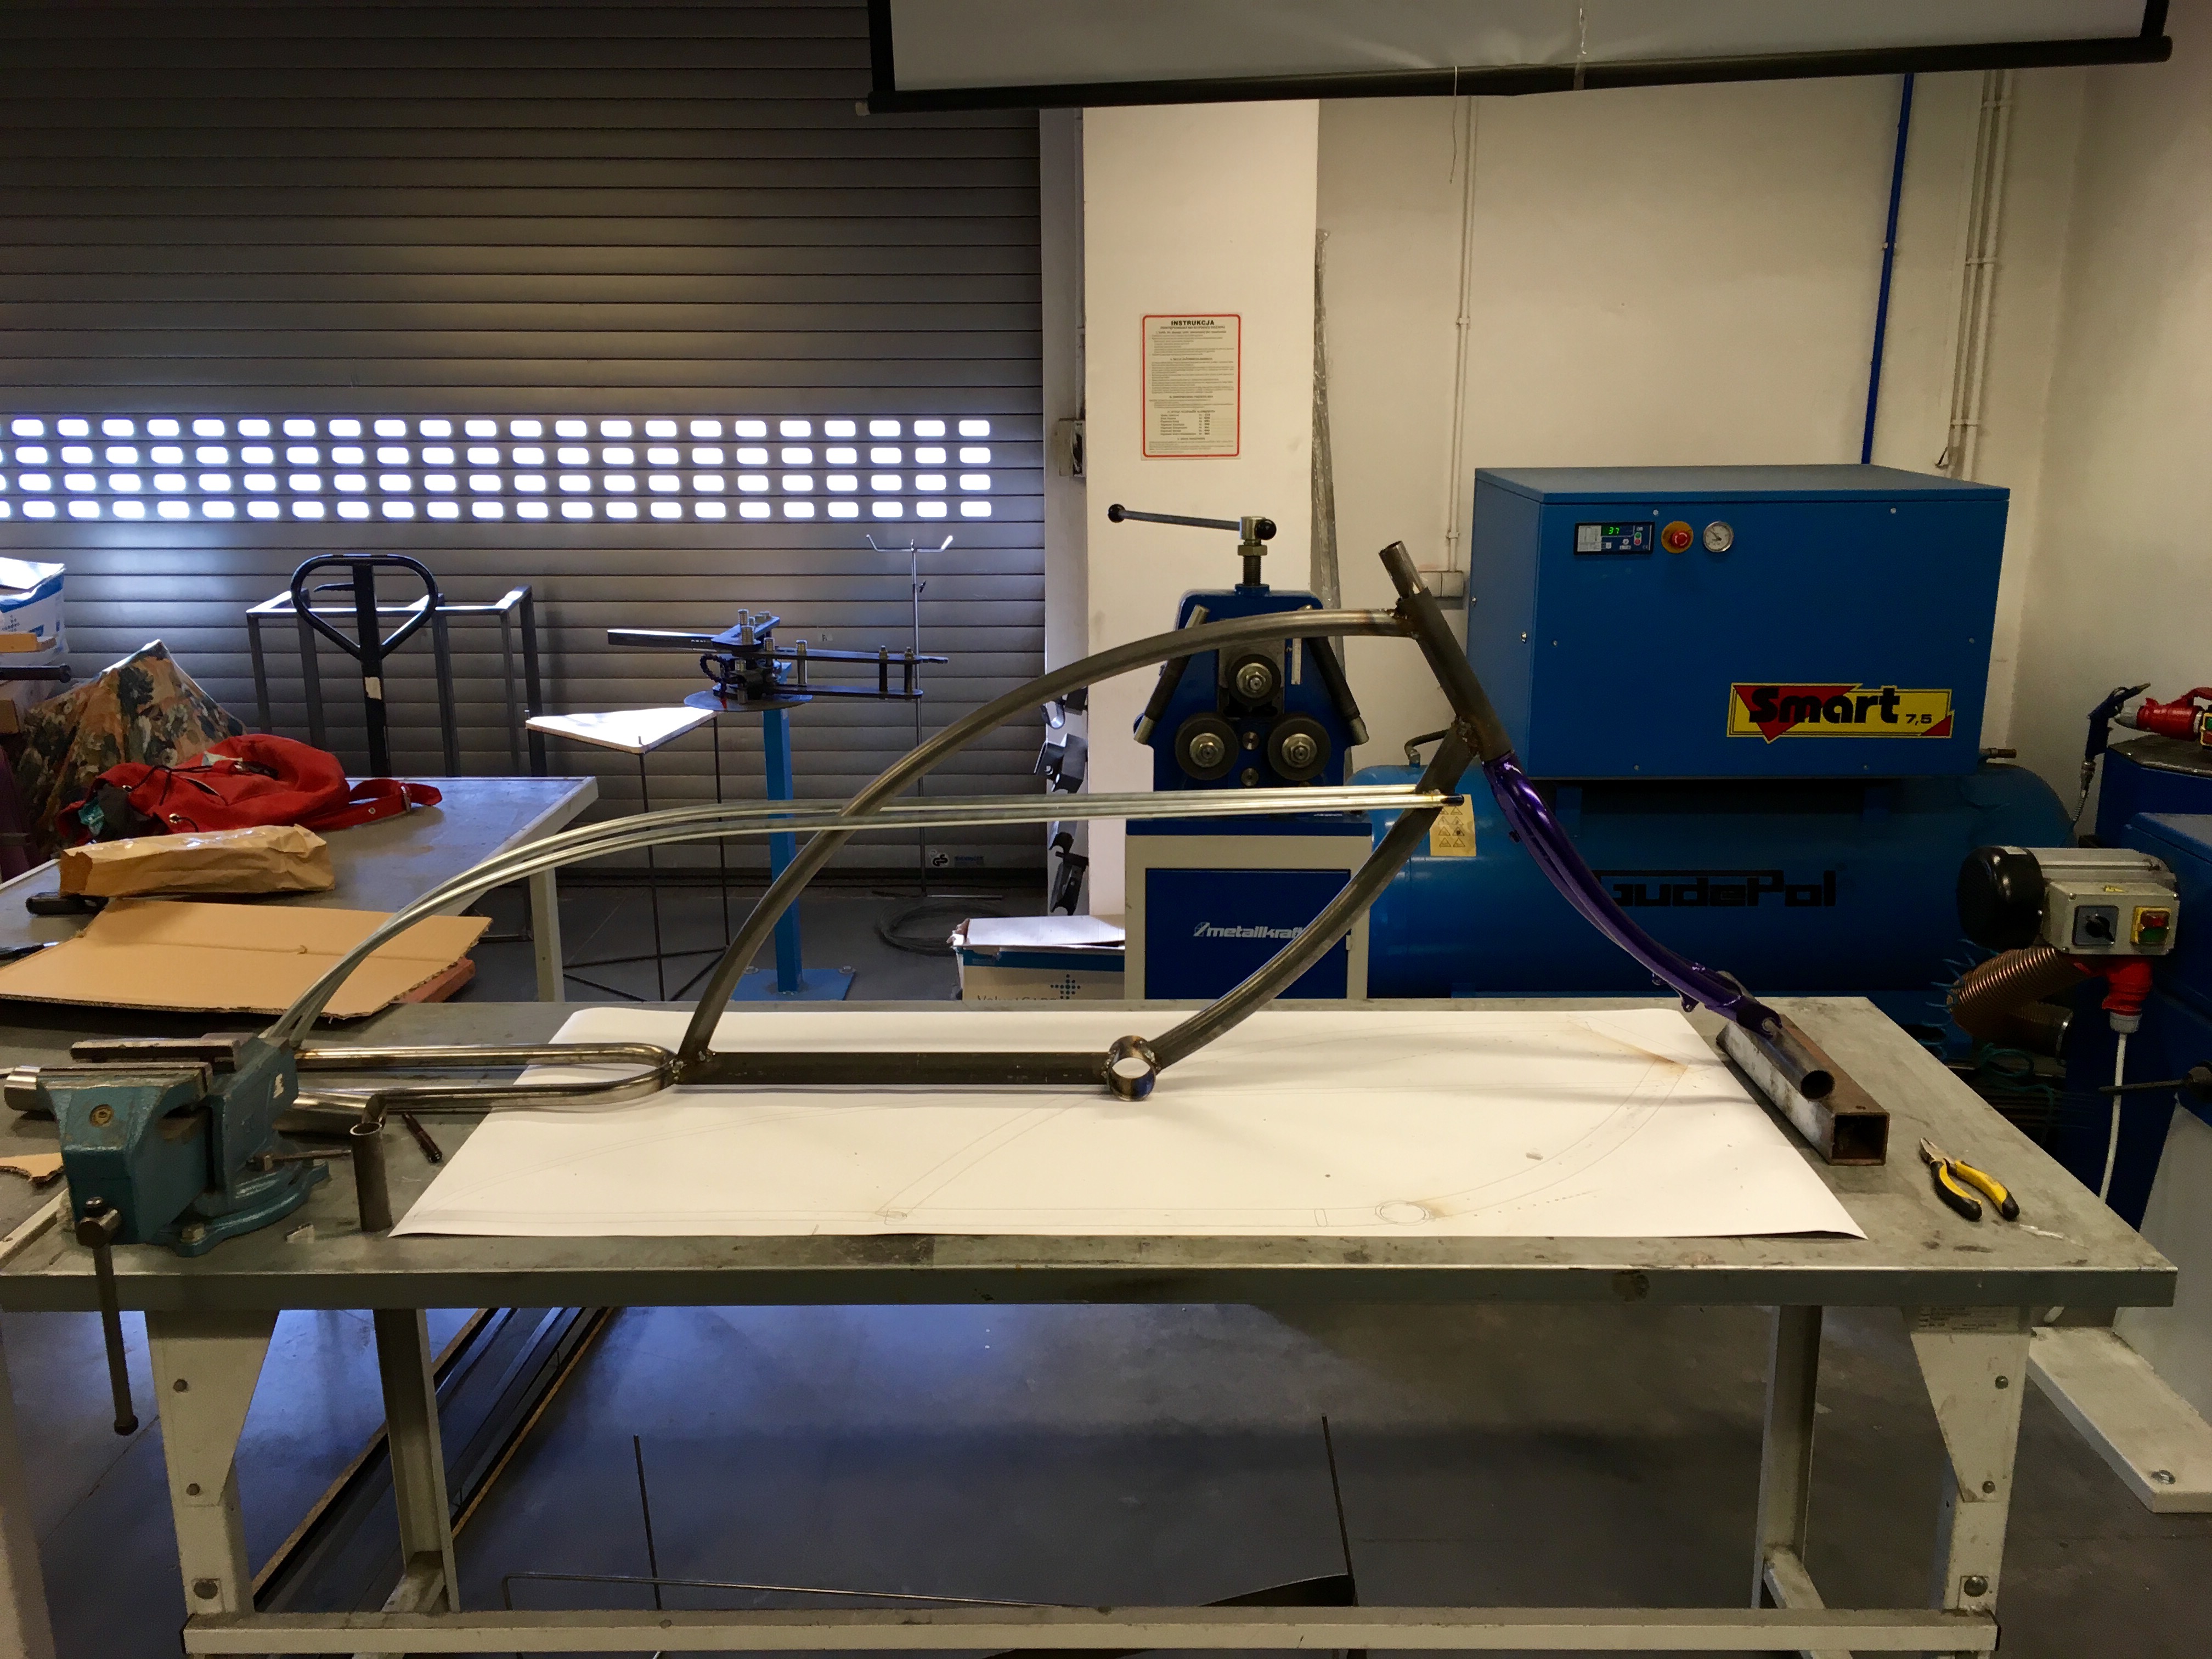
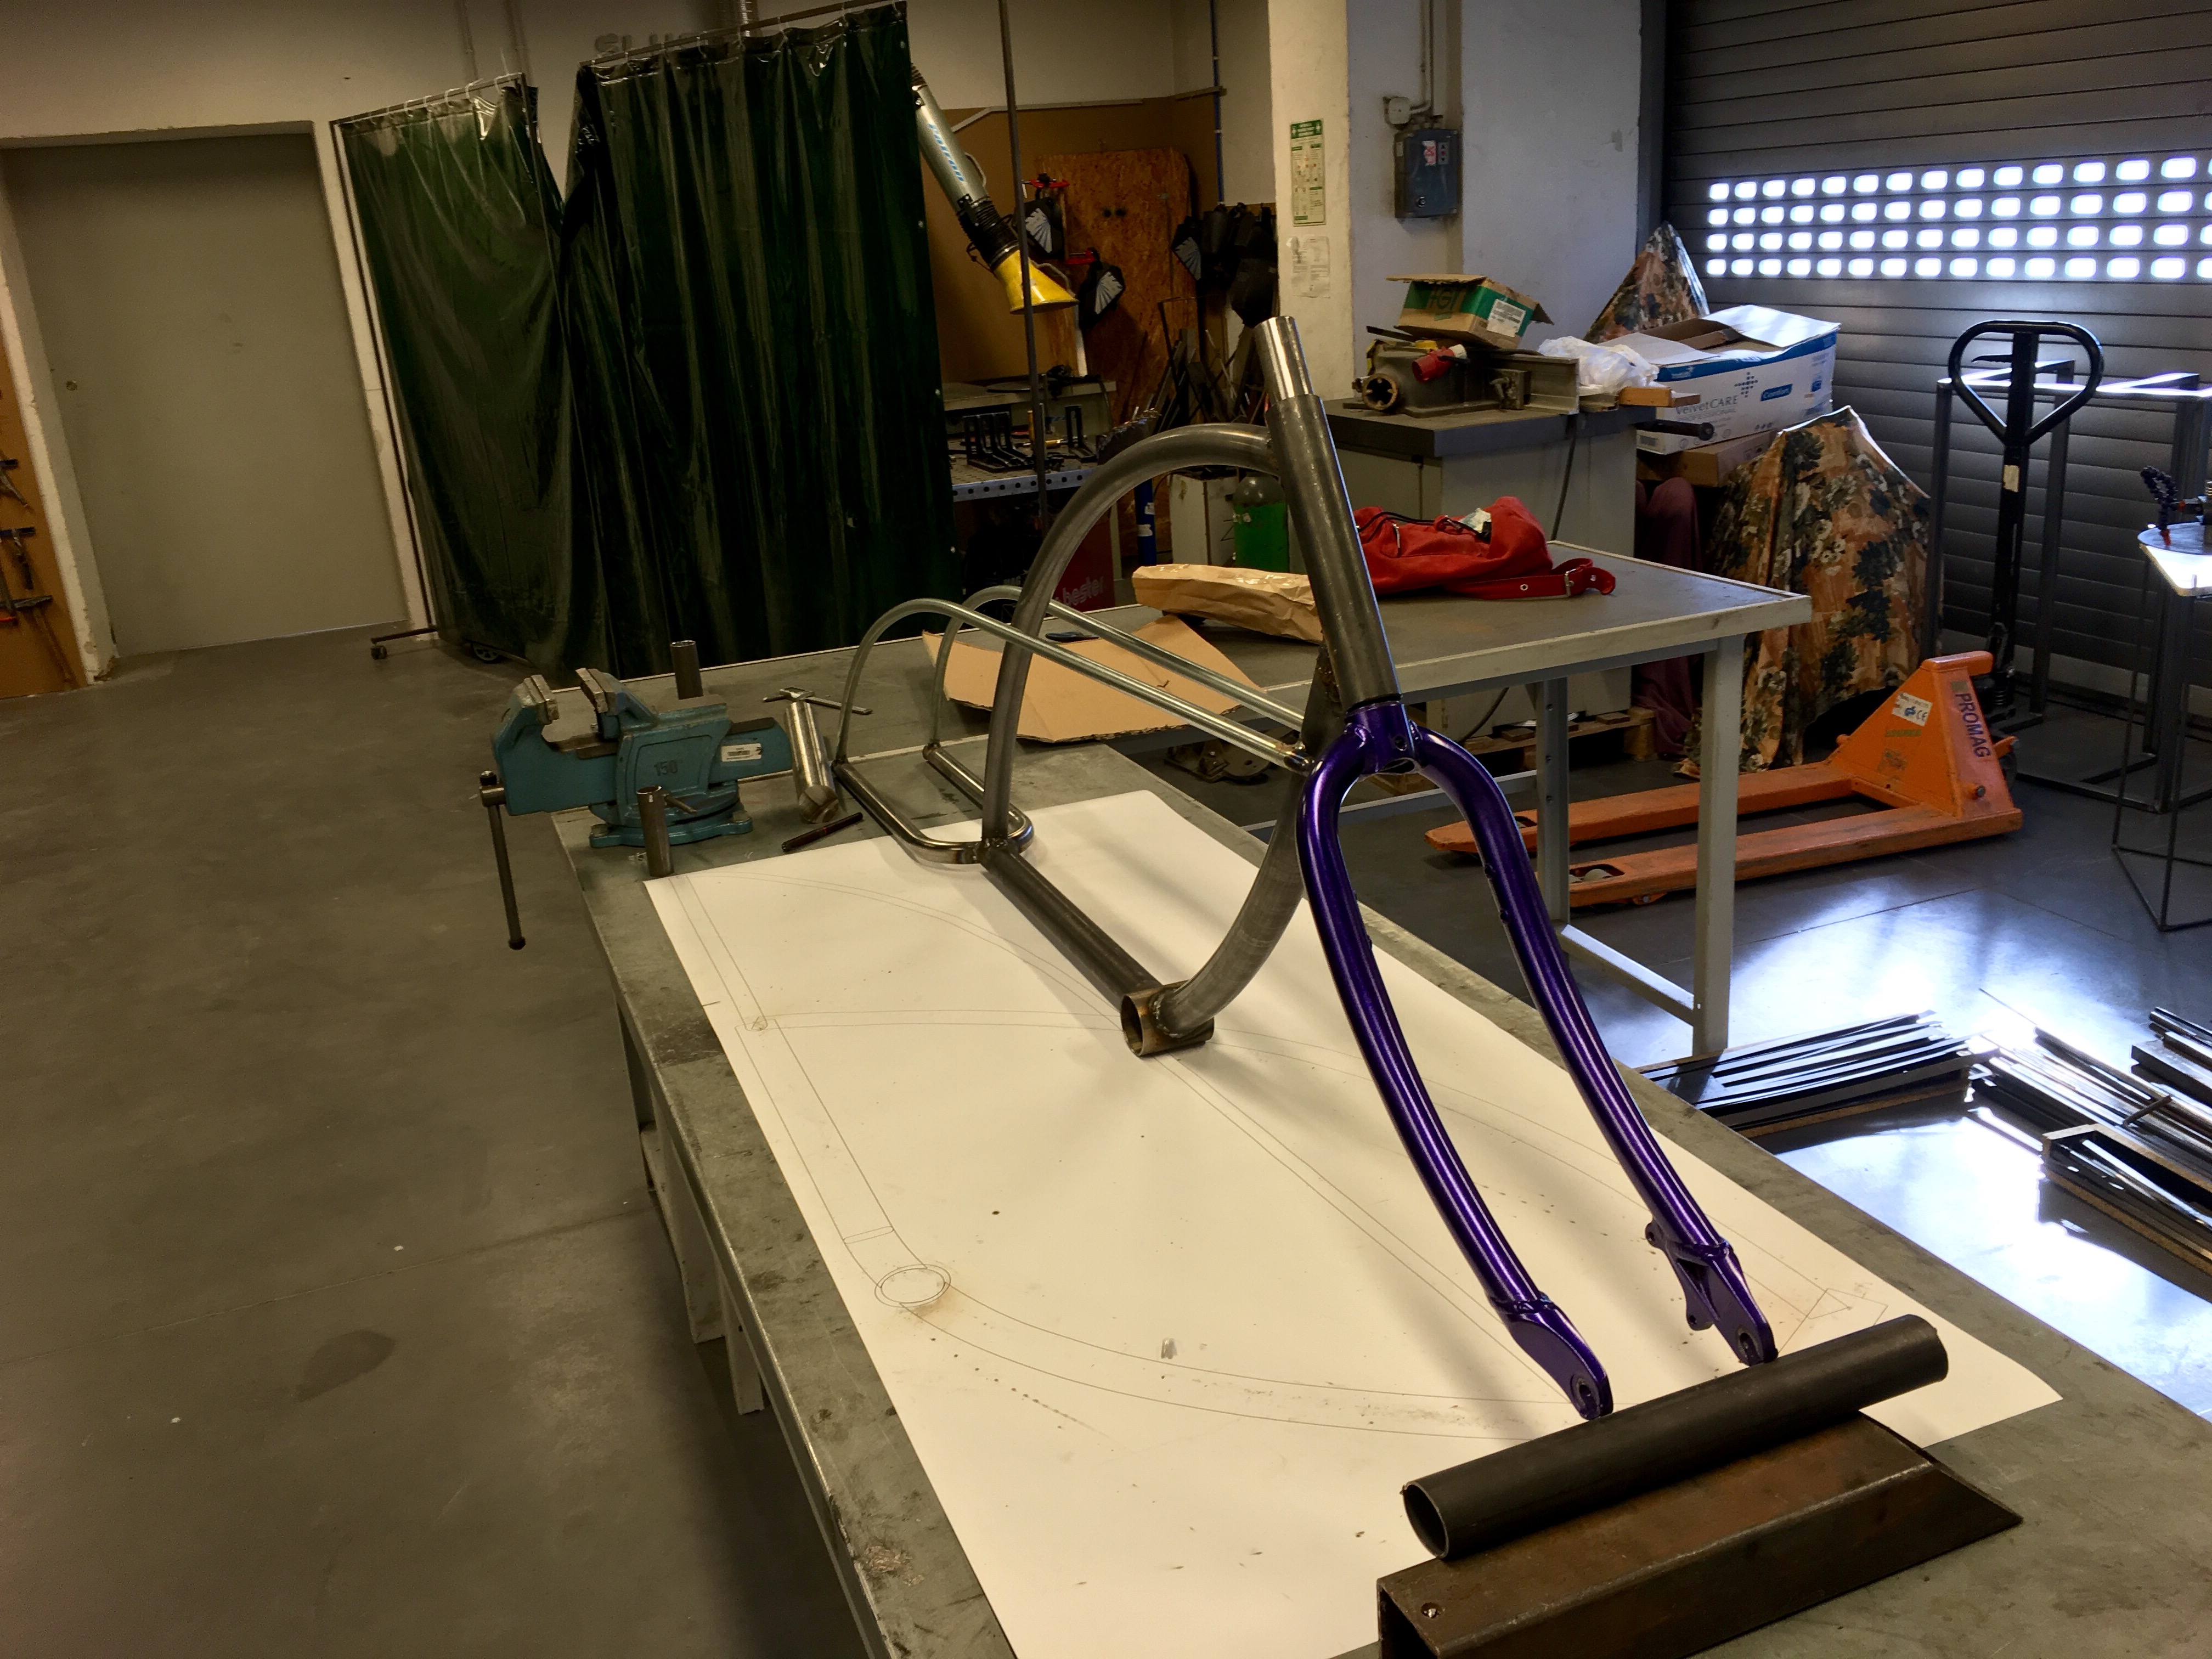
Quickly bent 1' tube, that is going to become chain stays.
73dc67c67b0b7d417de10d4054b6c659.jpg


Now it is time to work on a lathe, to prepare a 200mm head tube.
bffbc094c37333504aebc302a2f9239c.jpg


I had to fail two times before i have made it right :) Every time making a cut about 0,2mm wider then needed. Now i have two blanks for my next <200mm head tubes!
9dc96edbb7523758e0d7bd21775dd8d5.jpg


Even though y schools lathe is not as perfect and precised as ones on youtube videos, i guess the job is done pretty neatly.
ee5d67aad5255da4879bcd249f5028a8.jpg


Here is a finished head tube for my bike.
fc800a186975cb73ca1bce089a5495bb.jpg


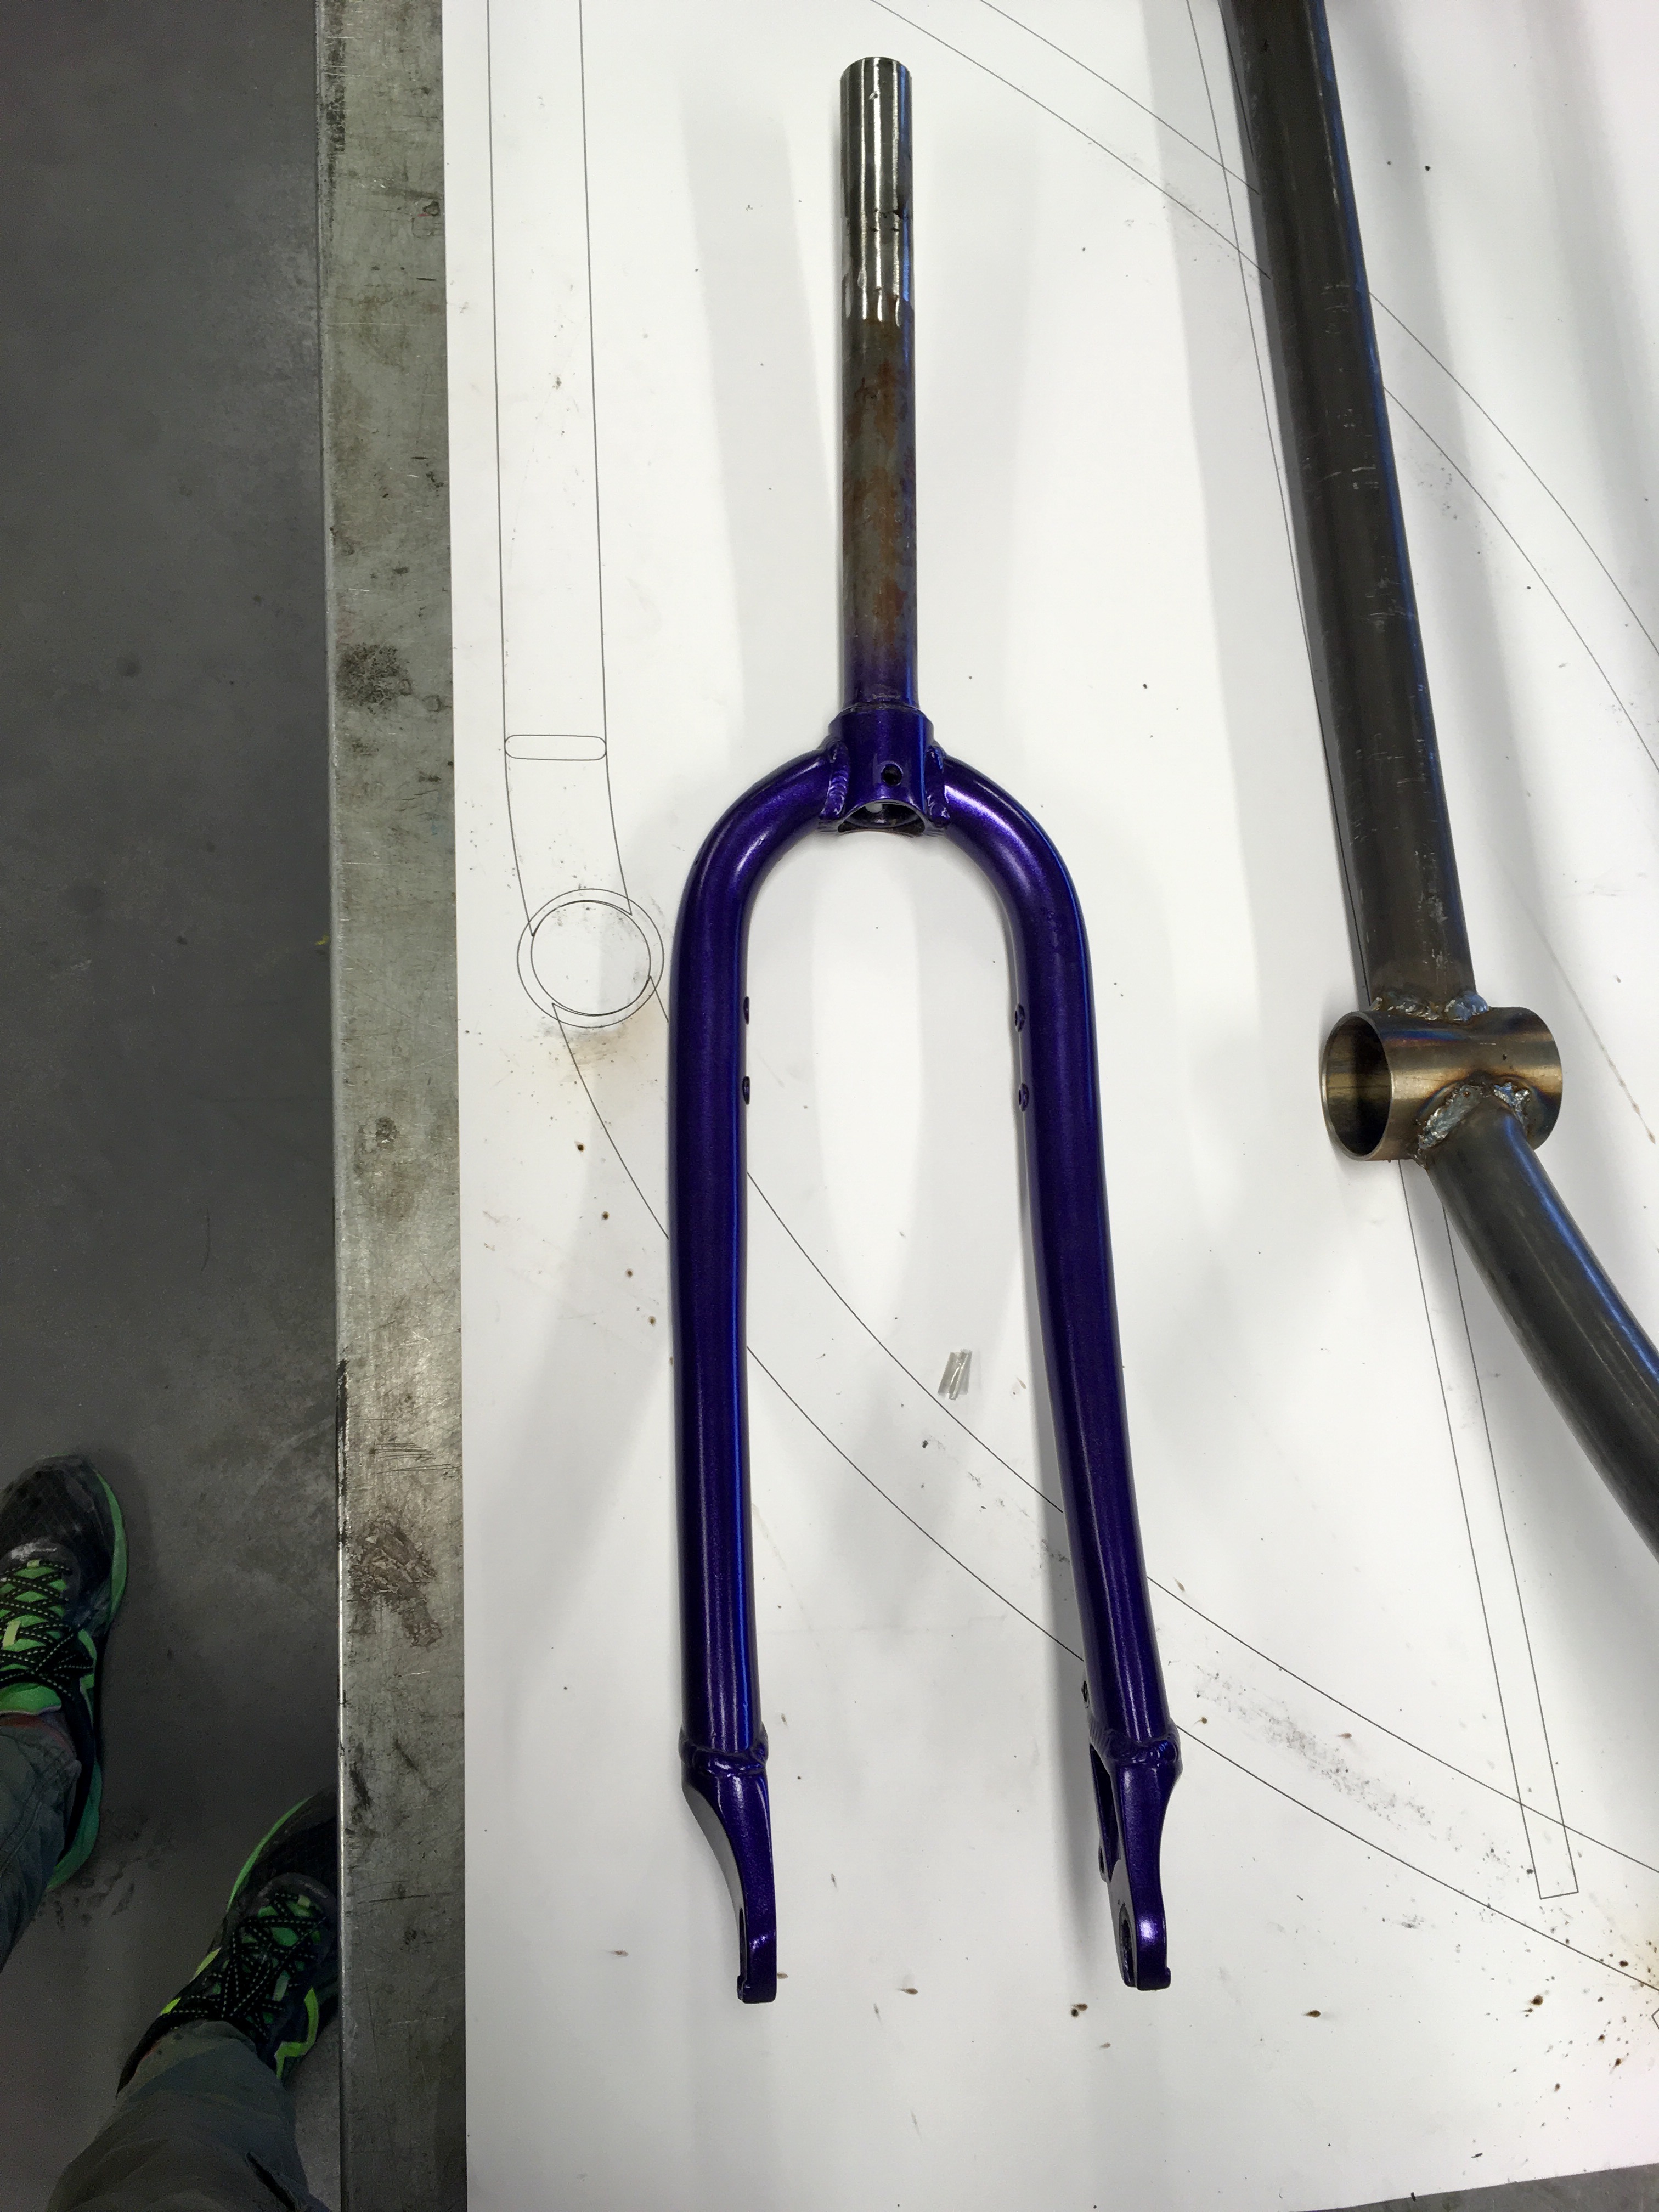
Talking about the parts i am going to use, i have some ideas already. For example using the parts from 2007 Kustom Kruiser Glide i got recently. That bike got style!
Here it is for the moment, so please wish me luck with finishing it in such a short time! :)
 
Welcome aboard the rat rod bike train! Your designs and workmanship so far are impressive. Looking forward to watching your process.
RaT oN!
 
I had to fail two times before i have made it right :) Every time making a cut about 0,2mm wider then needed. Now i have two blanks for my next <200mm head tubes!
9dc96edbb7523758e0d7bd21775dd8d5.jpg


Even though y schools lathe is not as perfect and precised as ones on youtube videos, i guess the job is done pretty neatly.
Looking good :thumbsup:

Your accuracy and finish issues (chatter) aren't necessarily due to the lathe...it is because the part is hanging out so far. If it has to be out that far (chuck and/or spindle bore too small for the part), you need to use a steady rest to support the workpiece...

hqdefault.jpg


Also, when turning long parts, you need to find the magic combo of slowing down your speeds, increasing your feeds, as well as increasing depth of cut until you get rid of the chatter.

Jason
 
Last edited:
Great inspiration for your build.
Nice work and tools so far.
 
Thanks everyone for your comments and feedback! :)
Last week i had no progress on the bike because i went to Netherlands for my friends wedding and to cruise around with local club Vcorps. Midland cruise was fun! Almost 100km from Veenendaal to Amsterdam.
Here is my 3d render as promised:
9072f5aea9f3c7acbb47275cfb9adf2d.jpg


And here are the cantilever tubes that i have bent yesterday with some help from Lukasz, the guy who works at our school workshop, to get both of them identical:
437be2fe056ccaa329d4866bd1ab534f.jpg

The very ends are not quite exactly as they are on the cardboard, but i have decided to leave them that way not to mess up a nice and careful main curve and then play around with the dropouts shape later.

After that i have been working all day long to fix the bending machine rollers that were produced for us earlier this year. One of three rollers of each roller-kits won't fit the axle, probably the central hole is crooked. I hope to finish with that part today and get my two other bends done. Then i will be ready for putting the frame together and making the dropouts.
 
So, the news are that i'm off my school deadline for more then a week now. That means i am not finishing it up to that date. I hoped to finish the frame before and then have time to build the bike up, and now because of all the difficulties i have faced (and also because it was exams time and i had to pay some attention to something apart from bikes) chances are i won't finish the build in time. But i still am going to try! I have another couple of weeks before i take off to NL.
First of all i have defeated the bending machine and after some time on a lathe i have fixed the rollers finally.
First bend of the top tube was not perfect, i have overdone it slightly and wanted to fix that by a hammer.
4f1918556fac0a3b5e53ded8b491c692.jpg


But that approach has its flaws:
d5850890febb1967a098f13adf808bbb.jpg


So i have decided to do it again, since i had more tube left, and this time it went out almost perfectly!
850ba034b10874b07a5c68cd3f20a80c.jpg


Here i am happily standing with a tube that satisfies me :)
00ae0e9f6f63b5ebe8dcb6041004be23.jpg


But then when i have moved to the bigger bottom tube i could not bend it as easily. I do not know for sure why, but the rolls slide over it. After few hours of hard work (spread over few days) i could only bend it slightly. It is the tube on top, as you see it is almost straight. If i proceed to do it like that, helping it with a hammer, it would take me another few days to bend only this one tube, so i guess i will try to grab some of the workshop assistants on Monday and try to figure what am i doing wrong.
9c8bc56c8bd8d80236d6d12b0866682d.jpg


However, the good news are that this is the last tube to be bent. When i am finished with that i can start welding the frame together. The dropouts still are to be cut, but apart from that everything is ready. I hope if i manage to finish the frame on coming week i might even have enough time to build the bike up. Things that still have to be done apart from mentioned above are fabrication of the motorcycle-style seat and then painting.
 
I'm sure you'll figure it out. Gonna be fun to see the tubes come together.
 
Hello!
So, here is the picture of my last tube bent. As you can see it is not a perfect fit, since the tip of it is not aligned with the template.
1b34ccabafb0e9c9888eca842a6e86cb.jpg


This is because it was a really difficult task to bend it, seems that the bender we have is not made for such big tubes as 38mm, when i was finishing the curve i saw some metal chips on the drive thread already, so i have decided to stop before i damage the bender. My plan is to compensate the difference in that curve by changing the position and angle of the tube welded to the other side of BB.
fdce723f894a3a9b2bafd07b7ff4b3e9.jpg


Here is my setup for welding the chain stays together!
216f55fce9d0776e75ebe0c07ccb2798.jpg


This lets me make sure the angle, distance and alignment to surface would be perfect, so i don't need to redo it few times later like last time :D
fb7fe429d56a795fa2de25effc2b6890.jpg


Here is a quick welding selfie.
75f02b7ba98d957aedfbac2eac0b80e1.jpg


And the chain stays are done!
728fed637e2bf89c3430fece59c2c6d2.jpg


Now i have ordered a print of my frame 1:1 scale, by Tuesday it is going to be done. In the mean time i have ordered the nice bobber-style springs for my future seat. Next week i'd be able to spend more time on that project, so hopefully i'd have a lot of progress before i leave to NL, and maybe even would be able to finish the bike, maybe without painting? I hope.
 
Hello, everybody! I've got some updates!

On Tuesday i got my frame drawing printed.
0951f17da2c2c081f2c3b781c6c90130.jpg


I've mocked up the tubes i had.
389e44a3e24ef40b42a4e082804db5e8.jpg


Then using the most precised and fascinating measuring tool on earth - my own eye, i have started cutting the tube fittings :)
9bd4692e6a18c101e6e165a9e5807e66.jpg


Welding frame tubes together using a welding table to keep the precision.
d091f6756db2594205a0704a05dd8b9e.jpg


Honestly, i did not always manage to ideally fit it up to my sketch, but after all it went out quite clean. Only dirty part is a head tube, because all the little mistakes have summed up there, in the end gaps were sometimes bigger there.
39e69c8527a26703896a5c507d4e1bd5.jpg


Cantilever tubes are taking places.
284daa35e9e143f46399d6f370681850.jpg


Cool trick with using bearing balls as tubing caps i've seen here! Can't quite remember who showed it now, but thanks a lot man, i love the looks of it!
a1b3e989c2189b0df05bbda639196c3c.jpg


And here we go, the frame has taken it's shape!
14c76b2ad915b70cc0a5629f8db27340.jpg


Here i have extended the OG 2007 Kustom Kruiser Glide fork to fit long 300mm head tube.
69ebf96664b2e4bf1fd62cae7d16ae7d.jpg


And here is a quick mock up of a bike with the fork.
0e96d47f298086c9fced35b679864bb0.jpg


I love the curves of that light aluminum fork, really.
c5a15e017b31cb8f2af655079236c439.jpg


And here i have started making drop-outs. From cardboard sketch to steel blank to cut dropout.
34f4014791df447c8290d1f73df2a27c.jpg


My time is running out, since i am planning to leave on Monday, and that means i will certainly not manage to finish the bike. But i will try my best to make it rideable, and that should be enough to complete the goal of build-off? :) I guess i will skip the painting and just have it raw. Today i must finish all the drop-outs, coaster brake mount, reinforcement of the cantilever tubes where they meet the top tube and mock-up the whole bike. Hopefully i will also have time and opportunity to work on the saddle, then the bike can be considered finished :)
 
Last edited:
Agreed ^ ! Really cool frame design, and your work is the proof in the pudding of that design. You will have a busy couple of days ahead.

I think the 'raw' look will suit this one-of-a-kind build very well! Yes, make it ride able and post a pic / video of you riding it and you will have a completed build-off bike.

RaT oN~!
 
Nice lines and execution.
Just make sure you have chainline clearance in your mockups before final dropout weldng. from your computer drawing it looks like it should be fine
 

Latest posts

Back
Top